To enhance the user experience, you can customize the loading effect that appears while filters are processing. Here’s how to do it:
Accessing the Customize Loader Section
- Navigate to the Plugin Settings:
- Go to Product Filters > Form Manage in your WordPress dashboard.
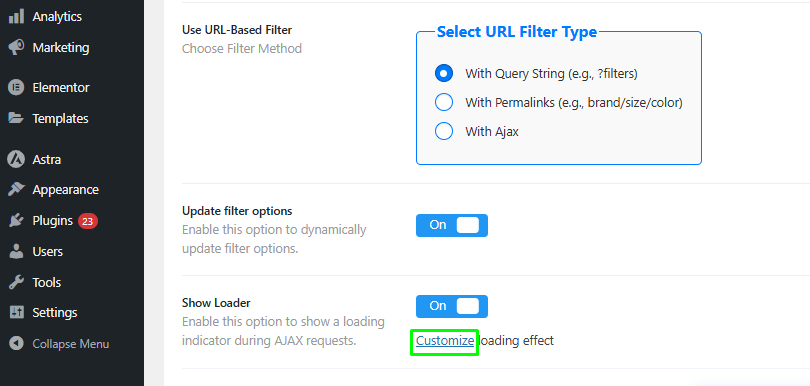
- Scroll Down to the Loader Section:
- Find the Loader Section and click on the Customize button.
- Open the Customization Popup:
- Upon clicking Customize, a popup window will appear where you can choose or create your loading effect.
Prebuilt Loading Effects
You can select from six default loading effects:
- Basic
- Comet
- Counter Arcs
- Dot Ring
- Half Ring
- Chase
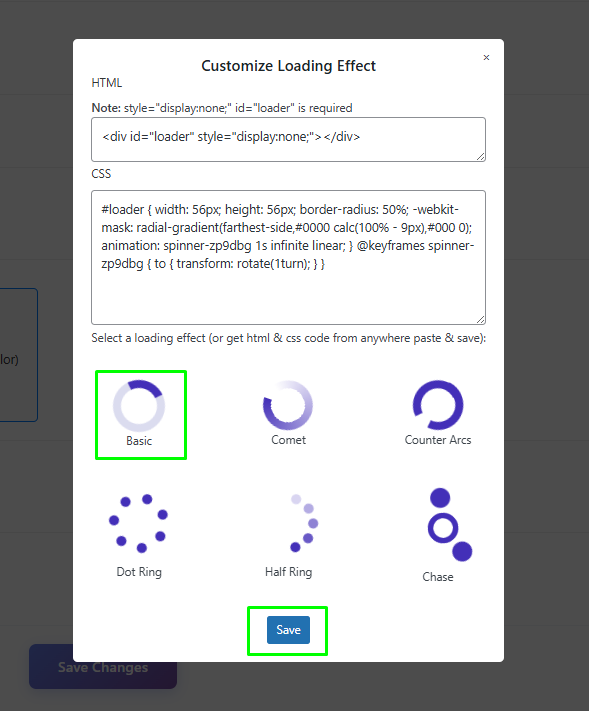
Simply select your desired loading effect and click Save to apply it.
Create Custom Loading Effect
If you want to create your own loading effect, follow these steps:
- Prepare Your HTML and CSS:
- Collect the HTML and CSS code for your custom loading effect.
- Paste Your Code:
- In the popup, you will see two text boxes:
- HTML Code Editor: Paste your HTML code here.
- CSS Code Editor: Paste your CSS code here.
- Important: Ensure your HTML includes the following attributes in its parent tag:
style="display:none;"andid="loader". - Example:
- In the popup, you will see two text boxes:
<div id="loader" style="display:none;">Loading...</div>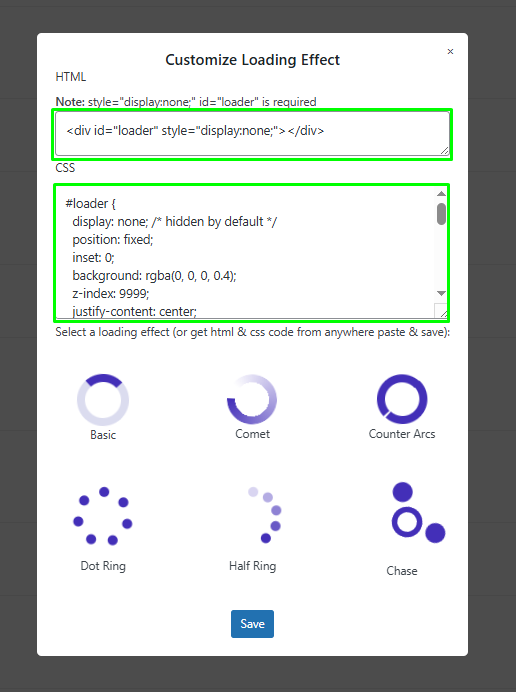
- Save Your Custom Effect:
- After pasting your code, click Save to apply your custom loading effect.
- Check Your Loading Effect:
- Refresh your site and test the filters to see your new loading effect in action
By customizing the loading effect, you can create a unique and engaging experience for users while they interact with your product filters. Whether you choose a prebuilt option or create your own, this feature enhances the overall aesthetic and functionality of your site.