With Multi Location Product & Inventory Management for WooCommerce, you can configure products with location-specific stock, pricing, availability, and backorders.
There are two professional ways to manage location-based product data, depending on your workflow.
Method 1: Configure Location-Based Settings from the Product Edit Page
This method is ideal when creating or editing individual products.
Step 1: Create or Edit a Product
- Go to WooCommerce → Products
- Click Add New or Edit an existing product
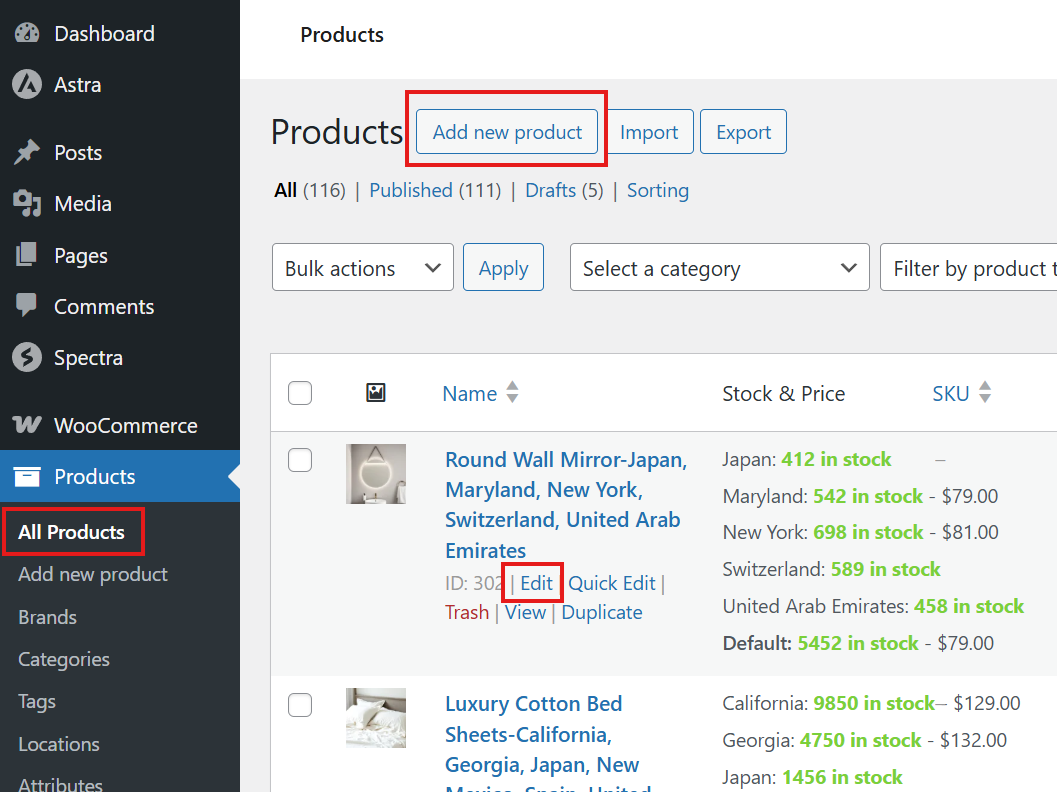
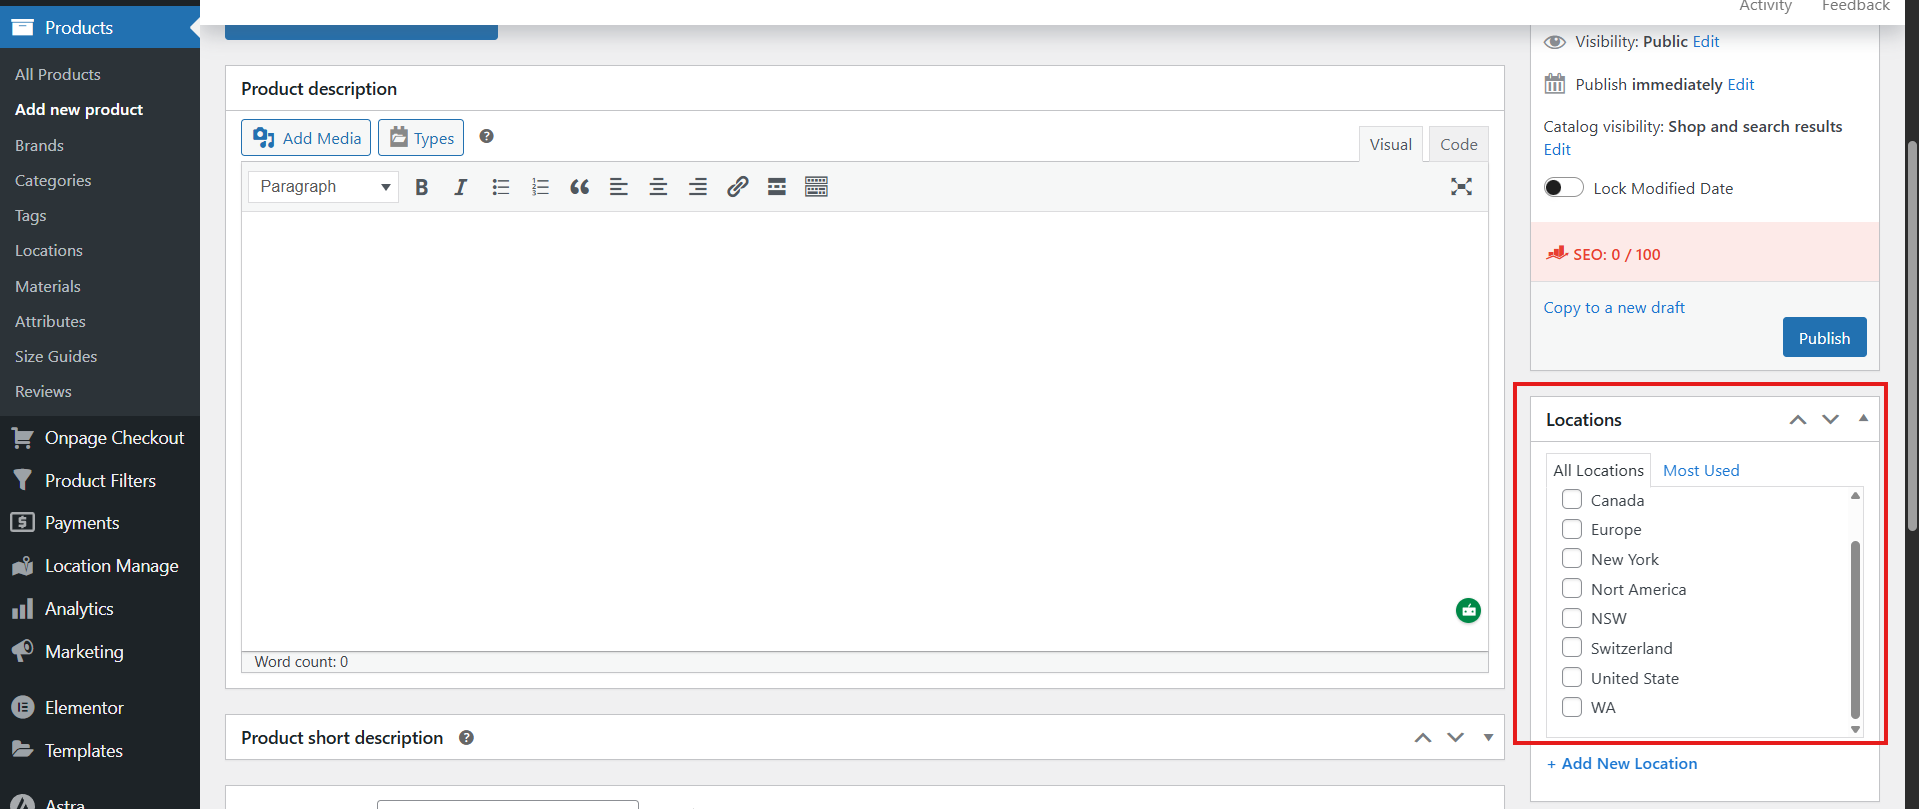
Step 2: Assign Locations
- On the right-hand side, find the Location panel
- Select one or more locations to assign to this product
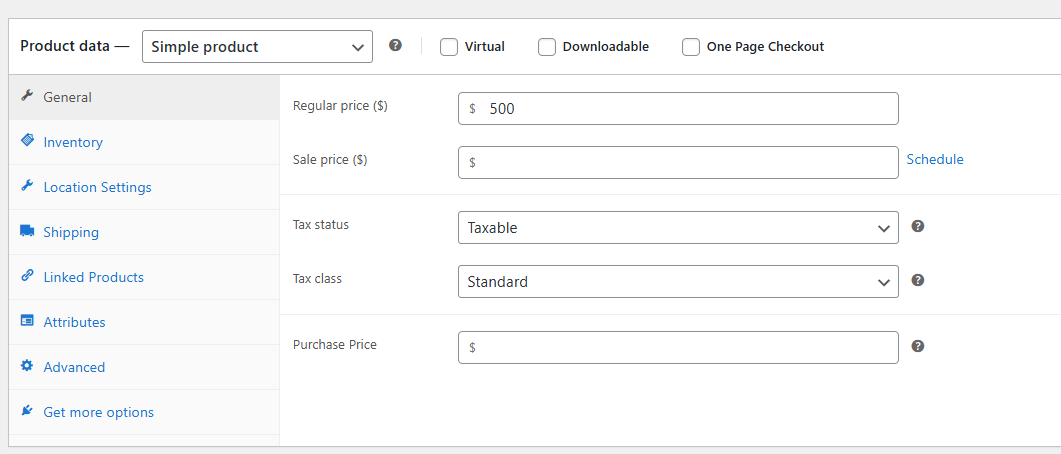
Step 3: Configure General Product Data
Navigate to the General tab:
- Regular Price: The standard selling price of the product.
- Sale Price: A discounted price offered for promotions or special deals.
⚠️ Important Rule: Regular Price and Sale Price must not be lower than the Purchase Price. - Purchase Price: The base cost of acquiring the product (your investment).
These values are used to accurately calculate investment, revenue, and profit.
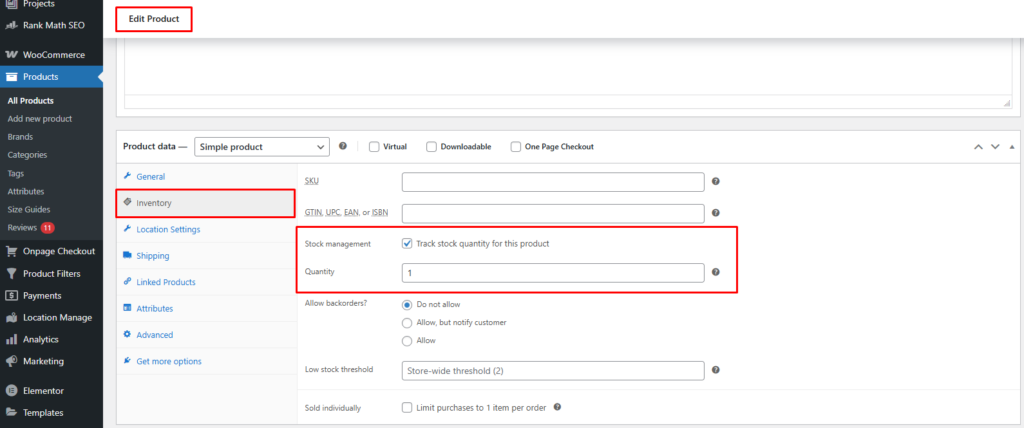
Step 4: Configure Inventory Settings
Go to the Inventory tab:
- Enable Stock Management by clicking the “Track stock quantity for this product” option
- Set Quantity
This quantity represents the maximum stock distributed across all locations.
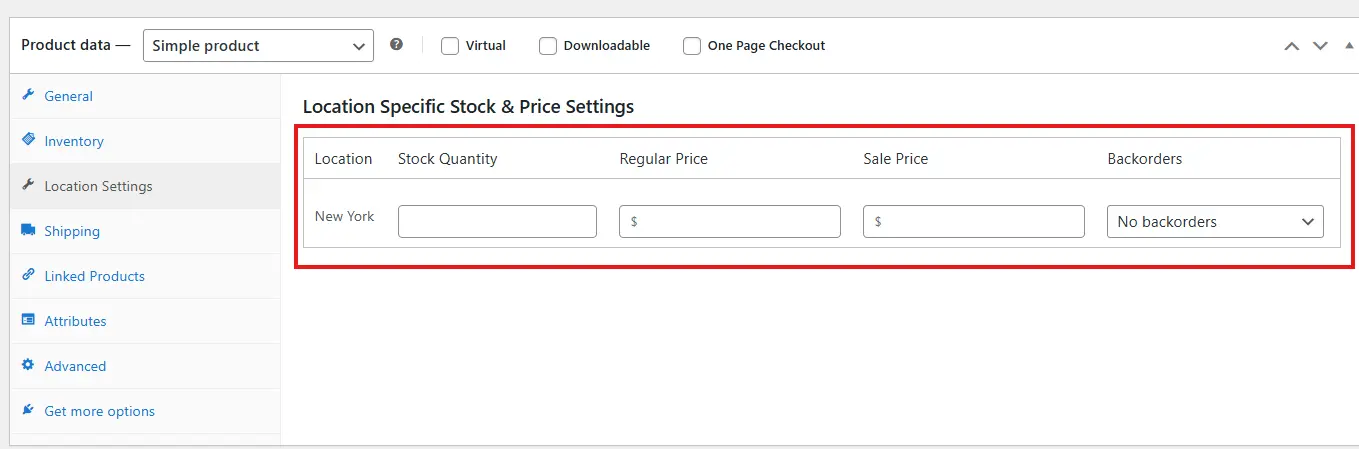
Step 5: Configure Location-Wise Settings
For Simple Products
A Location Settings tab appears after the Inventory tab. Here all the locations will be display that you choosed earlier.
- Fill the stock quantity for the locations.
- Set regular price and sale price
- Then choose if you want to allow backorder or not.
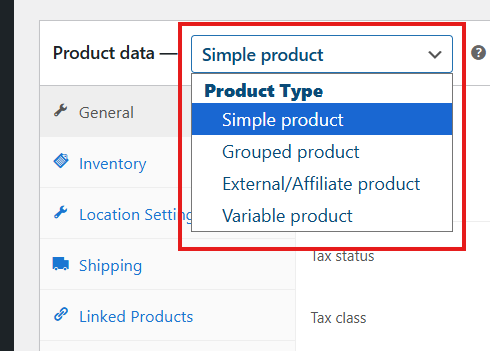
For Variable Products
First convert the product into a variable product.
- Inside the Product data section here you’ll see Simple Product is selected
- Click on the simple product, and a dropdown will open.
- From here select the variable product.
Now you won’t see the regular price, sale price, purchase price, or even the Location Setting. Now you have to configure these options for each variations but first you have to create variations for the product. Here’s how you can do it:
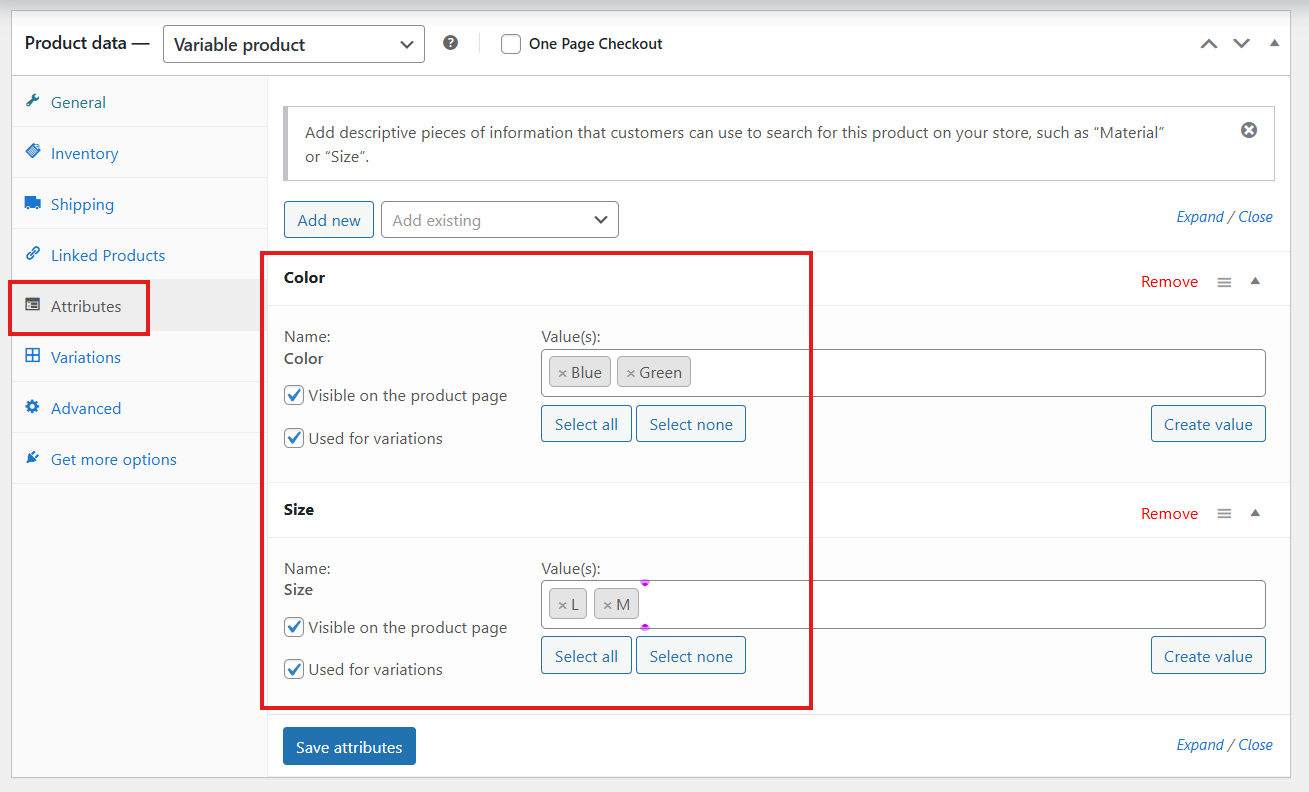
Step 1: Add Attributes
- Go to the Attributes tab.
- Choose an attribute, for example Color.
- Add values for the attribute, such as:
- Red
- Green
- Yellow
- You can add more attributes, like Size, with values such as:
- S
- M
- L
- XL
- Click Save Attributes.
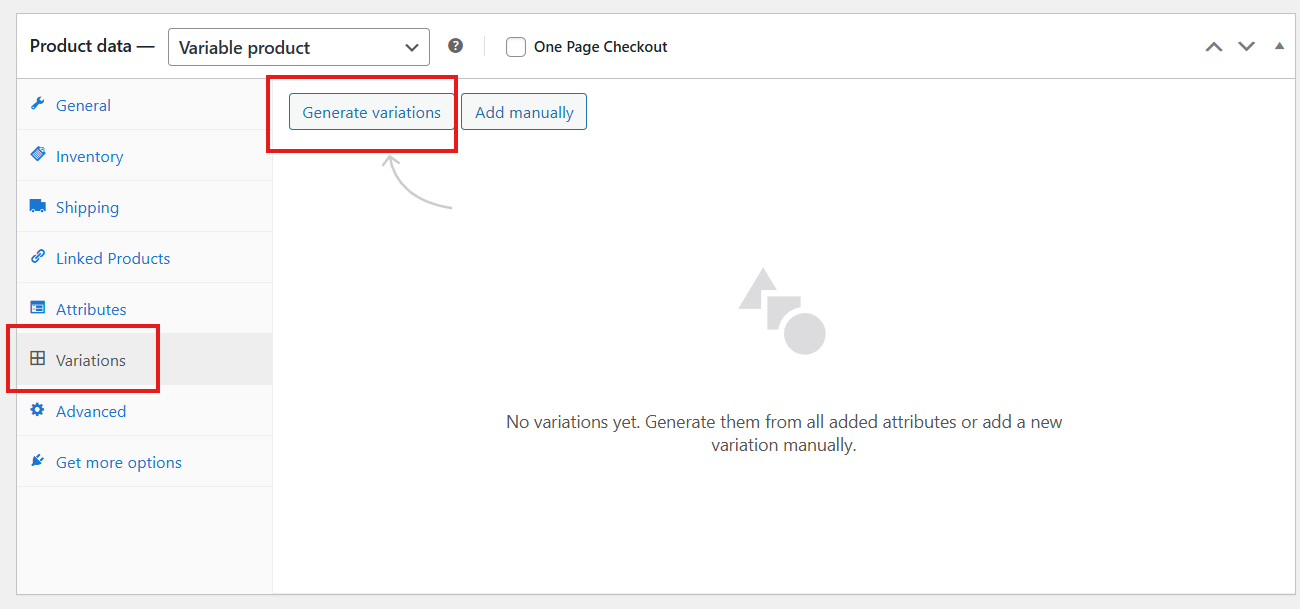
Step 2: Generate Variations
- Head to the Variations tab.
- Click on Generate Variations.
- WooCommerce will create product variations based on the number of attributes and values you added.
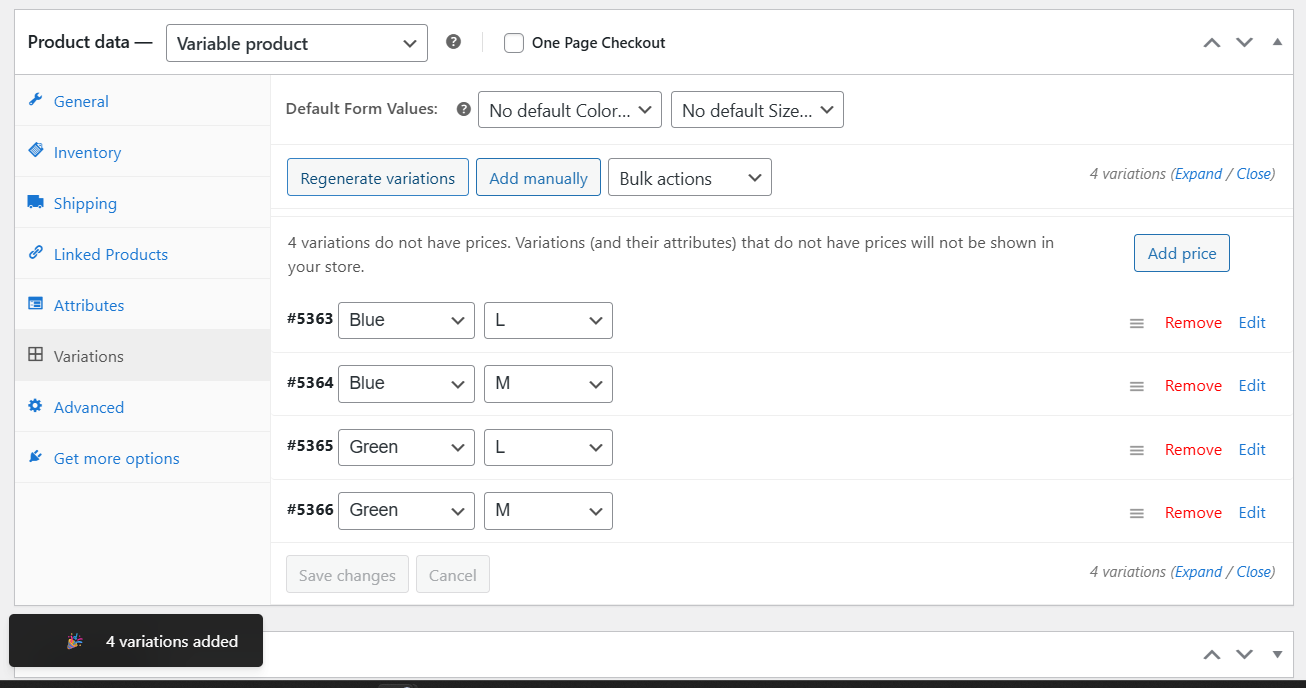
Once you have created variations, now you have to fill in the variation info location-wise. Here’s how you can do it:
Step 3: Expand a Variation
- Go to the Variations tab.
- Expand one variation to view all available fields.
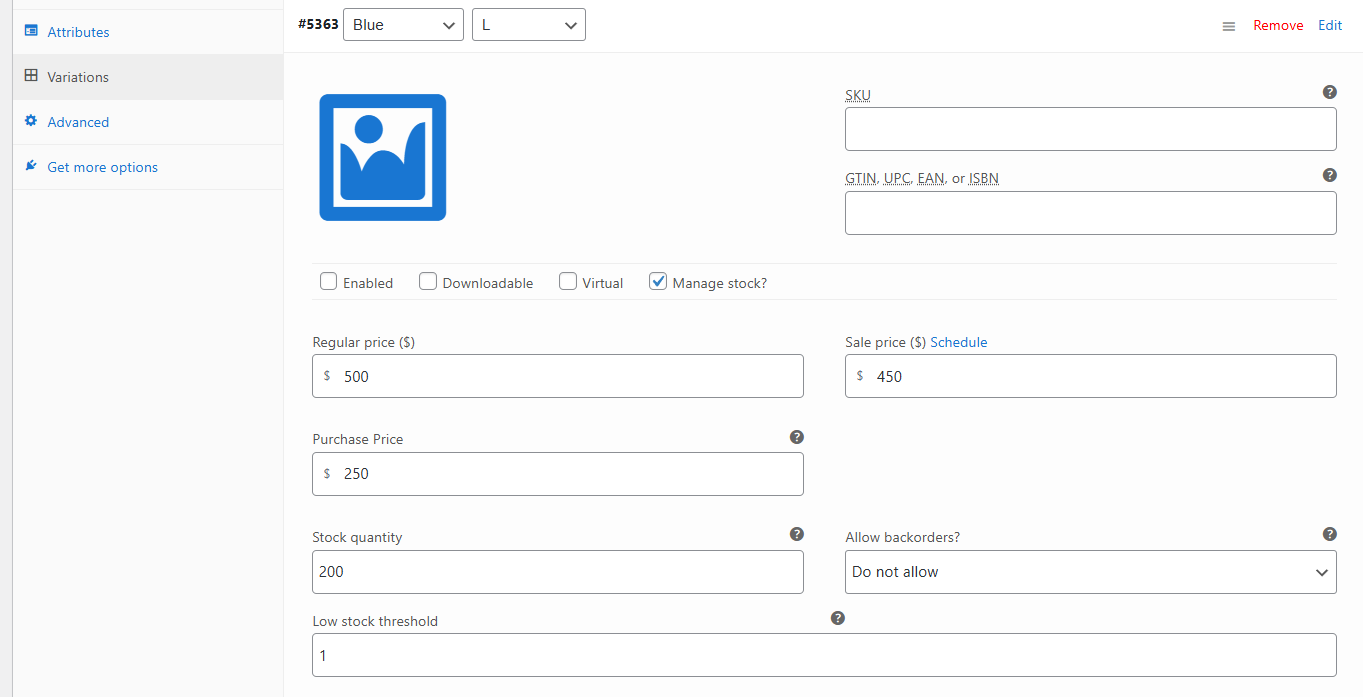
Step 4: Manage Stock
- Click on Manage Stock? to enable stock management for this variation.
- Enter the following details:
- Regular Price
- Sale Price (if applicable)
- Purchase Price
- Stock Quantity
- Backorder Option (choose whether backorders are allowed)
Step 5: Configure Location Settings
- Scroll down to the Location section.
- All selected locations will appear here.
- You can add as many locations as needed.
- For each location, fill in:
- Stock Status
- Regular Price
- Sale Price
- Backorder Option

- Remember: these settings apply to one single variation.
- You must repeat the process for each variation individually, entering the correct data for each.
- Once all variations are configured, click Save Changes.
- Finally, click Update or Publish to make the product live.
Method 2: Configure Location-Based Settings from Stock Central
This method is best for bulk or centralized inventory management. There are two stock central options. 1) Modern, and 2) Classic.
Let’s see both options:
1) Modern Mode
For Simple Products
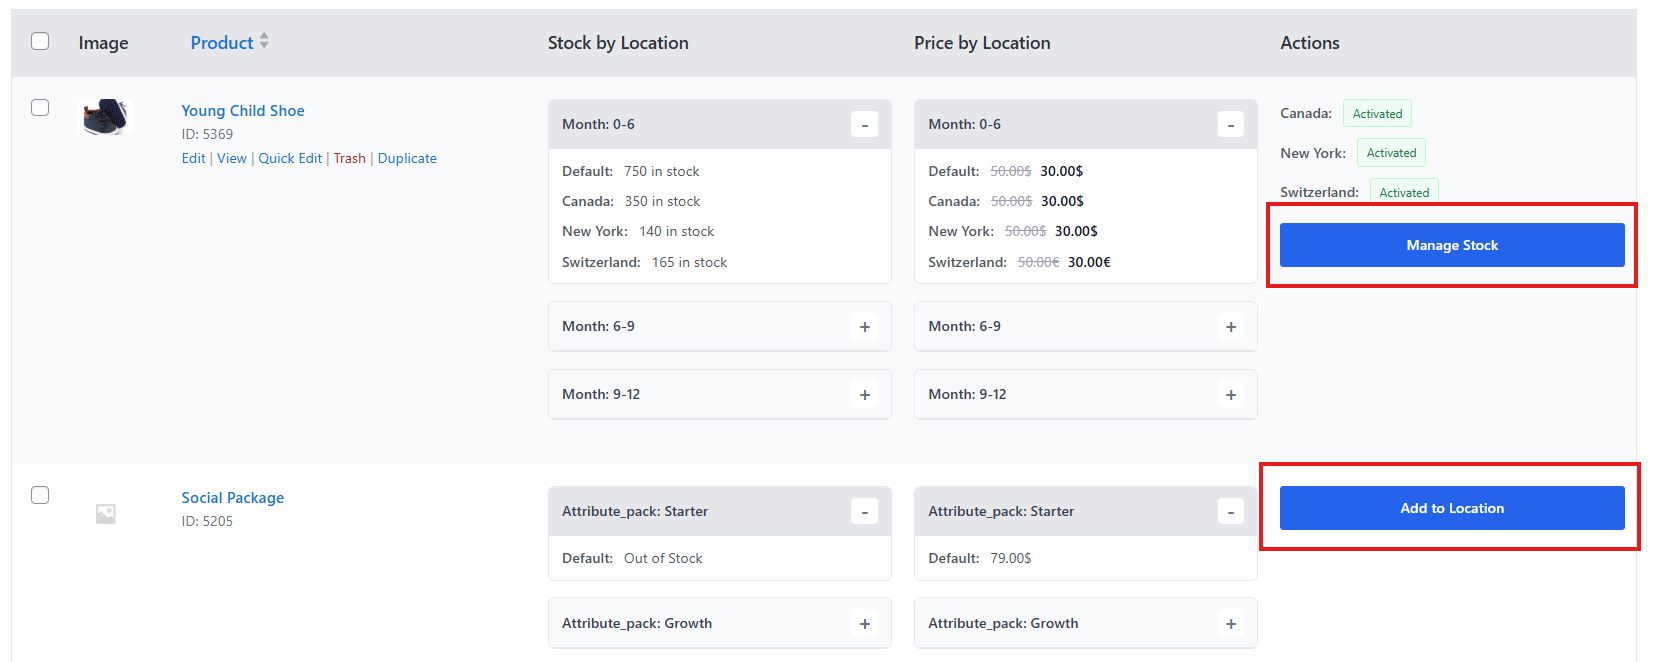
- Go to Location Manage > Stock Central.
- At the top, choose Modern layout.
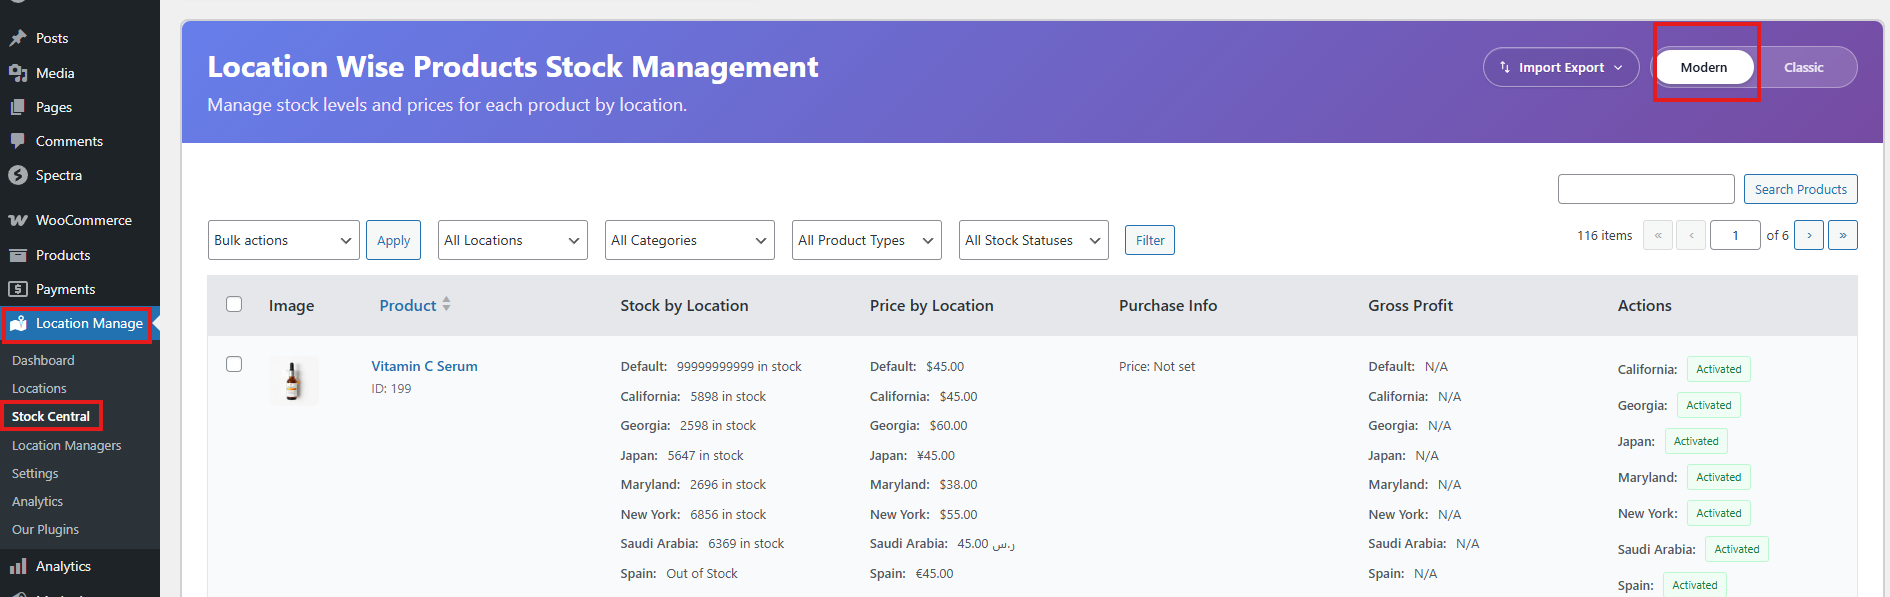
- Find the product you want to configure:
- If no location is assigned → you’ll see Add Location.
- If a location is already assigned → you’ll see Manage Stock.

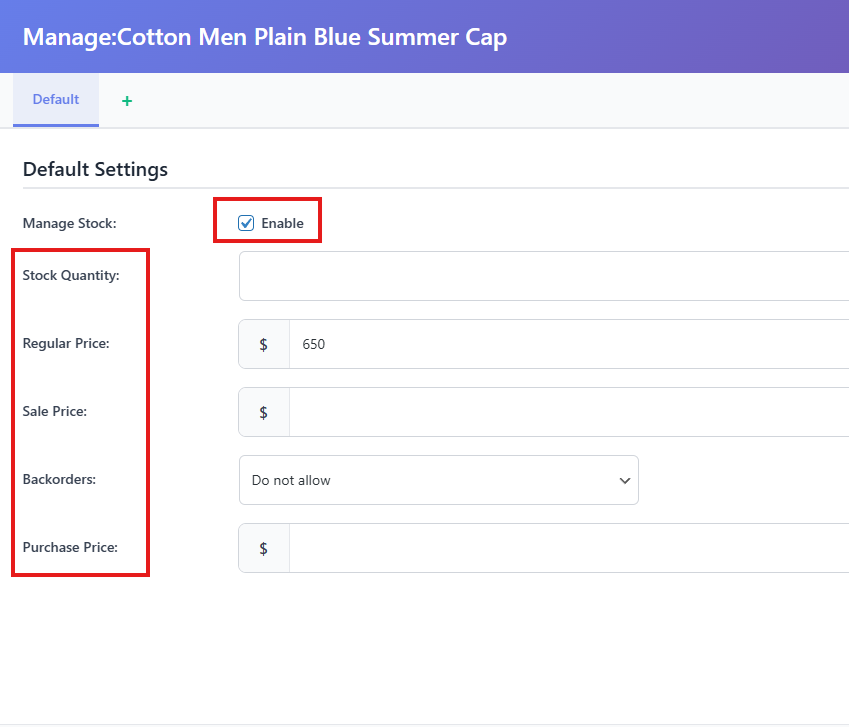
- Click the button to open the popup window.
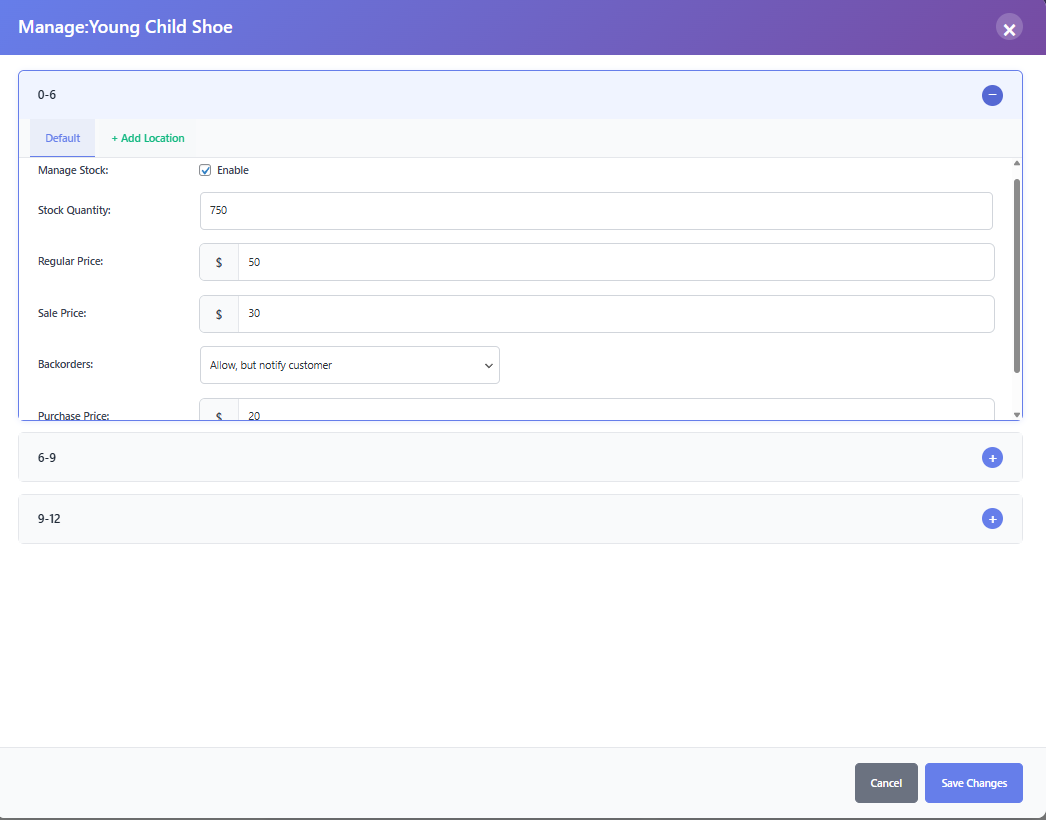
- Inside the popup, at the very top, tick the Enabled checkbox.
- This option activates stock management for the product.
- Fill in the general info shown directly below:
- Stock Quantity
- Regular Price
- Sale Price (if applicable)
- Backorder option (allowed or not)
- Purchase Price
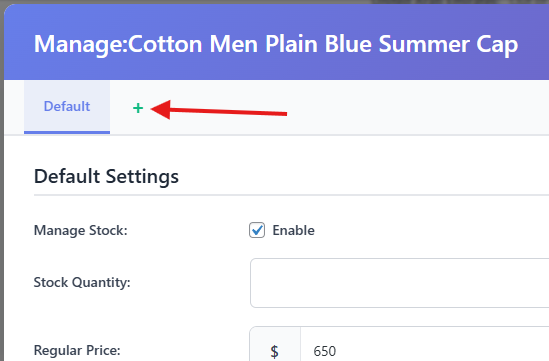
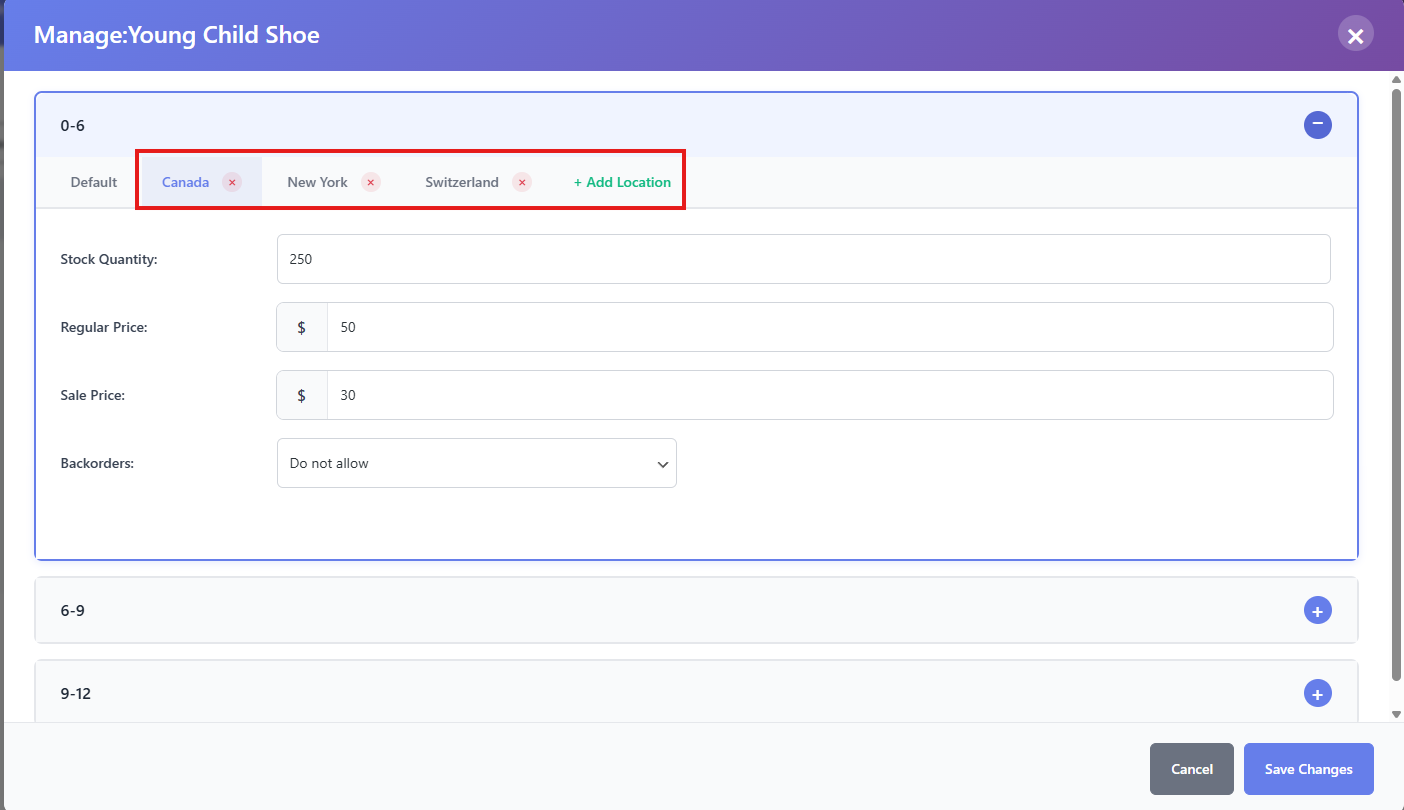
- To configure location-wise:
- At the top beside Default, click the + icon.
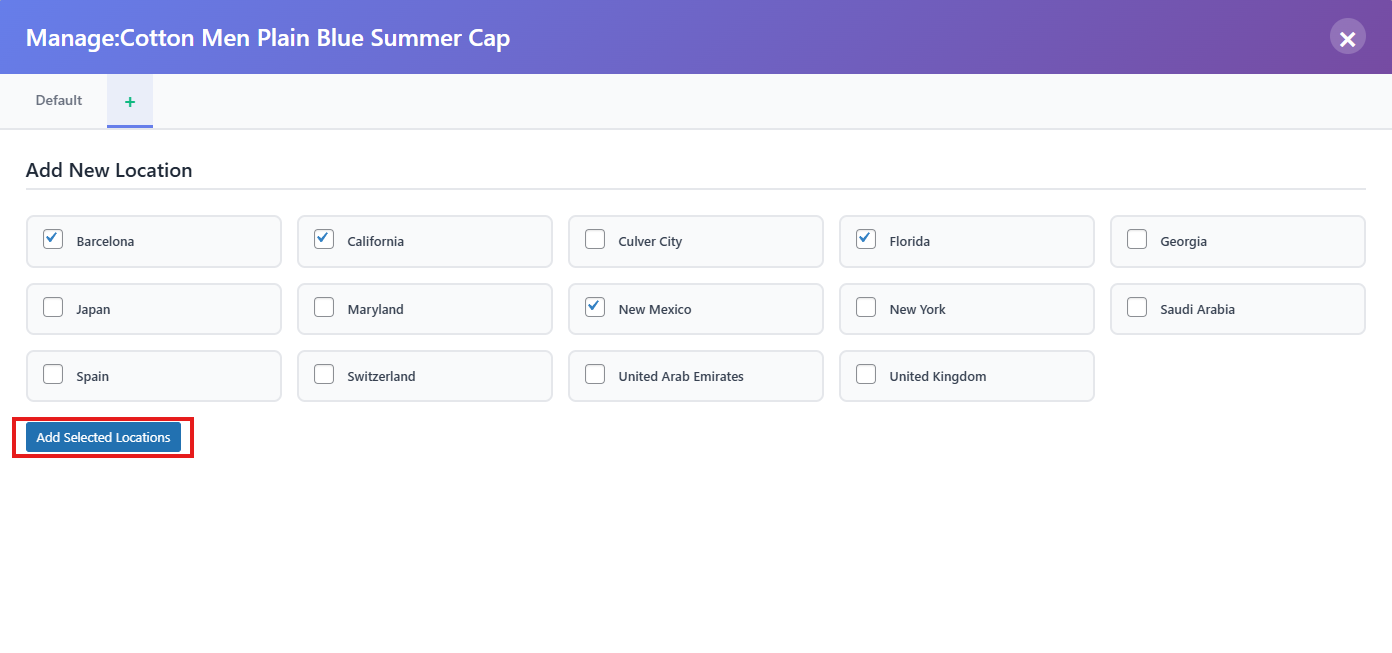
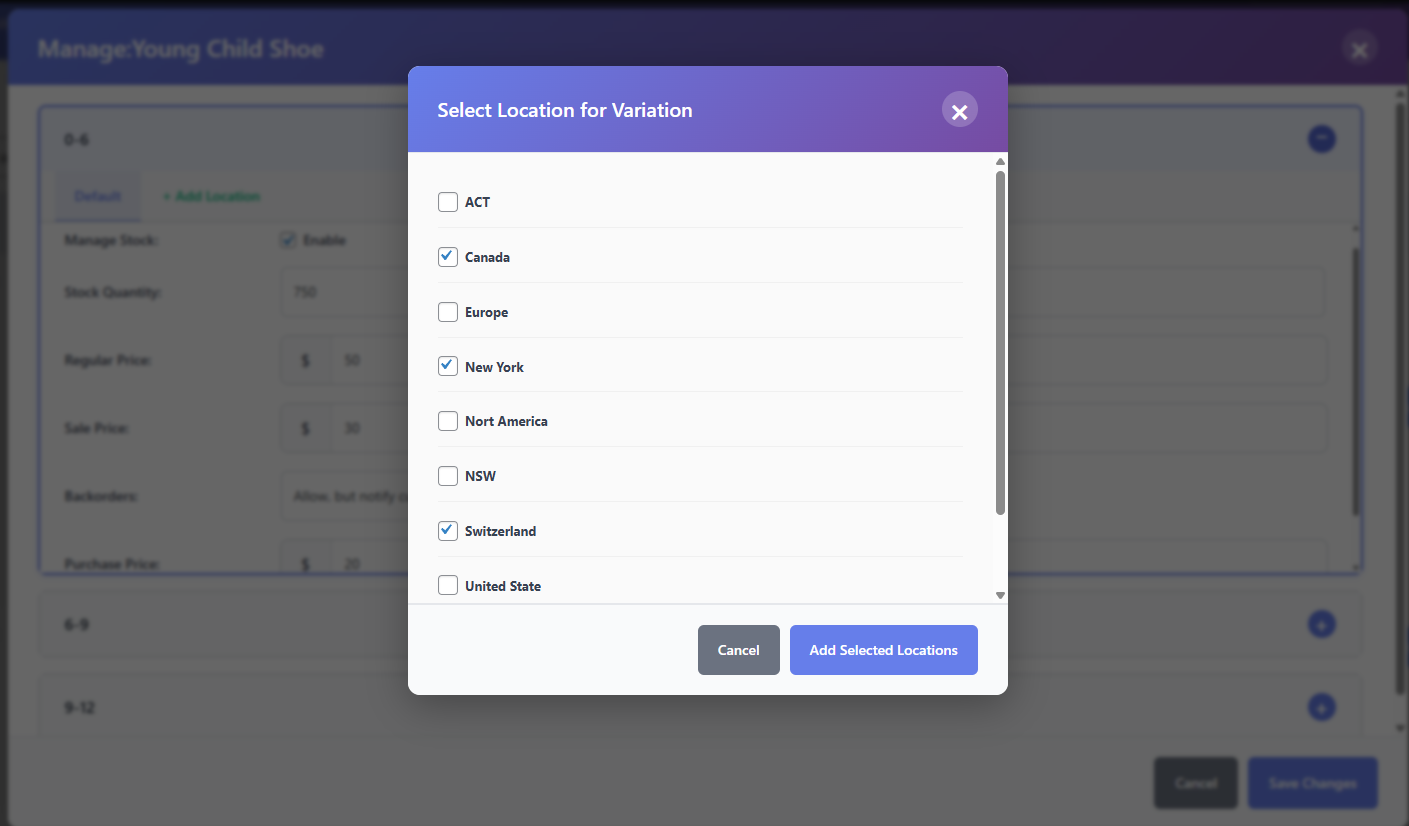
- A list of all available store locations will appear.
- Select one or multiple locations.
- Click Add Selected Locations.
- Each location will now appear as a separate tab next to Default.
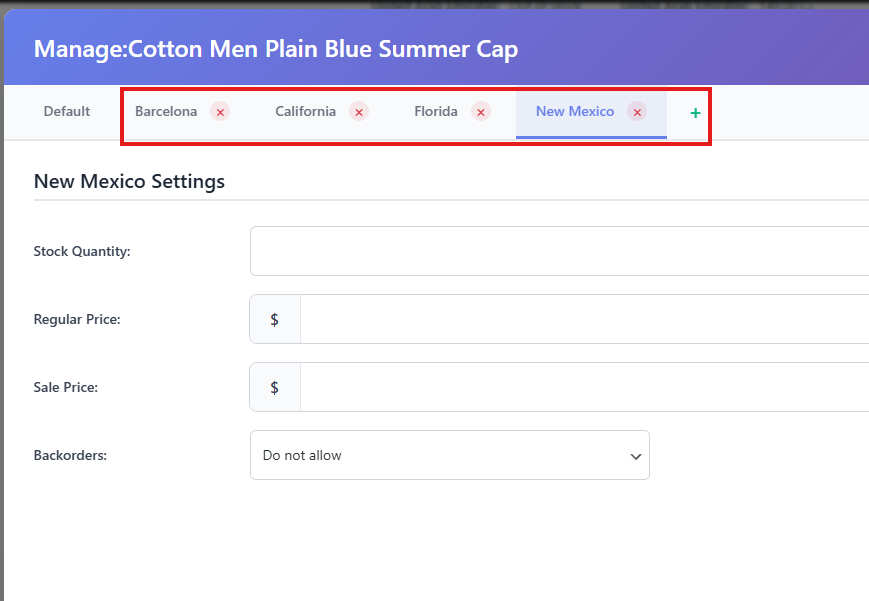
- For each location tab, fill in:
- Stock Quantity
- Regular Price
- Sale Price
- Backorder option
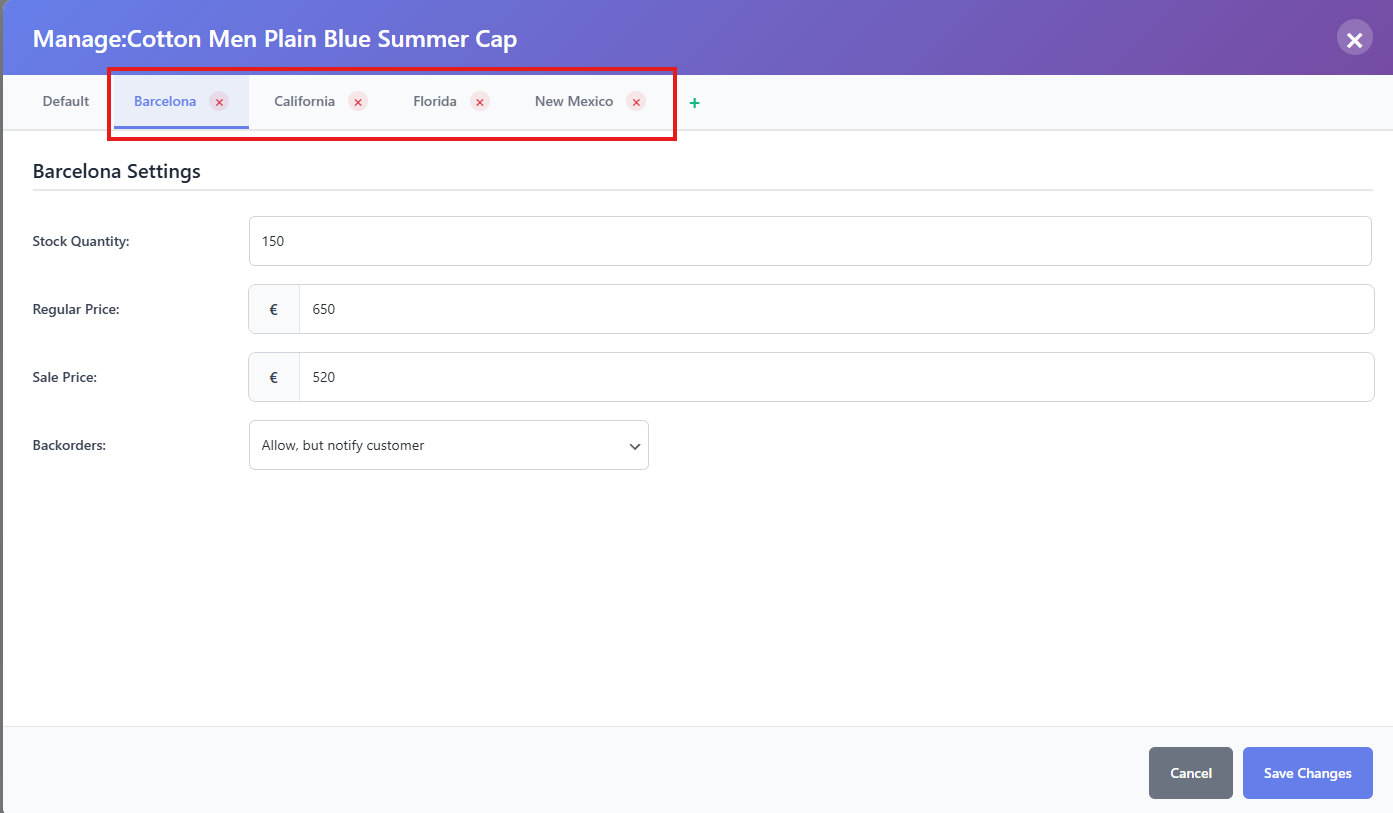
- Click Save Changes.
- To remove a location:
- Click the X icon beside the location name.
- Confirm removal, then save changes.
For Variable Products
- Create a variable product (without assigning location initially).
- Open Stock Central.
- Look for the product you want to edit. click on Add Location or Manage Stock
- Each variation will appear with its own tab.
- Expand a variation tab. At the top, tick the Enabled checkbox to activate stock management for that variation.
- Fill in the General Info fields: Stock Quantity, Regular Price, Sale Price, Backorder option, and Purchase Price.
- Add locations:
- Click on the + incon beside the Default option inside the variation tab.
- Select desired locations.
- Click Add Selected Locations.
- Do the same for each variations.
- For each location tab under that variation, fill in:
- Stock Quantity
- Regular Price
- Sale Price
- Backorder option
- Repeat for all variations.
- Click Save Changes when finished.
2) Classic Mode
For Simple Products
- From Stock Central, choose Classic layout.
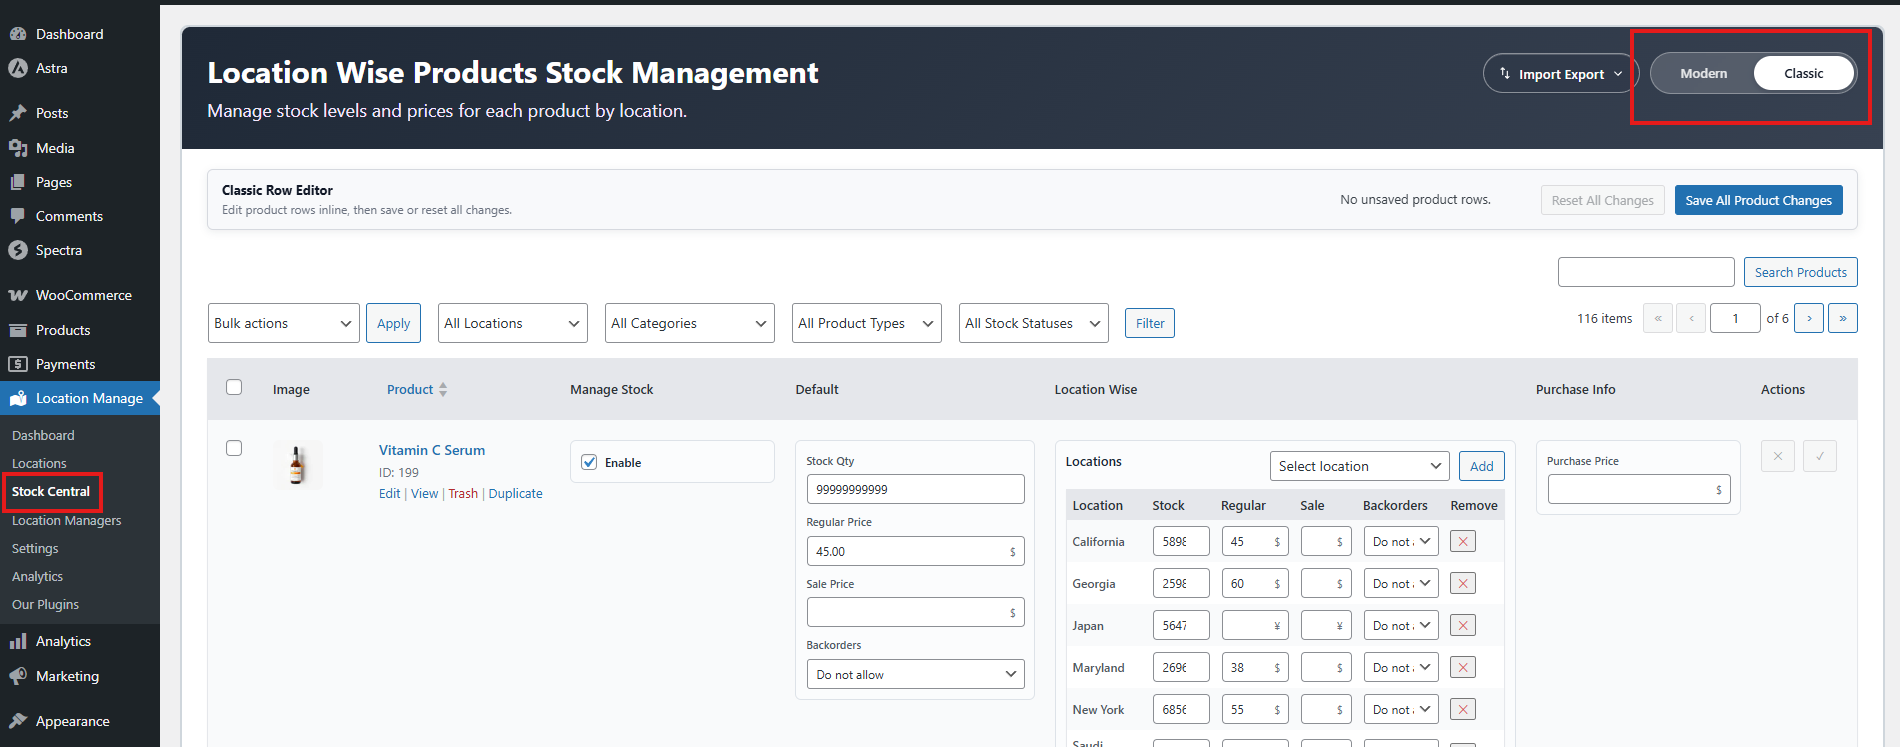
- All products will be listed. Select the product to edit.
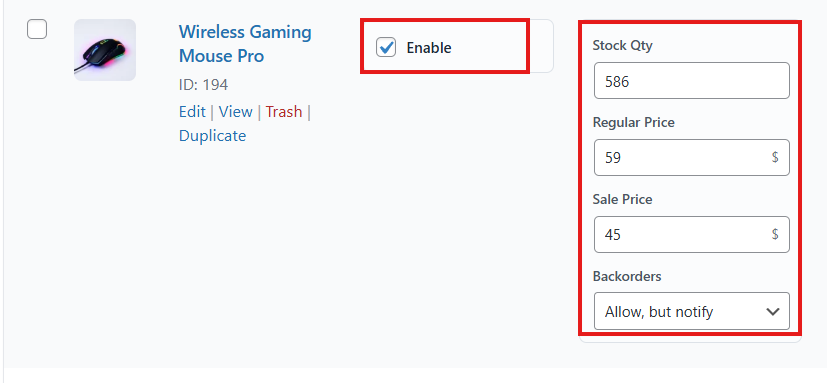
- Beside the product name, tick the Enabled checkbox to activate stock management.
- Fill in General Info:
- Stock Quantity
- Regular Price
- Sale Price
- Backorder option
- On the right side, configure Location:
- If no location is assigned, select from the dropdown.
- Choose All Locations or add them one by one.
- Remove locations if needed by clicking on the X icon.
- For each location, enter stock quantity, regular price, sale price, and backorder option.
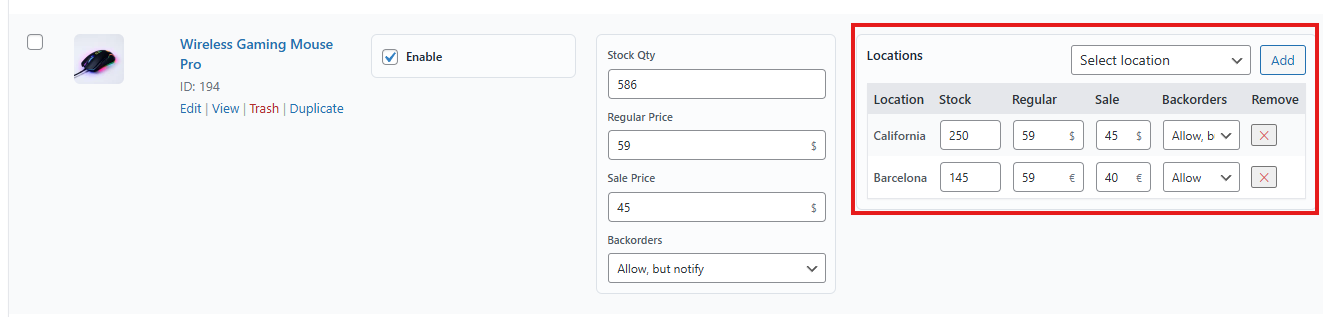
- Enter Purchase Price on the right side.

- Click the Tick icon to save changes.
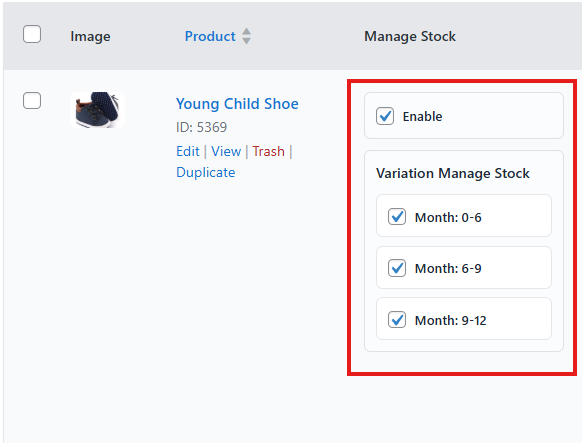
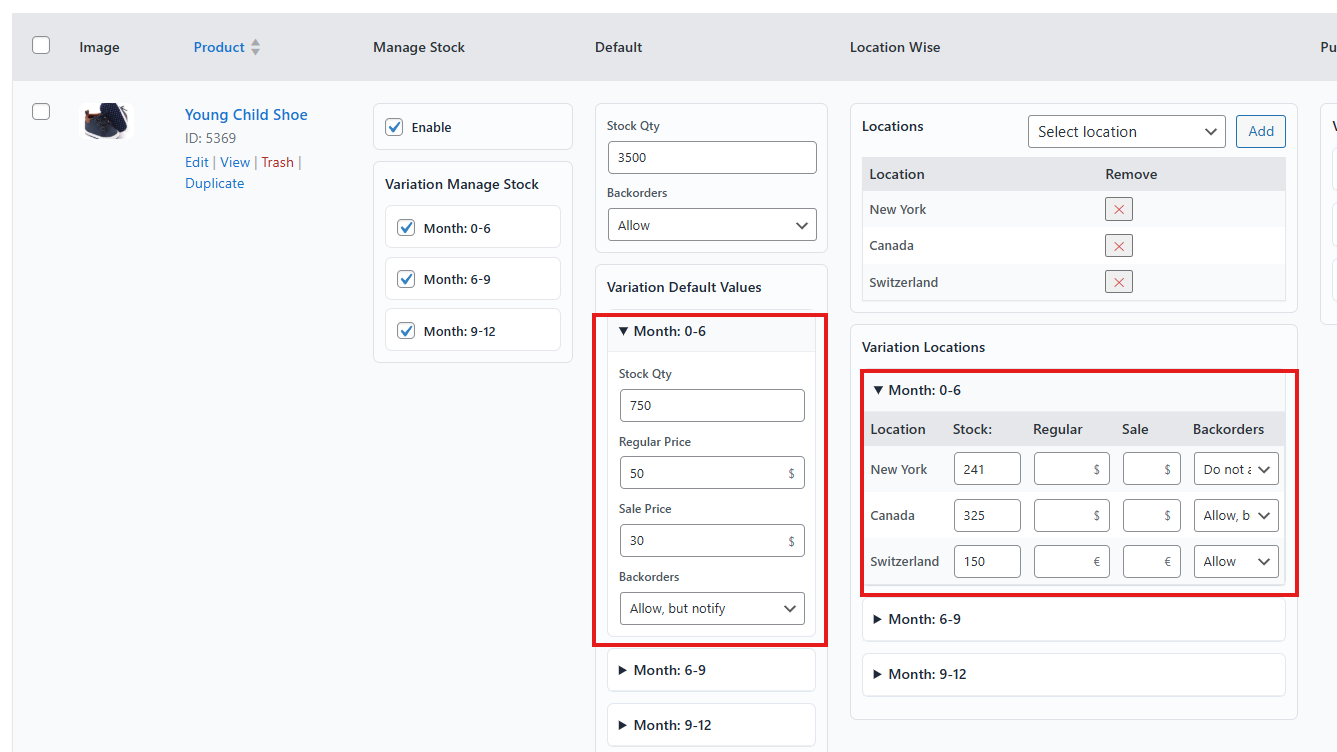
For Variable Products
- Find the variable product you want to edit.
- Beside the product name, you’ll see an option named “Enable.” Tick this option.
- Then you’ll see an option box named Variation Manage Stock; here all the variations will appear.
- Tick all the variations so you can edit them individually.
- Select the variations you want to edit (or all).
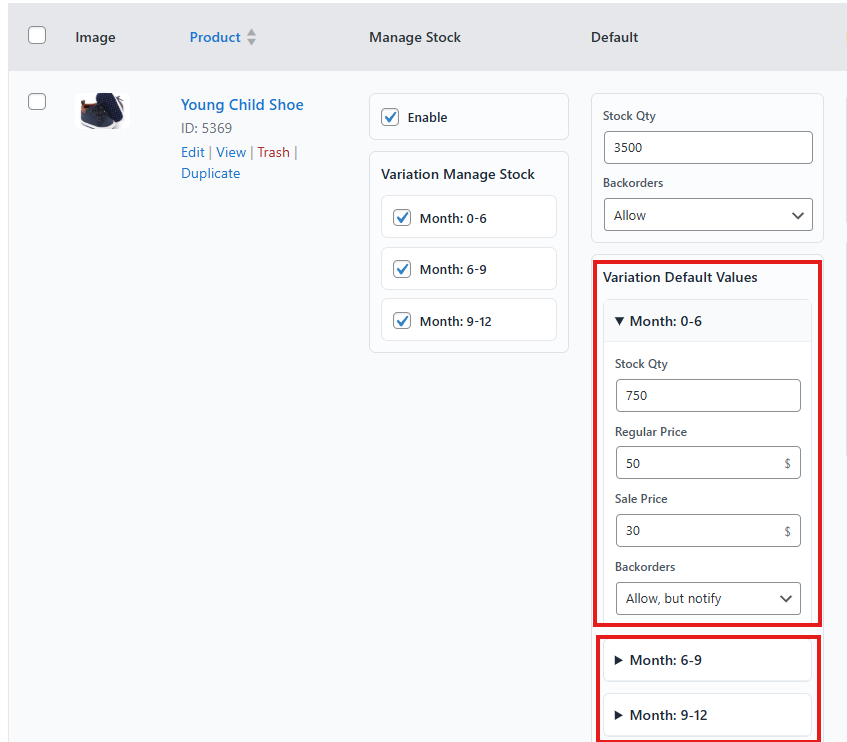
- Then on the Default tab, give the total stock quantity and if backorder is available or not.

- Fill in Variation Default Values:
- Stock Quantity
- Regular Price
- Sale Price
- Backorder option
- Fill this info for all variations
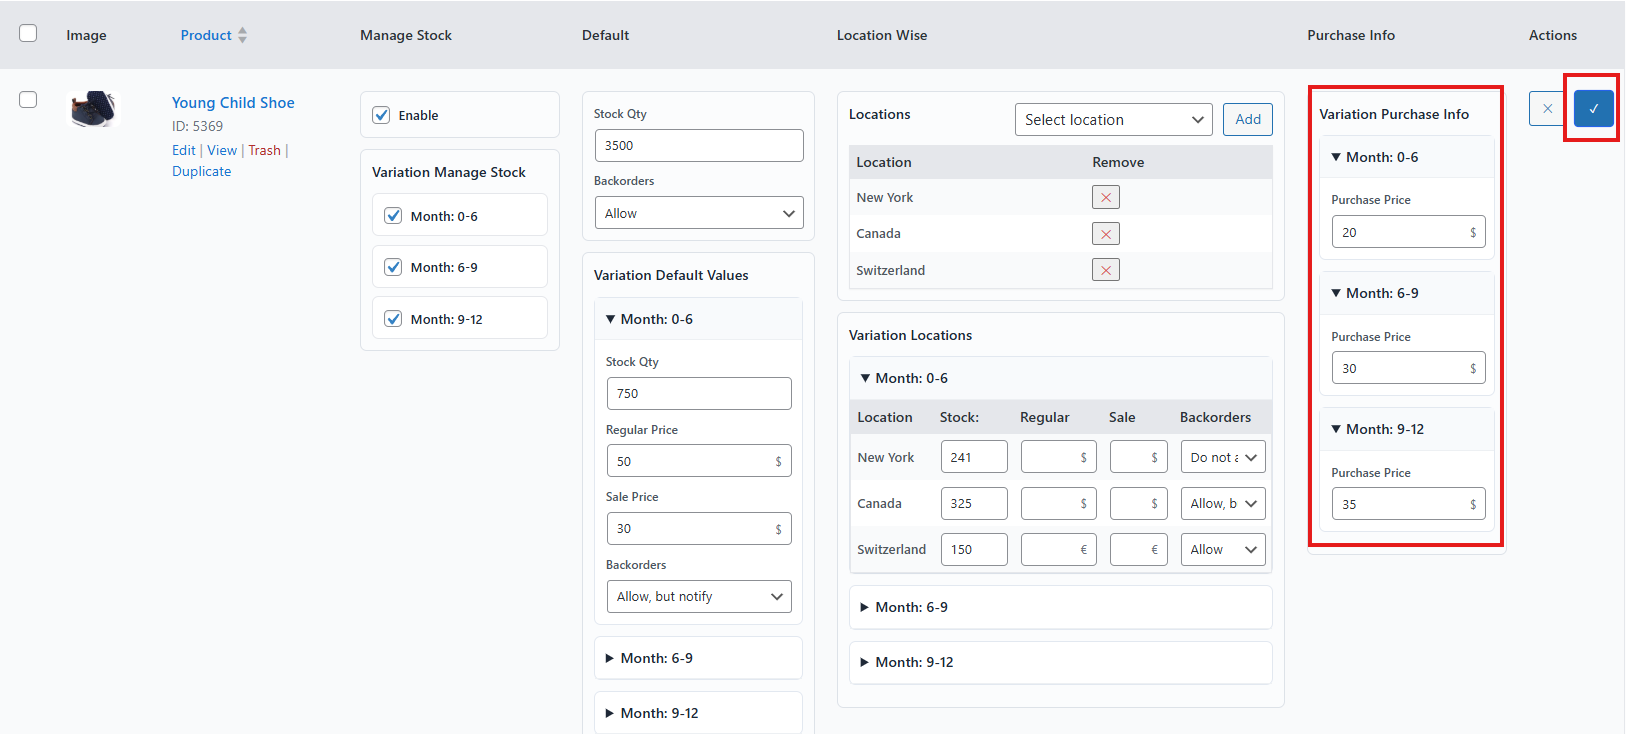
- Configure Variation Locations:
- Select locations (same as simple product).
- For each variation and location, enter stock quantity, regular price, sale price, and backorder option.
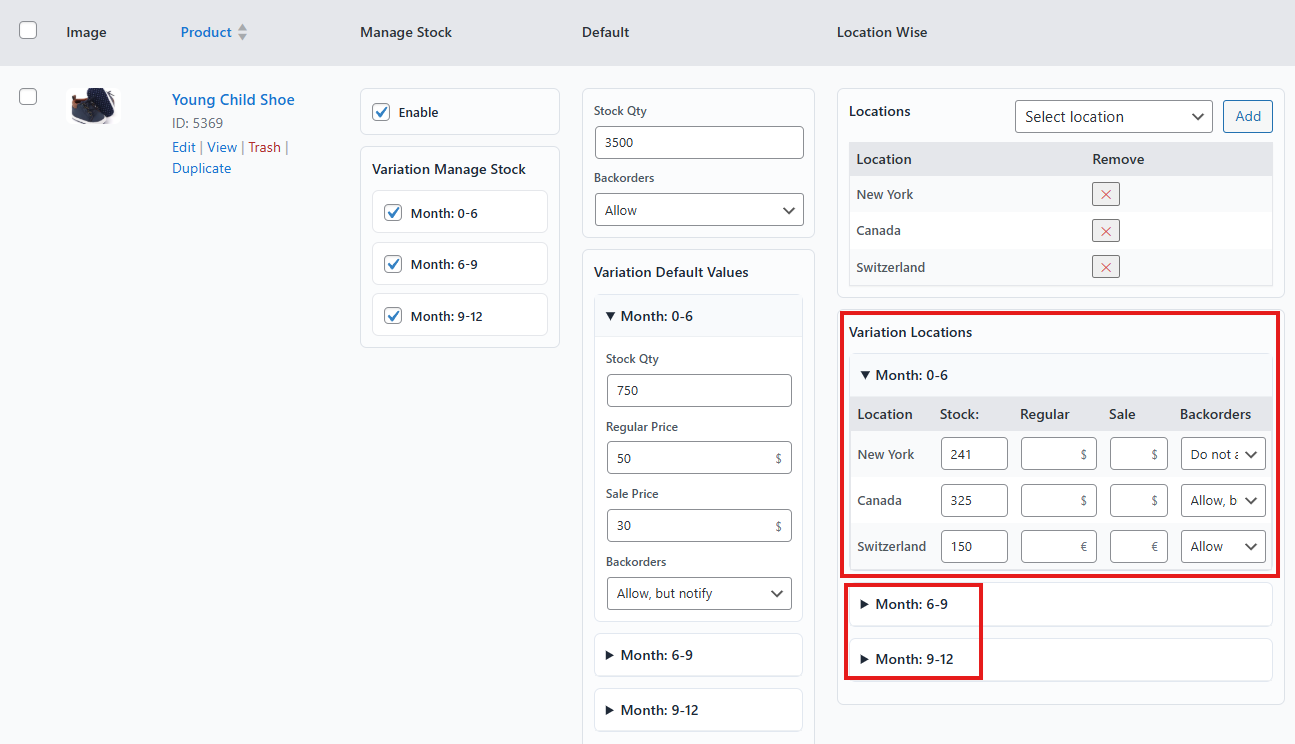
- Remember, for the Variation Locations variation info is matched with the Variation Default Value variation.
- For example, for the variation Month: 0-6 stock quantity has 750 units. That means for the same variation, when you assign location, you have to distribute the quantity within that, not more than 750 units.
- Enter Purchase Price for each variation.
- Save changes by clicking the Tick icon.
By using either the Product Edit Page or Stock Central, you can fully control location-based pricing, inventory, availability, and backorders—ensuring accurate stock management and a better customer experience.