The Multi Location Product & Inventory Management for WooCommerce plugin provides advanced tools to manage inventory across multiple store locations. By enabling location-based inventory management, you can control stock quantities for each location, receive alerts for low or out-of-stock items, and ensure accurate product availability for customers. This documentation covers the benefits of managing location-based inventory and explains two detailed methods: managing inventory on the product edit page and managing inventory through Stock Central.
Benefits
Managing location-based inventory offers several advantages:
- Accurate tracking of stock quantities across multiple locations.
- Flexibility to configure stock levels for each product variation and location.
- Alerts for low stock and out-of-stock conditions to prevent overselling.
- Improved customer experience with reliable product availability.
Enable Location-Based Inventory Settings
Before managing inventory, you must enable location-specific stock management.
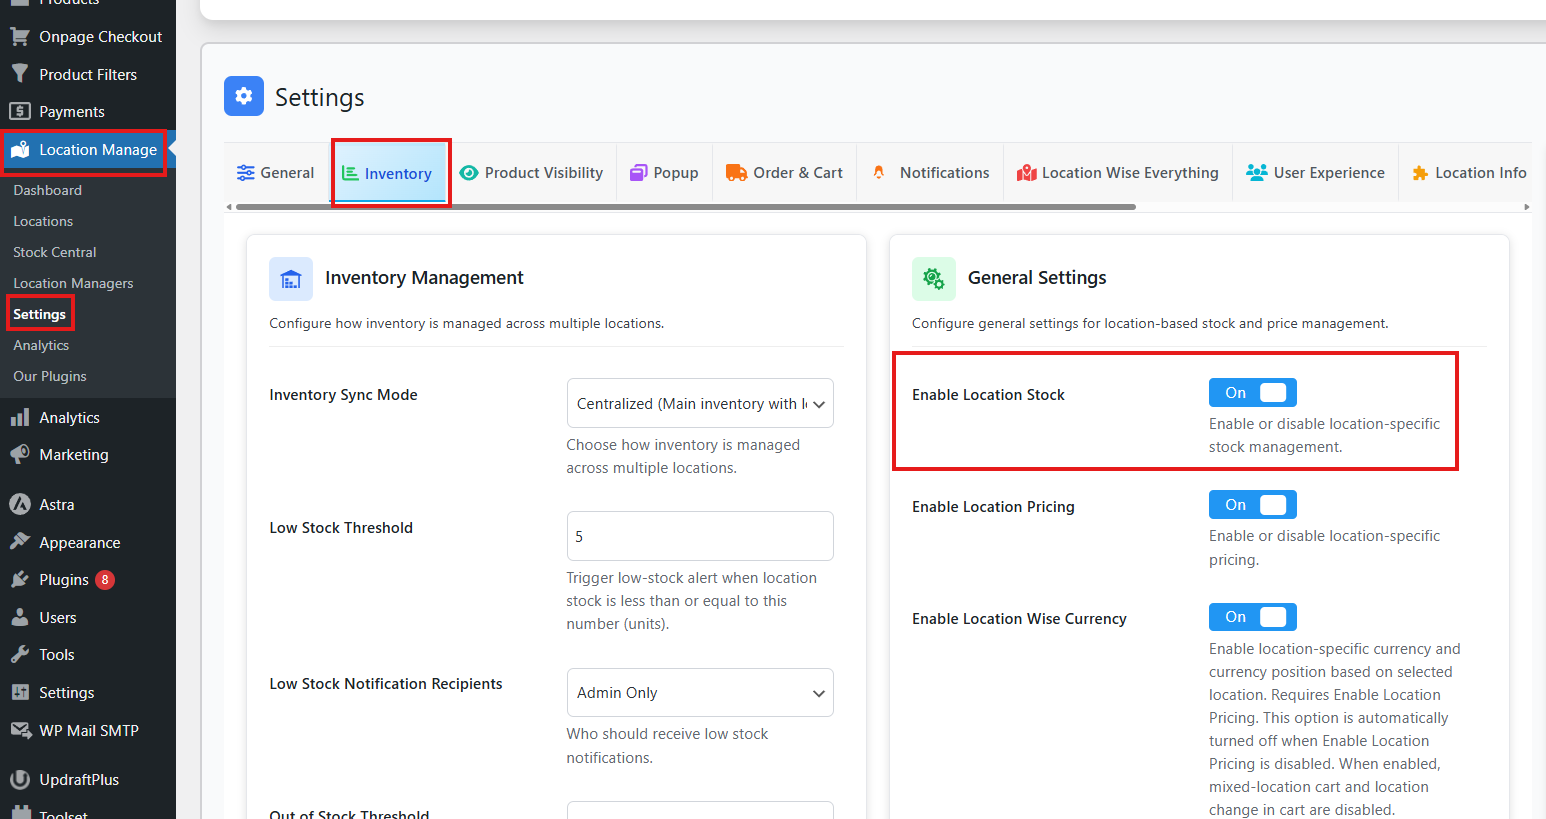
- From your dashboard, go to Location Manage > Settings > Inventory.
- Enable the option named Enable Location Stock.
- This allows you to manage stock quantities per location.
- Configure additional settings for flexibility in this Inventory setting:
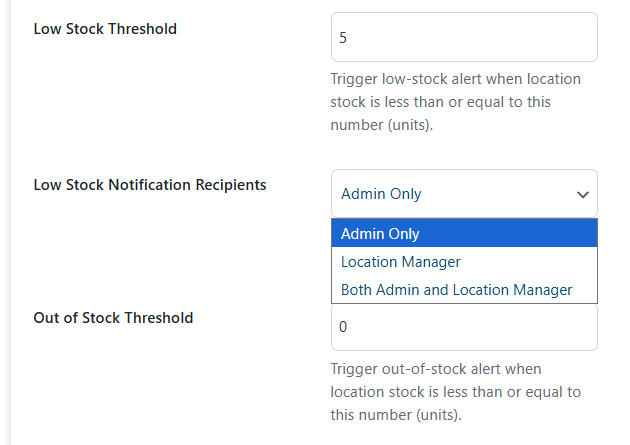
- Low Stock Threshold: Enter a number to trigger low-stock alerts when stock is less than or equal to this value.
- Example: Enter 5. If any product’s stock reaches 5 or lower, you will receive an alert notification.
- Low Stock Notification Recipients: Choose who should receive low stock notifications.
- Options: Admin Only, Location Manager, or Both.
- Out of Stock Threshold: Enter a number to trigger alerts when stock reaches this value.
- Low Stock Threshold: Enter a number to trigger low-stock alerts when stock is less than or equal to this value.
Enabling these settings ensures proactive inventory management and prevents overselling.
Method 1: Managing Inventory on the Product Edit Page
Simple Products
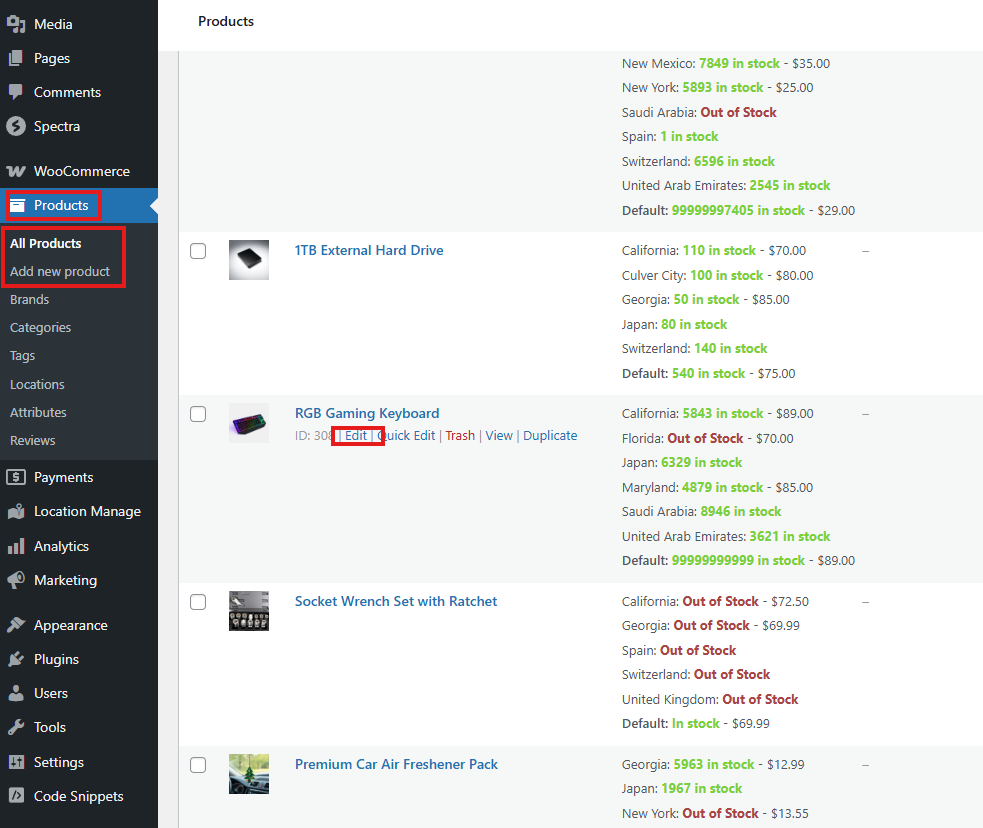
- Go to Products > All Products.
- Choose the product you want to configure or create a new product.
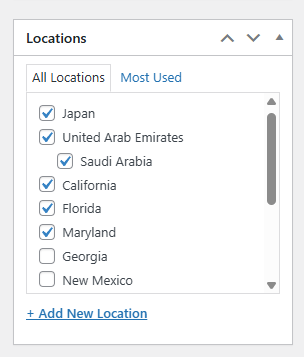
- In the Locations section, select the locations where you want to manage inventory.
- Go to the Product Data section.
- Configure prices (see Location-Based Price Setup documentation).
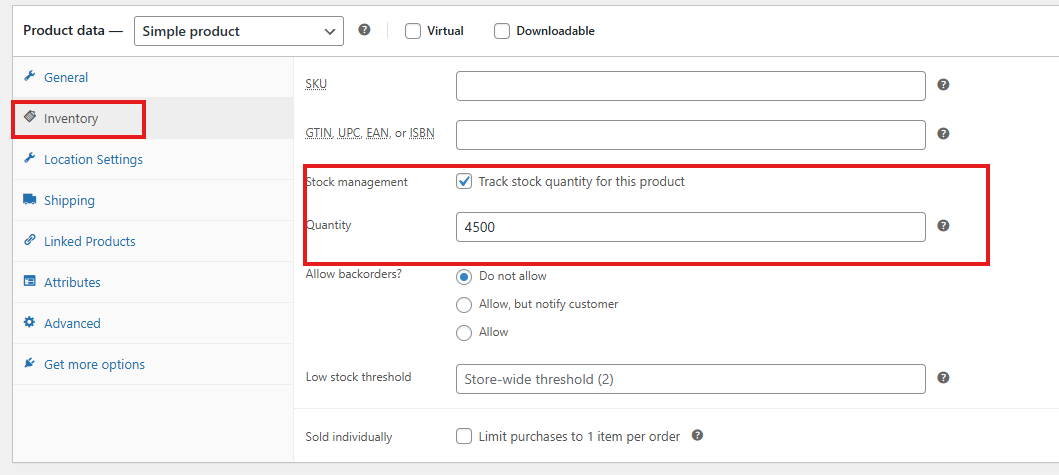
- Go to the Inventory tab.
- Enable Stock Management.
- Enter the total stock quantity for the product (not location-specific).
- Configure backorder options (see Location-Based Backorder documentation).
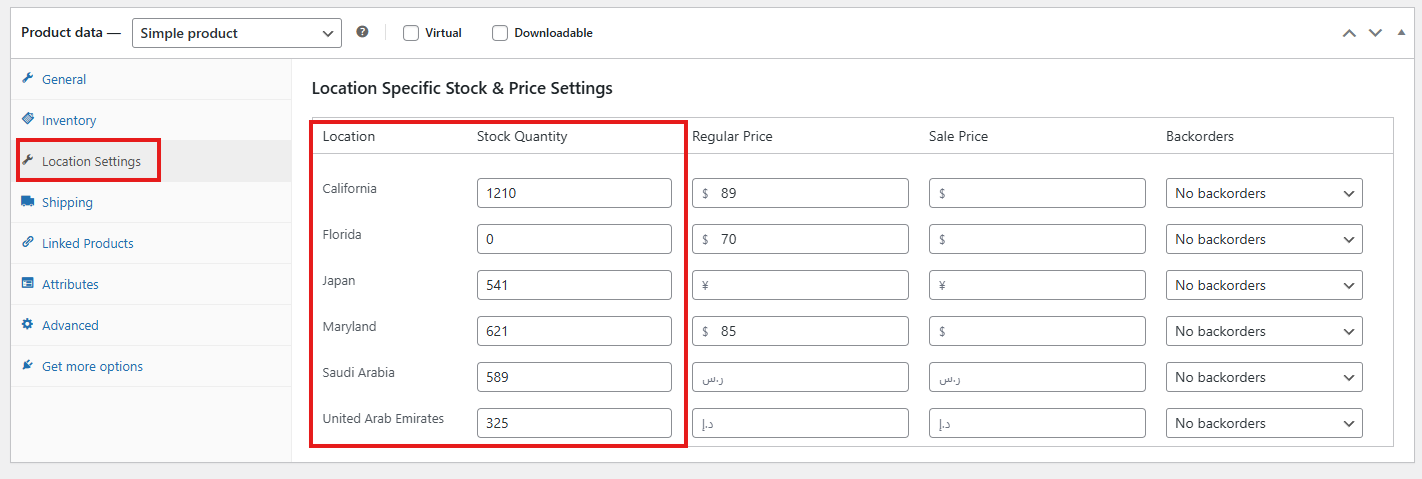
- Go to the Location Settings tab.
- For each location, enter:
- Stock Quantity
- Regular Price
- Sale Price
- Backorder Availability
- For each location, enter:
- Click Update or Publish to save.
Variable Products
- Open the variable product’s edit page.
- Add locations.
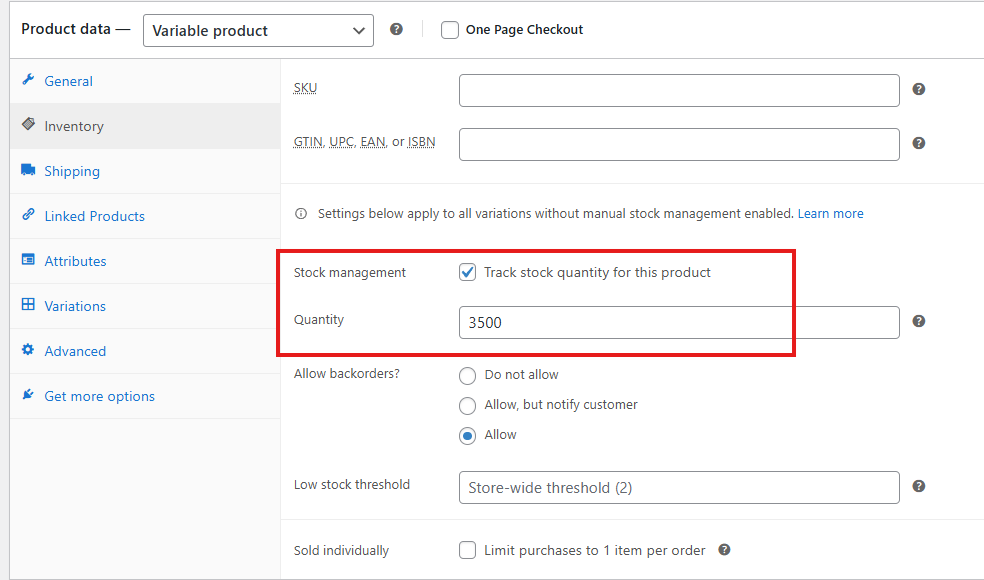
- In the Product Data section, go to the Inventory tab.
- Enable Stock Management.
- Enter the total stock quantity for the product (all variations combined).
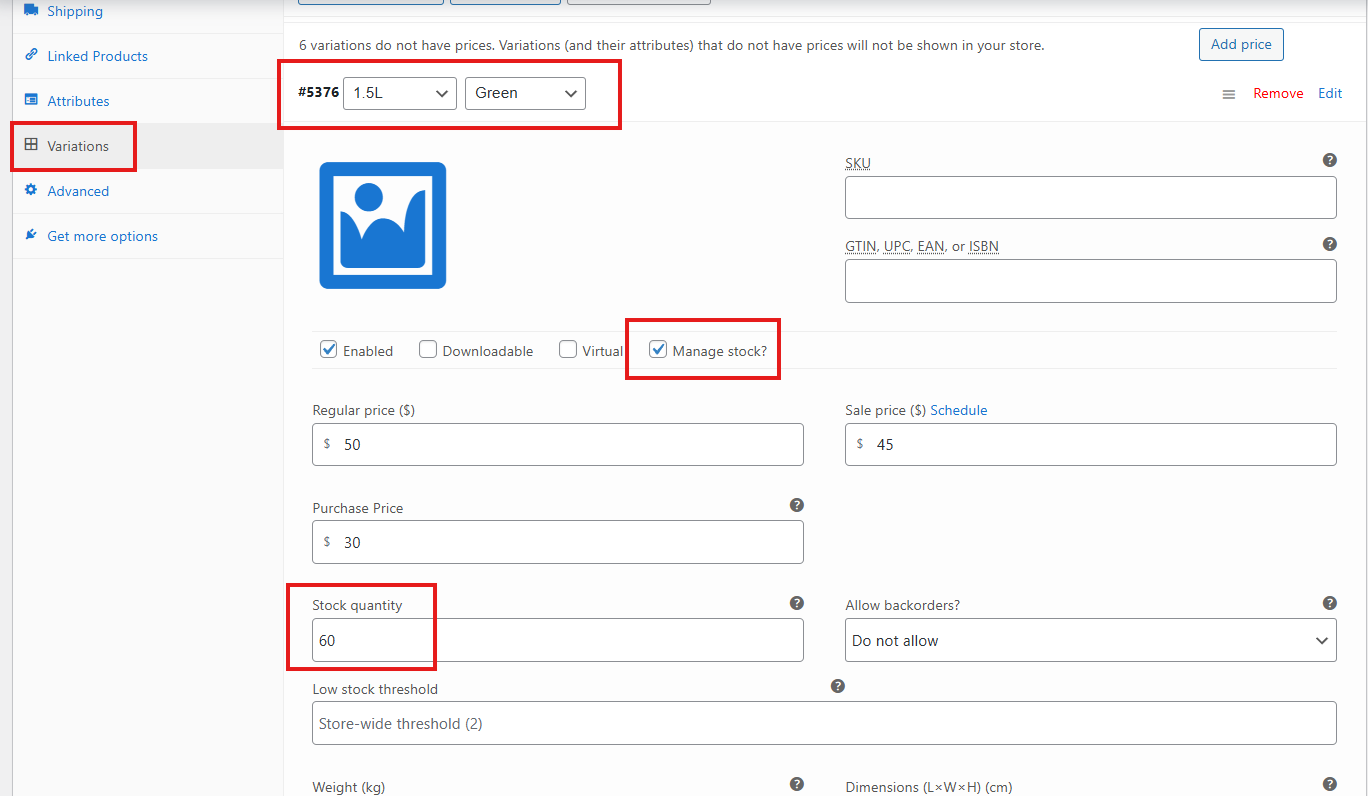
- Go to the Variations tab.
- Expand each variation.
- Tick Manage Stock?.
- Enter Regular Price, Sale Price, and Purchase Price for the variation.
- Enter the total stock quantity for the variation.
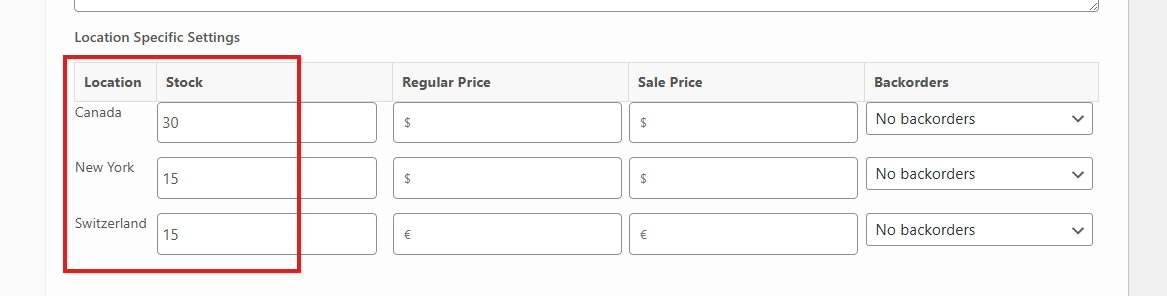
- Go to Location Specific Settings.
- For each location, enter stock quantity for the variation.
- Ensure the sum does not exceed the total stock quantity.
- Repeat for all variations.
- Click Save Changes, then Update or Publish.
Managing inventory on the product edit page ensures precise control over each product and variation.
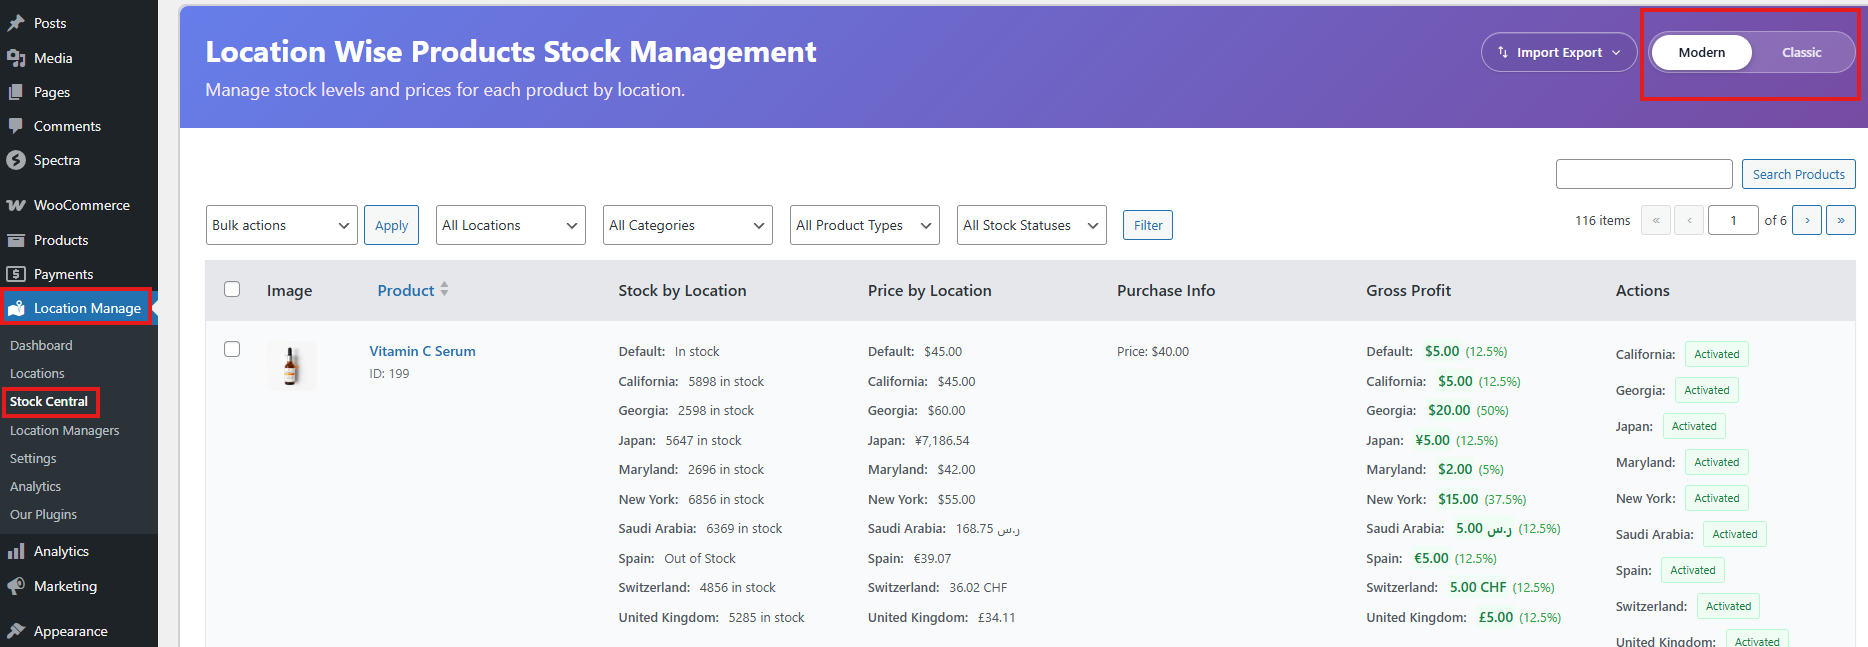
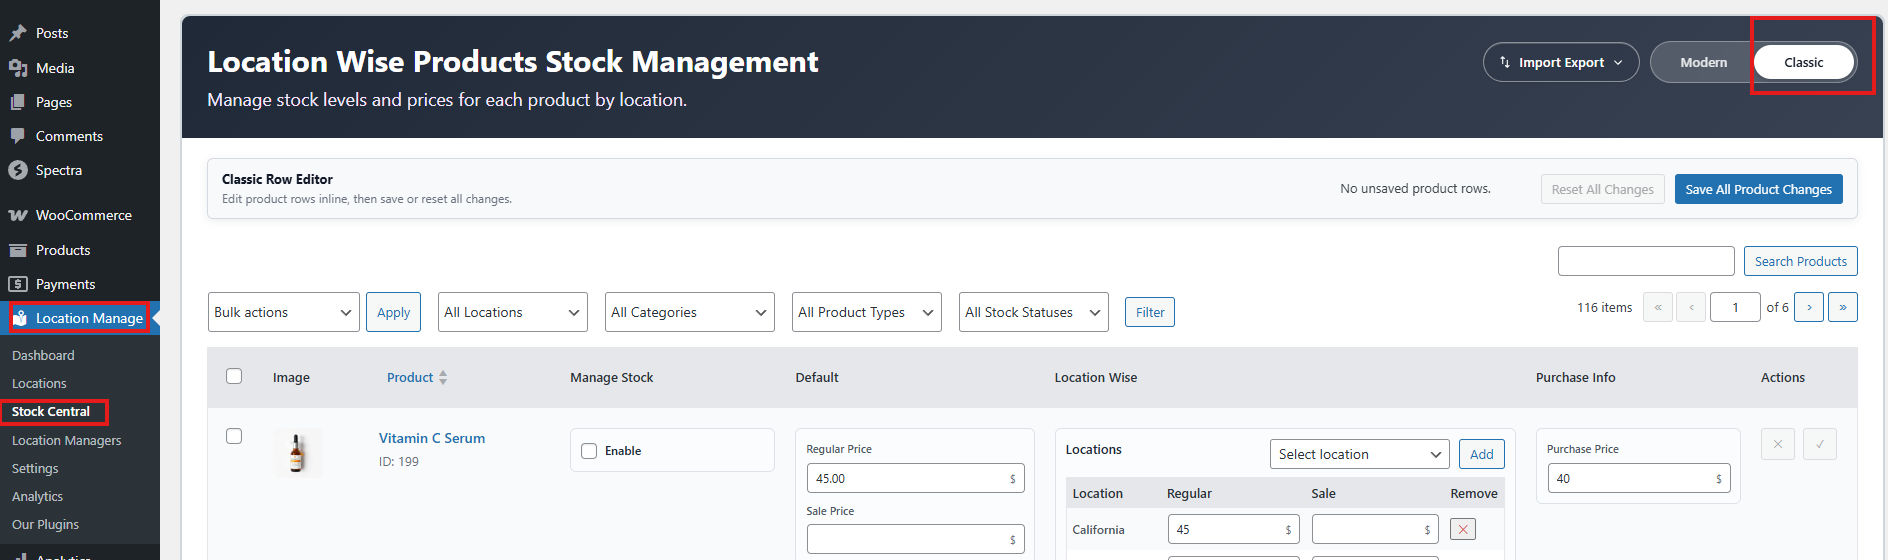
Method 2: Managing Inventory on Stock Central
Stock Central provides a centralized interface for managing inventory. It has two modes: Modern and Classic.
Modern Mode
Simple Products
- Go to Location Manage > Stock Central.
- Select Modern
- Choose a product.
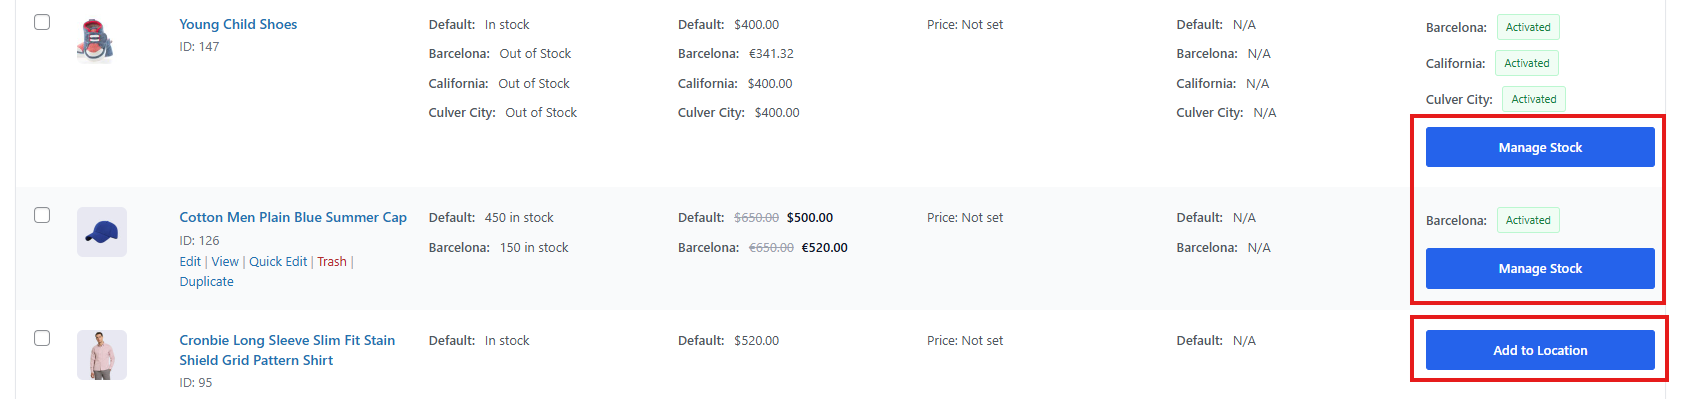
- Products with assigned locations show Manage Stock.
- Products without assigned locations show Add to Location.
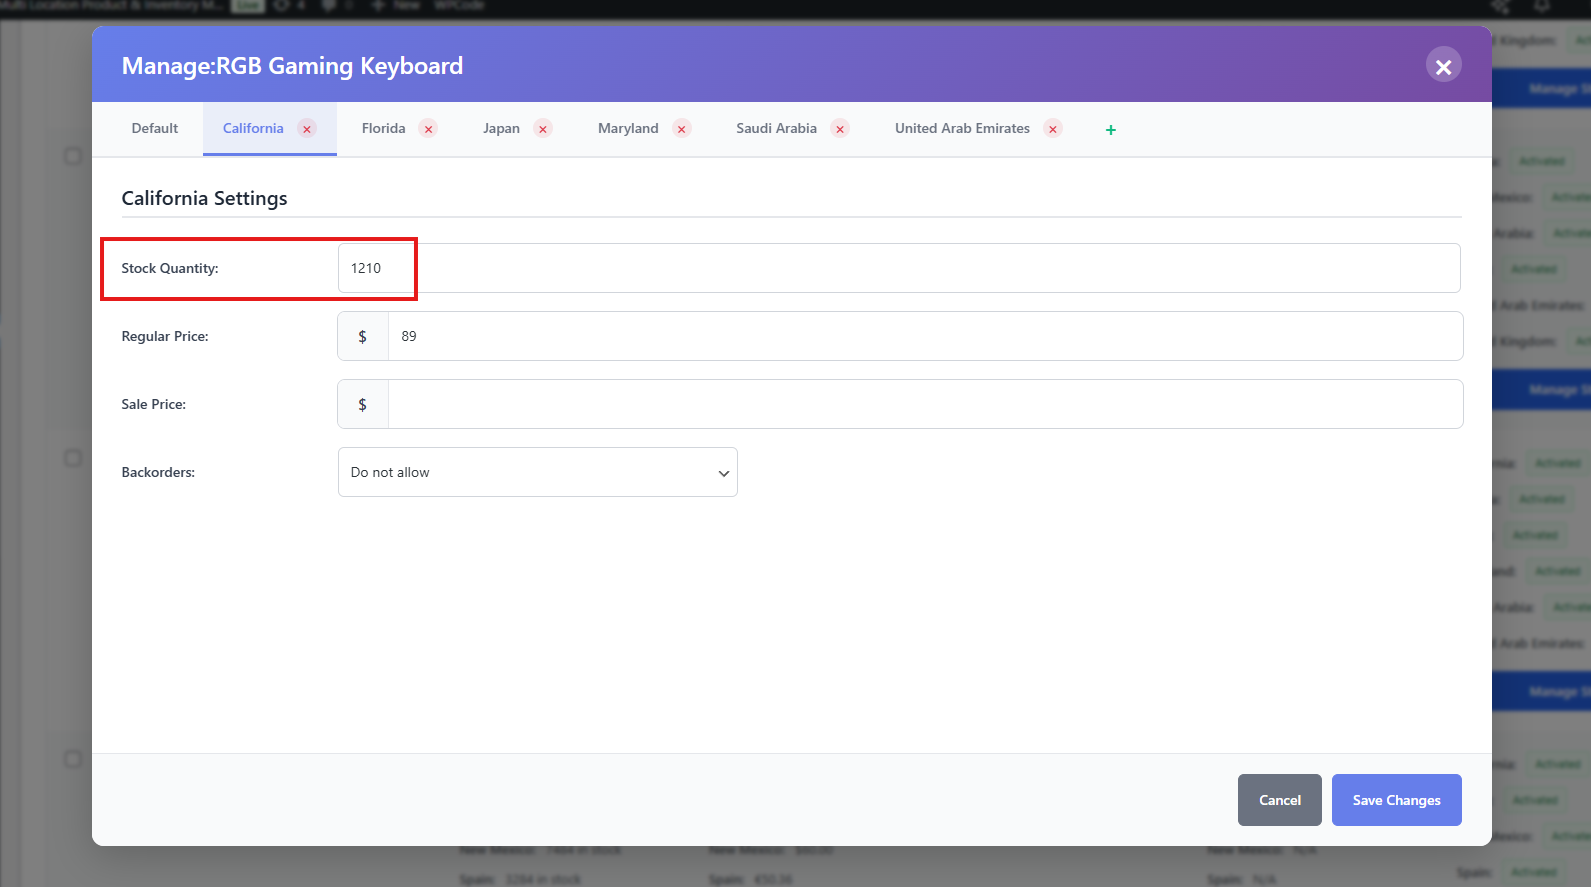
- Click Add to Location or Manage Stock.
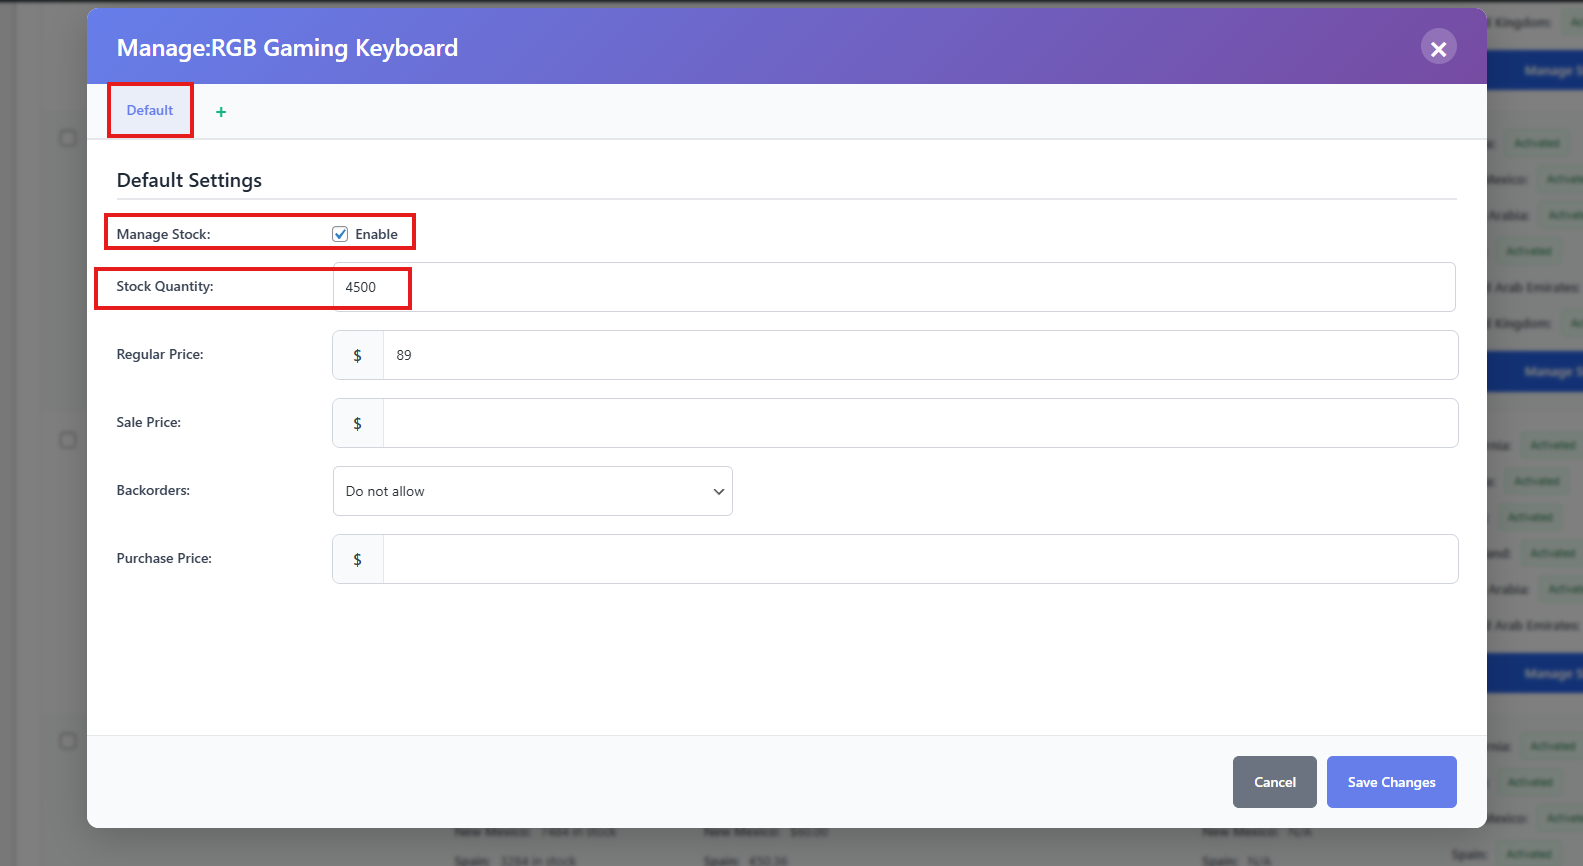
- A popup opens showing default settings (General and Inventory tabs combined).
- Check Manage Stock.
- In the Default tab, enter:
- Total Stock Quantity of the product
- Regular Price
- Sale Price
- Backorder Availability
- Purchase Price
- If no locations is assigned with the product, add locations:
- Click the + icon beside Default.
- Select locations and click Add Selected Locations.
- For each location tab, enter:
- Stock Quantity
- Regular Price
- Sale Price
- Backorder Availability
- Click Save Changes.
Variable Products
- Choose a variable product.
- Click Manage Stock or Add to Location.
- A popup opens with expandable tabs for each variation.
- Expand a variation.
- Assign locations if not already added.
- In the Default tab, enter:
- Stock Quantity (total for the variation)
- Regular Price
- Sale Price
- Backorder Availability
- Purchase Price
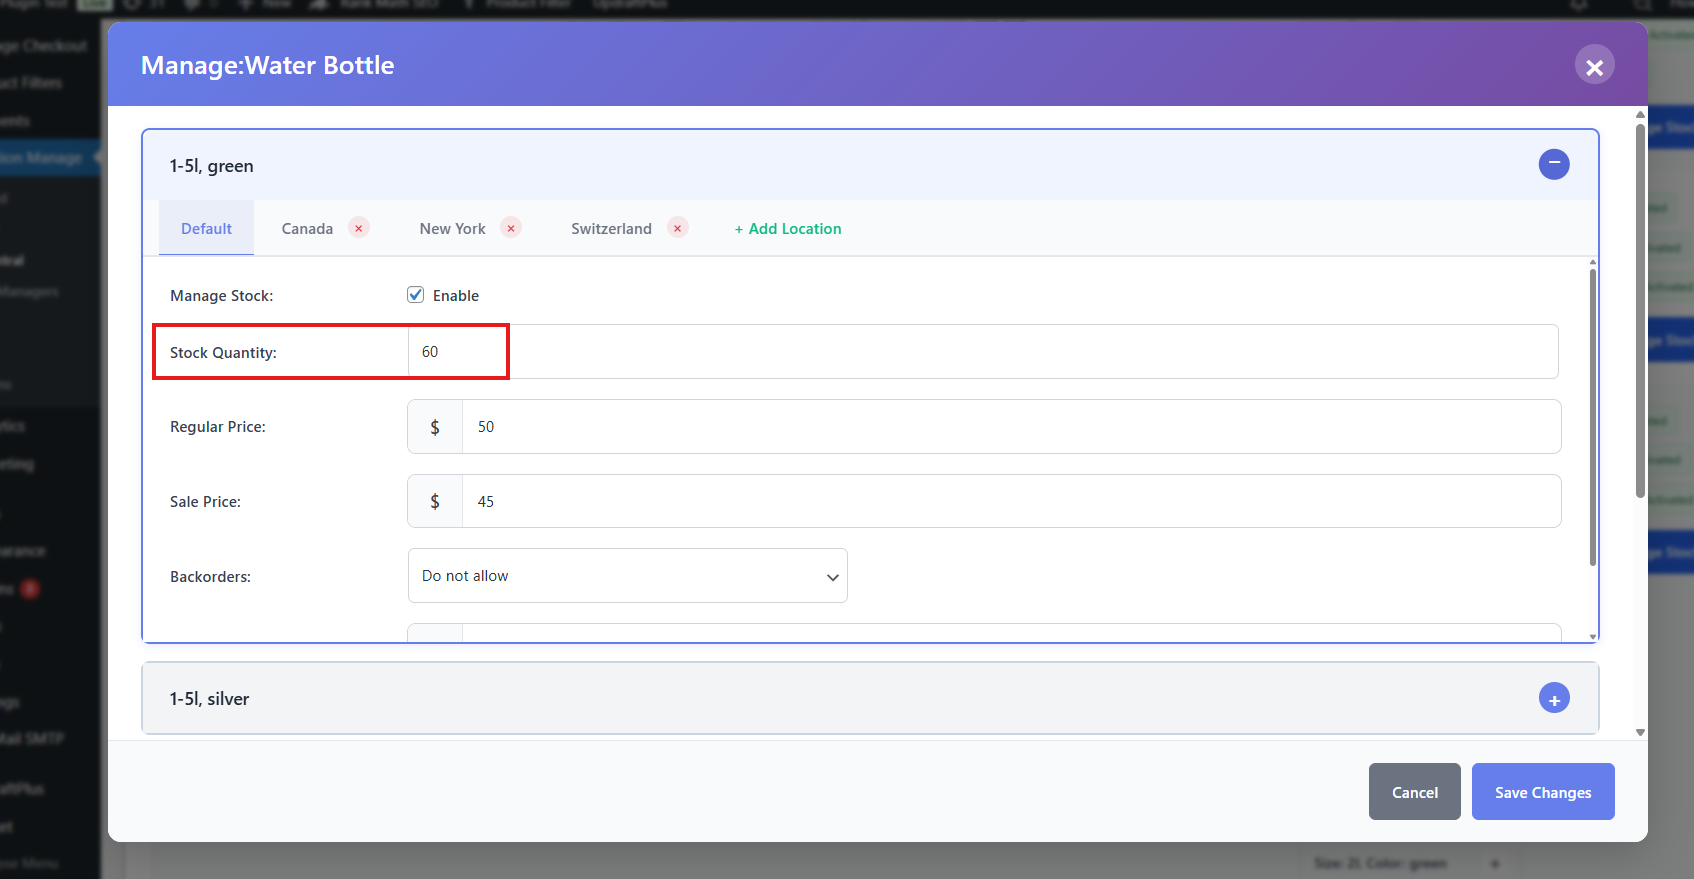
- In each location tab, enter:
- Stock Quantity (specific to the variation and location)
- Regular Price
- Sale Price
- Backorder Availability
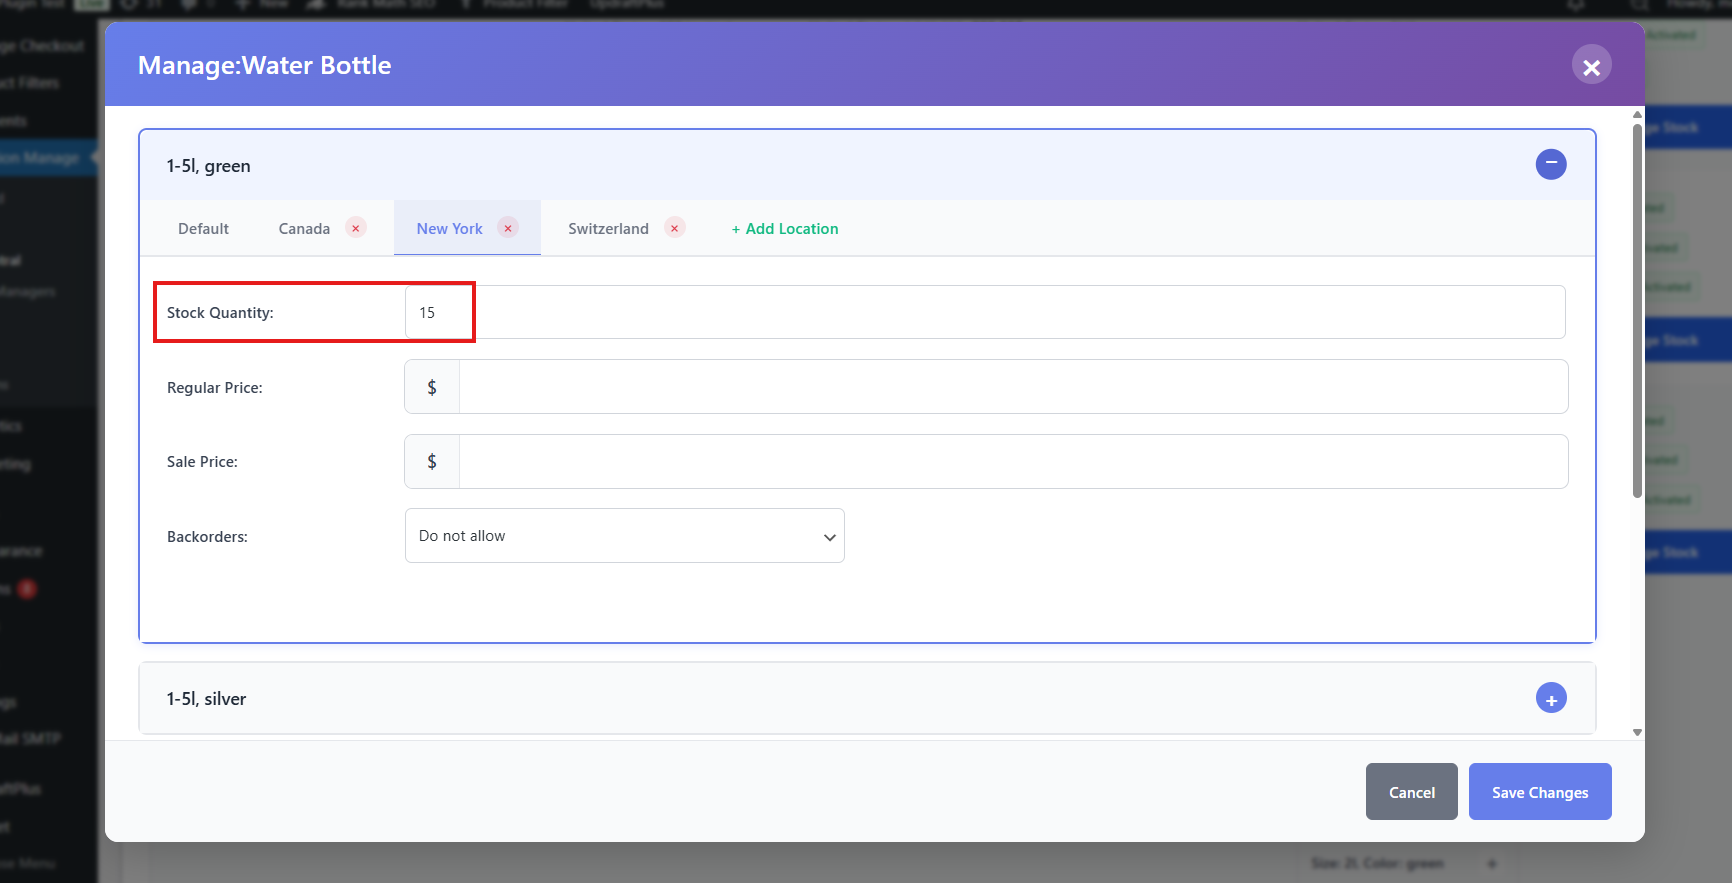
- Repeat for all variations.
- Click Save Changes.
Classic Mode
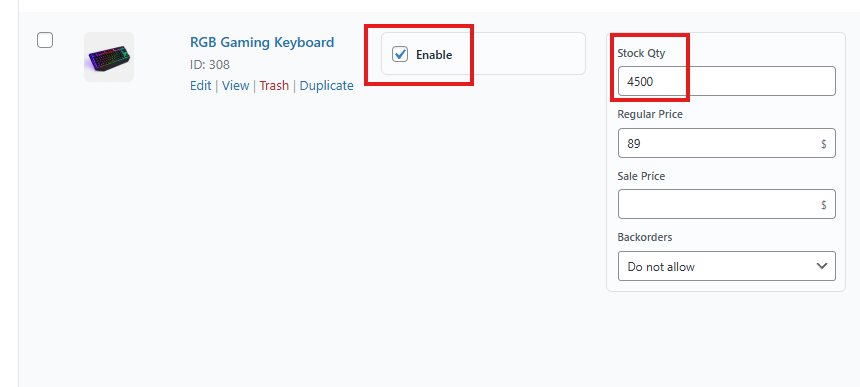
Simple Products
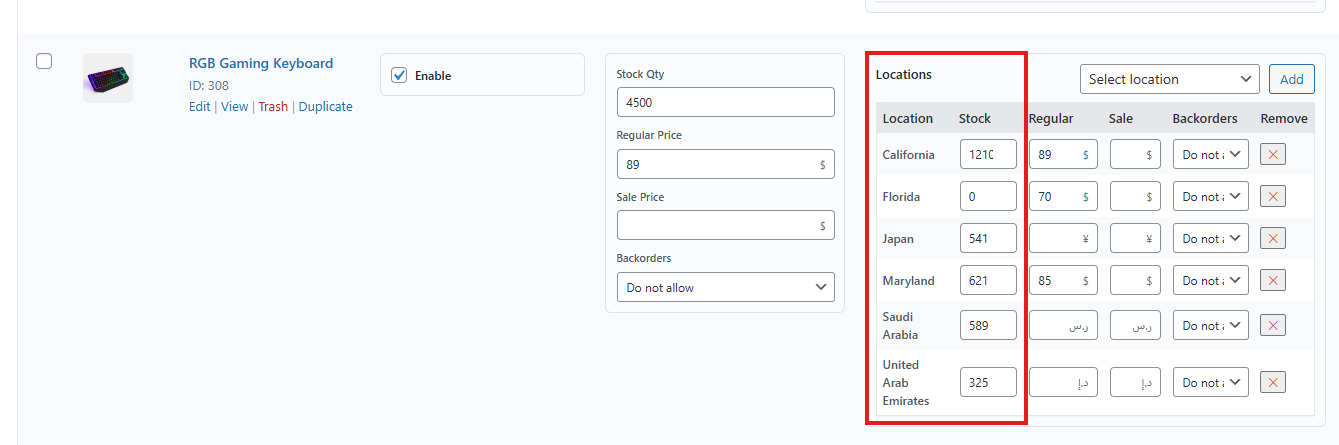
- Toggle to Classic Mode.
- Choose a product.
- Beside the product name, tick the Enable option.
- Enter:
- Total Stock Quantity
- Regular Price
- Sale Price
- Backorder Availability
- Go to the Location section.
- To add location:
- You can select All Locations to add all locations at once.
- Or you can add locations one by one.
- To add location:
- For each location, enter:
- Stock Quantity
- Regular Price
- Sale Price
- Backorder Availability
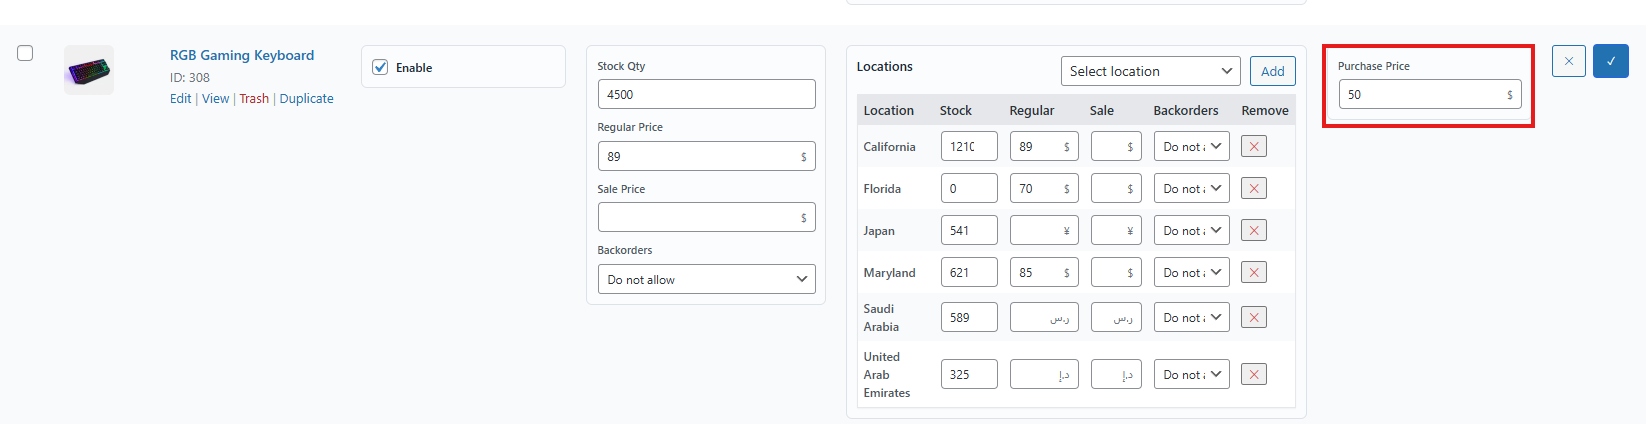
- Enter Purchase Price.
- Click the Check mark icon to save.
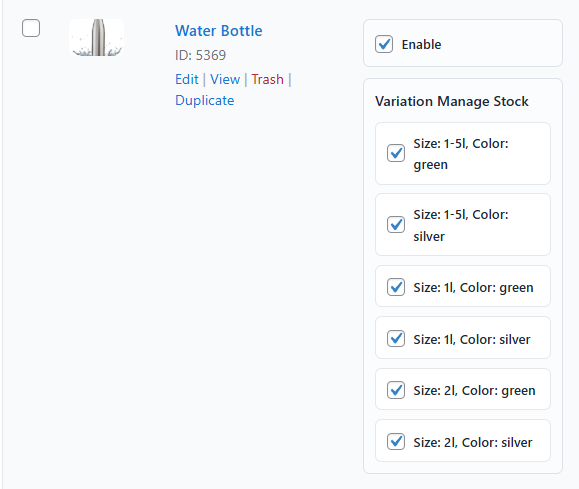
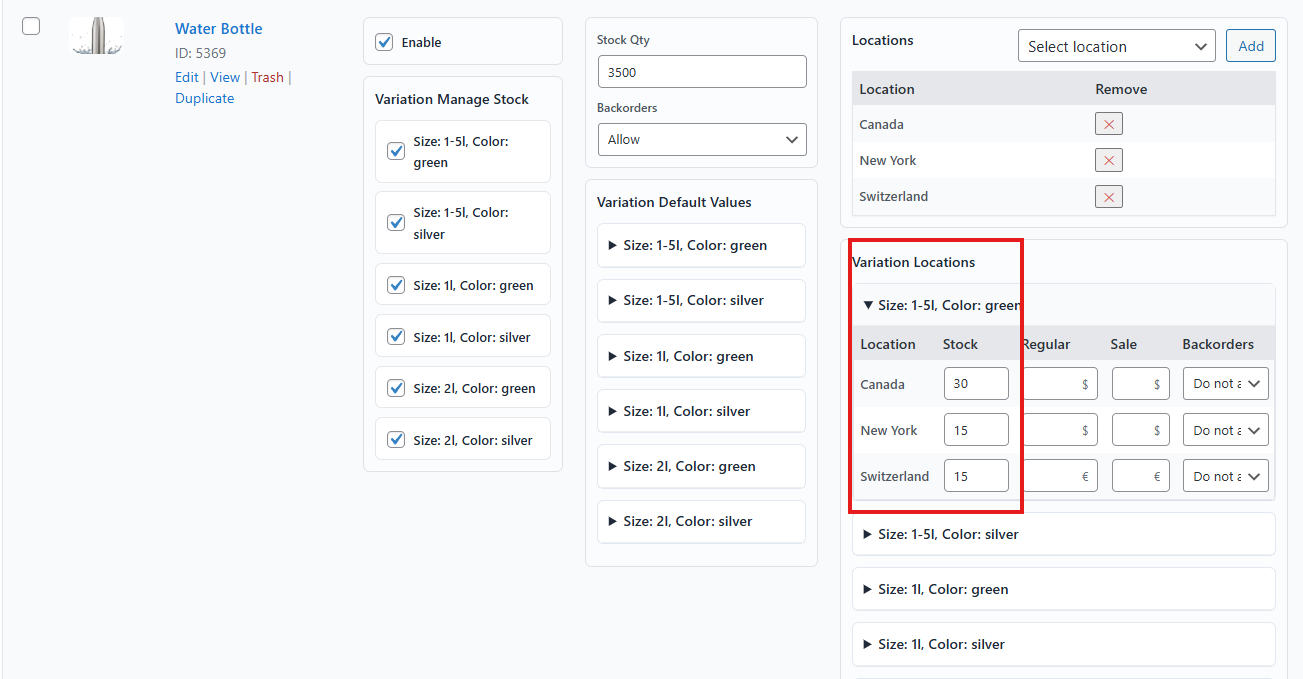
Variable Products
- Choose a variable product.
- Tick the Enable option.
- Go to Variation Manage Stock.
- Checkmark each variation.
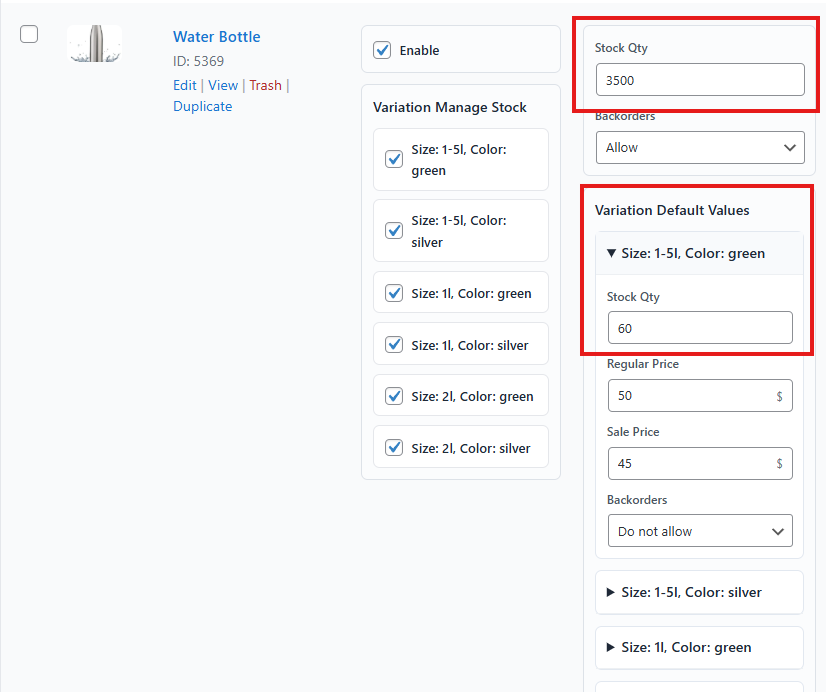
- Then enter total stock quantity for all variations combined.
- Enter backorder availability.
- In Variation Default Values, enter for each variation:
- Stock Quantity
- Regular Price
- Sale Price
- Backorder Availability
- Go to the Location section.
- Add locations. Same as the simple products.
- In Variation Locations, enter for each variation and location:
- Stock Quantity
- Regular Price
- Sale Price
- Backorder Availability
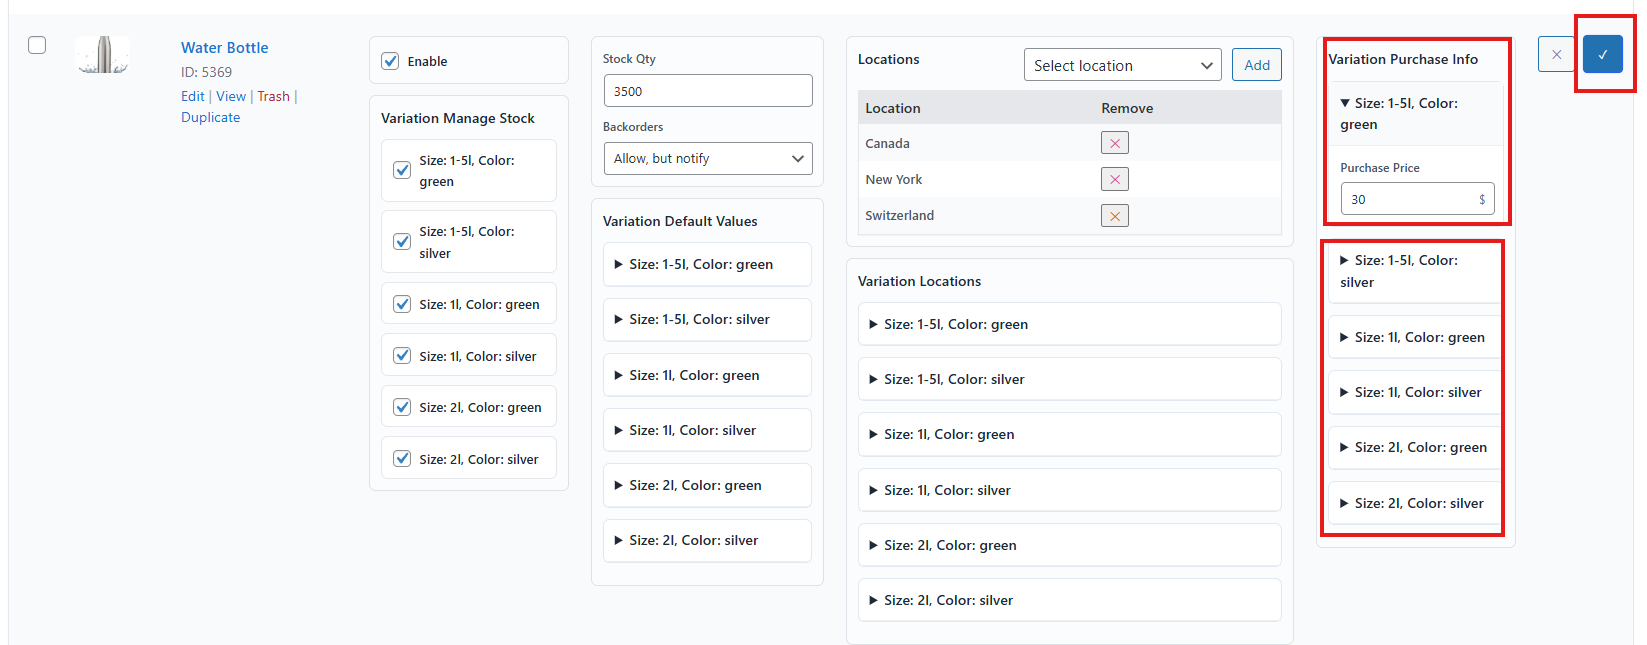
- Go to the Purchase Price section.
- Enter purchase price for each variation.
- Click the Check mark icon to save.
Example: Suppose a variable product has 4 variations and 2 locations, with a total of 400 units. Each variation has 100 units. Distribute these units across locations (e.g., 50 units per location, or 30 in one location and 70 in another). Ensure the total does not exceed 400.
Testing the Feature
After configuration, test the location-based inventory setup.
- Go to a product page.
- Change location.
- Verify that stock quantity updates according to the location.

Key Takeaway
Managing location-based inventory allows you to track and control stock across multiple locations with precision. Whether you use the product edit page or Stock Central, this feature ensures accurate stock distribution and reliable customer experiences.