Location-Based Shipping allows you to control which WooCommerce shipping methods are available based on the customer’s selected store, warehouse, branch, or pickup location.
This is useful when different locations support different carriers, delivery rules, pickup options, or shipping costs. For example, your New York warehouse may offer local delivery, while your London store may offer Royal Mail and local pickup.
How Location-Based Shipping Works
The plugin works with WooCommerce shipping zones and shipping methods. After creating shipping zones in WooCommerce, you can connect those shipping methods with your store locations.
Each shipping method can be available for:
- All locations — the shipping method is available for every selected store location.
- Selected locations only — the shipping method is shown only when the customer selects a matching location.
During checkout, the plugin checks the customer’s selected location and filters the available shipping methods accordingly.
For example, if Local Delivery is assigned only to the New York Store, customers who select the New York Store can see that method at checkout. Customers who select another location will not see that method unless it is also assigned to their selected location.
Step 1: Create WooCommerce Shipping Zones and Methods
First, create your shipping zones and methods from the WooCommerce shipping settings.
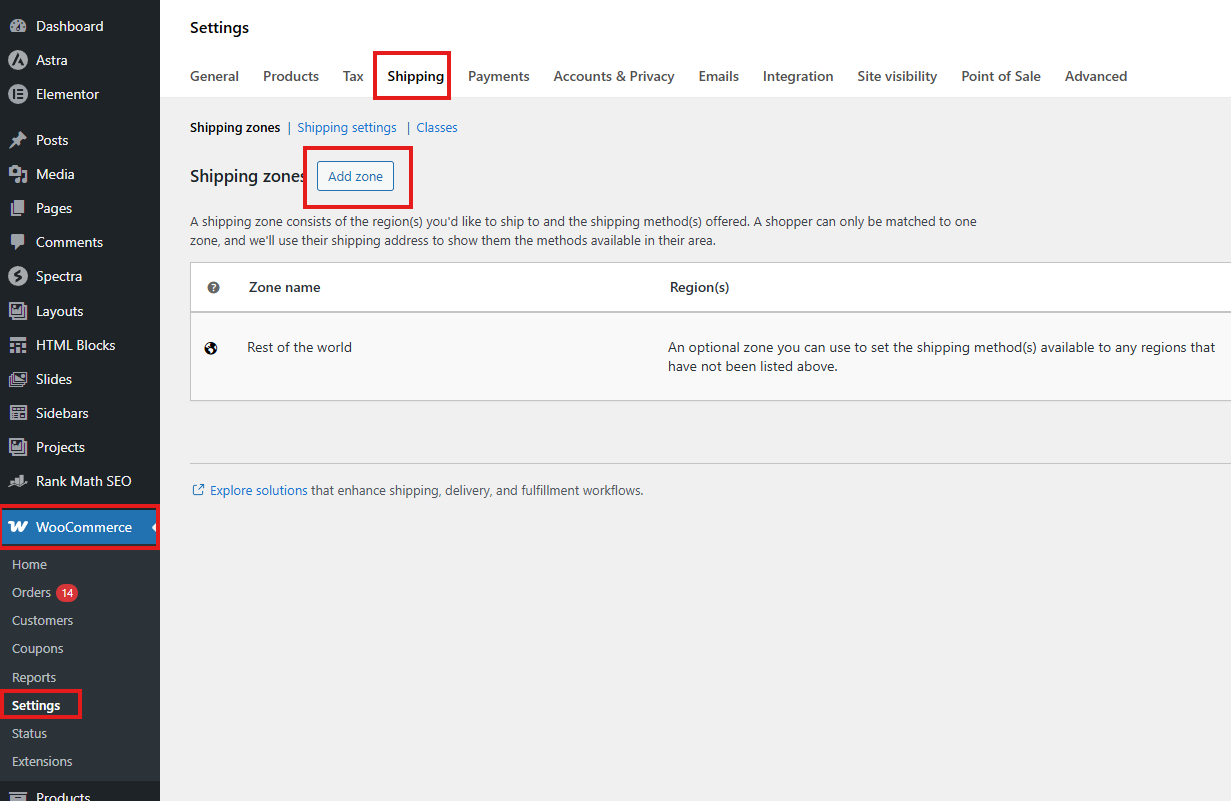
- Go to WooCommerce → Settings.
- Open the Shipping tab.
- Click Add Zone.
- Enter the shipping zone name.
- Select the region or regions for the zone.
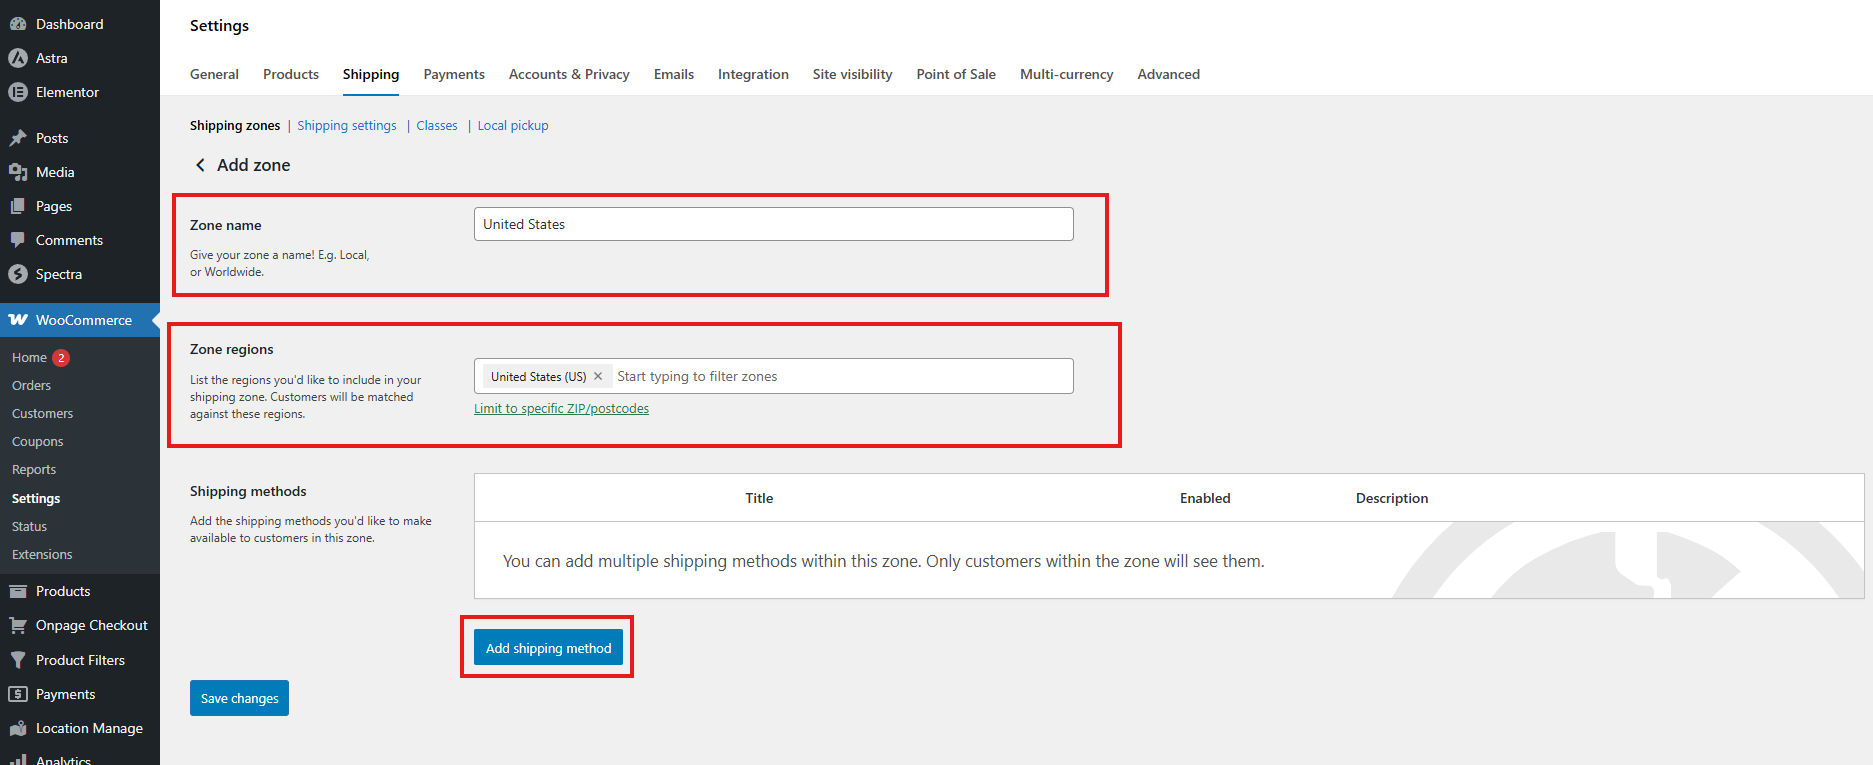
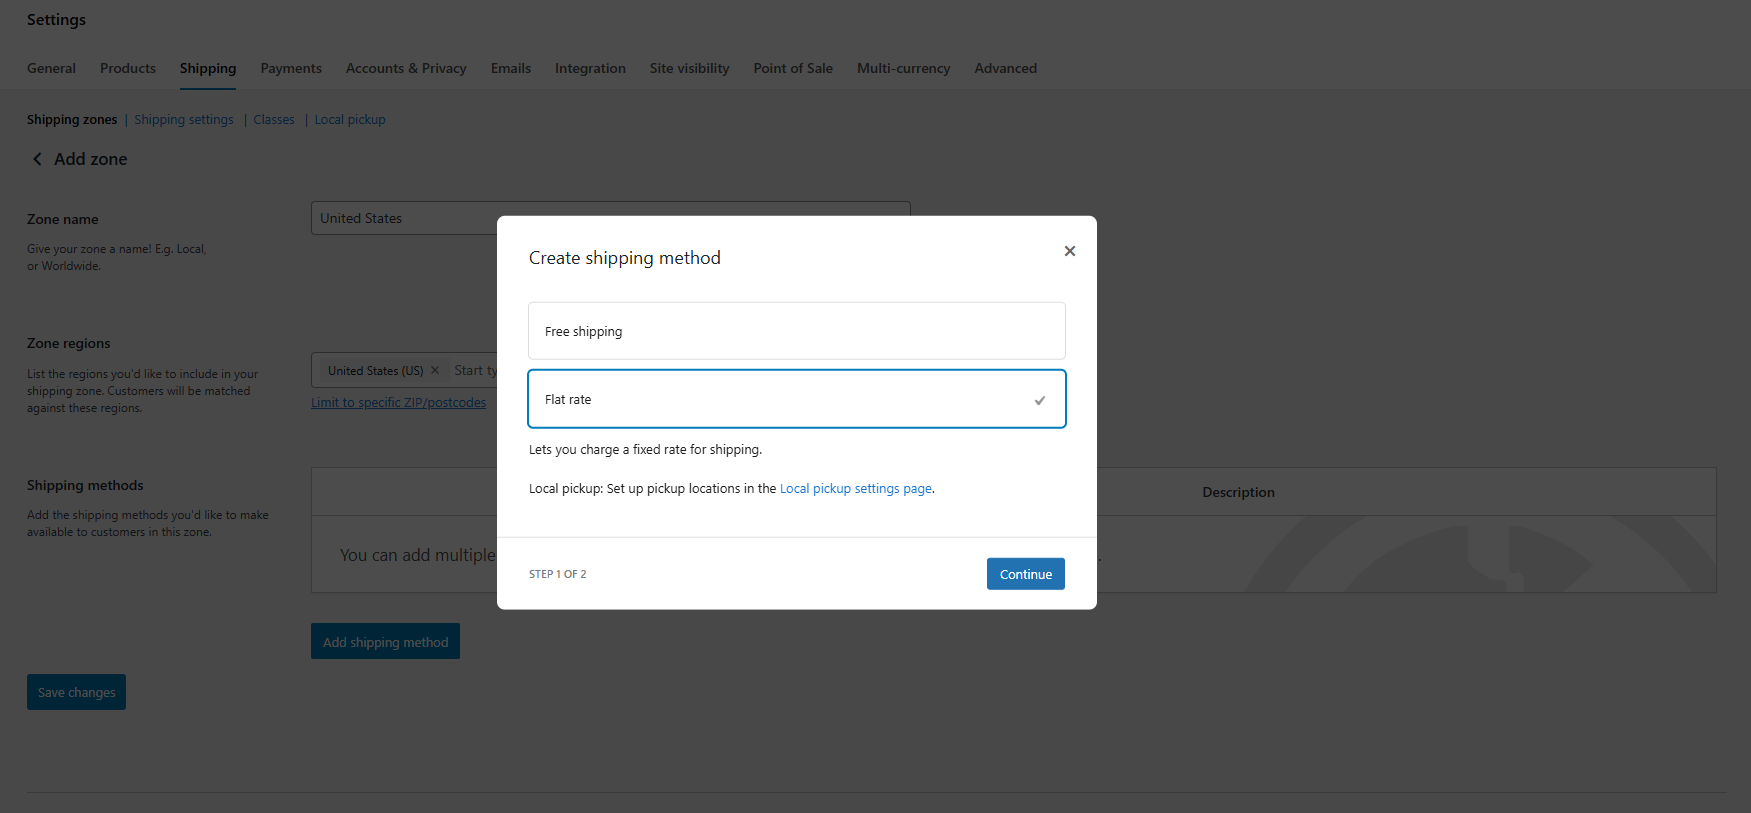
- Click Add Shipping Method. You can add WooCommerce shipping methods such as:
- Flat Rate
- Free Shipping
- Configure the shipping method depending on your needs.
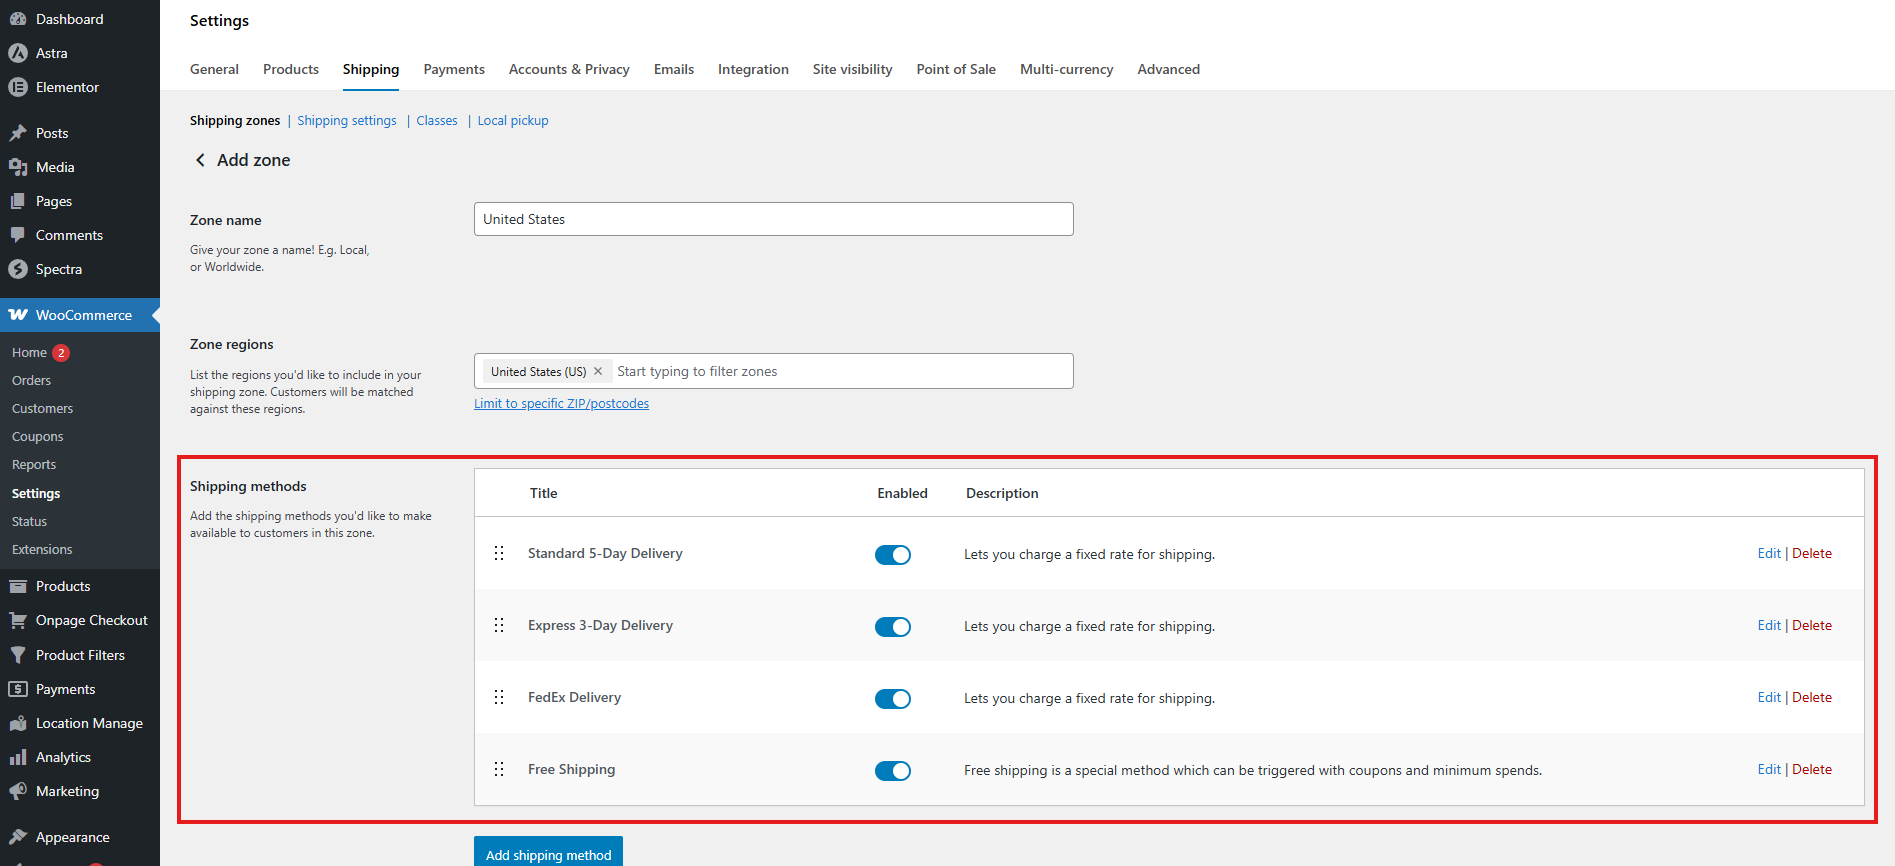
After adding a shipping method, configure the cost and method settings as needed. You can repeat this process for multiple shipping zones.
Step 2: Assign Shipping Zones and Methods to Store Locations
After creating your WooCommerce shipping zones and shipping methods, assign them to your store locations.
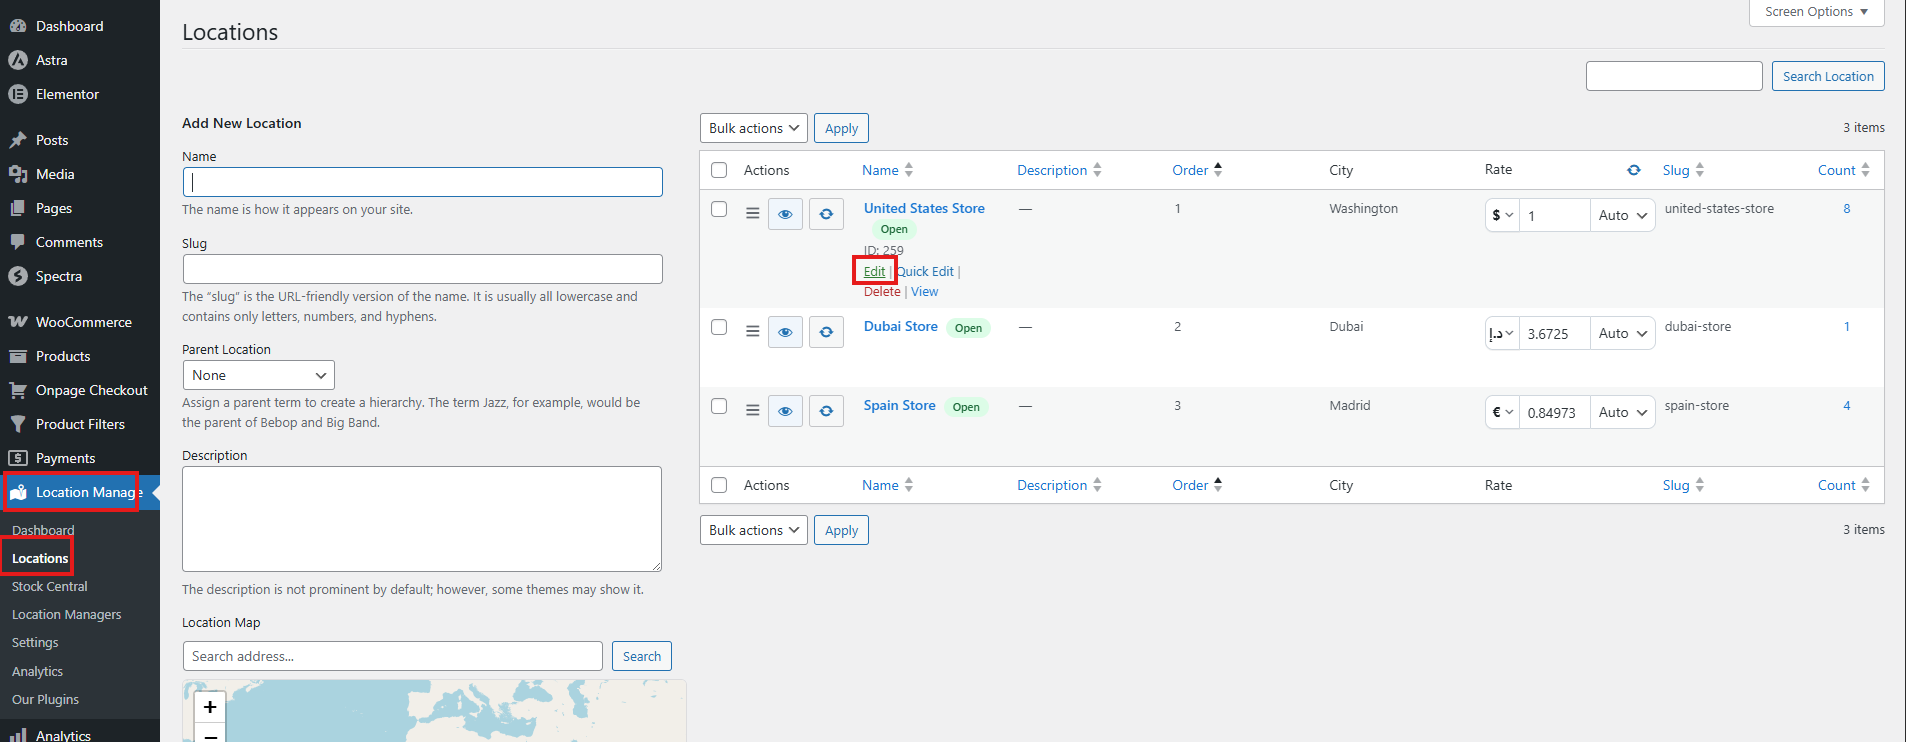
- Go to Location Manage → Locations.
- Click Add New Location or edit an existing location.
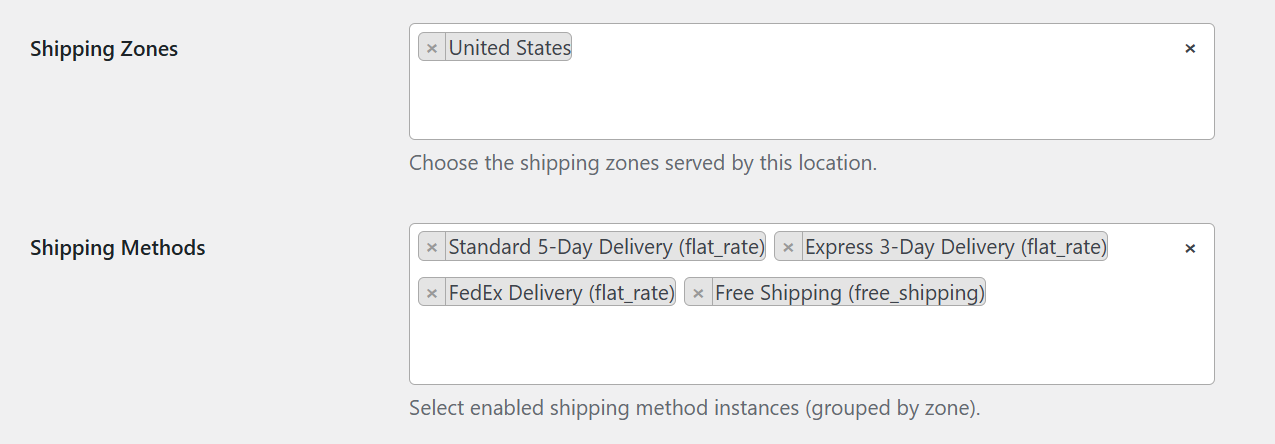
- Scroll to the Shipping Zones & Shipping Methods section.
- Select the shipping zones this location should serve.
- Select the shipping method instances that should belong to this location.
- Save or update the location.
This allows each store, warehouse, or branch to have its own shipping rules.
Example: If the London Store supports Royal Mail and Local Pickup, assign those shipping methods to the London Store. If the New York Warehouse supports Flat Rate and Local Delivery, assign those methods to the New York Warehouse.
Step 3: Enable Location-Based Shipping
After assigning shipping methods to your locations, enable the location-based shipping logic from the plugin settings.
- Go to the plugin settings.
- Open the shipping or checkout-related settings section.
- Enable Location-Based Shipping.
- Select the shipping calculation method that matches your fulfillment workflow.
- Save the settings.

Once enabled, the plugin can control available shipping methods based on the selected customer location.
Shipping Calculation Method Options
The plugin supports different shipping workflows depending on how your store handles fulfillment.
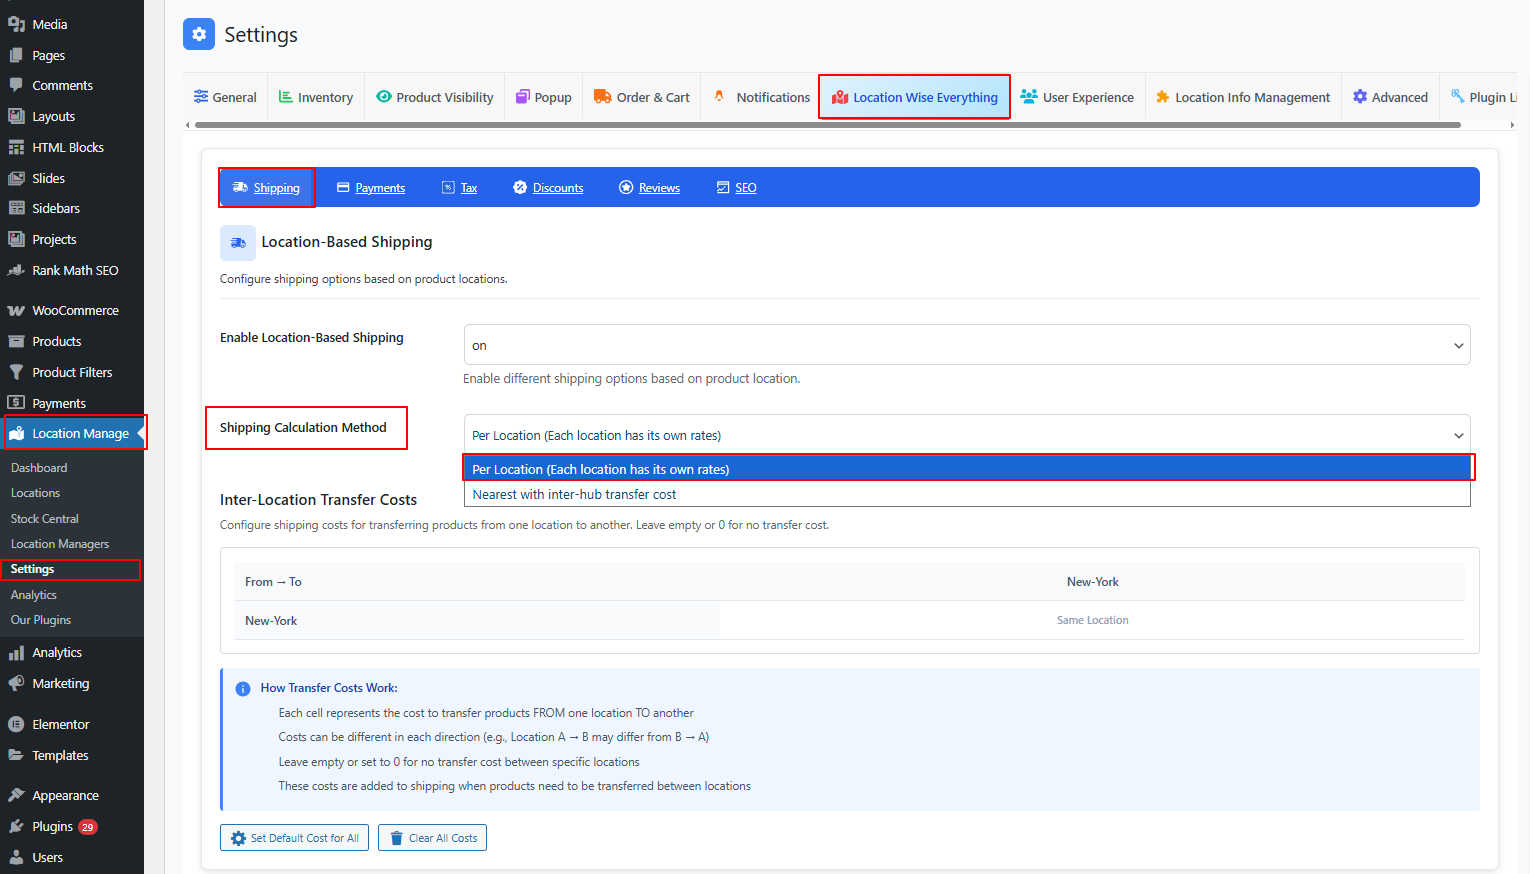
1. Per Location
Per Location mode is used when each store location, warehouse, or branch has its own shipping methods.
In this mode, checkout shipping methods are filtered based on the customer’s selected location. If a shipping method is assigned to the selected location, it can appear at checkout. If it is not assigned to that location, it will be hidden.
This is the recommended mode when you want strict location-based shipping method control.
Example:
Customer selected location: New York Store

Available shipping methods:
- New York Local Delivery
- New York Flat Rate

Hidden shipping methods:
- London Royal Mail
- Toronto Local Pickup
Use Per Location mode when:
- Each branch has different shipping methods.
- You want to hide unavailable methods for the selected location.
- You want store-specific delivery or pickup rules.
- You want customers to see only the shipping options available for their selected location.
2. Nearest Location With Transfer
Nearest Location With Transfer is designed for stores that want to use nearest-location fulfillment logic while keeping WooCommerce shipping rates based mainly on the customer’s shipping address and shipping zones.
In this mode, the plugin can use nearest-location logic for fulfillment or transfer workflows. However, shipping method filtering by selected location is not applied in the same strict way as Per Location mode.
This means WooCommerce shipping zones and shipping rates can continue to behave normally based on the customer’s shipping address, while the plugin handles nearest-location or inter-location transfer logic where configured.
Use Nearest Location With Transfer mode when:
- You want the nearest available location to be used for fulfillment.
- You do not want shipping methods to be strictly hidden by selected location.
- Your WooCommerce shipping zones should remain the main source for checkout shipping rates.
- Your store uses internal transfer or warehouse-routing workflows.
Important: If you need checkout to show only the shipping methods assigned to the selected store location, use Per Location mode.
Per Location vs Nearest Location With Transfer
| Behavior | Per Location | Nearest Location With Transfer |
|---|---|---|
| Filters shipping methods by selected location | Yes | No / limited |
| Uses WooCommerce shipping zones | Yes | Yes |
| Best for branch-specific shipping methods | Yes | No |
| Best for nearest-location fulfillment | Limited | Yes |
| Keeps WooCommerce shipping-rate behavior broader | No | Yes |
Choose the method based on your business model. If each location has its own delivery methods, use Per Location. If your shipping rates should mainly follow WooCommerce zones while fulfillment uses the nearest location, use Nearest Location With Transfer.
WooCommerce Shipping Zone Priority
WooCommerce shipping zones can overlap. For example, you may have one zone for a whole country and another zone for a specific state or postcode.
The plugin helps prioritize more specific shipping zone matches before broader matches.
| Priority | Zone Match Type | Example |
|---|---|---|
| 1 | Postcode | 10001 |
| 2 | State | US:NY |
| 3 | Country | US |
| 4 | Continent | North America |
A postcode is the most specific match, while a continent is the broadest match.
Example: If a customer enters a New York postcode, and your store has both a New York postcode zone and a United States country zone, the postcode zone should be treated as the more specific match.
If two zones have the same specificity level, WooCommerce zone order still matters. For example, if two postcode zones match the same address, WooCommerce will still use the existing zone order to decide which one applies.
When Shipping Methods Are Filtered
Shipping methods are filtered by location when:
- Location-based shipping is enabled.
- The shipping calculation method is set to Per Location.
- The customer has selected a store location.
- The shipping method is assigned to selected locations.
- The selected customer location matches the shipping method’s assigned location.
Shipping methods are not restricted by location when:
- Location-based shipping is disabled.
- No customer location is selected.
- The shipping method is available for all locations.
- The selected location is an all-products or all-locations option.
- The shipping calculation method does not use strict per-location filtering.
Best Practices
- Use Per Location mode when each store or warehouse has its own shipping methods.
- Use Nearest Location With Transfer when WooCommerce shipping zones should remain the main source of checkout rates.
- Assign general shipping methods to all locations.
- Assign branch-specific methods only to the locations that support them.
- Use postcode-based shipping zones for highly specific delivery areas.
- Use country or continent zones as fallback zones.
- Test checkout with different selected locations and customer addresses.
- Clear your cache if shipping changes do not appear immediately on the frontend.
Troubleshooting
Shipping methods are not changing after selecting a location
- Make sure location-based shipping is enabled.
- Make sure the shipping calculation method is set to Per Location if you want strict filtering.
- Check that the shipping method is assigned to the selected location.
- Check that the customer address matches the WooCommerce shipping zone.
- Clear cache and test again.
A shipping method appears for every location
If a shipping method has no selected locations or is set for all locations, it will be available for every location. Edit the shipping method or location settings and assign only the required locations.
A shipping method is missing at checkout
- Confirm that the customer selected the correct location.
- Confirm that the shipping method is assigned to that location.
- Confirm that the customer address matches the correct WooCommerce shipping zone.
- Check whether the shipping method is enabled inside WooCommerce.
- Check whether the selected calculation method supports location-based filtering.
A broad shipping zone is showing instead of a specific zone
Use more specific WooCommerce zones where needed. Postcode zones are treated as more specific than state zones, state zones are more specific than country zones, and country zones are more specific than continent zones. If two zones have the same specificity, review the WooCommerce shipping zone order.
Bulk assignment did not apply
- Make sure you selected a shipping zone.
- Make sure you selected at least one location.
- Click Apply to All Methods in Zone.
- Reload the shipping settings page and check the assigned methods again.