The Store Locator Map on the single product page allows customers to see which store or warehouse locations have the product available, along with map-based visualization using coordinates (latitude & longitude). This enhances user experience by helping customers identify the nearest store, check availability, and pick the best fulfillment point.
Step 1 — Add Location Details (Latitude & Longitude)
To display the store locator map properly, each location must have accurate geographical information.
- Go to Location Manage → Locations
- Click Add New Location or Edit an existing location
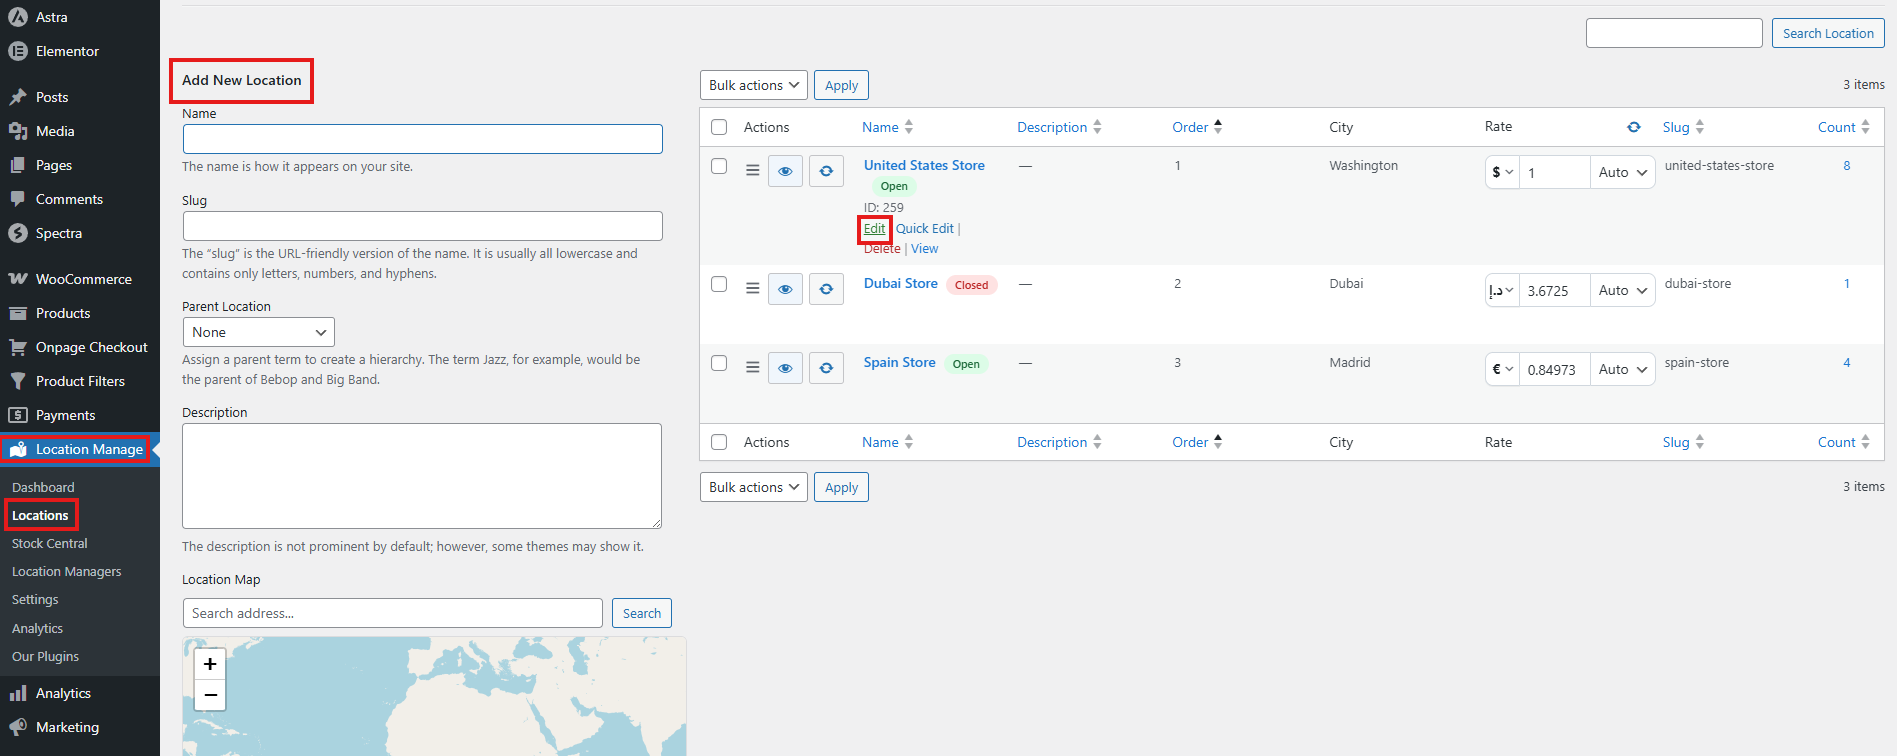
- Enter:
- Latitude
- Longitude
- Store/warehouse address
- Contact details (optional but recommended)
- Save the location

This ensures that the map can pinpoint the exact location on the product page.
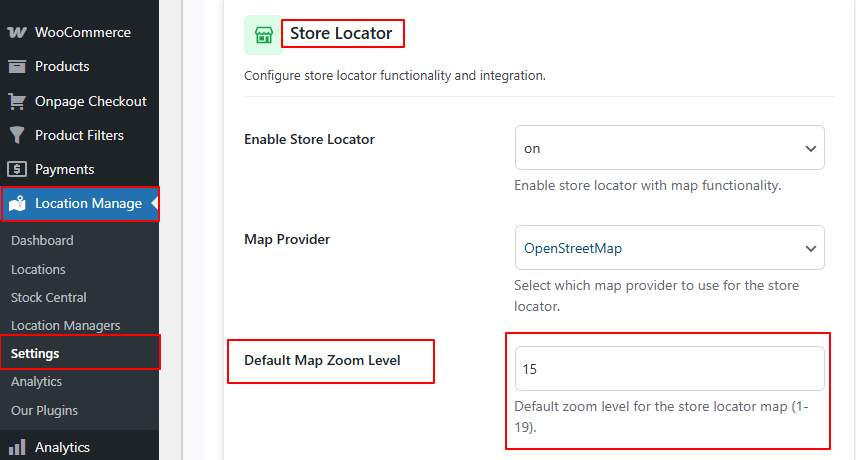
Step 2 — Enable Store Locator in Location Info Management
- Go to Location Manage → Settings → Location Info Management
- Open
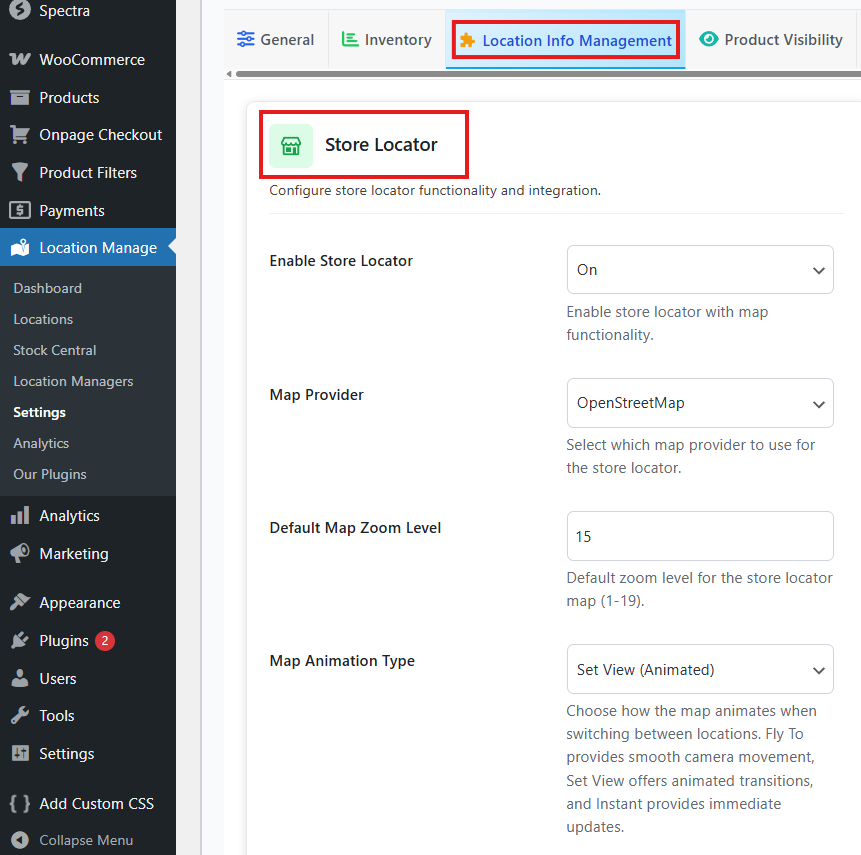
Enable Store Locator — ON
- Find the Store Locator panel
- Enable the feature:
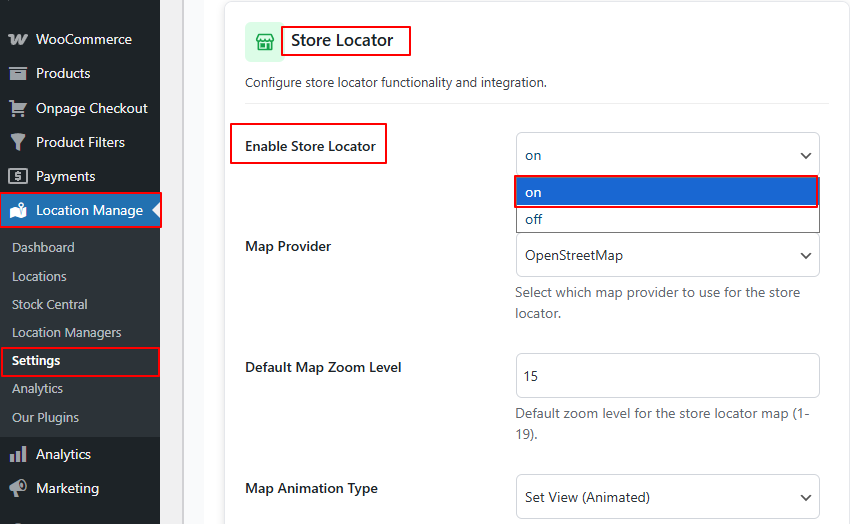
Enables location map functionality across product pages and archive pages.
Map Provider
Select which map engine to use:
- OpenStreetMap (default)
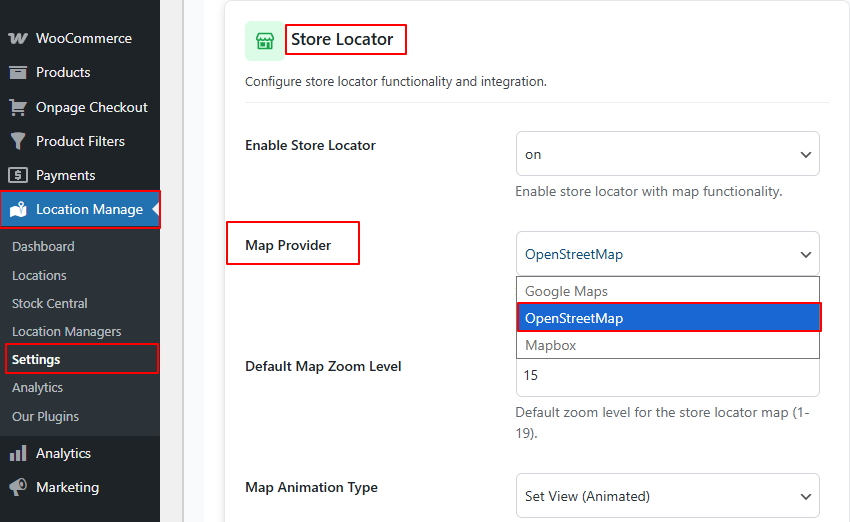
Future providers may also be supported depending on module updates.
Default Map Zoom Level
Configure how zoomed in the map should appear:
Default Zoom Level: 15
- Range: 1 (world view) to 19 (highly zoomed into streets)
- Recommended:
- 13–16 for stores in cities
- 10–12 for rural areas
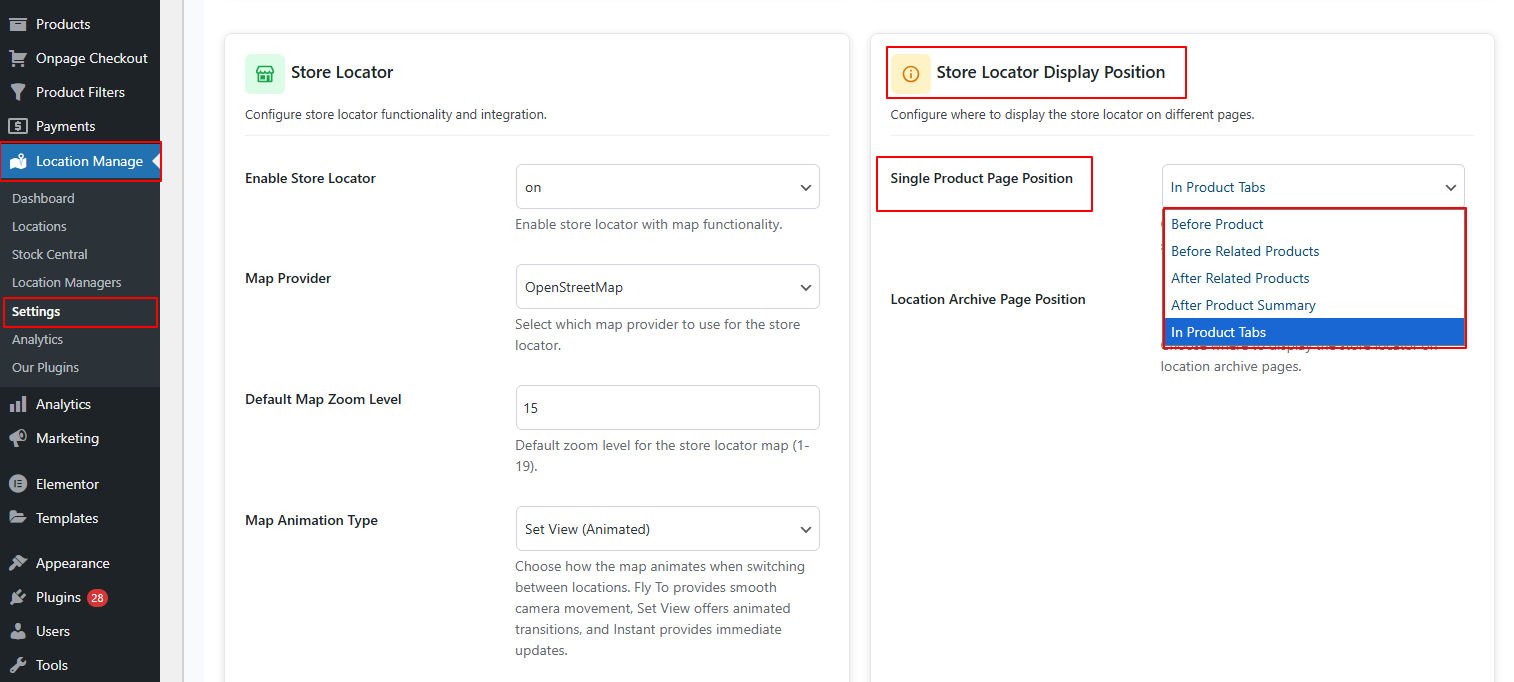
Step 3 — Choose Display Position on Single Product Pages
To control where the map appears, use the Store Locator Display Position panel.
Go to: Location Manage → Settings → Location Info Management → Store Locator Display Position
You will see multiple placement options:
Single Product Page Position
Choose one:
- Before Product: Appears at the very top of the product page
- Before Related Products: Appears just above the related products section
- After Related Products: Appears below related products, near bottom of page
- After Product Summary: Appears below the price / add to cart / product short description block
- In Product Tabs:
- Adds a new tab (e.g., “Store Locator” or “Available Locations”)
- Recommended for clean layout and better organization
How It Works on the Single Product Page
Once enabled:
- Customers visit a product page
- The plugin fetches the assigned locations for that product
- The map displays location markers for:
- Stores carrying stock
- Warehouses with inventory availability
- Each marker can show:
- Store name
- Address
- Stock availability (if enabled)
- Contact information
- Operating hours
This helps customers choose the closest location with available stock.
Benefits of Store Locator on Product Pages
Helps customers find nearby stores quickly
Shows the closest physical location with stock.
Improves pickup and local delivery workflows
Customers can see available locations at a glance.
Reduces customer confusion
Removes uncertainty about which store to choose.
Enhances user experience
Map-based UI is intuitive and visually appealing.
Encourages local shopping
Customers may choose pickup to save shipping costs.
Best Practices
- Always set correct latitude and longitude for each location
- Choose “In Product Tabs” for clean layout integration
- Use zoom level 14–15 for typical retail stores
- Ensure product-location assignments are accurately configured
- Test map loading on mobile devices for UX optimization