The Multi Location Product & Inventory Management for WooCommerce plugin allows you to display the location selector anywhere on your website — including pages, posts, sidebars, headers, and footers. This helps customers easily choose their preferred store or warehouse location and view stock or product availability instantly.
Step 1: Using the Shortcode
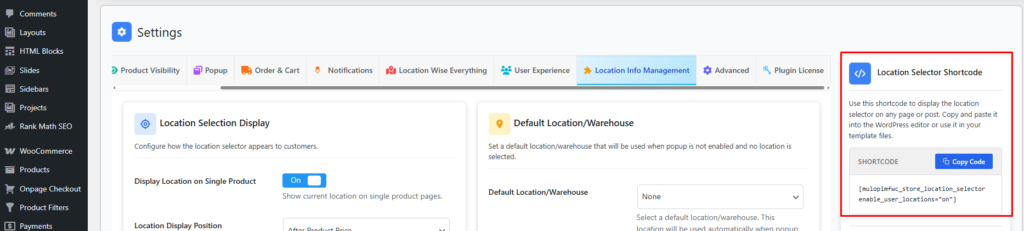
To display the location selector, use the following shortcode:
[mulopimfwc_store_location_selector enable_user_locations="on"]
You can place this shortcode in:
- Any WordPress page or post using the Block Editor or Classic Editor
- The Appearance → Widgets area for sidebars or footers
- A template file in your theme using the PHP do_shortcode() function
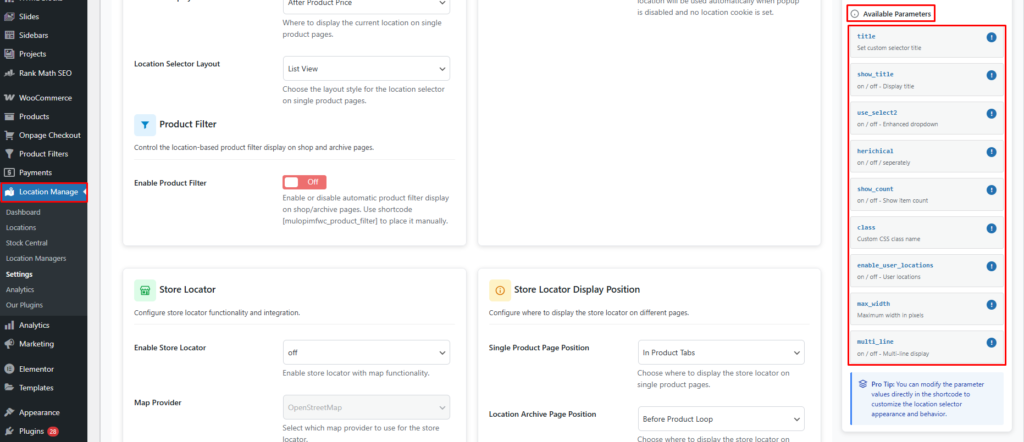
Step 2: Available Shortcode Parameters
| Parameter | Description |
|---|---|
| title | Custom title for the selector. Example: title="Select Your Store" |
| show_title | Show or hide the title. Options: on / off |
| use_select2 | Enable enhanced dropdown with Select2 styling. Options: on / off |
| herichical | Display locations in parent–child structure. Options: on / off / seperately |
| show_count | Show the number of child locations. Options: on / off |
| class | Add a custom CSS class for styling. |
| enable_user_locations | Enable automatic geo-location detection. Options: on / off |
| max_width | Set maximum width (in pixels). Example: max_width="300" |
| multi_line | Display the selector in multiple lines. Options: on / off |
Step 3: Example Shortcodes
Basic Page Selector
[mulopimfwc_store_location_selector title="Select Location" show_title="on" use_select2="on"]
Sidebar or Footer (Widgets Area)
To add in your site’s sidebar or footer:
- Go to Appearance → Widgets in your WordPress dashboard.
- Add a Text or Custom HTML widget to your desired area.
- Paste the shortcode inside:
[mulopimfwc_store_location_selector title="Choose Store" show_title="off" max_width="250" class="sidebar-location-selector"] - Click Save and check your site to confirm.
Header or Top Bar
Add the shortcode directly in your theme’s header.php file:
<?php echo do_shortcode('[mulopimfwc_store_location_selector show_title="off" max_width="200" class="header-location-selector"]'); ?>
Footer Section
To display in your footer, add it in a footer widget or footer.php file:
<?php echo do_shortcode('[mulopimfwc_store_location_selector title="Find Your Store" show_title="on" multi_line="on"]'); ?>
Template or Product Page Integration
Insert directly inside WooCommerce template files like single-product.php:
<?php echo do_shortcode('[mulopimfwc_store_location_selector enable_user_locations="on" use_select2="on" show_count="on"]'); ?>
Step 4: Styling the Selector
You can customize the appearance with CSS in your theme or customizer.
.sidebar-location-selector {
  margin: 10px 0;
  max-width: 250px;
}

.header-location-selector select {
  border-radius: 4px;
  font-size: 14px;
  padding: 6px;
}
Use class and max_width parameters to control layout and design for different areas such as sidebar, header, or footer.
Pro Tip
- Use Select2 (use_select2=”on”) for a modern, searchable dropdown experience.
- Enable Geo-location (enable_user_locations=”on”) to automatically detect a visitor’s nearest store.
- Combine multi_line=”on” and custom CSS to make the selector responsive on smaller devices.
- Add different versions of the shortcode in multiple site areas (header, footer, sidebar) to improve user accessibility.