The Multi Location Product & Inventory Management for WooCommerce plugin lets customers choose their preferred location directly from the single product page. This feature helps users check product availability, price, and stock for specific store locations — improving transparency and the shopping experience.
Step 1: Open the Location Info Management Settings
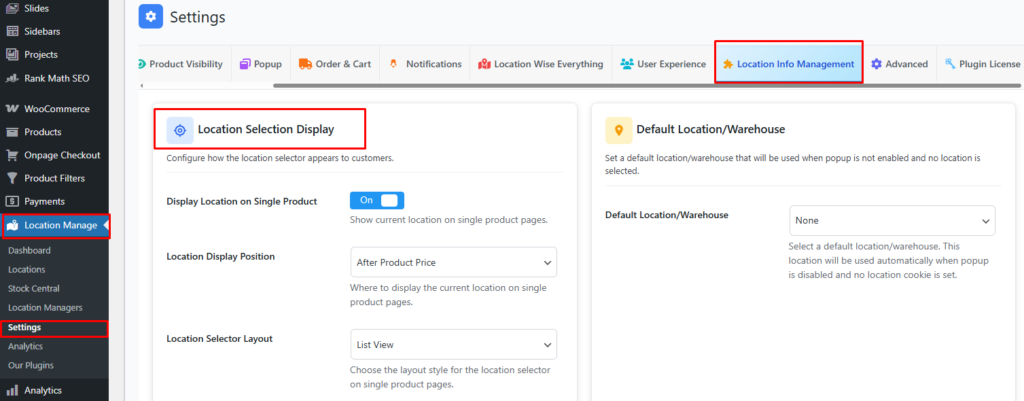
- From your WordPress dashboard, go to Location Manage → Settings.
- Open the Location Info Management tab.
- Scroll down to the section labeled Location Selection Display.
This section allows you to control how and where the location selector appears on your product pages.
Step 2: Configure Display Options
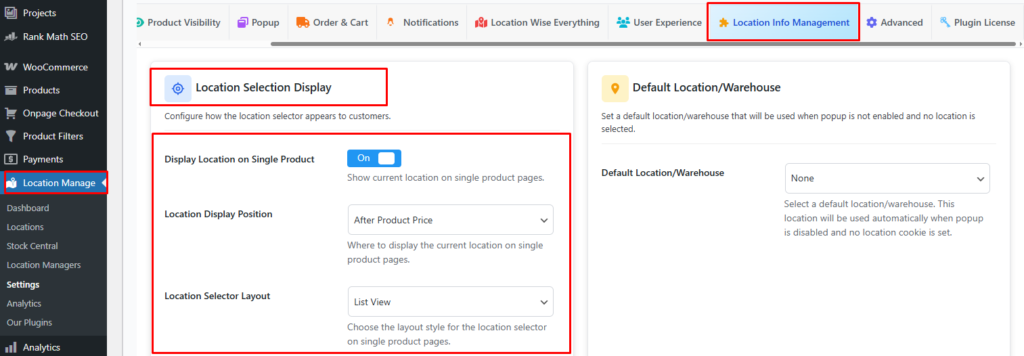
Here’s an overview of each setting and what it does:
| Setting | Description |
|---|---|
| Display Location on Single Product | Enable this option to show the current location selector on single product pages. When enabled, customers will see a location dropdown, buttons, or list view depending on your configuration. |
| Location Display Position | Choose where to display the current location selector on the single product page. Available positions include:• After Product Price• After Product Title• Before Add to Cart Button• After Add to Cart Button• In Product Meta |
| Location Selector Layout | Select how the location options are presented to customers. Available layouts include:• List View – Displays all locations in a vertical list.• Button Layout – Shows each location as clickable buttons.• Select Dropdown – Displays a dropdown selector for a clean look. |
Step 3: Handling Theme Compatibility
Depending on your theme, some placement positions (like after product title or after add to cart) might not display properly due to custom WooCommerce templates.
If that happens — don’t worry! You can manually place the location selector using the provided shortcode.
Step 4: Use the Shortcode (for Custom Placement)
If the automatic display positions do not work with your theme, you can use the following shortcode to manually display the location selector anywhere on your single product page:
[mulopimfwc_location_selector product_id="123" layout="buttons" label="Select Location:"]
Shortcode Attributes Explained:
| Attribute | Description |
|---|---|
| product_id | The ID of the product for which you want to show the location selector. If used inside a product template, it will automatically detect the current product. |
| layout | Defines how the selector will appear. You can use list, buttons, or dropdown. |
| label | Optional text to display before the selector. Example: “Select Location:” |
Example usage:
[mulopimfwc_location_selector layout="dropdown" label="Choose Store:"]
This shortcode can be added inside your single product template, short description, or even a custom block using a page builder.
Step 5: Frontend Example
Depending on your layout and position settings, customers may see:
Example 1: After Product Title
T-Shirt – $29.00
Select Location: [New York] [Los Angeles] [Chicago]
Example 2: Dropdown Layout
Select Location:
[Dropdown: Choose a Store]
Once the user selects a location, the product’s stock and price will automatically update based on that store’s inventory.
Pro Tip
If you are using a custom WooCommerce template or page builder (Elementor, Divi, etc.), the shortcode gives you full control over placement and styling — ensuring seamless integration with your product design.