Location-Based Backorder allows you to control backorder behavior separately for each store or warehouse location. This is especially useful when some locations can accept backorders while others cannot, based on logistics, supplier availability, or delivery timelines.
With this plugin, backorders can be managed per location, not globally—giving you full flexibility and accuracy.
What Is Location-Based Backorder?
Location-Based Backorder means:
- A product can be out of stock in one location but still:
- Allow backorders in that location, or
- Be completely unavailable
- Another location for the same product can:
- Have stock available, or
- Allow / disallow backorders independently
Customers will see backorder availability based on their selected location only.
Method 1: Configure Location-Based Backorder from the Product Edit Page
This method is ideal when managing individual products.
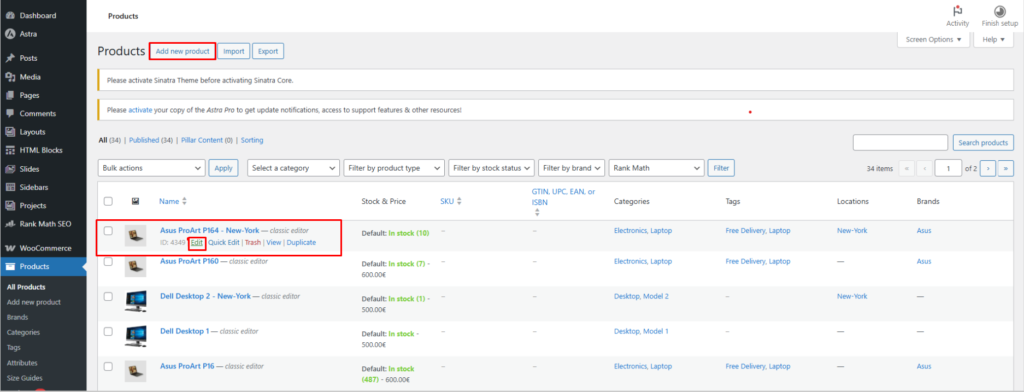
Step 1: Create or Edit a Product
- Go to WooCommerce → Products
- Click Add New or Edit an existing product
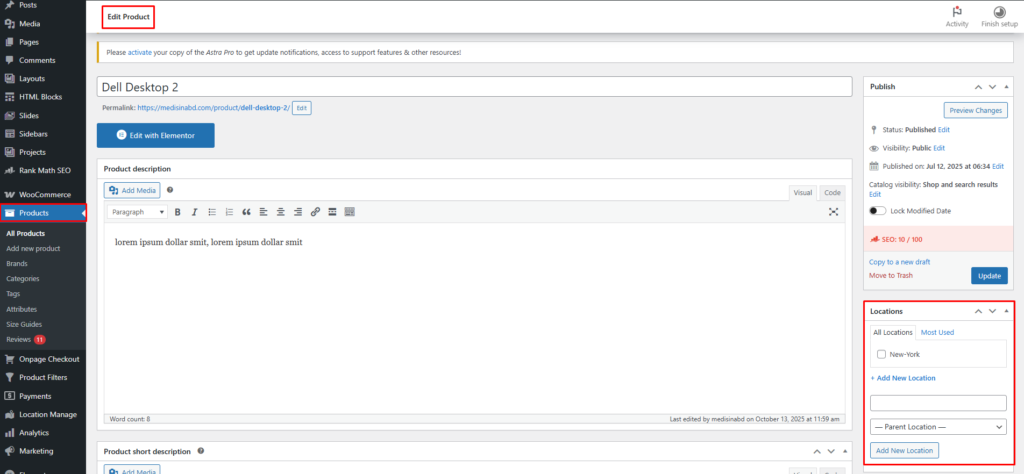
Step 2: Assign Locations
- In the right-hand Location panel, select the locations where the product is available
Backorder rules will apply only to these selected locations.
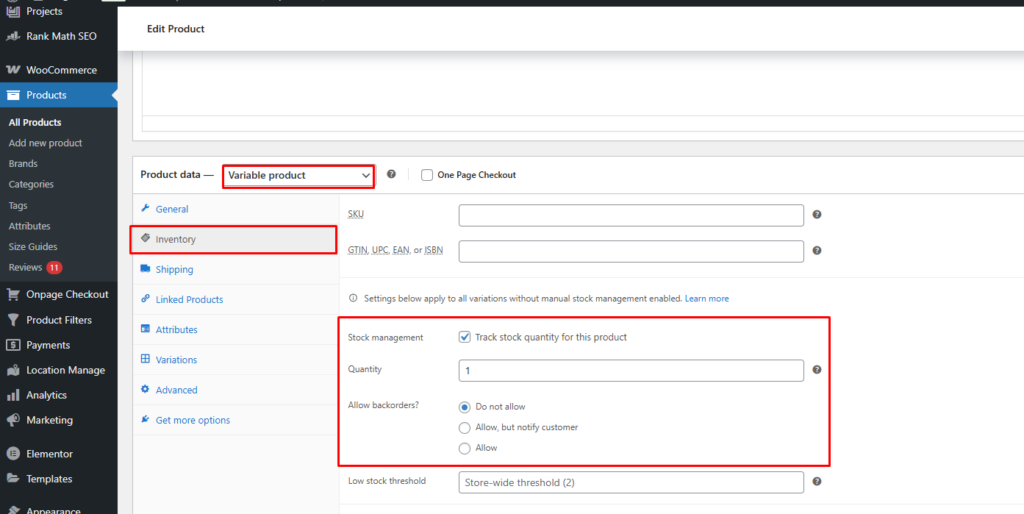
Step 3: Enable Stock Management
- Open Product Data → Inventory
- Enable Manage stock
- Set Quantity
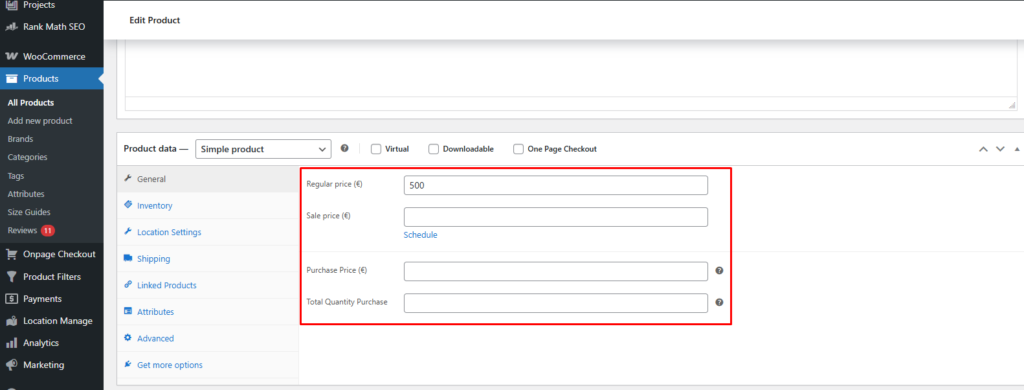
⚠️ Quantity must not exceed Total Quantity Purchase (from the General tab).
Step 4: Set Location-Wise Backorder Rules
For Simple Products
- Open the Location Settings tab (after Inventory)
For Variable Products
- Open each variation
- Configure location settings inside the variation
For each location, choose a Backorders option:
- Do not allow – Customers cannot place orders when stock is 0
- Allow – Customers can order even when stock is 0
- Allow, but notify customer – Orders are allowed with a backorder notice
⚠️ Backorder settings apply only to that specific location.
Step 5: Save & Test
- Click Publish / Update
- Visit the Single Product Page
- Switch locations to confirm:
- Backorder message appears correctly
- Add-to-cart behavior follows location rules
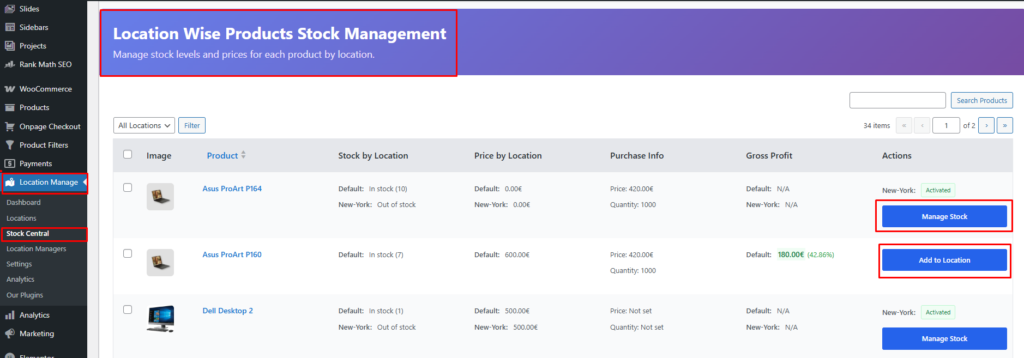
Method 2: Configure Location-Based Backorder from Stock Central
This method is best for centralized or bulk inventory control.
Step 1: Open Stock Central
- Go to Location Manager → Stock Central
- Locate the product
- Click Add Location / Manage Location
Step 2: Assign Locations
- In the popup, click the ➕ (plus) icon
- Select locations to assign to the product
- Locations appear in a tabbed view
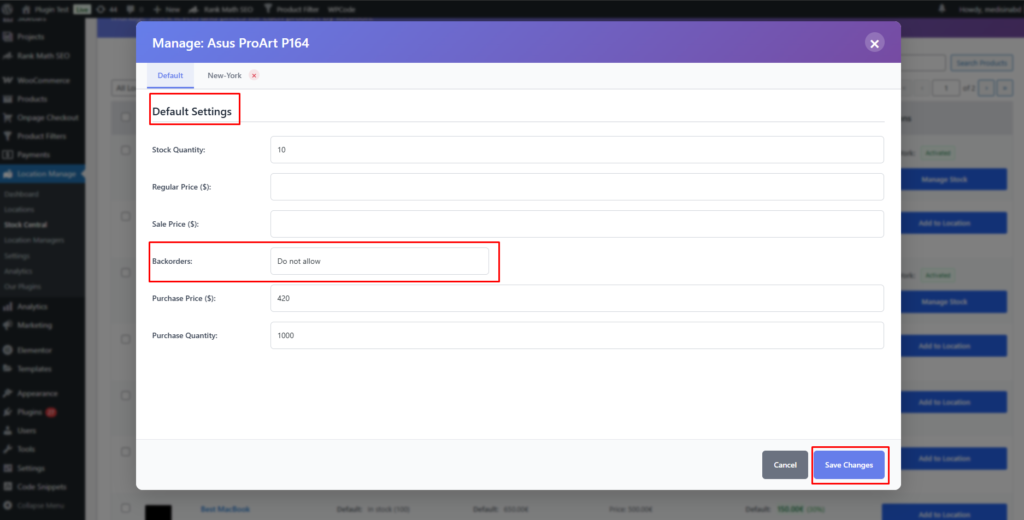
Step 3: Set Default Backorder Rule
In the Default Settings section:
- Choose a Backorders option
(This acts as the baseline rule)
Step 4: Set Backorder Rules per Location
Click on each location tab (example: New-York) and configure:
- Backorders (Allow / Do not allow / Allow with notification)
- (Optional) Adjust stock quantity
Each location can have different backorder behavior.
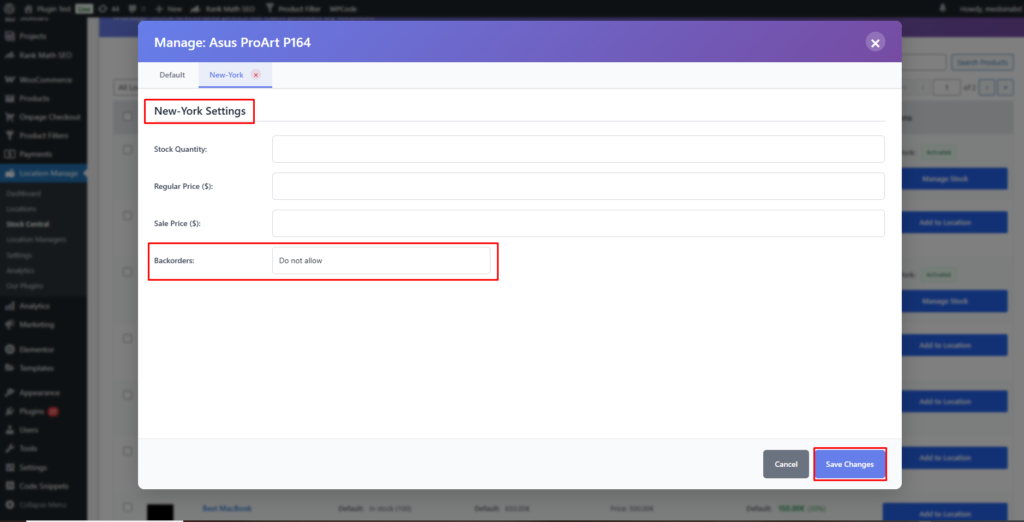
Step 5: Save Changes
- Click Save Changes
- Location-based backorder rules will apply instantly
How Location-Based Backorder Works on the Frontend
- Backorder availability changes dynamically based on:
- Selected location
- Stock quantity of that location
- Customers see:
- “Out of stock” if backorders are disabled
- “Available on backorder” if enabled
- Other locations remain unaffected
Best Practices for Location-Based Backorders
- Enable backorders only for locations that can fulfill later
- Use Allow with notification for better customer transparency
- Keep purchase quantity and stock levels updated
- Test backorder behavior by switching locations on the product page
- Use Stock Central for faster multi-location updates
With Location-Based Backorder, you gain precise control over how each warehouse or store handles out-of-stock situations—improving fulfillment accuracy and customer trust while preventing unwanted orders from unavailable locations.