Location-Based Pricing allows you to sell the same product at different prices depending on the selected store or warehouse location. This is useful when costs, taxes, logistics, or market prices vary by region.
With this plugin, you can configure location-based pricing in two flexible ways.
Method 1: Set Location-Based Pricing from the Product Edit Page
This method is best when managing pricing per product.
Step 1: Create or Edit a Product
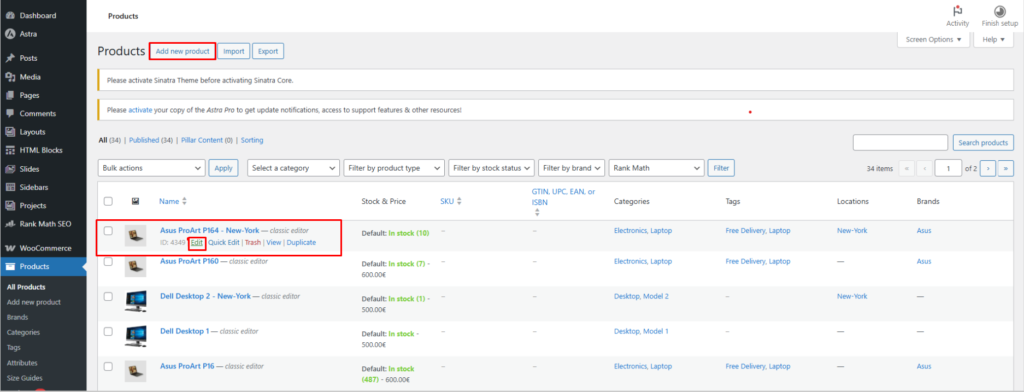
- Go to WooCommerce → Products
- Click Add New or Edit an existing product
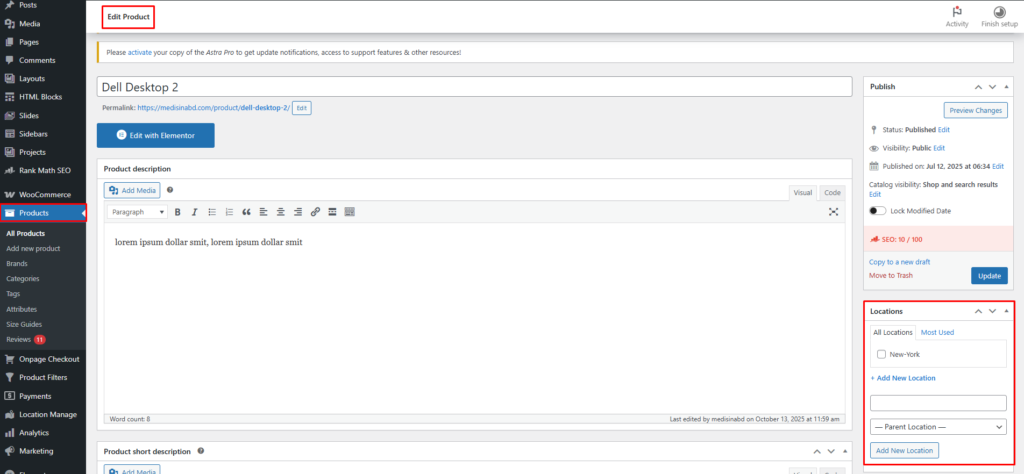
Step 2: Assign Product Locations
- On the right sidebar, locate the Location panel
- Select one or more locations for this product
Pricing rules will apply only to the assigned locations.
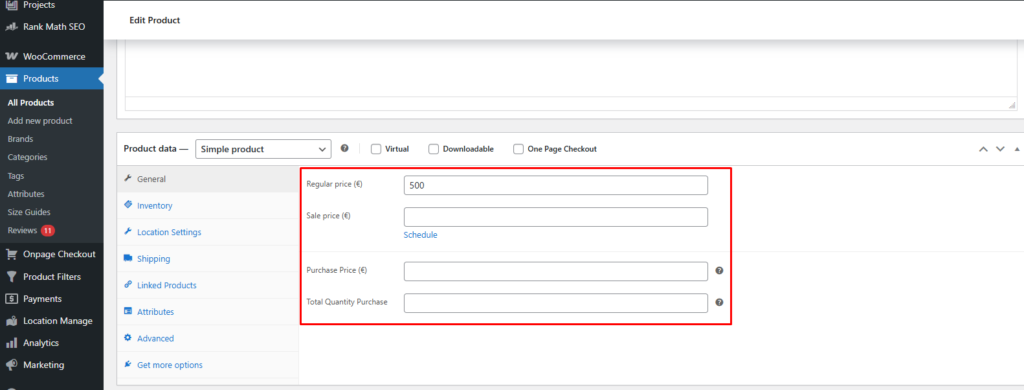
Step 3: Configure Base Pricing (General Tab)
Navigate to Product Data → General:
- Purchase Price
Your base cost for the product. - Total Quantity Purchase
Total purchased quantity across all locations. - Regular Price
- Sale Price
⚠️ Important Pricing Rule
- Regular Price and Sale Price cannot be lower than the Purchase Price
- These values are used to calculate profit, revenue, and investment
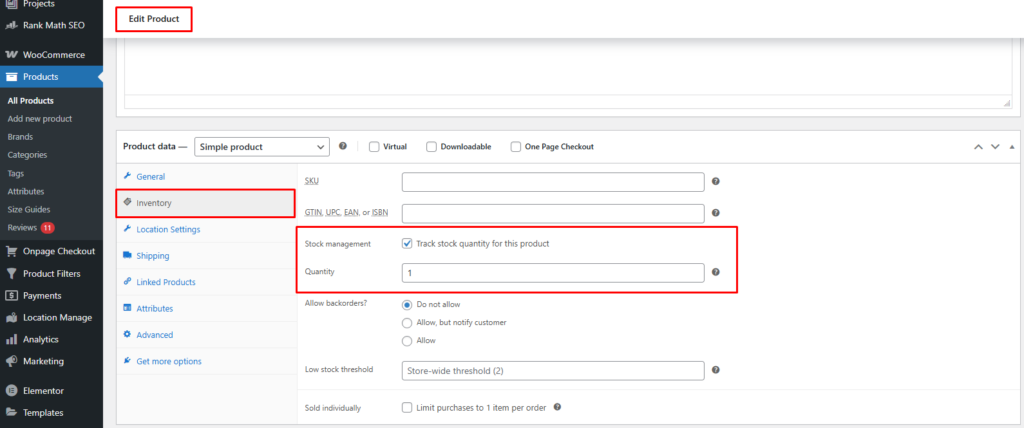
Step 4: Enable Inventory Management
Go to Product Data → Inventory:
- Enable Manage stock
- Set Quantity
⚠️ Quantity must not exceed the Total Quantity Purchase.
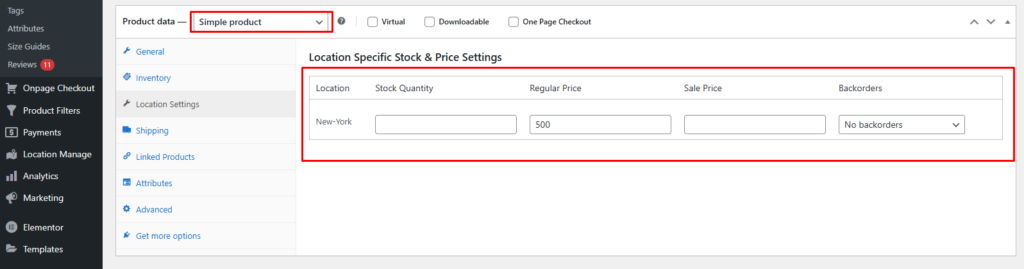
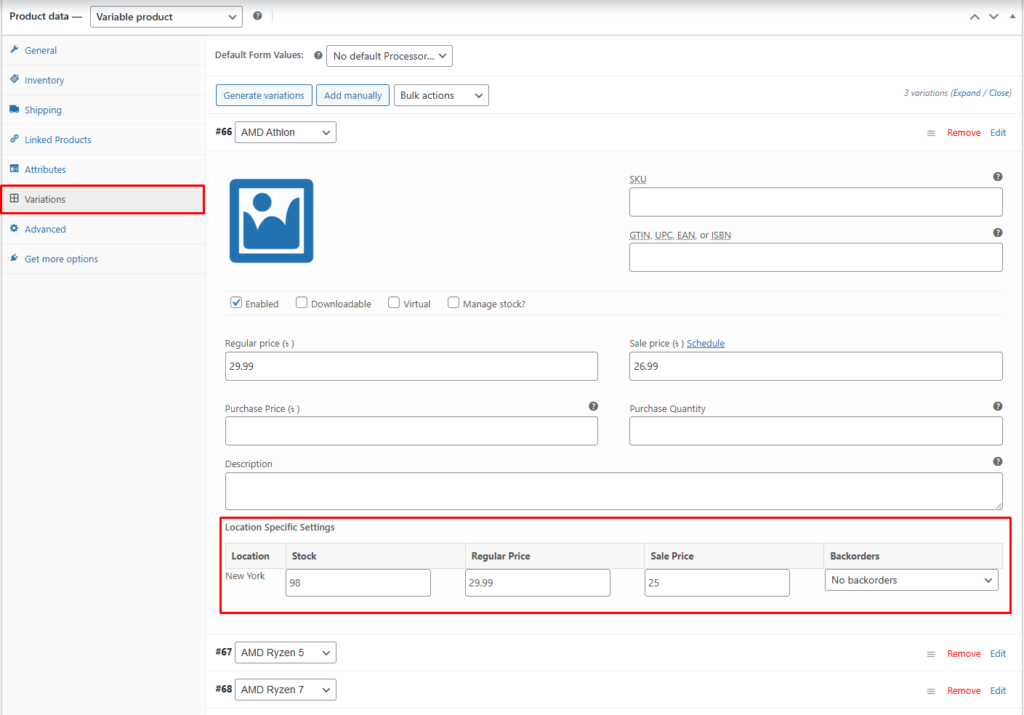
Step 5: Configure Location-Specific Pricing
For Simple Products
- Open the Location Settings tab (after Inventory)
For Variable Products
- Location-based pricing appears inside each variation
For each assigned location, configure:
- Regular Price (Location-Based)
- Sale Price (Location-Based)
(Cannot be lower than Purchase Price) - Stock Quantity
- Backorders
⚠️ The total of all location stock quantities must not exceed the Inventory Quantity.
Step 6: Save & Preview
- Click Publish / Update
- Visit the Single Product Page
- Switch locations to see:
- Location-specific prices
- Availability and stock status
👉 If pricing does not change, ensure the Location Selector is visible on the product page.
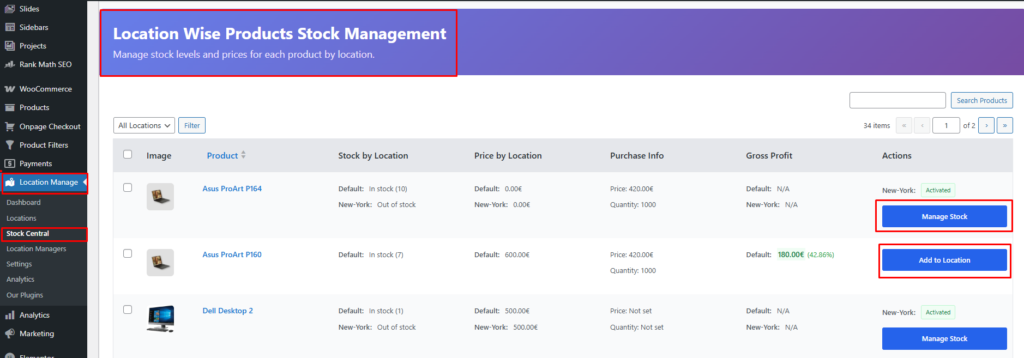
Method 2: Set Location-Based Pricing from Stock Central
This method is ideal for centralized or bulk pricing management.
Step 1: Open Stock Central
- Go to Location Manager → Stock Central
- Find your product
- Click Add Location / Manage Location
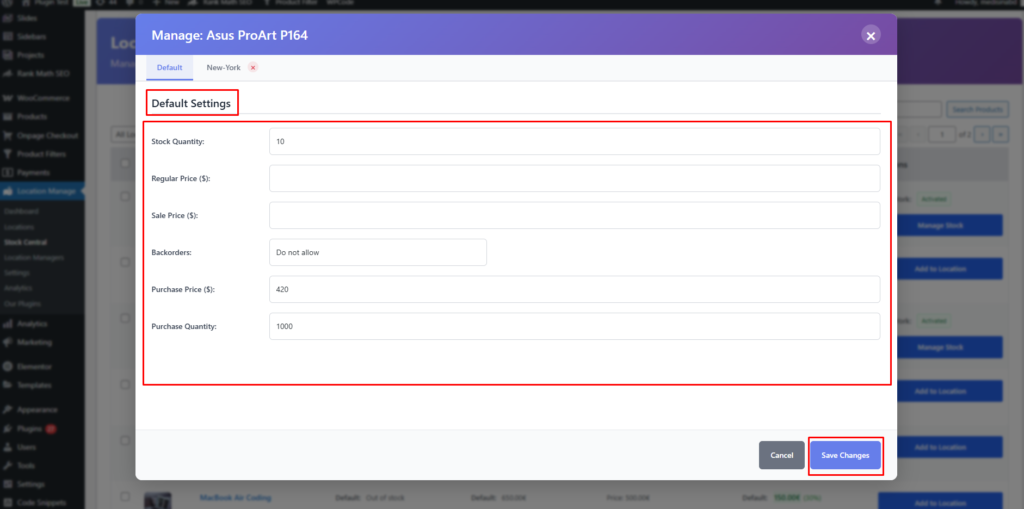
Step 2: Assign Locations
- In the popup, click the ➕ icon
- Select the locations you want to apply pricing for
- Locations will appear in a tab layout
Step 3: Configure Default Pricing
Set the global/default values:
- Purchase Price
- Purchase Quantity
- Regular Price
- Sale Price
- Backorders
These values act as fallback pricing.
Step 4: Configure Location-Based Pricing
Click on each location tab (example: New York) and set:
- Regular Price
- Sale Price
- Stock Quantity
- Backorders
Each location can have completely different pricing.

Step 5: Save Changes
- Click Save Changes
- Location-based pricing will now apply automatically on the frontend
How Location-Based Pricing Works on the Frontend
- Pricing changes dynamically based on:
- User-selected location
- Automatically assigned location (if configured)
- Sale prices, stock availability, and backorders update in real time
- Works seamlessly with:
- Simple products
- Variable products
- Location-based inventory rules
Best Practices for Location-Based Pricing
- Always define Purchase Price first
- Never set Sale Price below Purchase Price
- Keep inventory and pricing consistent across locations
- Use Stock Central for faster multi-location updates
- Test pricing changes on the single product page
With Location-Based Pricing correctly configured, you gain full control over regional pricing strategies, improve profit tracking, and deliver a more accurate shopping experience for your customers.