With Multi Location Product & Inventory Management for WooCommerce, you can configure products with location-specific stock, pricing, availability, and backorders.
There are two professional ways to manage location-based product data, depending on your workflow.
Method 1: Configure Location-Based Settings from the Product Edit Page
This method is ideal when creating or editing individual products.
Step 1: Create or Edit a Product
- Go to WooCommerce → Products
- Click Add New or Edit an existing product

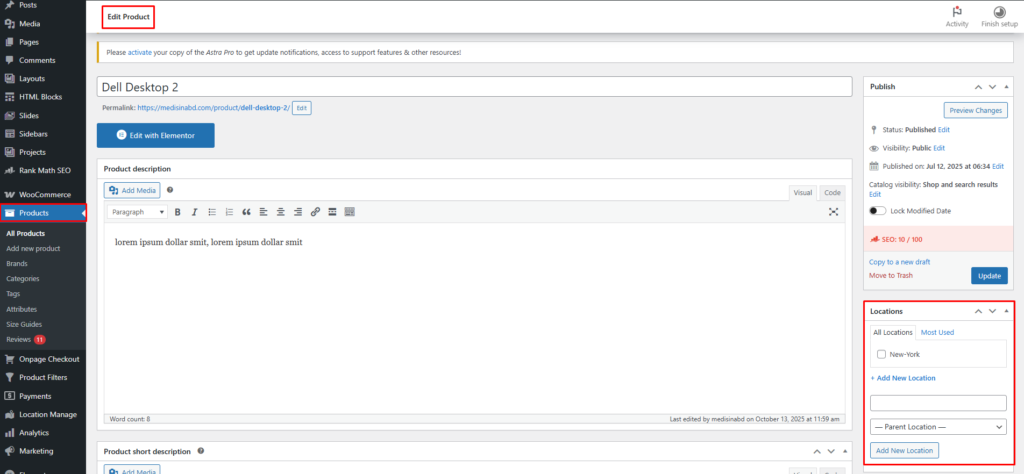
Step 2: Assign Locations
- On the right-hand side, find the Location panel
- Select one or more locations to assign to this product
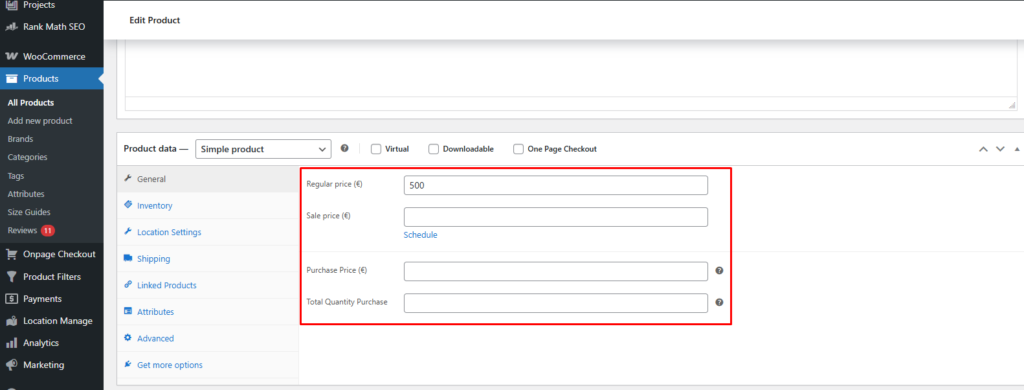
Step 3: Configure General Product Data
Navigate to the General tab:
- Purchase Price
Base purchase cost of the product. - Total Quantity Purchase
Total purchased quantity across all locations. - Regular Price
- Sale Price
⚠️ Regular and Sale prices cannot be lower than the Purchase Price.
These values are used to accurately calculate investment, revenue, and profit.
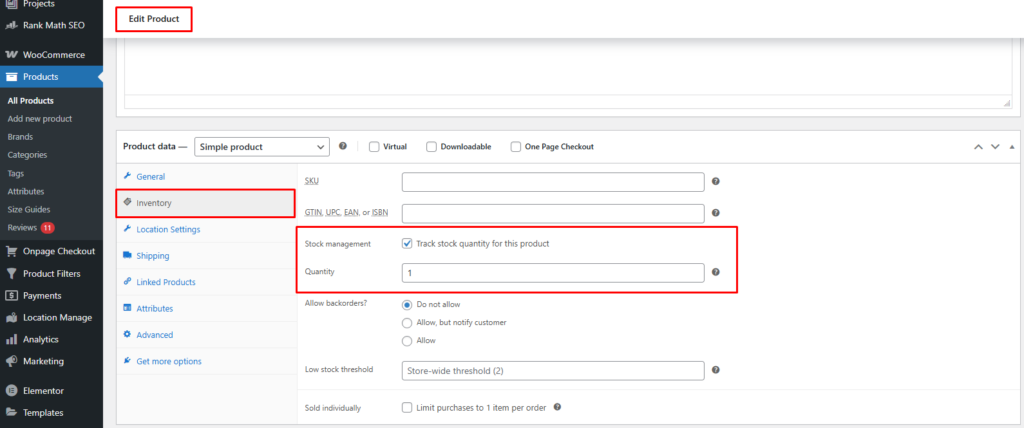
Step 4: Configure Inventory Settings
Go to the Inventory tab:
- Enable Stock Management
- Set Quantity
- ⚠️ This value cannot exceed the Total Quantity Purchase.
This quantity represents the maximum stock distributed across all locations.
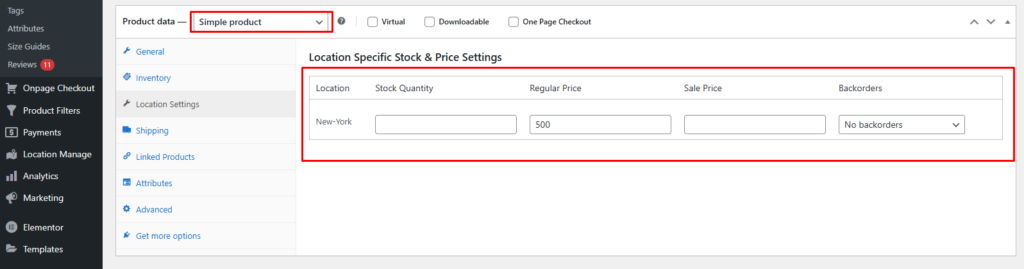
Step 5: Configure Location-Wise Settings
For Simple Products
- A Location Settings tab appears after the Inventory tab
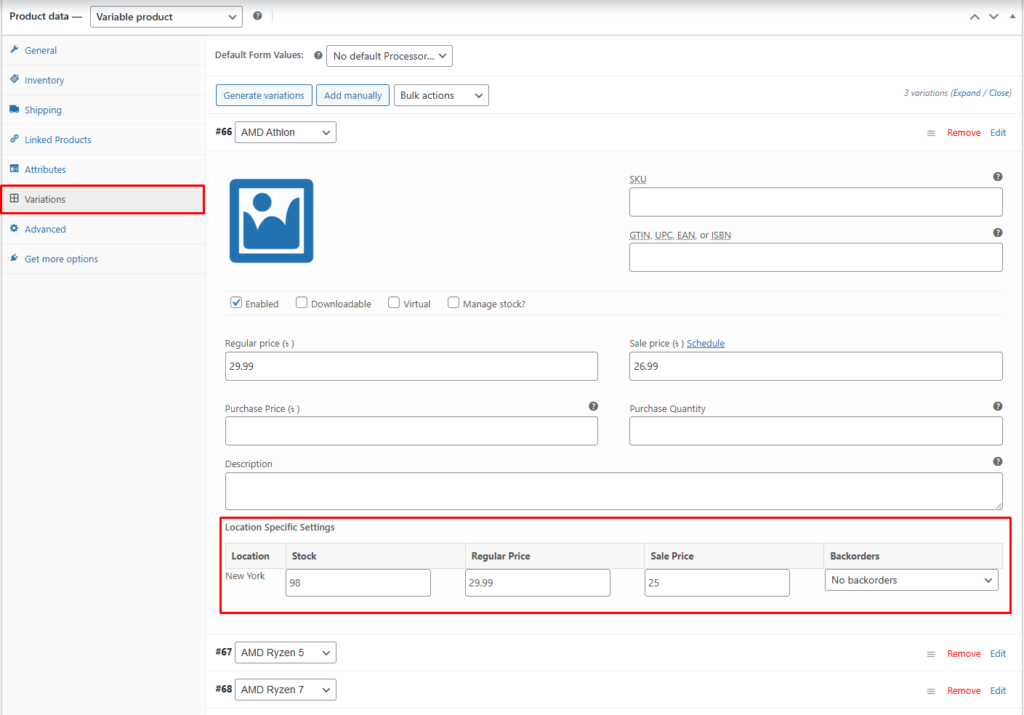
For Variable Products
- Location settings appear inside each variation
Configure the following per location:
- Stock Quantity
- Regular Price
- Sale Price (cannot be lower than Purchase Price)
- Backorders (Allow / Do not allow / Allow with notification)
⚠️ Important Rule
The sum of all location-based stock quantities must not exceed the Inventory Quantity value.
Step 6: Save & Verify
- Click Publish or Update
- Visit the Single Product Page
- Change the selected location to view:
- Location-based pricing
- Stock quantity & availability
- Backorder status
👉 If you do not see the location selector on the product page, follow the guide:
How to display location selector in single product page
Method 2: Configure Location-Based Settings from Stock Central
This method is best for bulk or centralized inventory management.
Step 1: Open Stock Central
- Go to Location Manager → Stock Central
- Find the product you want to configure
- Click Add Location / Manage Location
Step 2: Assign Locations
- A popup will appear
- Click the ➕ (plus) icon at the top
- Select the locations you want to assign to this product
The assigned locations will appear in a tabbed layout.
Step 3: Configure Default Settings
Set the global default values:
- Stock Quantity
- Regular Price
- Sale Price
- Backorders (e.g. Do not allow)
- Purchase Price
- Purchase Quantity
These act as the baseline configuration.
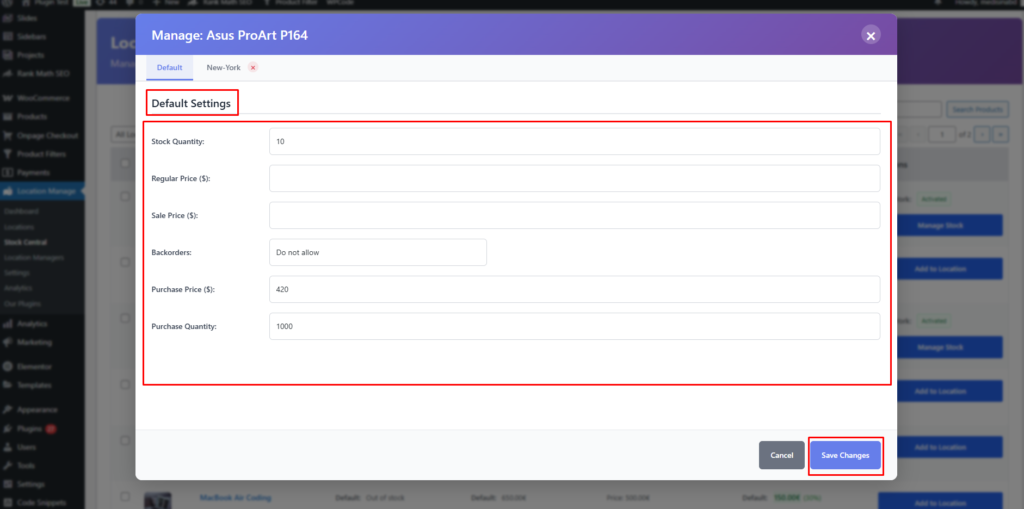
Step 4: Configure Location-Specific Settings
Click on a location tab (example: New York):
New York Settings
- Stock Quantity
- Regular Price
- Sale Price
- Backorders
Each location can have unique stock and pricing values.

Step 5: Save Changes
- Click Save Changes
- The product will now follow location-based inventory and pricing rules across your store
Best Practices
- Always set Purchase Price & Purchase Quantity first
- Ensure location stock totals never exceed inventory quantity
- Use Stock Central for faster multi-location updates
- Test location switching on the single product page
By using either the Product Edit Page or Stock Central, you can fully control location-based pricing, inventory, availability, and backorders—ensuring accurate stock management and a better customer experience.