Location Managers can receive location-specific emails and real-time notifications based only on the locations assigned to them. This ensures each manager stays informed about orders, stock status, and important store/warehouse events without receiving unrelated notifications.
Configure SMTP (Required)
Before testing any notification, you must configure SMTP. Without SMTP, WordPress may not reliably deliver emails.
Why SMTP is Required
By default, WordPress uses PHP mail, which often:
- Goes to spam
- Fails silently
- Is blocked by hosting providers
Recommended Setup
Install and configure a reliable SMTP plugin such as:
- WP Mail SMTP
- FluentSMTP
- Any trusted transactional mail service (SendGrid, Mailgun, Amazon SES, Gmail SMTP, etc.)
After Setup
- Send a test email from the SMTP plugin settings
- Confirm the email is delivered successfully
- Ensure sender email matches your domain
⚠️ Do not proceed with notification testing until SMTP is working properly.
Step 1 — Assign Email to Location Manager
When creating or editing a location manager:
- Go to Location Manage → Location Managers
- Add a manager or edit an existing one
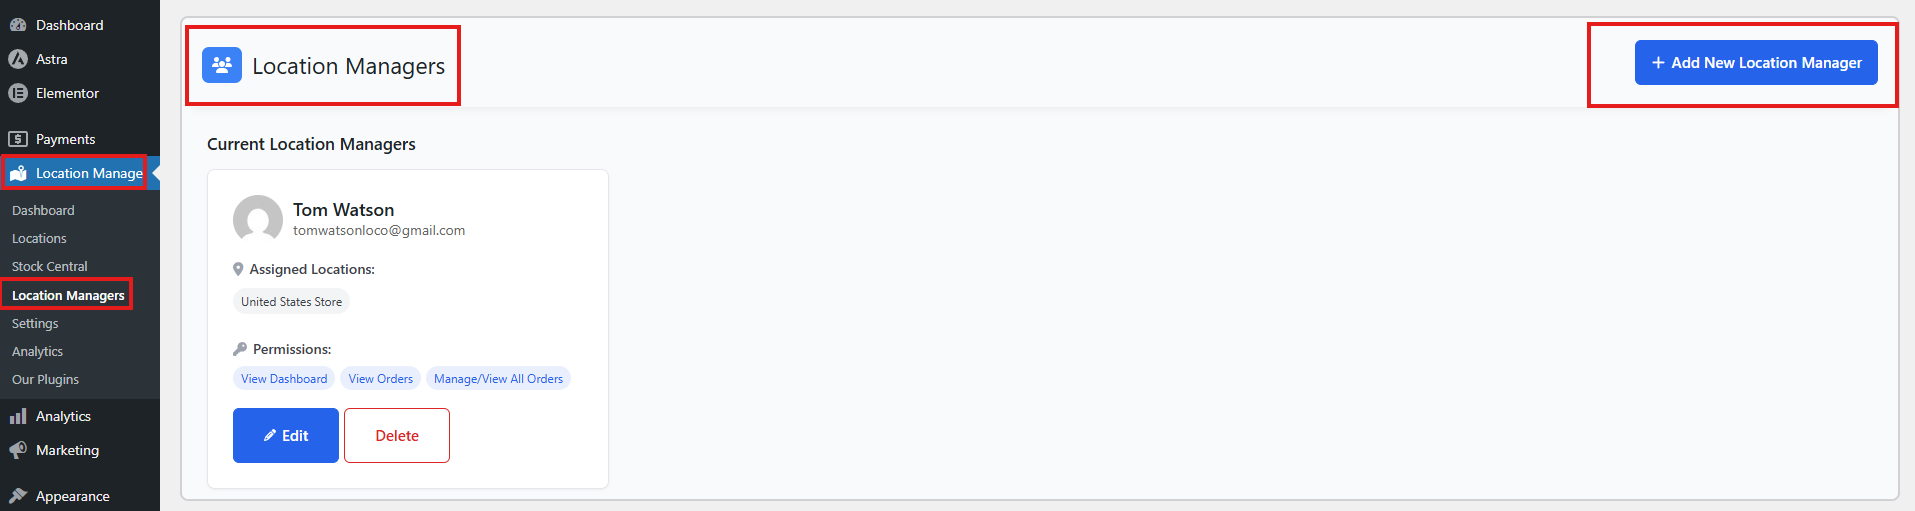
- Ensure the manager has:
- A valid email address
- Assigned location(s)
The email address tied to the manager is used for:
- Order notifications
- Stock alerts
- Manager-specific messages
- Location-based reports
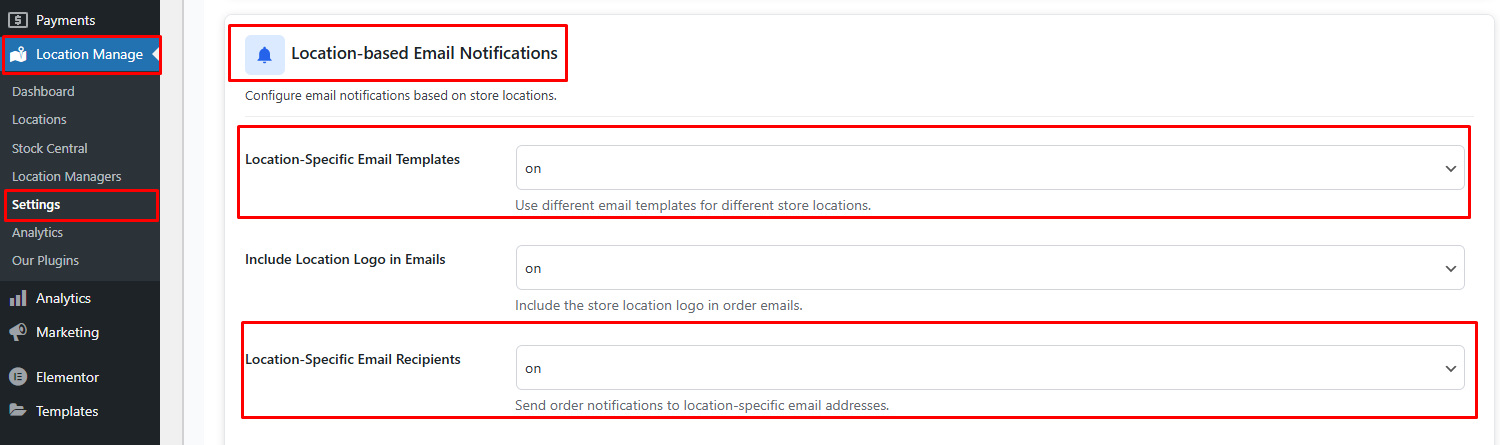
Step 2 — Required Settings to Receive Notifications (Important)
Before troubleshooting email issues, verify the following settings are enabled correctly:
✅ 1. Location-Specific Email Recipients = ON
Path:
Location Manage → Settings → Notifications → Location-based Email Notifications
This must be enabled for emails to route based on store location.
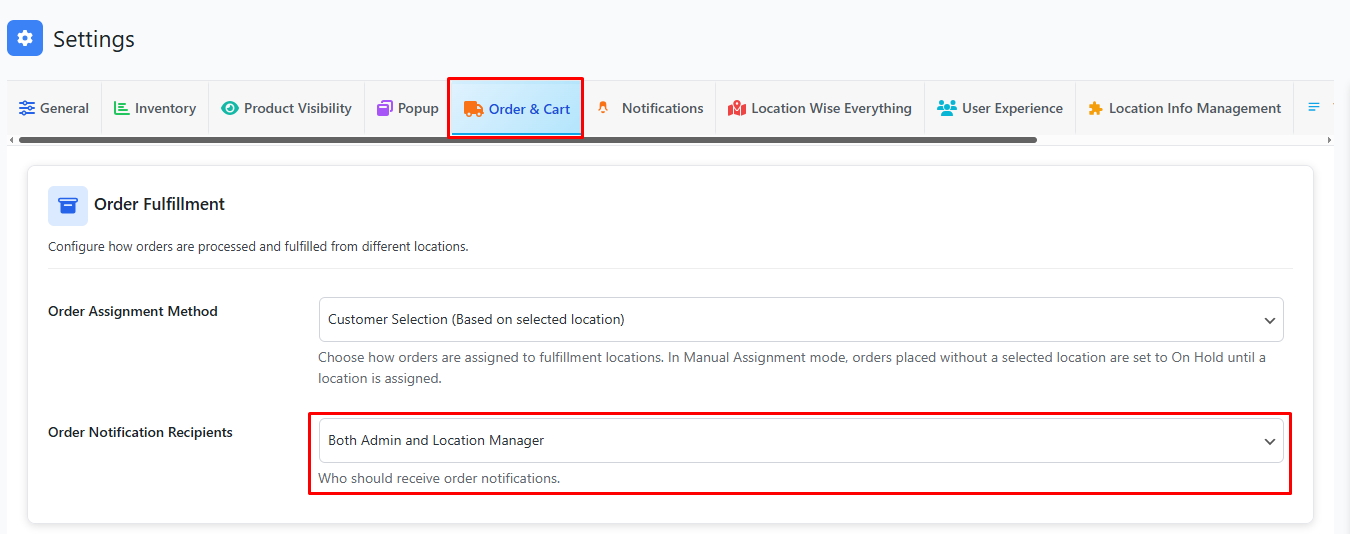
✅ 2. Order Notification Recipients Setting
Path:
Location Manage → Settings → Order & Cart
Then look for the setting named Order Fulfillment.
From here, set the Order Notification Recipients:
- Location Manager
or - Both (Admin + Location Manager)
If set to Admin only, managers will NOT receive order emails.
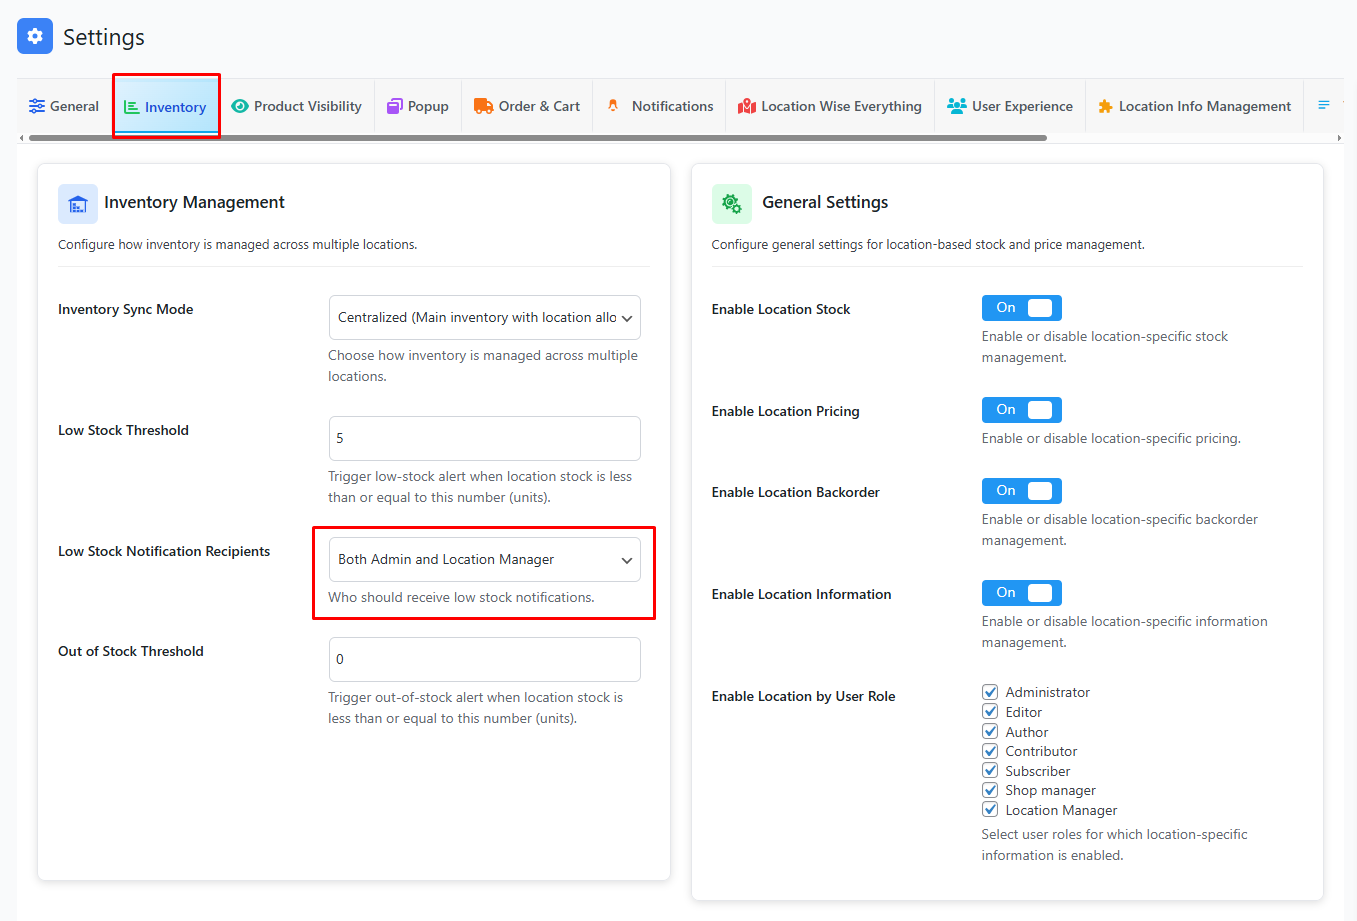
✅ 3. Stock Notifications (Low / Out of Stock)
To enable stock alerts:
Path:
Location Manage → Settings → Inventory
Set:
- Low Stock Notification Recipients = Location Manager or Both
- Configure stock thresholds properly
If thresholds are not set, alerts will not trigger.
✅ 4. Manager User Requirements
Make sure:
- The manager user is properly assigned to the location (Assigned Locations).
- The user account has a valid email address.
- The user role is correct (Location Manager role).
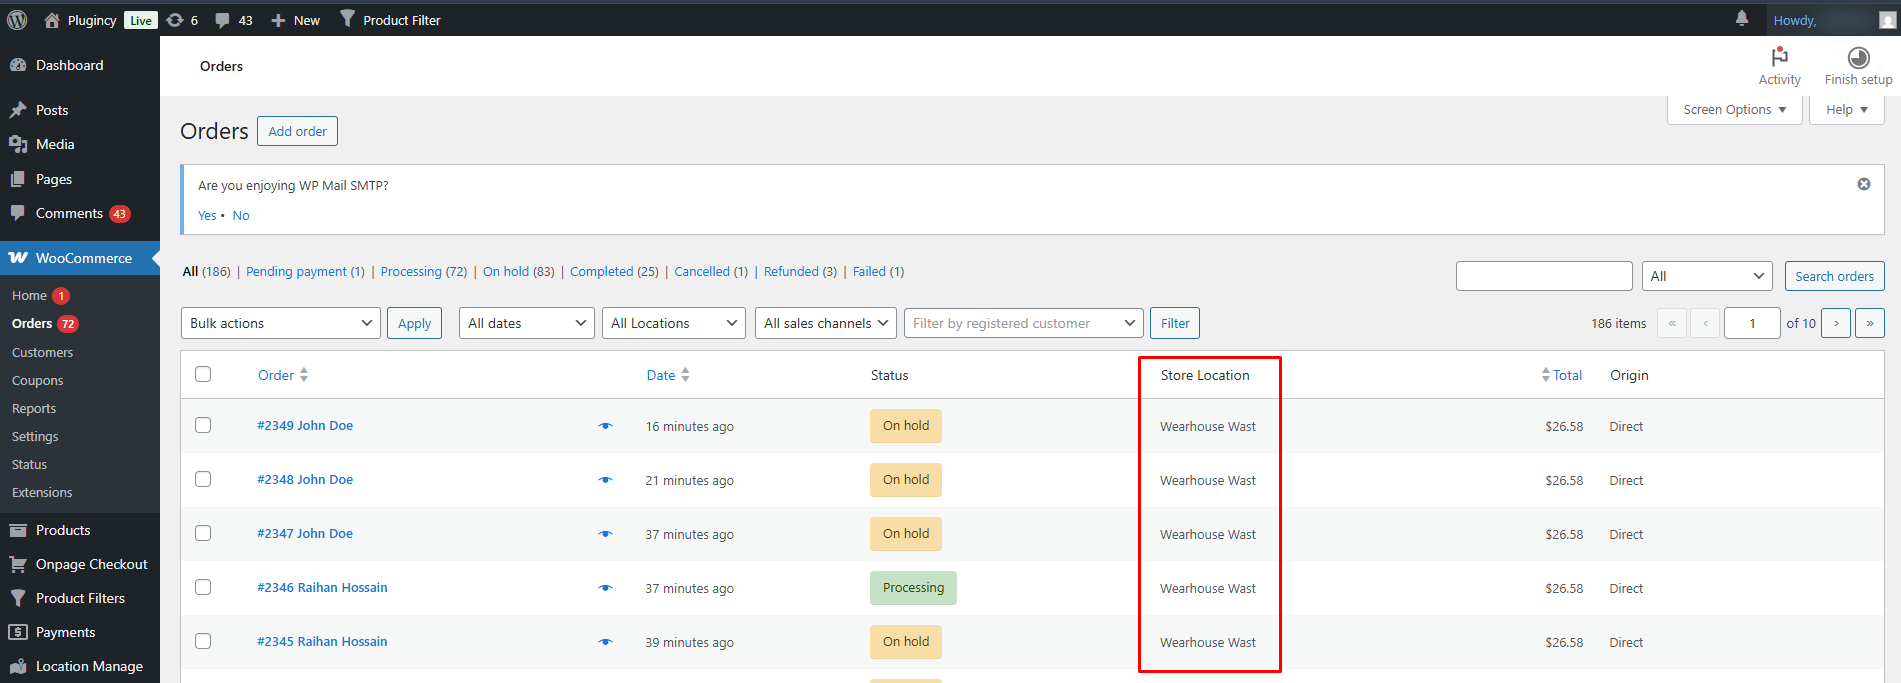
✅ 5. Order Must Have a Store Location Assigned
The order must contain:
_store_location
If the order is unassigned, no location-based email will be triggered.
✅ 6. WooCommerce Email Type Must Be Enabled
Go to:
WooCommerce → Settings → Emails
Ensure the relevant email types are enabled, such as:
- New Order
- Processing Order
- Completed Order
- Cancelled Order
- Failed Order
If WooCommerce emails are disabled, location-based routing will not work.
How It Works
When all required settings are properly configured:
- The system checks the order’s assigned store location.
- It finds the manager assigned to that location.
- It routes the email to:
- The Location Manager email
- The Location Contact email (if configured)
- The Admin email (based on WooCommerce settings)
Troubleshooting Checklist
If the manager is not receiving emails, verify:
- Location-Specific Email Recipients is ON
- Order Notification Recipients is set to Manager or Both
- Manager has assigned location
- Manager email is valid
- Order is not unassigned
- WooCommerce email is enabled
- WordPress email system is working (SMTP configured)
Location Email Template Support
Location-specific placeholders can be used in WooCommerce email templates:
| Placeholder | Description |
|---|---|
| {order_store_location} | Store location name |
| {store_location_address} | Location address |
| {store_location_phone} | Phone number |
| {store_location_email} | Location email |
| {store_location_logo} | Location logo (fallback if missing) |
| {store_manager_name} | Assigned manager name |
These can be inserted into:
- WooCommerce Email → Additional Content field
- Custom email templates
- Overridden HTML email files
Example:
Order for: {order_store_location}
Manager: {store_manager_name}
Email: {store_location_email}
Phone: {store_location_phone}
Step 3 — Social / Webhook Notifications for Managers
Each location manager can receive alerts via:
- Slack
- Discord
- Microsoft Teams
- Custom webhook (JSON POST)
- Telegram
To set this up:
- Go to Location Manage → Location Managers
- Edit a manager
- Scroll to Social Notifications section
- Add:
Slack / Discord / Teams Webhook URL:
https://hooks.slack.com/services/xxxx/xxxx/xxxx
Custom Webhook:
https://example.com/webhook
Telegram Chat ID:
Enter:
@username or numeric chat ID
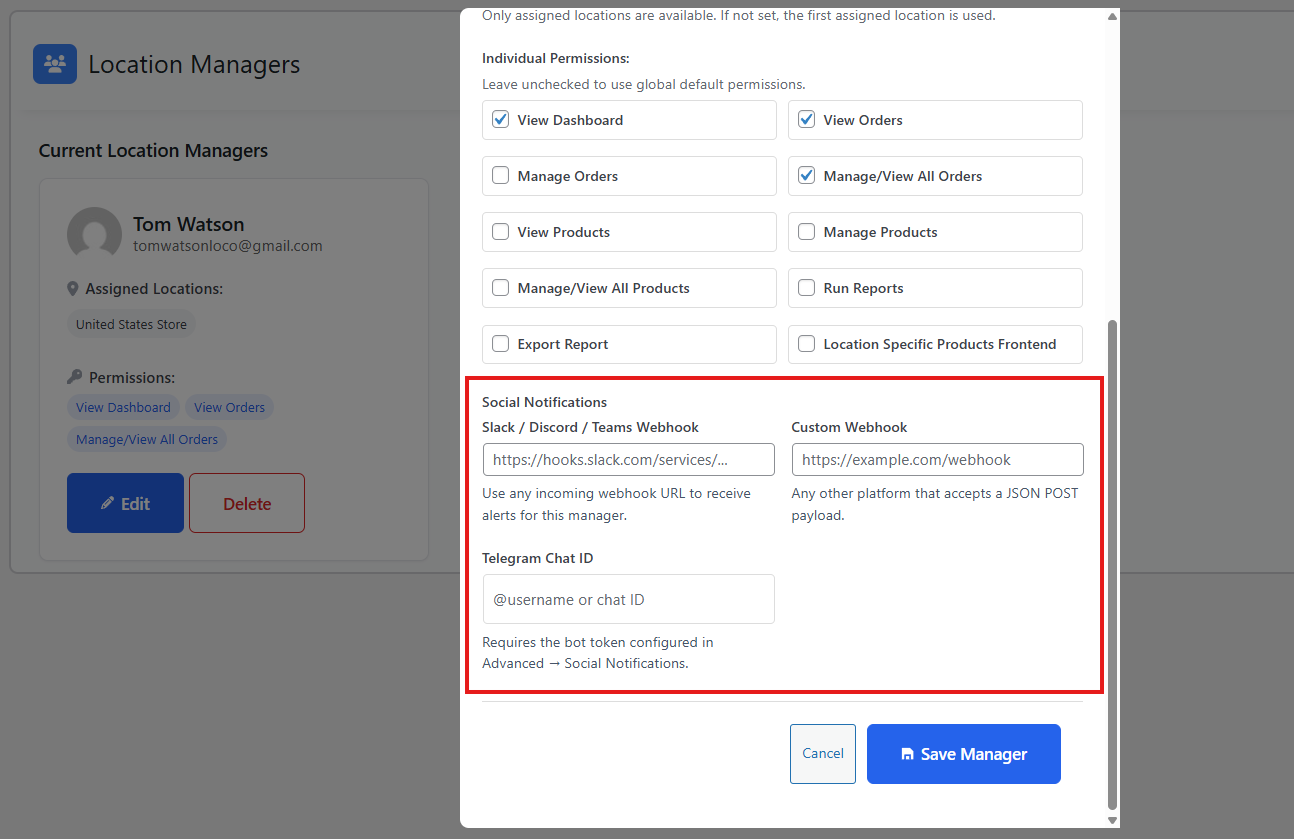
Requires a Telegram bot token in Settings → Notifications → Social Notifications
Supported Notification Events for Managers
Managers can receive notifications for:
- New orders
- Low stock alerts
- Out of stock alerts
- Restocked alerts
- Order cancelled
- Order refunded
- Order completed
- Payment failed
- High-value order
- Low-rating review
- Manager account changes
- Daily performance digest
You can enable/disable events per manager or globally.
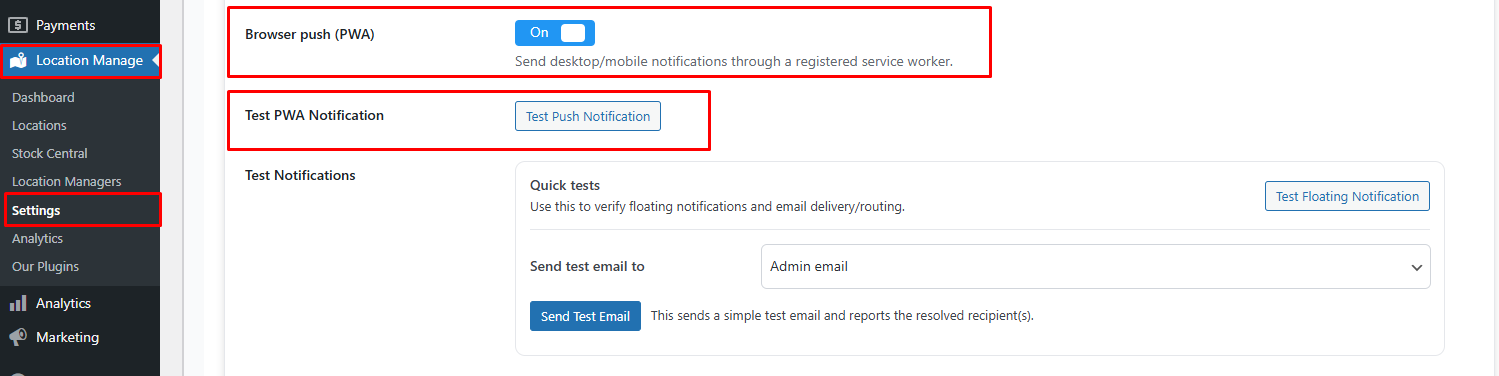
Device / PWA Notifications for Location Managers
Location managers can receive push notifications on mobile or desktop.
To enable:
- Go to Location Manage → Settings → Notifications
- Enable Browser Push (PWA)
- Then you can Test PWA Notification
👉 Learn how to configure PWA / Device notifications → View Documentation
Floating & Admin Bar Notification Configuration
Managers can also receive internal admin alerts:
Floating Notifications
- Popup-style alerts inside WordPress admin
- Shows low stock, out of stock, new order, etc.
👉 Learn how to configure floating notifications → View Documentation
Admin Bar Notifications
- Appears in top WordPress admin bar dropdown
- Shows a list of alerts for assigned locations
These require:
- Notifications enabled globally
- Manager assigned permissions (View Orders / Manage Inventory)
Permission Requirements for Notifications
To receive notifications, a manager must have relevant permissions:
| Notification Type | Required Permission |
|---|---|
| Stock Alerts | Manage Inventory |
| Order Alerts | View Orders / Manage Orders |
| Review Alerts | Run Reports or Manage Products |
| Admin Alerts | Any assigned permission |
Best Practices
- Assign only the necessary locations to avoid alert overload
- Give warehouse managers Manage Inventory for stock alerts
- Give store managers Manage Orders for fulfillment alerts
- Use Telegram for instant alerts during working hours
- Use Slack or Teams for internal team coordination
- Use daily digest to send summary instead of constant alerts
- Ensure all manager emails are correct and accessible
Summary
| Feature | Purpose |
|---|---|
| Location Manager Email | Receives order & stock emails |
| Social Notification | Slack/Discord/Teams/Telegram alerts |
| PWA Notification | Push alerts on device |
| Floating Notification | Instant in-dashboard popup |
| Admin Bar Alert | Global admin toolbar notification |
| Per-location Routing | Ensures only assigned managers get alerts |