Color often shapes the first impression shoppers have while browsing visual products. In WooCommerce stores selling fashion, beauty, decor, accessories, or furniture, a color filter helps customers move from a broad product list to options that match their preferred shade, tone, or finish.
In this guide, you will learn how to add a color filter in WooCommerce using attribute widgets, block-based filters, and AJAX color swatches. We will also cover color value setup, choosing the right method, conversion-focused optimization, and troubleshooting so the filter feels clear, useful, and easy to manage.
Quick Answer
Color filtering in WooCommerce uses a Color product attribute connected to each product. After creating the attribute and assigning color terms, you can show those colors as a shop filter through a widget, block, or AJAX swatch filter.
Use these steps to check the basic setup before moving into advanced display options.
- Create a Color attribute from Products > Attributes
- Add color terms such as Black, Blue, Red, or Beige
- Assign the right color terms to each product
- Add an attribute-based color filter to the shop or category layout
- Test the filter on desktop and mobile
What Does a Color Filter Do in WooCommerce?
A color filter allows shoppers to narrow products based on how items look rather than what they cost or where they sit in the store. It helps users remove shades they do not want and focus on visually relevant options.

This type of filtering is usually used early in the browsing process. Shoppers often choose a preferred shade before comparing prices, sizes, or features, making it a visual decision tool rather than a technical one.
Example:
In a clothing store selling the same jacket in several colors, a shopper who prefers black or navy can select those colors to hide products or options outside that range. This makes browsing faster and avoids unnecessary comparisons.
When Color Filters Are the Right Choice
Color filters work best when product appearance strongly affects the buying decision. They are especially useful for WooCommerce stores where shoppers choose by shade, tone, finish, or visual matching before comparing other details.
Color-based filtering works well when:
- Products have clear visual differences, such as black, white, red, blue, beige, or metallic finishes
- The same product or product type is available in multiple colors
- Shoppers often browse by looking before checking size, price, brand, or material
- Color matching matters for outfits, room decor, accessories, makeup, or product sets
- Product images clearly show the available color options
Unlike category, tag, or technical attribute filters, color filters support visual preference. They help shoppers narrow products by appearance rather than store structure or product functionality.

Prepare Product Color Values for Filtering
Clean color data helps WooCommerce show accurate filter results. Before placing the filter on your shop page, create a Color attribute, add clear color terms, and assign the correct values to each product. Here are the steps.
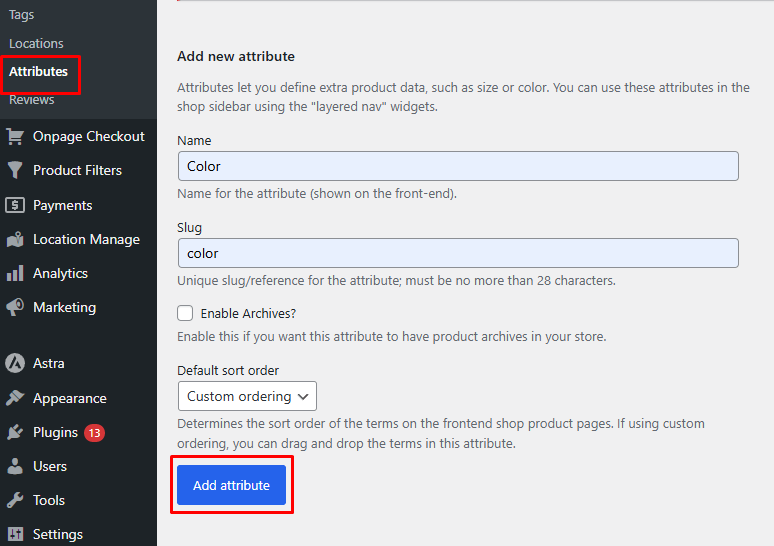
Step 1: Create a Color Attribute in WooCommerce
WooCommerce needs a dedicated Color attribute before it can filter products by color. This attribute stores the color options shoppers will later see in the filter, such as Black, White, Red, Blue, Beige, or Navy. Keep the terms simple and consistent so the filter stays easy to understand.
Step-by-Step Setup: Attributes
- Go to Products > Attributes
- Create an attribute named Color
- Add color terms such as Black, White, Red, and Blue
- Save the attribute

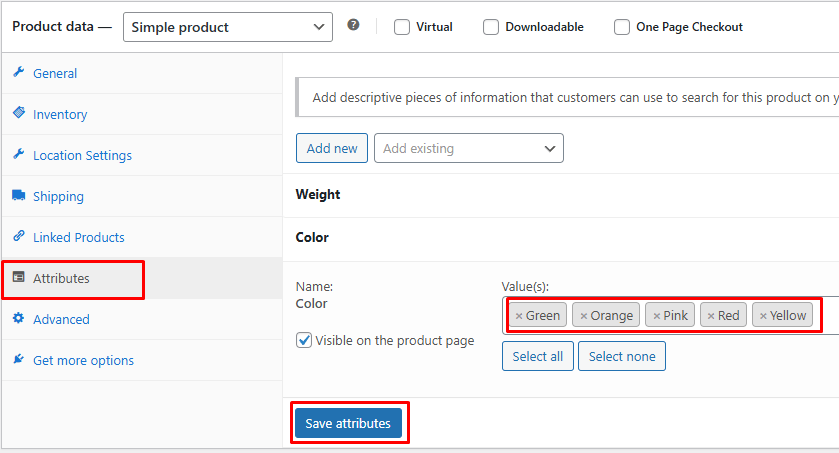
Step 2: Assign Colors to Products
After creating the attribute, connect each product to the correct color value. This step is important because the filter can only show products that already have a color assigned. If a product comes in more than one visible color, assign all relevant color terms so shoppers can find it under each matching option.
Step-by-Step Setup: Product Level
- Open a product from Products > All Products
- Go to Product Data > Attributes
- Select the Color attribute
- Assign the correct color value
- Save the attribute and update the product

How to Add Filter by Color in WooCommerce: 3 Simple Methods
Once your Color attribute is ready, you can show it as a filter in your WooCommerce store using widgets, block templates, or an AJAX color swatch setup. Choose the method that fits your theme layout and the way you want shoppers to browse by color.
Method 1 (Built-In): Add Color Filter Using Attribute Widget
WooCommerce includes a basic attribute filter that can be used for color filtering. This method works best with classic themes that use sidebars or widget-based product archive layouts.
Step-by-Step Setup (Widgets)
- Go to Appearance > Widgets
- Open the Shop Sidebar or product archive sidebar
- Add the Products Filter or the available WooCommerce attribute filter widget
- Keep the Color attribute and remove the rest if not needed
- Save the widget area
- Test the filter on your shop or category page
Limitation
- Displays color names, not visual swatches, by default
- May reload the page after selection
- Offers limited styling control
- Has limited advanced multi-color selection behavior
- Depends on the theme sidebar/widget support
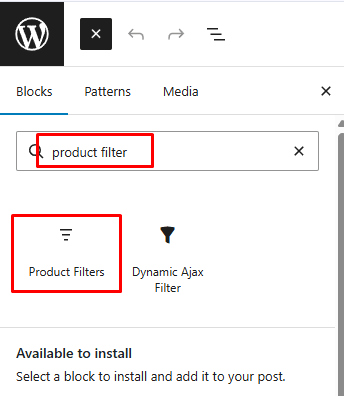
Method 2 (Block Themes): Add Color Filter Using Blocks
Block-based WooCommerce themes usually require filters to be added inside the shop or product archive templates. This method is useful when your store uses the Site Editor instead of classic widget areas.
Step-by-Step Setup (Block Editor)
- Go to Appearance > Editor
- Open Templates
- Choose Shop, Product Catalog, or the relevant product archive template
- Add the Product Filters block or the available attribute filter block
- Keep the Color with other filters inside the block
- Save the template
- Test the filter on the front end

Method 3 (Recommended for Visual Stores): Use AJAX Color Filtering
Visual stores need color filters that feel fast and easy to scan. With Dynamic AJAX Product Filters for WooCommerce, you can show color options as swatches, labels, or selectable filter styles while product results update on the same page.
Step 1: Install and Activate the Plugin
For the free version:
- Go to Plugins > Add New
- Search for Dynamic AJAX Product Filters for WooCommerce
- Click Install Now
- Click Activate

For the paid version:
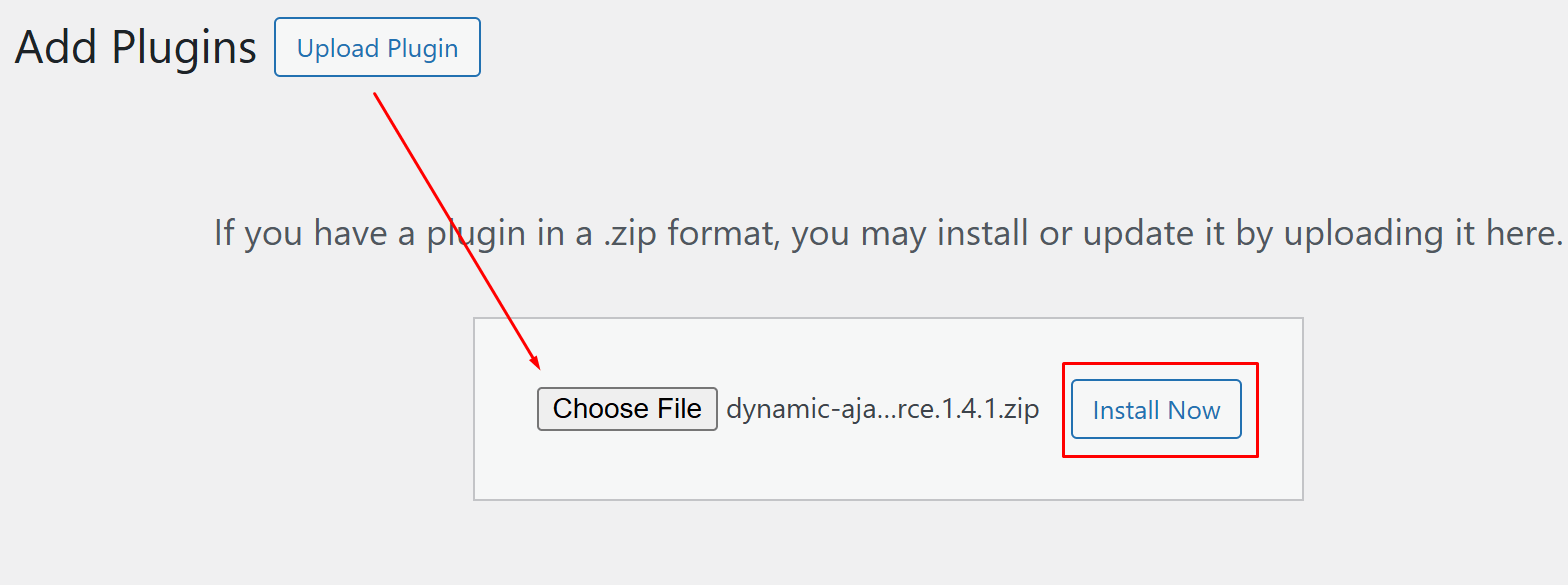
- Download the plugin ZIP file after purchase
- Go to Plugins > Add New > Upload Plugin
- Upload the ZIP file
- Click Install Now
- Activate the plugin

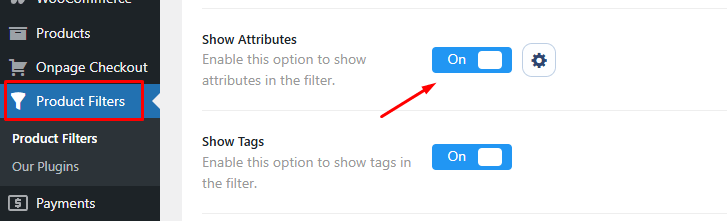
Step 2: Enable the Color Attribute Filter
- Go to Product Filters > Form Manage
- Find Show Attributes
- Toggle it on
- Save the setting

Step 3: Style the Color Filter
- Go to Product Filters > Form Style
- Select Color from the attribute dropdown
- Choose the color filter style
- Select how the color options should display, such as swatches, labels, or another supported style
- Adjust optional or advanced settings based on requirements


Step 4: Display the Filter on Your Shop Page
- Open the page where you want the filter to appear
- Add this shortcode to display the filter: [[plugincy_filters]]
- Optionally add this shortcode beside it to display products: [[products]]
Step 5: Save Changes and Test
- Click Save Changes to apply the settings
- Open the shop page on the front end
- Select a few color options
- Confirm that the product results update correctly
- Test the color filter on mobile as well
Best Method to Choose: Fast Decision Guide
The best color filter method depends on how important color is in the shopping journey. Simple stores can use built-in attribute filters, while visual or larger catalogs usually need AJAX color filtering for faster browsing and better swatch control.
| Store Type | Recommended Method | Why |
| Small stores | Method 1 or 2 | Simple setup for basic color-name filtering |
| Visual catalogs | Method 3, AJAX | Better for swatches, shade selection, and visual discovery |
| Large stores | Method 3, AJAX | More scalable for many colors, products, and category pages |
Choose the setup based on how much color affects buying decisions. Built-in methods work for simple color lists, while AJAX filtering is better for color-driven stores that need faster updates and clearer visual browsing.
How to Optimize Color Filters for Conversions
Color filters can support conversions when shoppers can recognize shades quickly, trust the selected results, and move back to the full product list without friction. Small improvements in swatch accuracy, labels, and mobile usability can make visual browsing easier.
Use these ideas to make color filtering more conversion-friendly.
- Match Swatches to Product Photos: Make sure each swatch reflects the actual product shade so shoppers trust the filter results.
- Show Color Names With Swatches: Pair visual swatches with labels like Black, Navy, or Ivory to avoid confusion between similar shades.
- Highlight Selected Colors Clearly: Use borders, checkmarks, or active labels so shoppers always know which colors are filtering the products.
- Keep Popular Colors Easy to Find: Place high-demand or seasonal colors where shoppers can see them without scrolling too much.
- Avoid Too Many Similar Shades: Group close shades when exact differences do not affect purchase decisions, such as light blue and sky blue.
- Make Mobile Swatches Easy to Tap: Use enough spacing and touch-friendly swatch sizes so mobile shoppers can select colors comfortably.
- Add a Clear Reset Option: Let users remove selected colors quickly so they can continue browsing without restarting their search.
Color Swatches vs Text Color Filters
Color swatches and text color filters both help shoppers narrow products by color, but they work best in different situations. Swatches are better for visual browsing, while text labels are better when shade names, accessibility, or exact wording matter.
Use the comparison below to choose the right color filter style for your WooCommerce store.
| Filter Type | Best For | Why It Works |
| Color Swatches | Fashion, beauty, decor, accessories, and furniture stores | Shoppers can recognize colors quickly without reading every label |
| Text Color Filters | Simple catalogs, technical products, or B2B stores | Clear color names help users avoid confusion between similar shades |
| Swatches With Labels | Stores with close shades, such as navy, ivory, beige, or charcoal | Combines visual scanning with clearer shade identification |
| Image Swatches | Patterns, textures, gradients, wood tones, metallics, or prints | Shows visual finishes more accurately than flat color blocks |
| Dropdown Text Filters | Stores with many color options and limited sidebar space | Keeps the layout clean while still letting shoppers choose by color name |
| AJAX Swatches | Visual catalogs that need faster browsing | Updates products without full page reloads and keeps color selection smoother |
How to Handle Similar Colors and Shades
Similar color names can make a WooCommerce color filter confusing when shoppers see too many near-identical options. Use a good WooCommerce color filter plugin for advanced customization. Use these rules to keep color options clear.
- Use Color Families for Simple Browsing: Group close shades under familiar names like Blue, Beige, Gray, or Brown when exact shade differences are not important.
- Use Exact Shades When They Affect Choice: Keep names like Navy, Ivory, Charcoal, or Rose Gold when shoppers clearly care about that specific shade.
- Avoid Duplicate Shade Terms: Do not use Blue, Dark Blue, and Navy interchangeably unless each term represents a clearly different product color.
- Match Names With Product Images: Make sure a swatch labeled Cream, Beige, or Ivory matches what shoppers see in the product photos.
- Limit Overly Fancy Color Names: Creative names can sound attractive, but shoppers may not understand them without a clear common color label.
- Review Color Terms Regularly: Check old, imported, or unused color terms so the filter stays clean as products change.
Troubleshooting: When Color Filter Is Not Working
Color filter issues usually come from missing attribute terms, incorrect product assignments, or swatches that are not connected to the right color values. Start by checking the Color attribute, product-level settings, display placement, and cache before rebuilding the filter.
Use this checklist to find the issue faster.
| Problem | Likely Cause | Fix |
| Color filter is not visible | Filter was not added to the correct widget, block, shortcode, or template area | Check the shop sidebar, product archive template, or AJAX filter placement |
| Some colors do not appear | Color terms are empty, unused, or hidden by filter settings | Assign those colors to visible products and check hidden-empty-term settings |
| Products missing from color results | Products do not have the correct Color attribute assigned | Edit the product and assign the right color term under product attributes |
| Swatches show wrong colors | Swatch values do not match the saved color terms or product images | Update the swatch color settings and compare them with product photos |
| Multi-color products filter incorrectly | Only one color term is assigned to products with multiple visible colors | Assign all relevant visible colors or use a clear dominant-color rule |
| AJAX color filter does not update | Cache, theme scripts, or plugin settings may block live updates | Clear cache, check AJAX settings, and test for theme or plugin conflicts |
| Color filter works on the shop but not the categories | Filter was added only to the main shop layout | Add the filter to the correct category or product archive template |
Most color filter issues come from missing color terms, wrong product assignments, inaccurate swatch settings, or incorrect template placement. Check those before changing the full setup.
FAQs About Color Filters in WooCommerce
Color filter questions often involve product variations, swatch accuracy, archive behavior, and how shoppers interact with visual options. These answers cover extra details that help store owners manage color-based filtering more confidently.
Can a Color Filter Work With Variable Products?
Yes, a color filter can work with variable products when the Color attribute is used consistently across product variations. Make sure each variation or parent product has the correct color values assigned.
Should Color Filters Show Product Counts?
Yes, product counts can help shoppers understand how many items are available in each color before selecting an option. This reduces dead-end clicks and improves browsing clarity.
Can Color Filters Work With Product Search Results?
Yes, color filters can work with product search results if your theme or filter plugin supports filtering search and archive pages. Test search results separately because layouts can behave differently.
Should Out-of-Stock Colors Stay Visible?
Usually, no. Hiding out-of-stock color options keeps shoppers from selecting colors they cannot buy. If you show them, make the availability clear.
Can Color Filters Be Combined With Size or Price Filters?
Yes, color filters can work with size, price, brand, category, rating, or stock filters. Test combinations to make sure results stay accurate and easy to reset.
Final Note
Color filtering works best when it mirrors how people shop visually. Clear shade names, accurate swatches, and properly assigned product colors help shoppers move through a catalog without second-guessing whether the results match what they selected.
By learning how to add filter by color in WooCommerce, you can make color-based browsing more useful on shop and category pages, especially for products where appearance, matching, and personal preference influence the final choice.