Category filters help shoppers navigate a WooCommerce store based on how products are organized. Instead of browsing the entire catalog, users can narrow products by type, collection, or product group, which makes navigation clearer and more predictable.
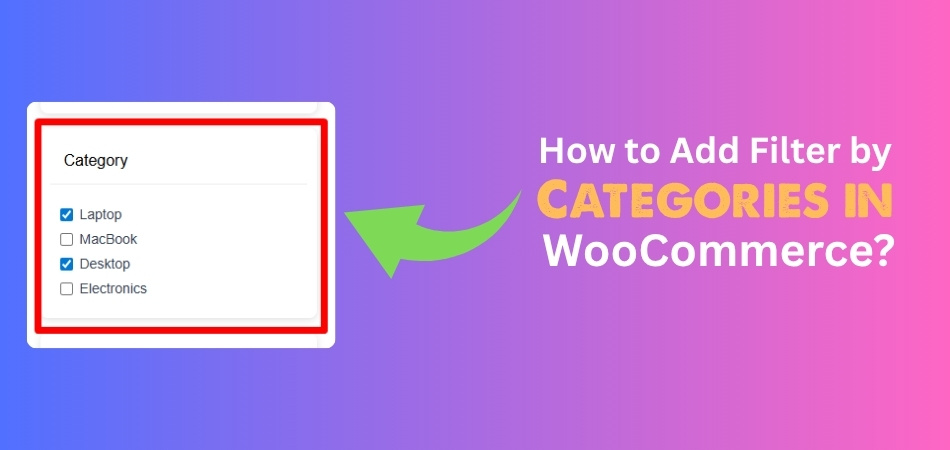
In this guide, you will learn how to add filter by categories in WooCommerce using built-in tools and advanced AJAX methods. We will also cover category structure best practices, common setup issues, and SEO considerations so category filtering supports clean navigation without harming site performance or search visibility.
Quick Answer
You can add filter by categories in WooCommerce by displaying product categories on shop or category pages so users can narrow products by store structure. WooCommerce includes built-in ways to do this, while AJAX-based methods give you more flexibility for larger catalogs.
Use the steps below to confirm that category filtering is visible and working on your product archive pages. More flexible methods are explained later in the guide.
- Go to Appearance → Widgets (or Customizer → Widgets)
- Add the Product Categories widget to the shop sidebar
- Save changes and test the filter on a shop or category page
What a Category Filter Does in WooCommerce?
Category filters help shoppers move through a WooCommerce store by product group instead of browsing the full catalog at once. Focus stays on store structure, not product traits, which makes navigation clearer on larger shop pages.
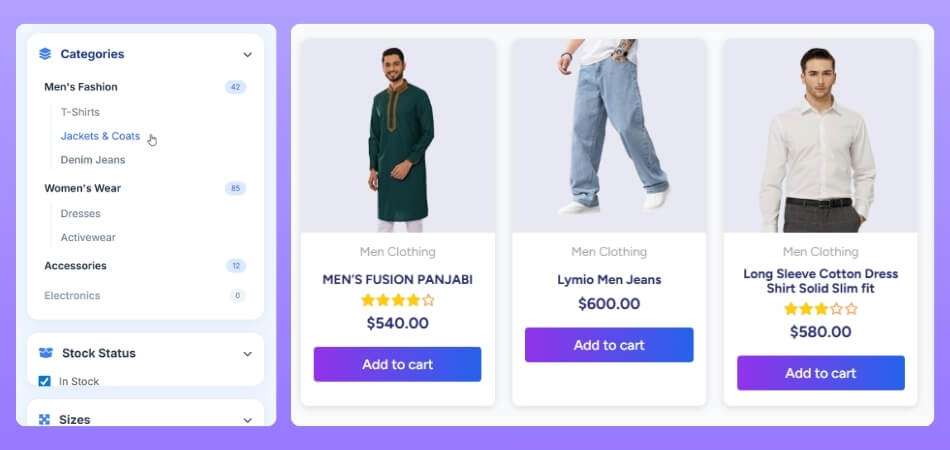
Someone visiting an electronics store, for example, might use the category filter to show only Laptops or Headphones. That removes unrelated items and helps narrow the catalog before price, brand, or other filters come into play.
When Category Filters Are the Right Choice?
Category filters work best when store structure plays a big role in how shoppers browse. They help users move through product groups first, before narrowing results with attributes or price.
Category filtering makes sense when:
- Products are divided into clear types or groups
- The catalog includes multiple categories or departments
- Shoppers arrive without a specific product in mind
- Users need to explore before comparing options
- The shop page acts as a main entry point
Prepare Your WooCommerce Product Categories Before Filter Setup
Category filtering works best when the store already has a clear category structure behind it. Before adding the filter itself, make sure your product categories are created properly and your products are assigned to the right ones. That way, the filter does more than appear on the page, it actually helps shoppers move through the catalog in a useful way.
- Go to Products → Categories
- Create the main categories your store needs
- Use clear, shopper-friendly category names
- Keep parent and child categories organized logically
- Assign products to the correct categories
- Avoid overlapping or unnecessary category groups
- Review the category structure before adding the filter
How to Add Filter by Categories in WooCommerce?
WooCommerce gives you multiple ways to add category filters depending on how your store is built. The right method depends on your theme type, layout, and how much control you need over filtering behavior.
Method 1 (Built-in): Add the WooCommerce Product Categories Widget
Classic WooCommerce themes usually support category filtering through the default Product Categories widget. This method is simple to set up, requires no extra plugin, and works well for stores that use a sidebar on shop or category pages.
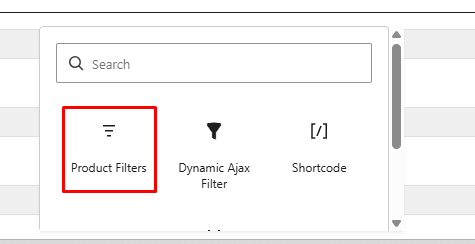
- Go to WordPress Dashboard → Appearance → Widgets
- Open the Shop Sidebar or product archive sidebar
- Add the Product Filters widget
- Keep the category filter from the list
- Save changes and test it on the shop page
If Your Theme Has No Sidebar
Go to Appearance → Customize → Widgets and check whether a shop sidebar exists. Block-based themes usually do not use traditional widget areas, so in that case, move to the block editor method instead.
Method 2: Add the Product Categories Block
Block-based WooCommerce themes handle category filtering through the editor instead of traditional widgets. This method works well when your shop or product archive pages are built with blocks and you want the filter placed directly inside the layout.
How to set it up:
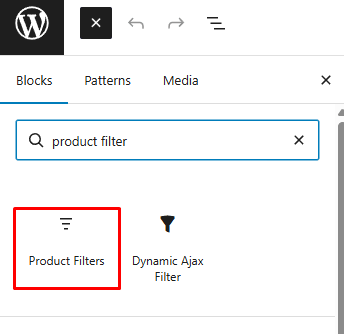
- Go to Appearance → Editor
- Open Templates and choose Shop or Product Catalog
- Add the Product Filters block where you want the filter to appear
- Save the template changes
- Test the filter on shop and category pages
What to keep in mind:
- Works only with block-based themes
- Gives more layout control than widget areas
- Still follows the limits of default WooCommerce category filtering
Method 3: Use AJAX Category Filtering
AJAX category filtering is a better fit for stores that need faster browsing and more flexible category navigation. Among advanced product filters for WooCommerce, this method stands out because it updates results without full page reloads and makes category-based browsing feel smoother on both desktop and mobile.
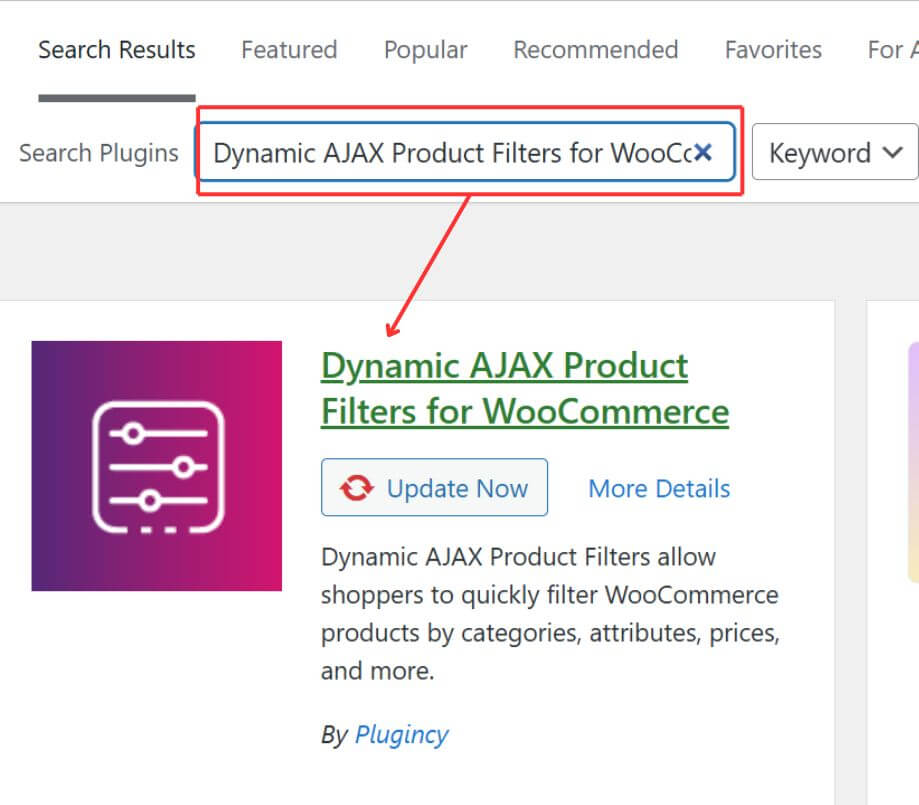
Step 1: Install and Activate the Plugin
- Go to Plugins → Add New
- Search for Dynamic AJAX Product Filters for WooCommerce
- Click Install Now
- Click Activate
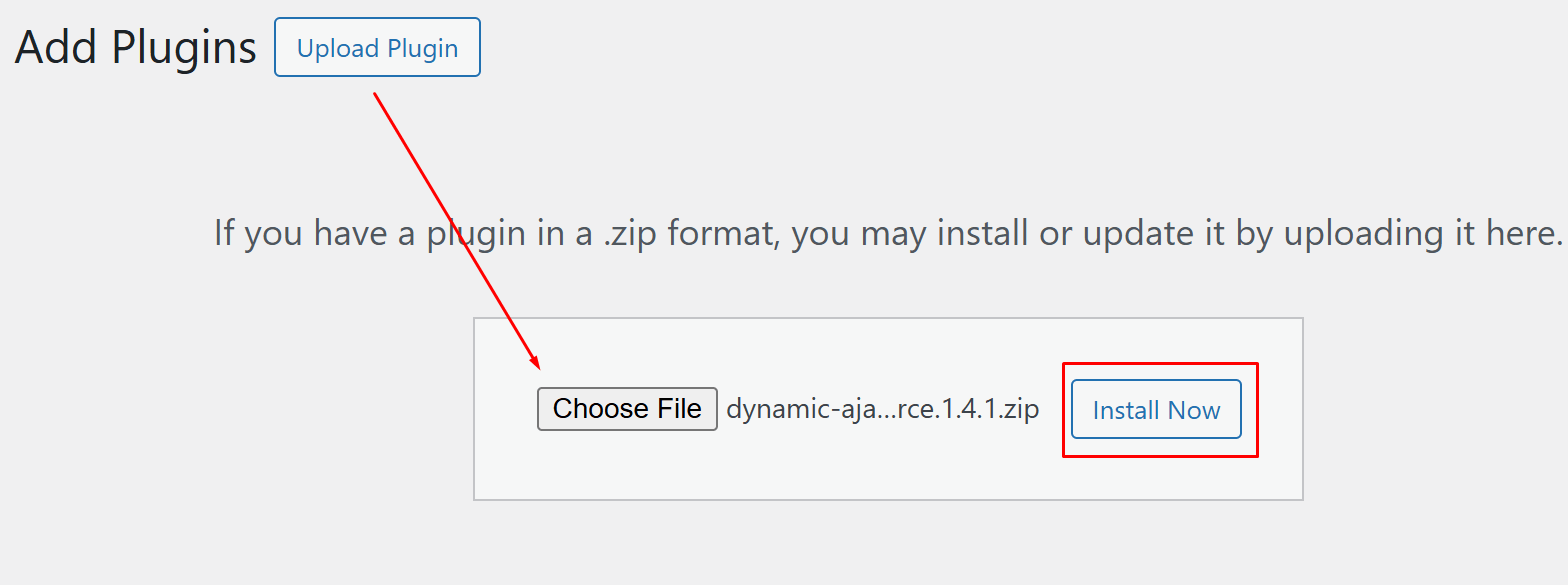
Pro version:
- Purchase the pro version from the official website
- Download the plugin ZIP file
- Go to Plugins → Add New → Upload Plugin
- Upload the ZIP file, install it, and activate it
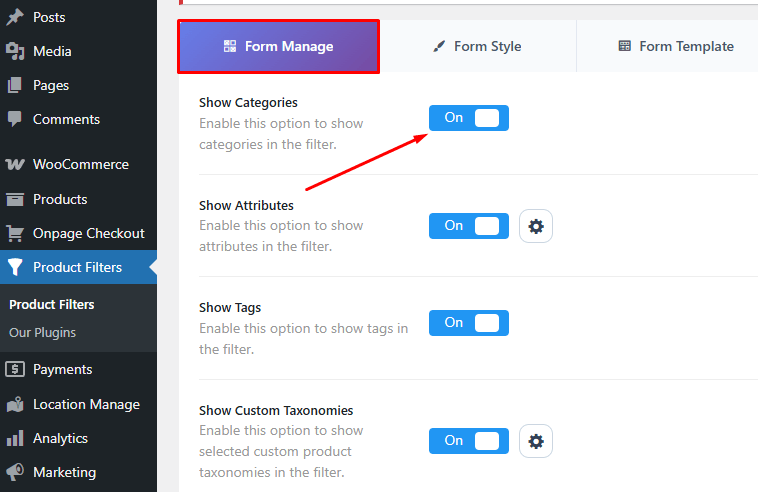
Step 2: Enable the Category Filter
- Go to Product Filters → Form Manage
- Find the Show Categories option
- Turn it on to enable category filtering
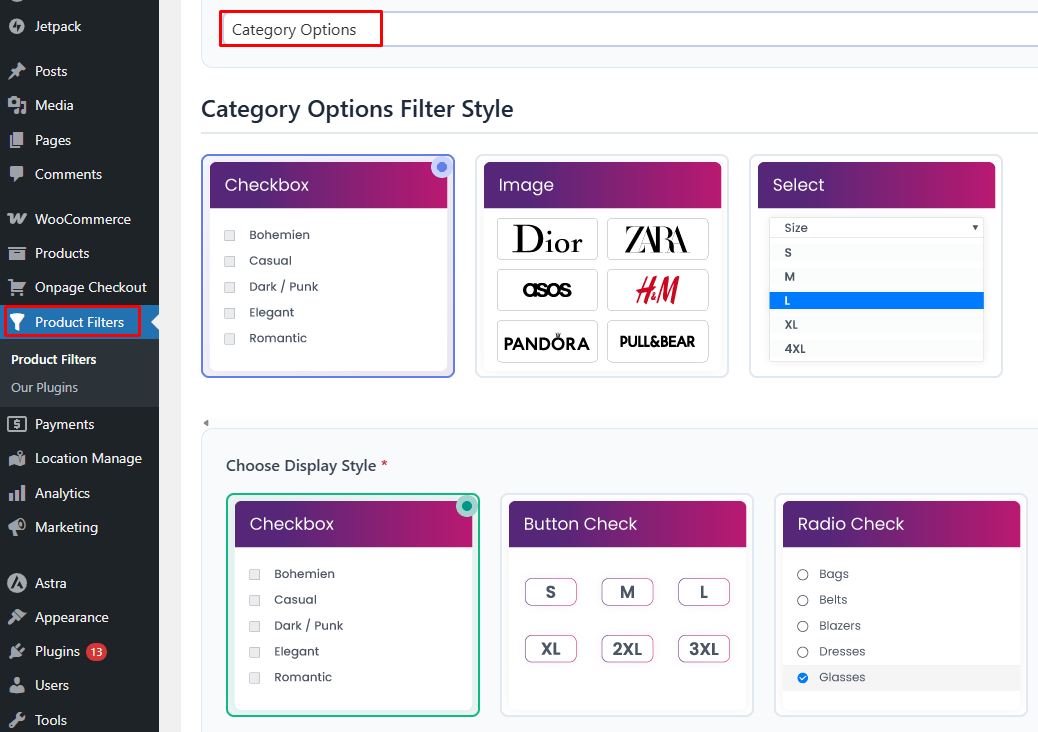
Step 3: Choose the Category Filter Style
- Go to Product Filters → Form Style
- Select Category from the attribute dropdown
- Select the filter style
- Choose how the filter should appear
- Configure optional and advance setting
- Save Changes
Step 4: Save and Display the Filter
- Click Save after finishing the filter settings
- Copy the [plugincy_filters] shortcode
- Paste it into your shop page, category page, or widget area where you want the filter to appear
Step 5: Test the Filter on the Front End
- Visit the page where the filter is placed
- Select a category and confirm products update correctly
- Test it on both desktop and mobile
Best Method to Choose
Right method depends on how your store is built and how shoppers move through the catalog. Some stores only need a basic category filter in the sidebar, while others need faster, more flexible product filters for WooCommerce to handle larger product ranges and smoother browsing.
| Store Type | Recommended Method | Why |
| Small stores | Product Categories Widget or Product Categories Block | Simple to set up and easy to manage |
| Medium stores | Product Categories Block or AJAX Category Filtering | Better layout control with more flexible filtering |
| Large stores | AJAX Category Filtering | Faster category browsing and better scalability |
When Category Filters Increase Conversions
Category filters help more when shoppers need direction before they need comparison. Clear category paths reduce confusion, shorten browsing time, and help users reach the right product group faster. That is one of the practical benefits of using WooCommerce product filters plugin features on stores with broader catalogs and more layered store structures.
- Large Shop Pages: Category filters make it easier to narrow a broad catalog without scrolling through unrelated products.
- Department-Style Stores: Stores with multiple product groups benefit from category filters because they act like navigation shortcuts.
- Mobile Browsing: Category-based filtering helps mobile users move through the catalog with less effort and less screen clutter.
- Multi-Category Stores: Shops that sell across different product types can guide visitors into the right section much faster.
- Early-Stage Browsing: Category filters help shoppers who are still exploring and have not decided which product features matter yet.
- Cleaner Product Discovery: Better category navigation reduces friction and helps users reach relevant products with fewer unnecessary clicks.

SEO Best Practices for WooCommerce Category Filters
Category filters can improve navigation, but they also need careful SEO handling once they start creating extra URL versions. Clean category pages can hold search value, while unnecessary filtered combinations often create duplication, weak index quality, and wasted crawl activity.
- Index Main Category Pages Only: Primary category archives usually deserve indexing because they reflect clear search intent and stable product groupings.
- Avoid Indexing Filter Combinations: URLs created by layered category selections or mixed filter states usually do not need to appear in search results.
- Keep Category URL Structure Consistent: Use one clean version of each category URL so search engines do not see multiple variations of the same page.
- Use Canonical Tags Properly: Canonical tags should point filtered or duplicated versions back to the main category page when that page is the stronger SEO target.
- Control Layered Filter Growth: Stores that also add color-based filters in WooCommerce need tighter URL control, because combining category and color filters can quickly create too many low-value page variations.
- Exclude Thin Filter URLs From Sitemaps: Sitemaps should focus on valuable indexable pages, not temporary filter states or navigation-based URLs.
- Do Not Let AJAX Views Create Index Noise: If filtering happens through AJAX, make sure those states do not generate crawlable low-value pages.
- Protect Crawl Budget on Large Stores: Stores with many categories and layered filters can create thousands of unnecessary URLs if index control is not handled early.
Common Problems With Category Filter and How to Fix
Small setup mistakes can make a category filter feel broken even when it is technically active. Poor placement, missing category assignments, layout conflicts, and weak mobile handling are some of the most common issues. Fixing them early helps keep filtering clear, accurate, and easier to use across the store.
| Problem | Likely Cause | How to Fix |
| Filter is not showing on the page | Added to the wrong sidebar, block area, or page template | Check whether your shop page uses widgets, blocks, or shortcode placement, then add the filter in the correct location |
| Categories appear but do not filter products | Products are not assigned to the correct categories | Edit your products and confirm each one is placed under the right category |
| Filter works on one page but not another | Shop and category templates are set up differently | Review both templates and make sure the filter is added to each required archive area |
| Filter layout looks broken | Theme styling is conflicting with the filter design | Test with theme defaults first, then adjust spacing, width, or custom styling as needed |
| Too many categories make the filter hard to use | Category structure is too deep or cluttered | Simplify the category tree and keep naming clearer so shoppers can scan options faster |
| Filter feels slow or clunky | Page reloads, caching, or heavy layouts are interfering | Use AJAX filtering where possible and clear any cache after making changes |
| Mobile users struggle to use the filter | The filter takes too much space or is poorly positioned | Use collapsible sections or cleaner placement so the filter stays usable on smaller screens |
| Filter creates messy SEO URLs | Layered filter combinations are generating too many indexable pages | Keep primary category pages indexable and prevent low-value filter combinations from being indexed |
FAQs About WooCommerce Category Filters
Practical questions usually come up once the category filter is added and tested on a real store. Things like filter behavior, store structure, shopper intent, and theme setup can all affect how useful category filtering feels in daily use. These FAQs cover some of the most relevant points store owners often want to clarify before refining the setup further.
Can Category Filters Help Shoppers Who Do Not Know Exactly What They Want?
Yes. Category filters are especially useful for broad browsing because they help shoppers move into the right product group before they start comparing details.
Should Every WooCommerce Store Use Category Filters?
No. Stores with a very small catalog or only one narrow product type may not need them. They become more useful when the catalog has multiple groups or departments.
Do Category Filters Work Better Than Attribute Filters?
Not necessarily. Category filters and attribute filters do different jobs. Categories help with store structure, while attributes help narrow products by traits like size, color, or material.
Can I Use Category Filters With Other WooCommerce Filters?
Yes, and that is often where they become more useful. A category filter can act as the first step, while other filters help narrow results further after shoppers enter the right product group.
Are Category Filters Good for Stores With Seasonal Collections?
Yes. They can help separate seasonal product groups more clearly, especially when shoppers need to move between changing collections without digging through unrelated items.
Do Category Filters Need a Different Setup for Large Catalogs?
Usually, yes. Larger catalogs often need a more flexible setup so category filtering stays easy to use as the number of products and category options grows.
Final Note
Store navigation gets easier when shoppers can move through product groups without digging through unrelated items. That is really what how to add filter by categories in WooCommerce comes down to: giving visitors a clearer path through the catalog based on how your store is actually organized.
Simple stores can often manage with built-in category filtering, while larger catalogs usually need a more flexible setup. What matters most is keeping category filters clear, useful, and easy to use so browsing feels smoother from the first click.