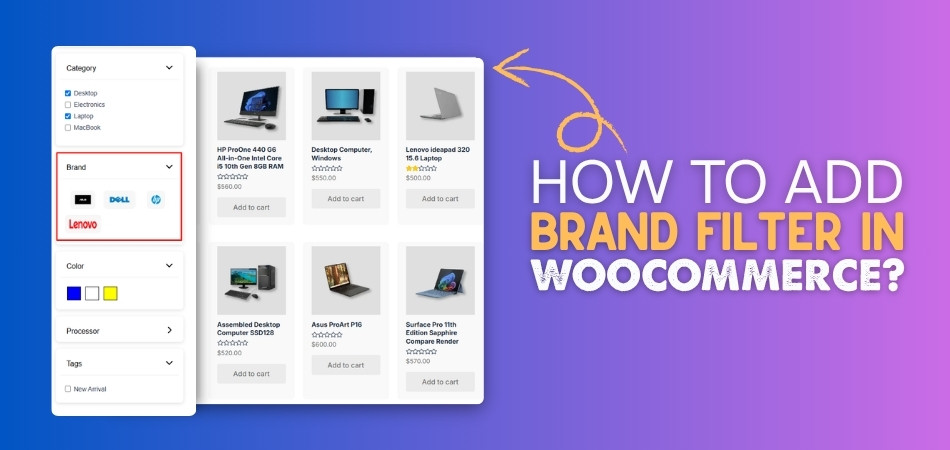
A brand filter helps shoppers narrow products based on the brands they already trust or prefer. Many buyers decide what to purchase by brand first, especially in stores where quality, reputation, or familiarity matters.
In this guide, we’ll cover how to add a brand filter in WooCommerce using different approaches, brand filter display styles, and common mistakes with practical fixes. By the end, you will know how to choose and set up a brand filter that makes product browsing easier for shoppers.
Quick Answer
WooCommerce does not include a brand filter by default. To add one, you must represent brands using either a brand attribute, a custom taxonomy, or a filter plugin that supports brands, then display that data as a filter on shop or category pages.
Use the steps below to confirm that brand filtering is visible and working correctly. More scalable methods are explained later in the guide.
AI Feature-Spinnest Highlight: Featured Snippet Block
- Create brands using an attribute or brand taxonomy
- Assign a brand to each product
- Add a brand filter using a widget, block, or AJAX filter
- Test the filter on the shop or category pages
What Does a Brand Filter Do in WooCommerce?
Brand filters let shoppers narrow WooCommerce products by manufacturer, label, supplier, or brand name. Instead of browsing every item, users can focus on names they already recognize, trust, or want to compare.
This works best when shoppers have a preferred brand before they start browsing. It reduces hesitation from unfamiliar options and makes it easier to compare products within a trusted set.
Example:
In an electronics store, a shopper may want to see only Samsung or Apple products. Selecting those names removes unrelated options from the results and helps the shopper compare familiar products with less distraction.
When Brand Filters Are the Right Choice
Brand filters are most useful when shoppers make decisions based on trust, recognition, or manufacturer preference. They fit WooCommerce stores where brand names carry meaning and help customers narrow choices with more confidence.
Use them when brand preference clearly affects the buying journey.
- Brand-Loyal Customers: Shoppers often return to names they already know, making it easier for them to find preferred products faster.
- Manufacturer Quality Differences: Brand-based browsing helps when product quality, warranty, reputation, or reliability changes noticeably between manufacturers.
- Multi-Brand Catalogs: Stores selling products from several labels or suppliers can help shoppers narrow large catalogs by familiar names.
- Same-Category Comparisons: Customers can compare products within one trusted brand before choosing based on price, features, or availability.
- Reseller or Marketplace Stores: Brand options make browsing easier when customers expect to filter products by manufacturer or official label.
Unlike technical attribute filters, brand filters are mainly about trust and preference. They help shoppers focus on familiar names instead of filtering only by product specifications.

Things to Prepare Before Adding Brand Filters
Clean brand data is important before adding brand filters in WooCommerce. If brands are stored inconsistently or missing from products, the filter may show incomplete results, duplicate brand names, or empty options.
Use the steps below to prepare your brand data first.
Step 1: Decide How to Represent Brands in WooCommerce
WooCommerce does not include brands as a native product field by default, so you need to decide how brand data will be stored before creating the filter.
Common options include:
- Brand as an Attribute: A simple option for small stores that only need basic brand filtering.
- Brand as a Custom Taxonomy: Cleaner structure for larger catalogs, brand archives, and long-term organization.
- Brand Through a Filter Plugin: Flexible option for AJAX filtering, styling control, logos, and advanced display options.
For long-term scalability, a dedicated brand taxonomy or WooCommerce Ajax product filter plugin setup is usually better than treating brands as a loose product detail.
Step 2: Assign Brands to Products
Brand filters only work well when products have the correct brand assigned. Missing or inconsistent brand values can stop products from appearing in filtered results.
Step-by-Step Setup at Product Level
- Open the product you want to edit
- Go to Product Data > Attributes or the plugin’s brand field
- Select the correct brand value
- Save the attribute or brand field
- Update the product
After assigning brands, test a few products from different brands to make sure they appear under the right filter option.
How to Add a Brand Filter in WooCommerce
Adding a brand filter in WooCommerce starts with organizing brand names and connecting them to the right products. Once the brand data is ready, you can display it as a filter on the shop page, category page, sidebar, or product archive.
The methods below show different ways to set up brand filtering based on how your store handles brand information.
Method 1 (Basic): Add Brand Filter Using Attribute Widget
If brands are stored as a WooCommerce attribute, you can use WooCommerce’s attribute filter to show them in a sidebar or widget area. This method works best for classic themes, small stores, and limited brand lists.
Step-by-Step Setup (Widgets)
- Create the Brand under Products > Attributes
- Assign the Brand attribute to the right products
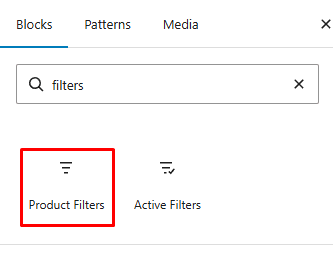
- Go to Appearance > Widgets
- Open the Shop Sidebar or product archive sidebar
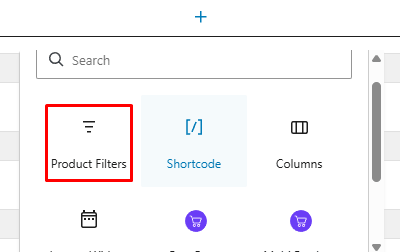
- Add Product Filters or the available WooCommerce attribute filter widget

- Click on the [+] icon to add the filter block
- add the Brand Filter on the block
- Save the widget area
- Test the filter on your shop or category page

Limitation
- May reload the page after selection
- Does not show brand logos by default
- Offers limited styling control
- Has limited advanced multi-brand behavior
- Depends on the theme sidebar/widget support
Method 2 (Block Themes): Add Brand Filter Using Blocks
Block-based WooCommerce themes usually require filters to be added inside shop templates. This method is useful when your store uses the Site Editor instead of classic widget areas.
Step-by-Step Setup (Block Editor)
- Go to Appearance > Editor
- Open Templates
- Choose Shop, Product Catalog, or the relevant product archive template
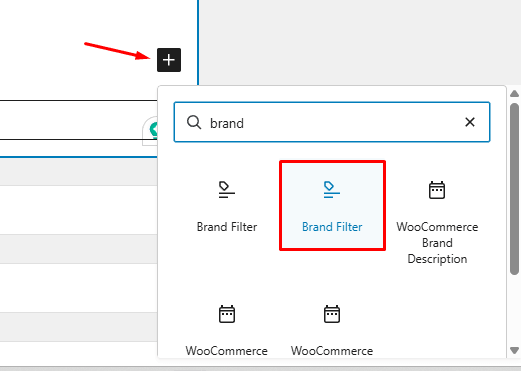
- Add the Product Filters block or Filter by Attribute block

- Click on the [+] icon and insert Brand Filter into the block
- Save the template
- Test the filter on the front end
![Click on the [+] icon and insert Brand Filter into the block](data:image/svg+xml;base64,PHN2ZyB4bWxucz0iaHR0cDovL3d3dy53My5vcmcvMjAwMC9zdmciIHdpZHRoPSI0OTEiIGhlaWdodD0iNDUwIiB2aWV3Qm94PSIwIDAgNDkxIDQ1MCI+PHJlY3Qgd2lkdGg9IjEwMCUiIGhlaWdodD0iMTAwJSIgc3R5bGU9ImZpbGw6I2NmZDRkYjtmaWxsLW9wYWNpdHk6IDAuMTsiLz48L3N2Zz4=)
This helps the brand filter appear correctly in block-based WooCommerce layouts.
Method 3 (Recommended for Brand-Focused Stores): Use AJAX Brand Filtering
Brand-based browsing works best when shoppers can move between familiar names without waiting for full page reloads. An AJAX brand filter plugin like Dynamic AJAX Product Filters for WooCommerce keeps the browsing flow smoother. Here is the full installation and setup process.
Step 1: Install and Activate the Plugin
For the free version:
- Open Plugins > Add New
- Search for Dynamic AJAX Product Filters for WooCommerce
- Click Install Now
- Click Activate

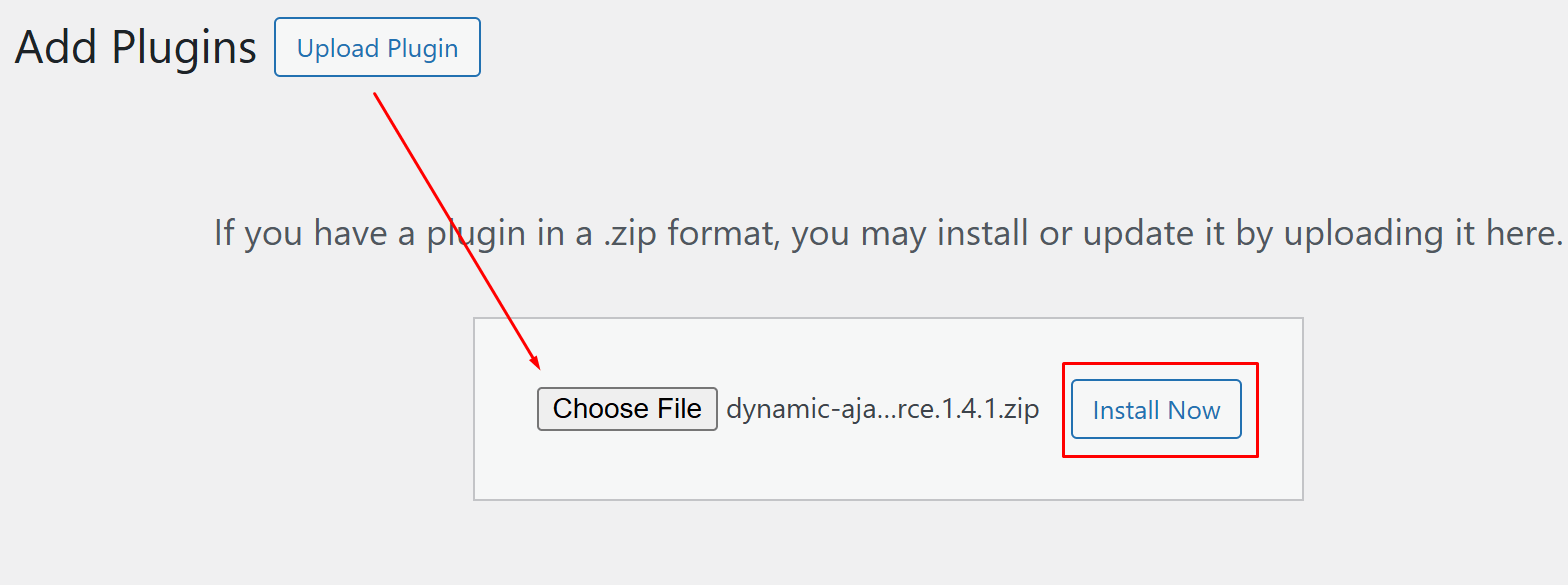
For the paid version:
- Purchase and download the plugin ZIP file from Plugincy.com
- Open Plugins > Add New > Upload Plugin
- Upload the ZIP file
- Click Install Now
- Activate the plugin

Step 2: Enable the Brand Filter
- Go to Product Filters > Form Manage
- Turn on Show Brand
- Save the changes

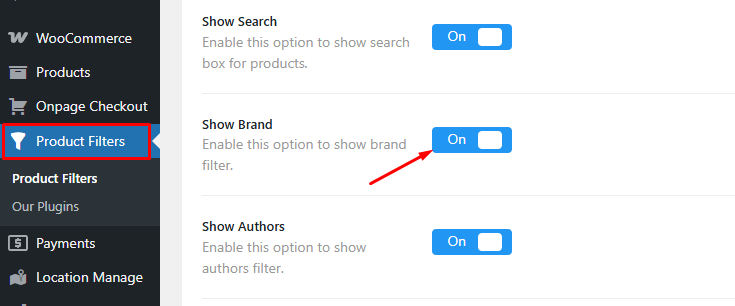
After this, the brand filter becomes part of your product filter form.
Step 3: Choose the Brand Display Style
- Open Product Filters > Form Style
- Select Brand from the dropdown
- Choose a filter style that fits your layout
- Pick the display style for brand options
- Add brand icons or logos from Advanced Options for Terms, if needed
- Configure optional and advanced settings based on your store design


Use a clean text list for small brand sets. For recognizable brands, icon or logo-based display can make scanning easier.
Step 4: Add the Filter to Your Page
- Open the shop page, category page, sidebar area, or product archive where the filter should appear
- Add the shortcode: [[plugincy_filters]]
- Add the products shortcode if you want products to display beside the filter: [[products]]
- Save or update the page
Step 5: Save and Test
- Open your shop page on the front end
- Select one brand and check the results
- Try switching between brands
- Test multiple brand selections if enabled
- Confirm the filter resets correctly
- Review the layout on mobile
Brand Filter Setup Based on Brand Data Type
Brand filters work better when the setup matches how your store handles brand information. Before choosing a method, look at whether your brands are simple text labels, structured brand terms, visual logos, or part of a larger catalog system.
| Brand Data Type | Best Setup | Best Fit |
| Simple brand names | Attribute-based filter | Small stores with a short list of brands |
| Brand names inside block templates | Product Filters block | Stores using block themes and Site Editor layouts |
| Many brands across categories | AJAX brand filter | Catalogs where shoppers need faster brand switching |
| Brands with logos or icons | AJAX filter with brand images | Stores where visual recognition helps browsing |
| Dedicated brand pages | Custom taxonomy or plugin-based brand setup | Stores that need a cleaner brand organization and SEO control |
Match the filter setup to the role brands play in your store. If brands are only basic product labels, attributes can work. If they guide browsing, recognition, or SEO structure, use a stronger setup with AJAX, images, or taxonomy support.
How to Choose the Right Brand Filter Display Style?
Choosing the right display style depends on how many brands your store has, how much space is available, and how shoppers recognize brand names. Short lists can stay visible, while longer lists usually need dropdowns, search, or logo-based layouts.
Here are the best options to choose from.
- Checkbox List: Best for short brand lists where shoppers can quickly scan and select familiar names without extra clicks.
- Dropdown Filter: Useful for medium brand lists when you want to save sidebar space and keep the filter area cleaner.
- Searchable Select: Better for large brand catalogs because shoppers can type the brand name instead of scrolling through long lists.
- Logo or Image Style: Works well when shoppers recognize brands visually, and logos help them find familiar names faster.
- Alphabetical List: Helpful for stores with many brands because users can browse names in a predictable A-to-Z order.
- Collapsible Section: Best for mobile layouts or crowded filter areas where brand options should stay available without taking too much space.
Single Brand Selection vs Multi-Brand Selection
Single-brand selection and multi-brand selection serve different shopping behaviors. Use single selection when shoppers want one exact brand, and use multi-selection when they want to compare several acceptable brands before narrowing further.
| Single Brand Selection | Multi-Brand Selection | Use Case |
| Shows products from one selected brand only | Shows products from two or more selected brands | Electronics shoppers comparing Samsung and Apple phones |
| Best when shoppers already know the brand they want | Best when shoppers have several trusted brands in mind | Fashion shoppers browsing Nike, Adidas, and Puma together |
| Keeps results narrow and focused | Keeps results broader for comparison | Beauty shoppers comparing skincare products from multiple familiar brands |
| Works well for small brand lists | Works better for larger multi-brand catalogs | Marketplace stores with many sellers, labels, or manufacturers |
| Reduces filter complexity | Gives shoppers more flexibility | Sports gear stores where users compare several performance brands |
| Better for brand-loyal customers | Better for comparison-driven shoppers | Appliance shoppers comparing LG, Samsung, and Whirlpool before choosing |
Choose the selection type based on shopper intent. Single-brand filtering supports focused brand loyalty, while multi-brand filtering supports shortlist-style browsing where customers keep several trusted names in view before making a final choice.
Common Brand Filter Mistakes and Fixes
Brand filter issues usually come from messy brand data, poor display choices, or products not being connected to the right brand terms. Fixing these problems helps shoppers find trusted names faster and prevents empty or confusing filter results.
Using Duplicate Brand Names
Duplicate names split products across separate filter options. For example, HP, H.P., and Hewlett Packard may appear as different brands even though they refer to the same company.
Fixes:
- Choose one official brand name format
- Merge duplicate brand terms
- Avoid spelling variations and unnecessary abbreviations
- Review brand names before importing new products
Leaving Products Without Brand Assignments
Products without a brand value may not appear when shoppers use the brand filter. This can make results look incomplete, especially in large catalogs.
Fixes:
- Check products from Products > All Products
- Assign the correct brand attribute, taxonomy, or plugin brand field
- Review newly added products before publishing
- Bulk update brand values when possible
Showing Empty Brand Options
Empty brand terms create dead-end clicks because shoppers select a brand and see no products. This can hurt trust in the filter.
Fixes:
- Hide empty brand terms from the filter
- Remove unused brand names
- Check product visibility and stock status
- Recheck brand terms after product imports
Choosing the Wrong Display Style
Long brand lists can feel cluttered if every option appears at once. Small stores may not need search or dropdown controls, while large catalogs usually do.
Fixes:
- Use checkboxes for short brand lists
- Use searchable dropdowns for long lists
- Use logo style only for recognizable brands
- Keep mobile layouts compact and easy to scan
Forgetting Brand Logos or Labels
Logo-only filters can confuse shoppers if icons are unclear, while text-only filters may feel less useful for highly visual brands.
Fixes:
- Pair logos with text labels when possible
- Use consistent logo sizes
- Avoid blurry or cropped images
- Add readable labels for accessibility
Not Testing Brand Filters on Category Pages
A brand filter may work on the main shop page but fail or show odd results on category pages if the filter setup is not tested across templates.
Fixes:
- Test the filter on shop and category pages
- Try different brand and category combinations
- Check active filters and reset behavior
- Confirm AJAX updates work across product archive pages
Brand Filter Optimization Tips
Better WooCommerce brand filter optimization helps shoppers find trusted names faster without making the product archive feel crowded. Focus on clean data, clear display choices, and smooth navigation so users can narrow products with less effort.
Use these tips to improve the experience after setup.
- Show Product Counts: Display item counts beside brand names so shoppers know how many products are available before selecting a filter.
- Sort Brands Clearly: Use alphabetical sorting for long lists and popularity-based sorting when certain brands drive most searches.
- Keep Popular Brands Visible: Place top-selling or frequently searched brands higher so returning shoppers can find them quickly.
- Add Search for Long Lists: Include a search field when your store has many brands, so users do not need to scroll through every option.
- Use Clear Active Filters: Show selected brand names above the product grid or near the filter area so users understand the current results.
- Make Reset Easy: Add a visible, clear button so shoppers can remove brand selections and return to the full product list quickly.
- Check Mobile Layout: Use dropdowns, collapsible sections, or filter drawers so brand lists stay easy to use on smaller screens.
Optimize brand filters around clarity and speed. Clean brand data, visible product counts, searchable lists, and easy reset options help shoppers narrow products faster without making the archive feel cluttered.
FAQs About Brand Filters in WooCommerce
WooCommerce brand filters help shoppers narrow products by trusted names, but store owners often need clarity on setup, visibility, product search, and B2B use cases. These FAQs answer common questions not covered in the main setup steps.
Can I Add Brand Filters Without a Separate Brand Plugin?
Yes, you can use a WooCommerce product attribute named Brand for a basic setup. A separate plugin is only needed when you want AJAX filtering, logos, advanced layouts, or custom brand behavior.
Should Brand Filters Appear on Every Category Page?
Not always. Brand filters should appear where brand choice helps shoppers narrow products. If a category has only one or two brands, showing the filter may add unnecessary clutter.
Can Brand Filters Work With Product Search Results?
Yes, brand filters can work with search results if your theme or filter plugin supports filtering search/archive pages. Test search pages separately because some layouts handle filters differently.
Why Are Some Brands Missing From the Filter?
Brands may be missing if no visible products are assigned to them, products are out of stock, the brand term is empty, or the filter is set to hide unavailable options.
Are Brand Filters Useful for Wholesale or B2B Stores?
Yes, they can help wholesale and B2B buyers reorder from preferred manufacturers, compare supplier lines, or narrow catalogs by approved brands more quickly.
End Note
Knowing how to add a brand filter in WooCommerce gives your store a clearer path for shoppers who browse by manufacturer, label, or trusted product name. When brand data is organized well, users can move through large product lists with more confidence and less guesswork.
Keep the setup focused on real shopping behavior. If customers often recognize, compare, or return to specific brands, a well-placed brand filter can make the catalog easier to scan and the buying journey more intentional.