The Dynamic AJAX Product Filters plugin allows you to filter products by price in WooCommerce. Here’s a step-by-step guide to setting up price filters, including customization options for the price widget.
Step 1: Add Products and Set Price
- Go to All Products:
- Navigate to Products > All Products in your WordPress dashboard.
- Edit or Add a New Product:
- Click on an existing product to edit it or click Add New to create a new product.
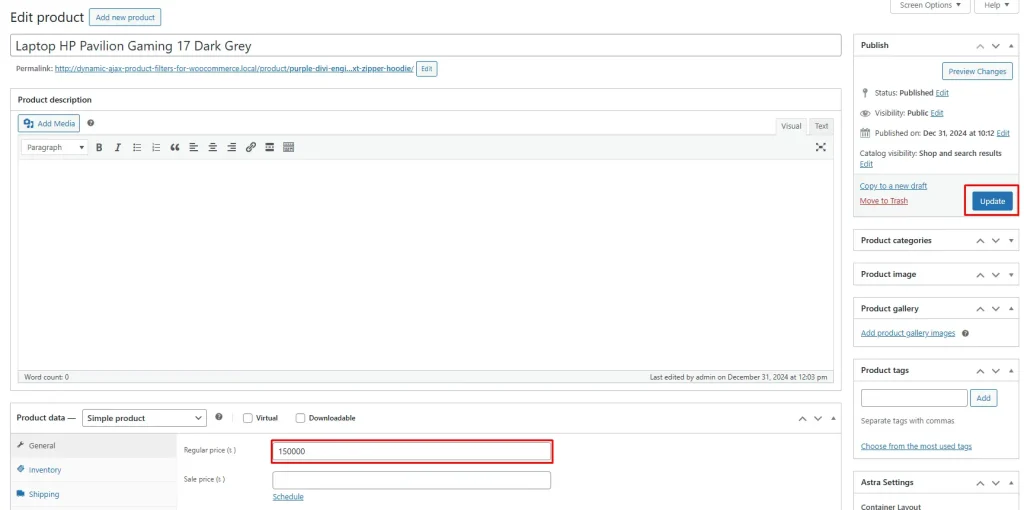
- Set the Price:
- In the product edit screen, locate the Product data section.
- Enter the price in the Regular price field.
- Click Update or Publish to save your changes.
Step 2: Manage Price in the Filter Widget Form
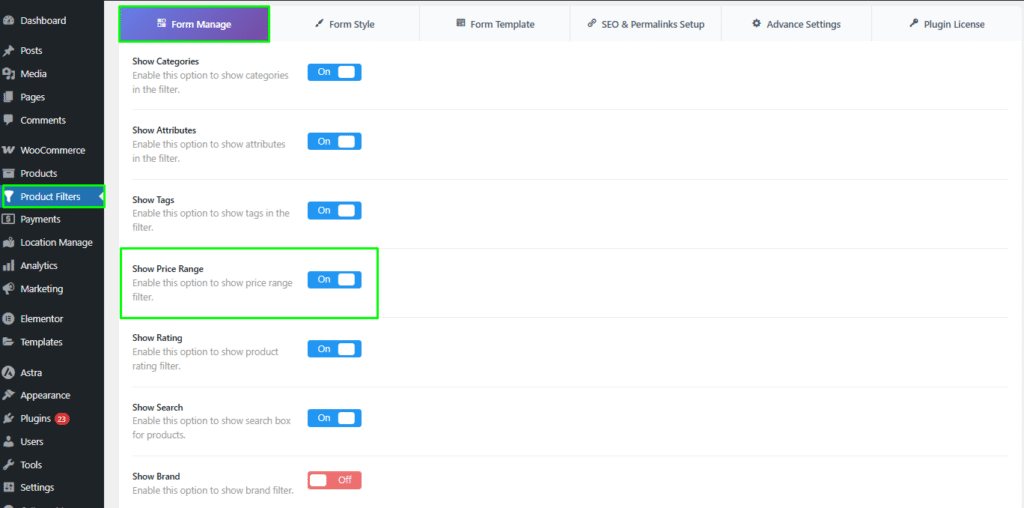
- Access Filter Settings:
- Go to Product Filters > Form Manage in your WordPress dashboard.
- Show Price:
- In the settings, find the Show Price option.
- Toggle this option on or off to control whether the price filter appears in the widget.
Step 3: Style/Design/Customize the Price Widget
- Access Form Style Settings:
- Go to Product Filters > Form Style in your WordPress dashboard.
- Select Price from Dropdown:
- From the Select Attribute dropdown menu, choose Price.
- Choose Price Style Options:
- Select one of the style options:
- Price
- Select one of the style options:
- Select Suboptions:
- Based on the style option you choose, configure the suboptions (Price, Slider, Slider 2, and Input Price Range) to customize the appearance and functionality of the price widget.
- Set Minimum & Maximum Price:
- In the Optional Settings section, look for fields labeled Min Price and Max Price.
- Enter the desired minimum and maximum price values to limit the range of prices available for filtering.
Optional Settings
The Optional Settings section allows you to control the appearance, behavior, and ordering of individual filter widgets.
Set Min & Max Price
Defines how the minimum and maximum values for the price filter are set.
- Auto Set – Automatically sets min and max prices based on available products.
- Disabled (Manual) – Allows you to manually enter custom minimum and maximum price values.
Enable Minimization Option
Controls whether the filter widget can be collapsed.
- Disabled – Filter always stays expanded
- Enabled with Arrow – Toggle using an arrow icon
- Enabled without Arrow – Toggle without showing an icon
- Initially Minimized – Filter loads in collapsed state
Show / Hide Widget Title
Controls the visibility of the filter title on the frontend.
- Show – Display title
- Hide – Hide title
Widget Title
Set a custom title for the filter widget.
Min Input Label
Set the label text displayed for the minimum price input field.
Default: Min Price
Max Input Label
Set the label text displayed for the maximum price input field.
Default: Max Price
Advanced Settings
The Advanced Settings section lets you fine-tune filter behavior, appearance, and user interaction, including term logic, search options, tooltips, and auto-suggestion.
CSS Class
Add a custom CSS class to the filter widget for custom styling or JavaScript targeting.
Tooltip Settings
Provides additional information for filter terms.
- Enable / Disable Tooltip
- Tooltip Text – Set tooltip content
Show in Active / Chips Filter Widget
Displays selected filter terms in the Active Filters or Chips widget for easy visibility and removal.
Step 5: Save Changes
After customizing the category widget, make sure to click Save to apply your changes.
Step 6: Display the Product Filter on Your Webpage
- Insert Filter Shortcode:
- Visit the page where you want to display the product filter.
- Add the shortcode
plugincy_filtersto the desired location (e.g., in a page or widget).
- Optional Product Shortcode:
- If you want to display products alongside the filters, you can also include the shortcode
products.
- If you want to display products alongside the filters, you can also include the shortcode
- Customize Sidebar or Page:
- You can add the filter shortcode to a sidebar widget or directly within a page’s content.
Once you have completed these steps, customers will be able to filter products by price on your webpage using the Dynamic AJAX Product Filters plugin. The customizable price widget enhances the user experience, allowing users to find products that meet their budget more efficiently.