Enhancing customer trust at checkout is crucial for improving conversion rates. The Trust Badges feature allows you to display trust signals and security badges on the checkout page.
Step 1: Install the Plugin
Before configuring the Trust Badges, ensure the plugin is installed. For detailed installation steps, please visit the [Installation Guide Documentation Page].
Step 2: Configure Trust Badges
- Log in to your WordPress admin dashboard.
- Go to Onpage Checkout.
- Click on Advanced Settings.
Trust Badges Configuration
- Enable Trust Badges: Toggle this option to display trust signals and security badges on the checkout page.
- Badge Position: Choose the position of the badges:
- Above Checkout Form
- Below Checkout Form
- Next to Payment Methods
- Badge Style: Select how the badges will be displayed:
- Horizontal Row
- Grid (2 columns)
- Vertical List
- Badge Items: Add the specific trust badges you want to display.
- Advanced: Custom HTML: If you prefer, you can use custom HTML to define your trust badges instead of the predefined options.
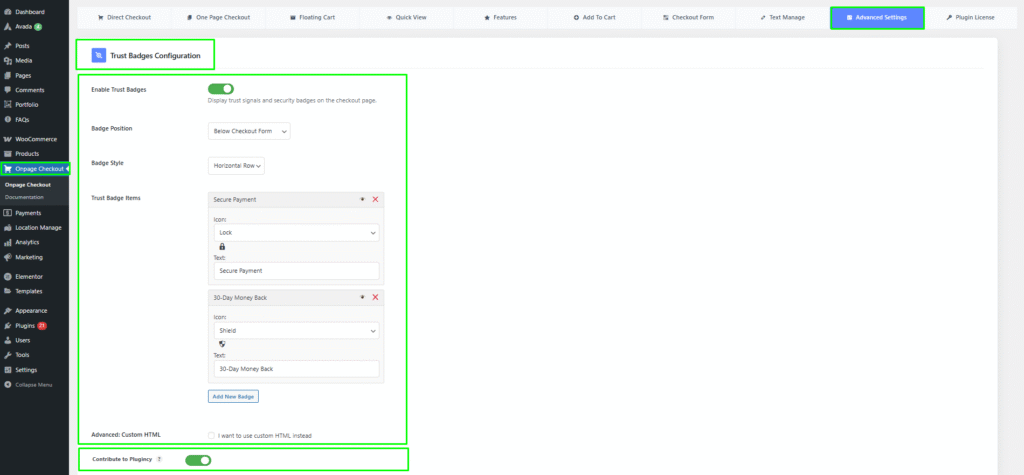
Contribute to Plugincy
Join our community! Report bugs, suggest new features, or contribute code and documentation to improve Plugincy.
This documentation provides a comprehensive guide for configuring Trust Badges in the One Page Quick Checkout for WooCommerce. For further assistance, please refer to our support section or contact our support team.