Brand filters are one of the simplest ways to help people shop faster in an online store. They let shoppers narrow products by specific names without scrolling endlessly. If you are working with WooCommerce, you might already be thinking about how to create a brand filter dropdown in WooCommerce?
You can create a brand filter dropdown in WooCommerce, install the Dynamic AJAX Product Filters plugin, enable the Show Brand option, and set the filter style to Select or Select 2 under Form Style > Configure Style > Brands. Add the filter to the sidebar widget and assign brands to products.
If you are curious about setting up a brand filter that works smoothly, you will find everything here in detail. This article explains the installation steps, brand setup, style options, and even why dropdown filters improve customer shopping. All the important details are included so you can set it up without confusion.
How to Create a Brand Filter Dropdown in WooCommerce?
Adding a brand filter dropdown in WooCommerce helps your customers quickly find products by brand. Since WooCommerce doesn’t have this option by default, you can easily set it up with a plugin. Below is a complete step-by-step guide that shows you how to install the plugin, enable the brand filter, and assign brands to your products.
Step 1: Installing the Plugin
To create a brand filter dropdown in WooCommerce, you need the right tool because WooCommerce by itself does not provide this feature. A plugin makes the whole process easier by adding filter options without needing any coding. One of the most popular options is called Dynamic AJAX Product Filters for WooCommerce. This plugin comes in both Free and Pro versions, and you can choose the one that fits your needs. Using a reliable WooCommerce product filter plugin like this helps customers shop faster and improves the overall store experience.
Free Version Installation
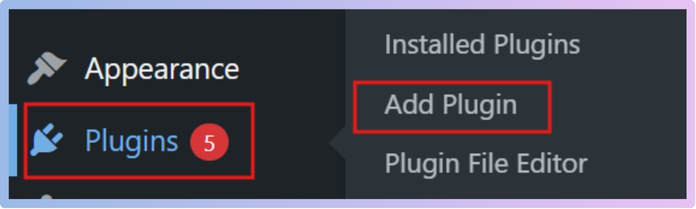
- Go to your WordPress Admin Dashboard.
- From the left menu, click on Plugins.
- Select Add New Plugin.

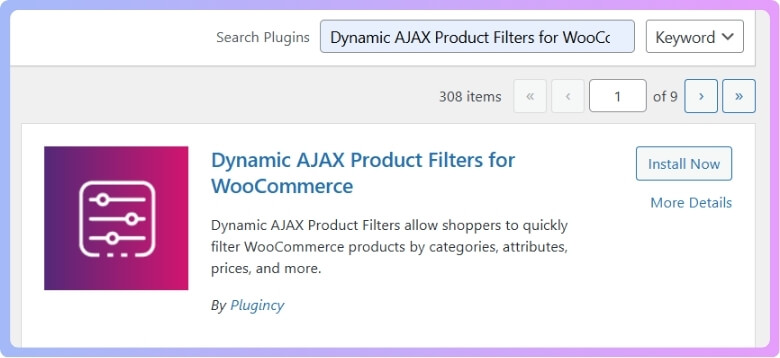
- In the search bar, type Dynamic AJAX Product Filters for WooCommerce.

- Find it in the results and click Install Now.
- Once installed, click Activate.
Now the free version is active and ready to use with basic features.
Pro Version Installation
If you purchase the Pro version, you’ll receive a ZIP file along with a license key. This version unlocks more advanced filter options. To install it:
- Go to your WordPress Dashboard.
- Click on Plugins.
- Select Add New Plugin.
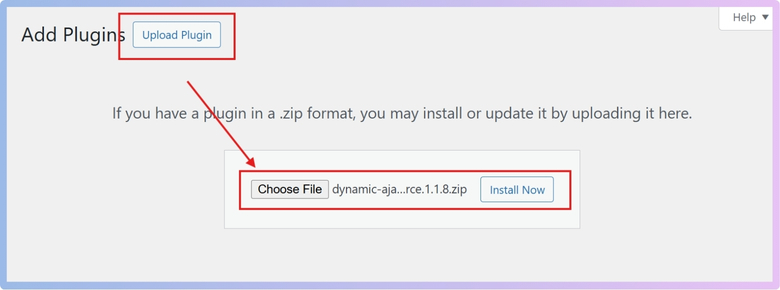
- Click on Upload Plugin.
- Choose the ZIP file you downloaded.
- Click Install Now.

- Once installed, click Activate.
- From your dashboard menu, go to Product Filters > Plugin License.
- Paste the license key you received.
- Click Activate License.

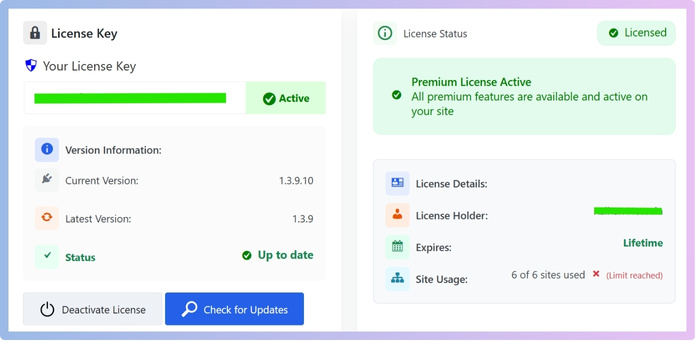
Now the Pro version is set up, and all the advanced features are available.
Step 2: Enable the Brand Filter
Here, you will turn on the option to use brands in the filter.
- From your dashboard, go to Product Filters > Form Manage.
- Find the option Show Brand.
- Turn it on.
- Click Save Changes.

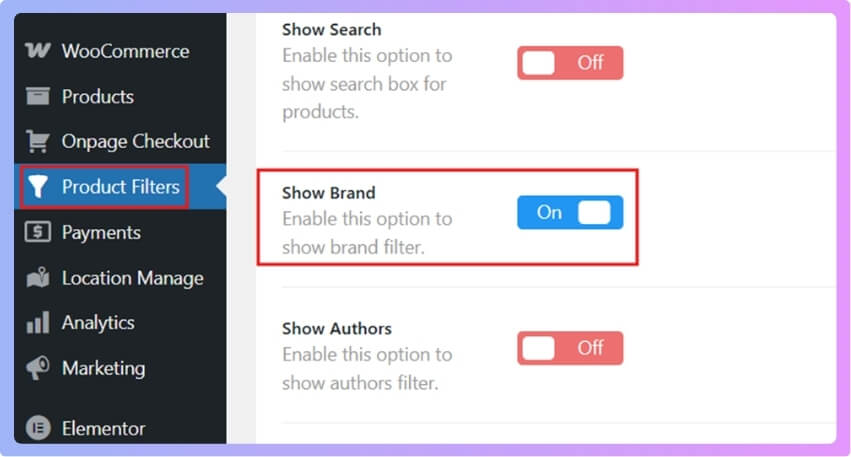
Now the brand filter option is enabled.
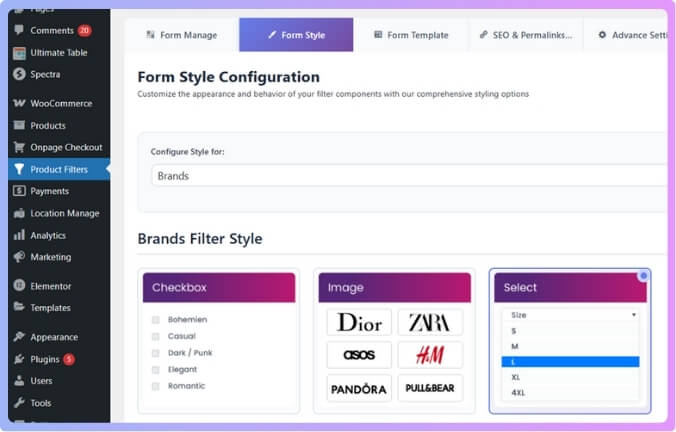
Step 3: Choose the Dropdown Style for the Brand Filter
After enabling the brand filter, you can set its style to a dropdown.
- Go to Form Style in the plugin settings.
- Choose Configure Style as Brands.
- You will now see Brand Filter Styles.

- There are three styles available. To create a dropdown, choose Select.
- Under Select, you can pick between Select and Select 2.
- Choose one option and click Save Changes.

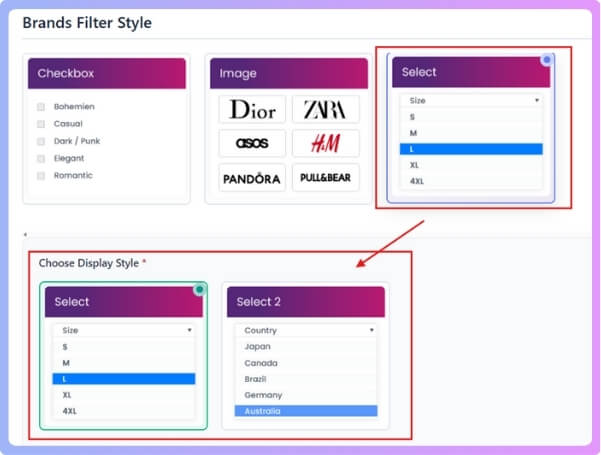
Now the brand filter will appear as a dropdown menu.
Step 4: Add Brand Filter to Sidebar
To display the filter on your site, place it in a widget area like the WooCommerce sidebar.
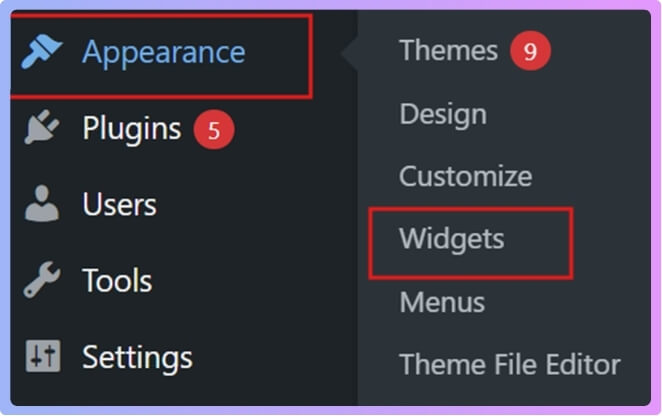
- Go to Appearance > Widgets.

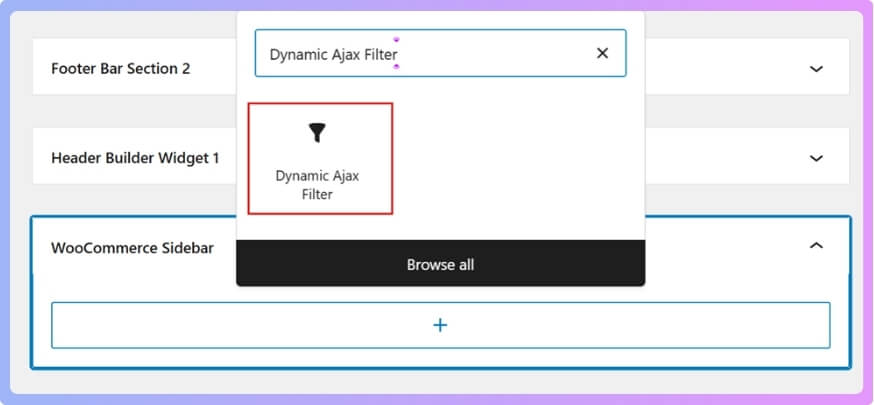
- Select a sidebar (for example, WooCommerce Sidebar).
- Click + and search for Dynamic Ajax Filter.
- Add it to the sidebar.

- Click Update to save changes.
Your brand filter dropdown will now show on the shop page.
Step 5: Create Brands in WooCommerce
For the dropdown to work, you must have brands created. If you don’t, then create brands in WooCommerce. This is how you can do it:
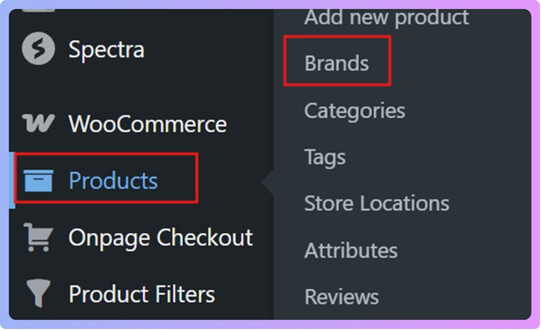
- Go to Products > Brands from the dashboard.

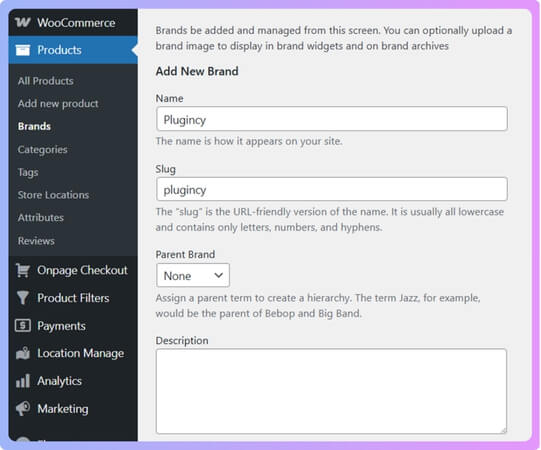
- Enter the Brand Name (example: Plugincy).
- Enter the Slug (example: plugincy).

- If needed, you can also add a description or logo (but for dropdown filters, a logo is not necessary).
- Click Add New Brand.
Repeat these steps to add as many brands as you need.
Step 6: Assign Brands to Products
Finally, you must assign brands to products so that the filter works correctly.
- Go to Products > All Products.

- Pick a product you want to edit.
- On the right-hand side, look for the Brand option.
- Select the brand you created earlier.

- Click Publish or Save Draft.
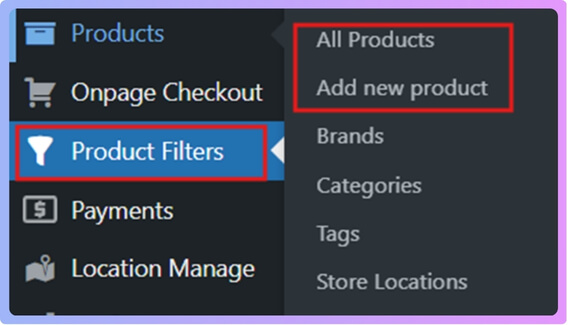

If you are adding a new product, you will also see the brand option on the right. Just choose the brand and save.
That’s all you need to do to create a brand filter dropdown in WooCommerce. With these steps, your customers will be able to filter products by brand in a clean dropdown menu, making shopping faster and easier. Start setting it up today and give your store a more professional look.
Why Should You Use the Dynamic Ajax Product Filters Plugin for Dropdown Brand Filters?
Helping customers find products in any online store quickly is essential. The Dynamic Ajax Product Filters plugin makes browsing smooth and efficient. Dropdown brand filters add clarity, save space, and give shoppers an easier way to refine results. Let’s explore why they’re such a smart choice.
Faster Experience
With AJAX, the page doesn’t reload each time a customer selects a brand. Products update instantly on the same page. This quick response makes shopping feel smooth, reduces waiting, and keeps people from leaving out of frustration.

Clean Design
Dropdown filters take less space compared to long lists of checkboxes or links. They look tidy and fit well with any store design. If your shop has many brands, this clean look makes it easier for people to browse without feeling overwhelmed.
Searchable Dropdowns
The plugin supports advanced dropdowns that let customers type and search within the list. This is especially useful when you have 50 or more brands. Instead of scrolling endlessly, they can quickly type a few letters to find the brand they want.
SEO Benefits
Filtered pages can have their own URLs, titles, and descriptions. This means search engines can index them, and people might land directly on those pages when searching for a specific brand. More visibility in search results means more chances to get buyers.
Smarter Filtering
The plugin supports cascading filters, where choosing one option updates the next. For example, picking a brand can adjust related filters like model or category. This avoids empty results and gives a better shopping flow, saving time for customers.
Using Dynamic Ajax Product Filters for dropdown brand filters makes your store faster, neater, and smarter. It improves both customer experience and visibility in search engines, helping your shop attract and keep more buyers.
Why Use a Brand Filter Dropdown in WooCommerce?
Running an online store means ensuring customers can quickly find what they need. Brand filters make this easier, and dropdown-style options add even more convenience. They save space, improve navigation, and create a smoother shopping experience. Let’s explore why they matter:
Saves Space
One of the key reasons to use WooCommerce brand filters in a dropdown style is that they save space and keep navigation simple for customers. Instead of showing a long list of brand names, a dropdown neatly hides them until clicked, leaving the page clean.
Cleaner Layout
A dropdown filter helps in keeping the layout neat. Customers are not distracted by too many options showing at once. This clean look also makes the website more professional and well-arranged, which improves the overall shopping experience.
Easy Brand Search
Customers often look for a specific brand directly. A dropdown filter lets them quickly scroll through names and select the one they want. This reduces the time they spend searching and makes the process more enjoyable and stress-free.
Better Navigation
Dropdowns make it easier for customers to move through your store without feeling lost. Having one organized box for brands means they can focus on finding products faster. This keeps them engaged and less likely to leave your site.
Improved Shopping
When the shopping process feels smooth, customers are more likely to stay longer and buy more. A dropdown filter removes clutter, makes searching simple, and gives a better overall shopping experience. This small change can lead to more satisfied buyers.
Using a dropdown brand filter in WooCommerce is a smart way to save space, keep navigation clean, and help customers find what they want quickly. Small design choices like these can make a big difference in sales.
What Are the Differences Between Dropdown and Checkbox Brand Filters in WooCommerce?
When setting up brand filters in WooCommerce, you usually get two common options: Dropdowns and Checkboxes. Both have their own strengths, and the right choice depends on how many brands you have and how you want customers to interact with the filter.
| Feature | Dropdown | Checkbox |
| Best for | Large brand lists (many options) | Small to medium brand lists (fewer options) |
| Space usage | Compact, takes up little space on the page | Takes up more space, especially with many brands |
| Selection type | Usually single selection (user picks one brand at a time) | Allows multiple selections (user can filter by several brands at once) |
| User experience | Cleaner design, avoids clutter | More flexible for customers who want to compare across brands |
| Load time & speed | Faster for very long lists, since only one choice is shown at once | Slower and less practical if the list is too long |
| Scrolling/Navigation | Requires opening a dropdown menu, which may be less obvious to some users | Brands are visible right away, no need to click to open |
| When to use | When you have 20+ brands or a very long list | When you have fewer than 15 brands and want to allow multi-select |
Dropdowns are better when you want a clean look with lots of brands, while checkboxes are better when you want customers to quickly pick and compare multiple brands. Choosing the right filter type makes shopping easier and improves the overall store experience.
Where Should You Place a Brand Filter Dropdown in WooCommerce?
Running a WooCommerce store means giving shoppers an easy way to filter products by brand for a smoother browsing experience. A brand filter dropdown helps buyers quickly find what they want and improves their shopping journey. Here are some of the best places to position it effectively:
- Sidebar placement: Adding the filter in the sidebar keeps it always visible while shoppers scroll through products, making it simple to switch between different brands quickly.
- Top navigation bar: Putting it in the main navigation bar makes the filter instantly accessible, especially for returning customers who already know their favorite brands.
- Above product listings: Showing the dropdown at the top of product archive pages helps buyers apply filters before scrolling through long product lists, saving them time and clicks.
- Category pages: Displaying it on category pages allows users to refine their search within a specific product type, giving them a focused browsing experience with fewer distractions.
- Shop page header: Adding the filter to the shop page header works well if you want it highlighted as an important tool for brand-focused shoppers.
- Mobile-friendly menu: Including the dropdown inside the mobile navigation or collapsible menu makes it accessible without cluttering the screen for users on smaller devices.
- Sticky filter bar: A floating or sticky dropdown that stays visible while users scroll ensures they don’t have to scroll back up to change their brand choice.
A smartly placed brand filter can make shopping faster, reduce frustration, and guide buyers directly to what they’re looking for. The goal is to place it where it feels natural and easy to use.
How Does a Brand Filter Dropdown Improve Customer Experience in WooCommerce?
When customers shop online, they want quick ways to find products. Dropdown filters play an important role here by making searches simple and smooth. They also make store navigation more organized. Let’s explore how these filters improve customer experience.
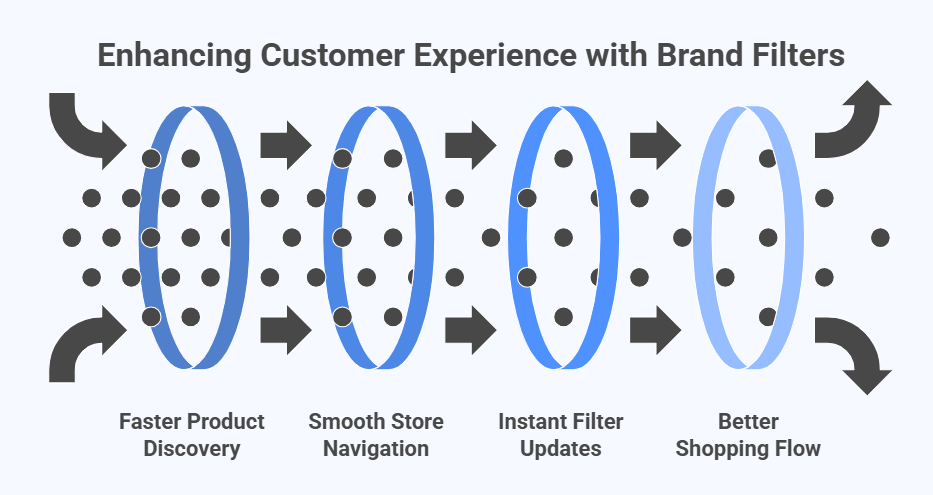
Faster Product Discovery
A dropdown filter helps customers quickly spot the brand they are searching for without scrolling through long pages. This speed makes shopping more enjoyable and reduces wasted time. Quick access to products keeps buyers happy and ready to purchase.
Smooth Store Navigation
Dropdowns create a cleaner store structure by grouping brand names inside a single box. Instead of being distracted by a long list of links, customers only see what they need when they click. This organized navigation makes the store easier to use.
Instant Filter Updates
One way to improve speed is to enable Ajax brand filtering in WooCommerce, which makes dropdown selections update results instantly without reloading the page. This feature keeps customers engaged, as they see products appear right away without interruption.
Better Shopping Flow
When navigation feels natural, customers move smoothly from one product to another. Dropdown filters cut down on confusion and guide users directly to their desired items. This improves the shopping flow and encourages buyers to stay longer in your store.
More Sales Opportunities
By giving customers a faster and easier way to reach the products they want, dropdown filters can directly lead to more sales. The less effort it takes to shop, the more likely people are to buy multiple items.
Brand filter dropdowns improve customer experience by making searches faster, navigation smoother, and shopping more enjoyable. Small updates like adding Ajax filtering can create a big impact on sales and customer satisfaction.
FAQs About How to Create a Brand Filter Dropdown in WooCommerce?
When setting up a brand filter dropdown in WooCommerce, many store owners have common questions. These questions usually come up when installing, styling, or managing the filter. To make things simple, here are some important FAQs with clear answers you can follow.
Can I Use a Brand Filter Dropdown Without Coding in WooCommerce?
Yes, you can create a brand filter dropdown without touching any code. Plugins like Dynamic Ajax Product Filters are built to make this process easy for everyone. All you need to do is install the plugin and adjust the settings. This way, even beginners can set it up smoothly.
Does a Brand Filter Dropdown Slow Down My WooCommerce Store?
A well-coded plugin will not slow down your site if used properly. Since it works with Ajax, product results update quickly without reloading the whole page. This actually makes the store feel faster and smoother for shoppers. Always keep your plugin updated to avoid performance issues.
Can I Customize the Design of the Brand Filter Dropdown?
Yes, most plugins allow you to change the design of the dropdown. You can adjust the colors, fonts, and overall style to match your theme. Some plugins also support advanced styles like Select2, which adds a search box inside the dropdown. This helps the dropdown blend nicely with your store’s layout.
Can I Show a Brand Filter Dropdown Only on Certain Pages?
Yes, you can choose where the filter appears. For example, you can place it only on shop pages, category pages, or even specific product archive pages. Most plugins let you control this using widgets or shortcodes. This flexibility helps you keep your store organized and user-friendly.
Is It Possible to Make a Brand Filter Dropdown Mobile Friendly?
Yes, the dropdown style works very well on mobile devices. It saves space and makes it easier for users to scroll and choose brands on smaller screens. Many plugins also have responsive settings to improve mobile performance. This ensures your store looks professional on all devices.
Can I Use Multiple Filters Along With the Brand Dropdown?
Yes, you can combine brand dropdowns with other filters like color, size, or price. This gives customers more ways to refine their searches. Most plugins allow you to stack or link filters for smarter results. Offering multiple filter types creates a better shopping experience overall.
Can I Translate the Brand Filter Dropdown Into Other Languages?
Yes, most filter plugins support translation or work with translation tools like WPML or Loco Translate. This means you can change the filter labels into any language you want. It helps make your store accessible to global customers. Having a multilingual filter also improves customer trust.
Do I Need the Pro Version of a Plugin to Use Brand Filter Dropdowns?
The free version of many plugins already supports brand dropdown filters with basic features. However, the Pro version often comes with extra styles, advanced options, and better SEO features. If you want more control and customization, the Pro version is worth it. But for simple needs, the free version works fine.
Can I Track How Customers Use the Brand Filter Dropdown?
Yes, you can track filter usage by connecting your store with tools like Google Analytics. Some plugins also have built-in reports to show which filters are used most. This data helps you understand what brands are popular among customers. Tracking usage can guide future marketing or product decisions.
What Should I Do If The Brand Filter Dropdown Does Not Show Up?
If the filter doesn’t appear, first check if you placed the widget or shortcode correctly. Then make sure you have created and assigned brands to products in WooCommerce. Also, confirm that the plugin is activated and that the settings are saved. If it still doesn’t work, clearing the cache or contacting plugin support usually solves the problem.
Conclusion
Adding a brand filter dropdown in WooCommerce is more than just a design choice; it is a tool that makes shopping easier for customers and gives your store a cleaner, more professional look. It reduces clutter and improves the way people explore products.
So, how to create a brand filter dropdown in WooCommerce? The answer is simple: install a plugin like Dynamic AJAX Product Filters, enable the brand option, choose the dropdown style, add it to your sidebar, and assign brands to products.
To make the most out of it, always keep your filters visible, test on mobile devices, and update your brands regularly. These small steps make shopping faster and keep your store user-friendly. Best wishes as you set it up successfully.