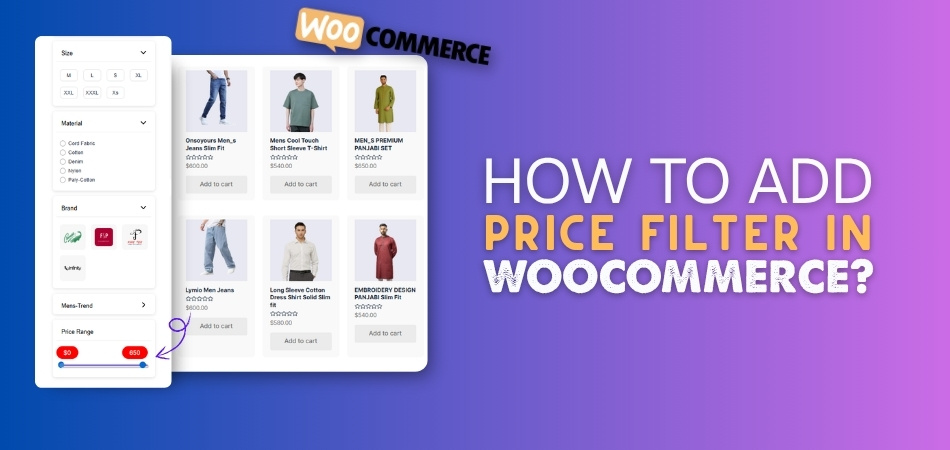
A price filter helps WooCommerce shoppers narrow products by budget, such as low-cost, mid-range, or premium options. To add price filter in WooCommerce, place a price filter widget, Product Filters block, shortcode, or AJAX price filter on the shop or category page so customers can refine products by price range.
In this guide, you’ll learn how to add price filter in WooCommerce using multiple methods. You’ll also learn what to check before setup, how price logic works for sale and variable products, when to use AJAX, and how to handle SEO, conversion, and troubleshooting issues.
Quick Answer
Follow this checklist to confirm the price filter is added correctly and working as expected. More detailed methods, customization options, and performance guidance are covered later in the guide.
- Go to Appearance → Widgets (or Customizer → Widgets)
- Add Product Filters to the shop sidebar
- Adjust the Price Filter options
- Save the changes and test the filter on a product category page
If your store uses the block editor, open the Shop template and add the Product Filters block instead.
What a Price Filter Does in WooCommerce
A price filter lets shoppers narrow WooCommerce products by selecting a price range that matches their budget. Instead of reviewing every item in the catalog, customers can remove products that are too low or too high in price and focus on options they are more likely to buy.
Price filtering is especially useful on shop and category pages with many products or wide price differences. It helps shoppers compare items within a comfortable budget range, and when used with AJAX filtering, product results can update without reloading the full page.
Example:
If a store sells headphones from $20 to $500, a shopper with a $100 budget can set the filter to $20–$100. The shop page then shows only products within that range, making comparison faster and more focused.
What to Set Up Before Using a WooCommerce Price Filter
Before adding a price filter, make sure product prices are complete and displayed clearly. Missing prices, wrong variation prices, or confusing tax settings can make price filtering inaccurate.
Step 1: Check Product Prices
- Go to Products > All Products
- Open a product
- Review the Regular price and Sale price
- Update the product


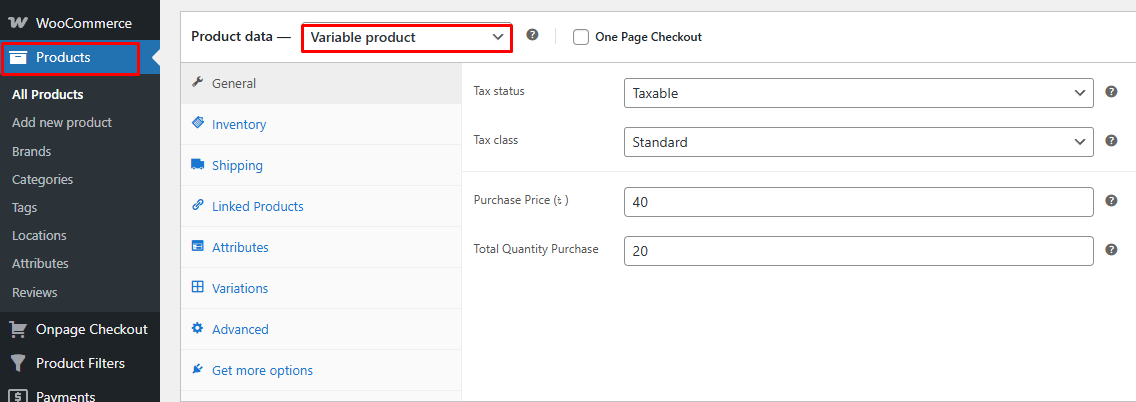
Step 2: Review Variable Prices
- Open a variable product
- Go to Product Data > Variable Products
- Check each variation price
- Save changes

Step 3: Confirm Store Price Display
- Go to WooCommerce > Settings
- Check currency settings
- Review tax display settings
- Test product prices on the shop page
Accurate product prices, variation prices, currency, and tax display help the WooCommerce price filter return the right results.
How to Add Price Filter in WooCommerce
After checking product prices, variation prices, and store price display, you can add the price filter to the shop or category layout. The right setup depends on whether your store uses classic widgets, block templates, shortcode-based extensions, or AJAX filtering.
Method 1 (Built-in): Add the WooCommerce “Filter Products by Price” Widget
Classic WooCommerce themes often use widget areas to show filters beside the product grid. This method is the fastest option when your theme includes a shop sidebar or product archive sidebar, and you only need a simple price range filter.
Step-by-Step Setup (Widgets)
- Go to WordPress Dashboard > Appearance > Widgets
- Open your Shop Sidebar or the sidebar used on product archive pages
- Add Product Filters widget to the sidebar
- Adjust the Price Filter
- Click Save
- Visit a shop or category page
- Test the price slider with different ranges

This method works best when your theme provides a visible widget area for WooCommerce product archives.
If Your Theme Has No Sidebar
- Go to Appearance > Customize > Widgets
- Check whether a shop sidebar or product archive sidebar exists
- If no sidebar is available, use the block theme method instead
Method 2 (Block Themes): Add the “Filter Products by Price” Block
Block-based WooCommerce themes usually manage shop and category layouts through templates instead of classic sidebars. In this setup, the price filter should be added inside the shop or product catalog template so it appears as part of the product archive layout.
Step-by-Step Setup (Block Editor)
- Go to Appearance > Editor
- Open Templates
- Choose Product Catalog, Shop, or the relevant product archive template
- Add the Product Filters block
- Adjust the Price Filter option inside the block
- Save the template
- Test the filter on the shop and category pages

This method is better for modern WooCommerce themes where the shop layout is controlled through the Site Editor.
Method 3 (Shortcode): Add a Price Filter Using WooCommerce Extensions
Shortcode-based price filtering is useful when you want the filter inside a custom layout, landing page, or page builder section. This method requires a WooCommerce extension that provides a dedicated price filter shortcode, because the default WooCommerce may not include one.
Step-by-Step Setup (Shortcode Option)
- Install an extension that provides a price filter shortcode
- Edit the page where products are listed
- Add a Shortcode block or page builder shortcode element
- Insert the price filter shortcode from the extension
- Publish or update the page
- Test the filter on the product listing
Price Filter Shortcode Example
If you are using WooCommerce Product Search, you can use:
[[woocommerce_product_filter_price]]
You can place this shortcode inside a Shortcode block, page builder element, or custom layout section where products are displayed.
Example With Products Displayed Below the Filter
[[woocommerce_product_filter_price]]
[[products limit="12" columns="4"]]
In this setup, the price filter appears above the product list so shoppers can filter the displayed products by minimum and maximum price.

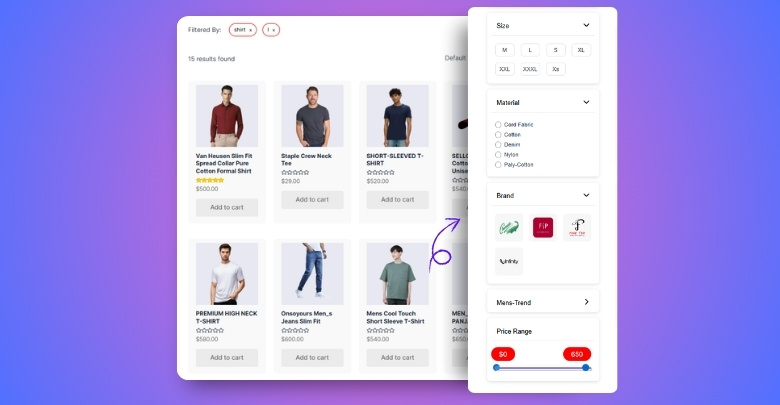
Method 4 (Recommended for AJAX): Use Dynamic AJAX Product Filters for WooCommerce
Built-in price filters are enough for simple stores, but they can feel limited when shoppers need faster price-range updates or when the shop layout needs more design control. With Dynamic AJAX Product Filters for WooCommerce, you can show a price range filter and update product results without refreshing the whole page.
Step 1: Install and Activate the Plugin
Free Version
- Go to Plugins > Add New Plugin
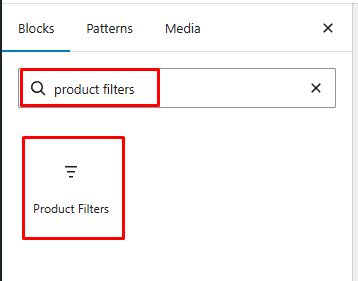
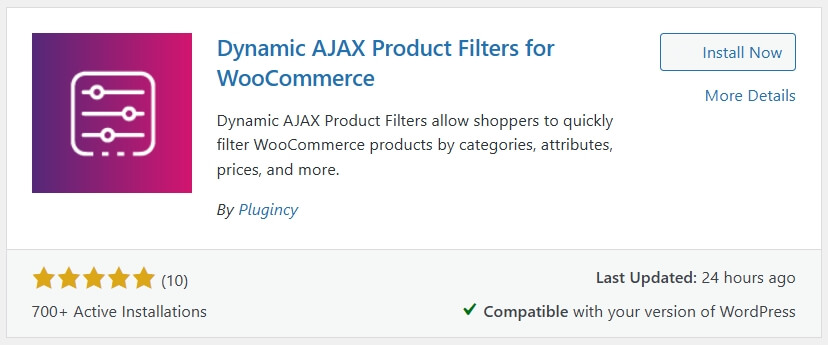
- Search for Dynamic AJAX Product Filters for WooCommerce
- Click Install Now
- Click Activate

Pro Version
- Buy the Pro version from the official website
- Download the plugin ZIP file
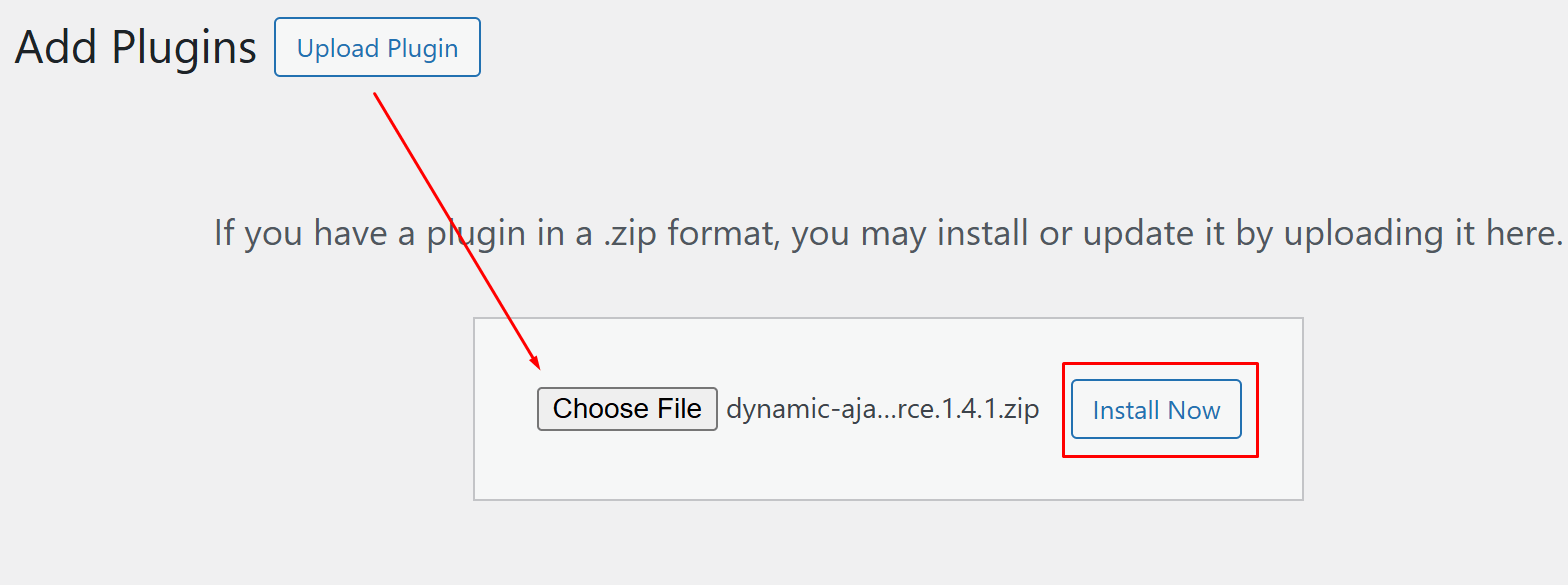
- Go to Plugins > Add New Plugin > Upload Plugin
- Upload the ZIP file
- Click Install Now
- Click Activate

Step 2: Enable Price Range Filtering
- Go to Product Filters > Form Manage
- Find Show Price Range
- Turn it on
- Save your changes
Step 3: Customize the Price Filter Style
- Go to Product Filters > Form Style
- Select Price from the filter options
- Choose the display style for the price filter
- Set minimum and maximum price values if needed
- Adjust optional or advanced settings as required
Step 4: Display and Test the Filter
Once the filter is configured, place it where shoppers can use it, such as the shop page, category page, or widget area.
- Click Save
- Open the page or section where the filter should appear
- Add the plugin shortcode: [[plugincy_filters]]
- Save or update the page
- Test the price filter on the front end
Performance Comparison: AJAX vs Non-AJAX Price Filtering
Price filtering can feel very different depending on whether product results update instantly or reload the full page. AJAX product filters for WooCommerce keep shoppers in the same browsing flow, while non-AJAX filtering is simpler but can feel slower on larger catalogs.
| Aspect | AJAX Price Filtering | Non-AJAX Price Filtering |
| Page Reload | Updates results without reloading the page | Reloads the page after each filter action |
| Speed | Feels faster because products refresh in place | Feels slower because the full page loads again |
| User Experience | Keeps browsing smooth and uninterrupted | Breaks the browsing flow after each selection |
| Mobile Performance | Works better for quick range changes on mobile | Can feel heavy on smaller devices or slower networks |
| Best For | Large catalogs, multiple filters, and active browsing | Small stores with fewer products |
| Bounce Rate Impact | Can help keep shoppers engaged longer | May increase drop-offs when filtering feels slow |
AJAX price filtering is usually the better choice for fast, scalable WooCommerce price filtering, especially on large catalogs or mobile-heavy stores.
Best Method to Choose: Fast Decision Guide
Store size, theme type, and filter complexity usually decide which WooCommerce price filter setup fits best. Built-in filters are enough for smaller catalogs, while larger stores often need AJAX filtering to keep price-based browsing fast and smooth.
| Store Size | Recommended Method | Why This Works Best |
| Small Stores: Under 200 Products | Method 1: Widget or Method 2: Block | Built-in filters are easy to manage and usually enough for small catalogs with simple filtering needs. |
| Medium Stores: 200–5,000 Products | Method 1: Classic Themes or Method 2: Block Themes, plus plugin if needed | Built-in filters can work, but plugin-based solutions improve UX and support multiple filters as the catalog grows. |
| Large Stores: 5,000+ Products | Method 4: AJAX Filtering | AJAX filtering improves speed, reduces friction, and handles large catalogs with better performance and usability. |
Built-in price filters fit smaller stores, while AJAX filtering becomes more important as catalog size, traffic, and filter complexity grow.
Price Filter Logic: Minimum Price, Maximum Price, or Visible Price
WooCommerce price filters usually match products to the selected range using the active catalog price. For variable products, the filter may consider the minimum or maximum variation price, so sale prices and variation ranges should be tested before publishing.
Minimum Price: Best for “Starting From” Product Ranges
Minimum price is commonly used when a product has multiple variation prices. For example, if a hoodie has variations priced at $30, $40, and $50, it may appear in a lower price range because the cheapest option starts at $30.
This helps shoppers find products that fit within their budget, even if some variations cost more.
Maximum Price: Important for Wide Variation Ranges
Maximum price matters when variations have a large price difference. For example, if a product ranges from $30 to $80, shoppers may still see it in wider price ranges because some options reach the higher price point.
This is important for products where size, bundle quantity, material, or configuration changes the final price.
Visible Price: What Shoppers Expect the Filter to Match
Visible price is the price shoppers see on product cards, category pages, or the main shop page. For simple products, this is usually the regular or sale price. For variable products, it may appear as a range or a “starting from” price.
For the best user experience, the price filter should feel consistent with the visible product price. Test simple products, sale products, and variable products to make sure the filtered results match shopper expectations.
SEO Notes for Price Filters
Price filters can create many URL combinations, and most do not need to appear in search results. Random price ranges, stacked filter URLs, and AJAX-only views are better used for navigation, not SEO landing pages.
Practical Indexing Rule
Index only intentionally price-filtered pages with clear demand, such as Under $50 or $50–$100, and only when they contain enough useful products. Keep narrow, duplicate, temporary, or highly specific price combinations as noindex to protect crawl budget.
What to Index vs What Not to Index: Price Filters
| Scenario | Index | Noindex | Why |
| Clear price ranges, e.g., “Under $50” | ✔ | Has user intent and enough products | |
| Broad, reusable ranges, e.g., “$50–$100” | ✔ optional | Useful if it matches search demand | |
| Random or narrow combinations, e.g., “$47–$53” | ✔ | Low value and thin content | |
| Multiple stacked filters with price | ✔ | Creates duplicate intent pages | |
| Pagination + price filters | ✔ | Wastes crawl budget | |
| AJAX-only filtered views, no URL change | ✔ | Navigation-only, not SEO targets | |
| Seasonal or temporary price filters | ✔ | Short-lived value |
Index only intentional, broad price ranges with real demand. Keep random, stacked, temporary, and AJAX-only price-filter views as noindex to protect crawl budget.
Conversion Tips for Price Filters
Price filters can improve WooCommerce conversions when they help shoppers stay within a comfortable budget and compare products they are more likely to buy. A useful price filter should feel clear, fast, and easy to adjust on both desktop and mobile.
Use these tips to make price filtering more effective for purchase decisions.
- Place Price Near the Top: Price is often one of the first buying criteria, so keep the filter easy to find on shop and category pages.
- Use Realistic Price Ranges: Match filter ranges to your actual catalog prices so shoppers do not select ranges with few or no products.
- Show Currency Clearly: Make sure the filter uses the same currency format shoppers see on product cards.
- Keep Mobile Controls Easy: Use sliders, larger handles, dropdowns, or preset ranges so mobile shoppers can adjust price without frustration.
- Support Sale Browsing: Test discounted products so sale prices appear in the expected price range during campaigns or promotions.
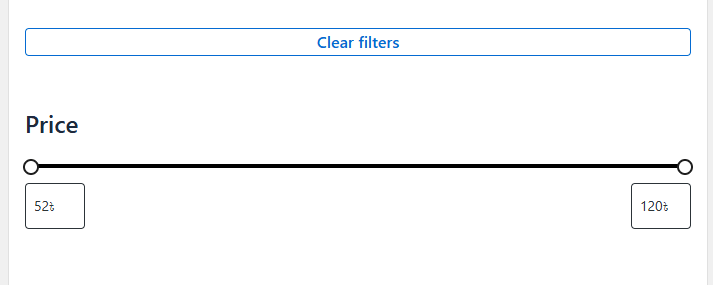
- Add a Clear Reset Option: Let shoppers remove price limits quickly if they want to return to the full product list.
- Avoid Empty Budget Ranges: Hide or avoid ranges that return no products because they can make shoppers feel stuck.
- Pair Price With Other High-Intent Filters: Price works better when shoppers can also narrow by category, brand, rating, stock, or key product details.
Troubleshooting: When Price Filter Is Not Working
Price filter issues usually come from page context, sidebar placement, cache, theme layout, or script loading conflicts. Start with the visible setup first, then move to technical checks if the slider appears, but the products do not update.
Quick Troubleshooting Checklist: Price Filter Not Working
| Issue | What to Check First | Quick Fix |
| Slider Moves but Products Do Not Change | Page has visible WooCommerce products | Test on a shop or category page |
| Slider Moves but Nothing Updates | Cached files or browser cache | Clear site cache and test in a private window |
| Slider Appears but Filtering Fails | Theme scripts or WooCommerce scripts | Check for missing or blocked scripts |
| Price Filter Widget Not Visible | Wrong sidebar selected | Confirm the sidebar used on shop pages |
| Widget Added but Still Not Showing | Shop sidebar disabled in theme | Enable the shop sidebar in theme settings |
| Price Filter Needed on Custom Page | Widget not supported in that layout | Use shortcode or template placement |
| Filter Works on Category Pages Only | Shop template missing the filter area | Edit the shop template or block layout |
Most WooCommerce price filter issues come from sidebar placement, cache, theme layout, or script conflicts rather than WooCommerce core.
Developer-Focused Troubleshooting Note
If the filter still fails, check whether the shop/archive template includes standard WooCommerce hooks such as:
woocommerce_before_shop_loop
Also, inspect the browser console for errors related to:
jQuery
wc-price-slider
AJAX requests
Custom loops, missing WooCommerce hooks, deferred scripts, minification, or aggressive cache settings can stop the price filter from updating results.
FAQs About Price Filters in WooCommerce
WooCommerce price filters help shoppers browse by budget, but store owners often need clarity on pricing behavior, sale products, product types, and filter placement. These FAQs cover extra questions that support accurate and user-friendly price filtering.
Can WooCommerce Filter Products by Price?
Yes, WooCommerce can filter products by price using a built-in widget, Product Filters block, shortcode-based extension, or AJAX product filter plugin. The best option depends on your theme and catalog size.
Why Is My Price Filter Showing the Wrong Products?
A price filter may show unexpected products when sale prices, variation prices, tax display, or product visibility settings do not match the price shoppers see on the storefront.
Does a WooCommerce Price Filter Work With Sale Products?
Yes, but the result can depend on whether the filter uses the active sale price or the regular price. Always test discounted products to confirm they appear in the expected range.
Can I Use a Price Filter on a Custom Product Page?
Yes, a price filter can work on a custom product page if the layout supports WooCommerce product queries and the filter is added through a shortcode, widget, block, or compatible filter plugin.
Is a Price Slider Better Than Fixed Price Ranges?
A price slider is better for flexible budgets, while fixed ranges work better when shoppers commonly browse by clear tiers such as Under $50, $50–$100, or Premium.
Endnote
Price is often where shoppers decide whether to keep browsing or move on. A clear price filter helps them stay focused on products that fit their budget instead of scanning through options that are too low, too high, or not relevant.
That is why learning how to add price filter in WooCommerce matters for stores with different price ranges. Keep your prices accurate, make the filter easy to adjust, and choose AJAX filtering when you want shoppers to compare products without constant page reloads.