Price filters are one of the most useful tools on any online store because they let buyers quickly focus on products that fit their budget. Many store owners want to know how to add this feature and may often think about how do I show price filter on WooCommerce shop page?
Show a price filter on the WooCommerce shop page by installing the Dynamic AJAX Product Filters plugin, enabling the price filter in settings, choosing the slider or input style, and placing the shortcode “plugincy_filters” in a sidebar, page, or widget.
If you are curious about price filters and want to understand more, this article covers everything in detail. You will find step-by-step setup, styling options, placement methods, and even performance tips. By reading further, you will get clear information that makes it easier to use price filters on your shop page.
How Do I Show Price Filter on WooCommerce Shop Page?
To show a price filter on your WooCommerce shop page, you first need to add one. WooCommerce has its own default filter option, but it’s limited if you want more design or control. That’s why many people use a plugin.
One good option is the Dynamic Ajax Product Filters for WooCommerce plugin. It comes in both free and pro (paid) versions. Let’s break down how to set it up and use it.
Installing the Plugin
The price filter is important because it lets customers quickly find products within their budget. WooCommerce’s built-in filters are limited, so you may not get much freedom in customizing the look or functionality.
By using the Dynamic Ajax Product Filters plugin, you can add flexible filters that look good and work smoothly on your shop page. This makes the shopping experience easier and helps increase sales because customers don’t waste time scrolling through products outside their price range. Adding a WooCommerce product price filter plugin gives shoppers more control and helps them buy faster.
Here’s how you can install both plugins:
Free Version
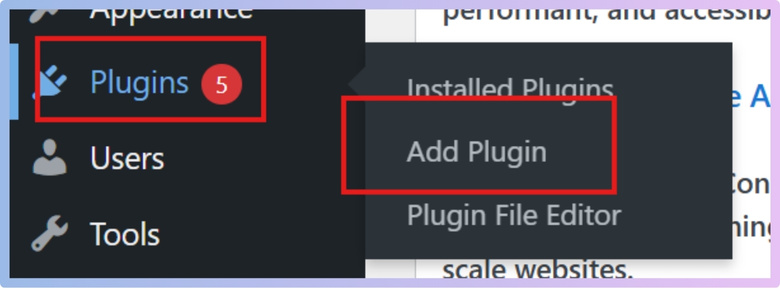
- Go to your WordPress Admin Dashboard.
- Click on Plugins in the left menu.
- Select Add New Plugin.

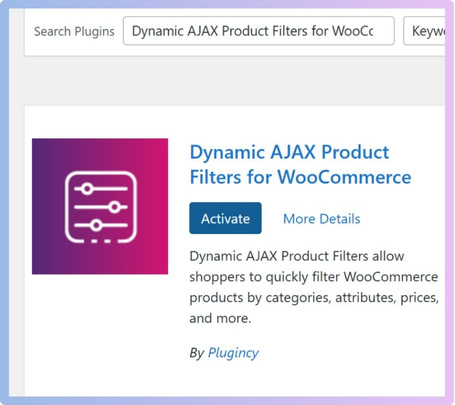
- In the search bar, type: Dynamic AJAX Product Filters for WooCommerce.
- When it shows up, click Install Now.
- After installation, click Activate.

That’s it for the free version.
Pro Version
- Go to Plugins.
- Click Add New Plugin.
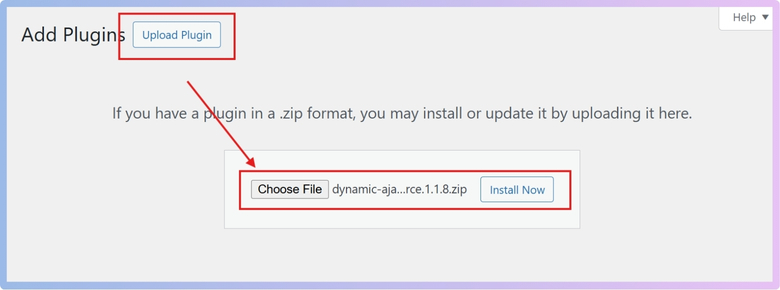
- Select Upload Plugin.
- Click Choose File and pick the plugin ZIP file you got when you purchased it.
- Click Install Now.

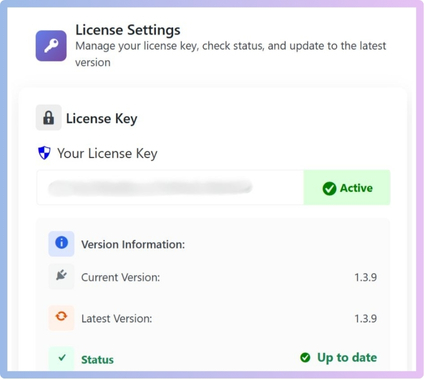
Along with the premium plugin, you will get a license key.
- Go to Product Filters > Plugin License in your dashboard.
- Paste the license key there.
- This will unlock all the premium features.

Step 1: Add Products and Set Their Price
- Go to Products > All Products in your WordPress dashboard.
- You can either:
- Click an existing product to edit it, or
- Click Add New to create a new product.
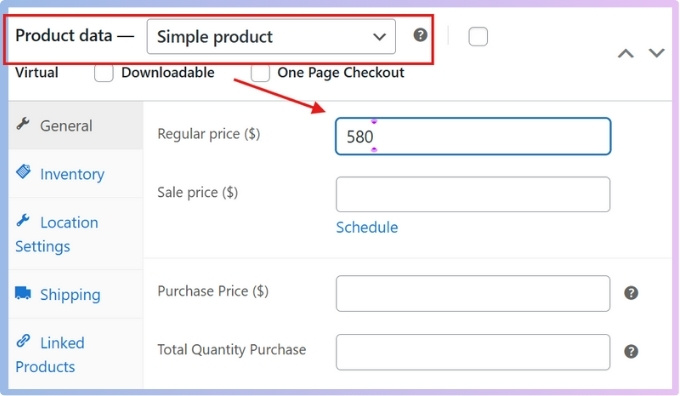
- Inside the product editing screen, look for the Product data section.
- Enter your product’s price in the Regular price field.
- Click Update or Publish to save it.

Step 2: Manage Price in the Filter Widget Form
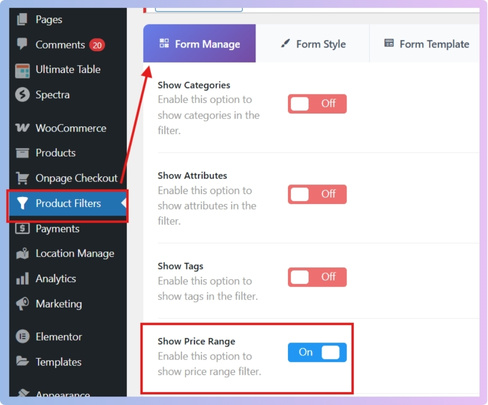
- Go to Product Filters > Form Manage.
- Find the option called Show Price.
- Toggle this option ON to display the price filter in your widget, or toggle it OFF if you don’t want it to show.

Step 3: Style, Design, and Customize the Price Widget
- Go to Product Filters > Form Style.
- In the Select Attribute dropdown, choose Price.
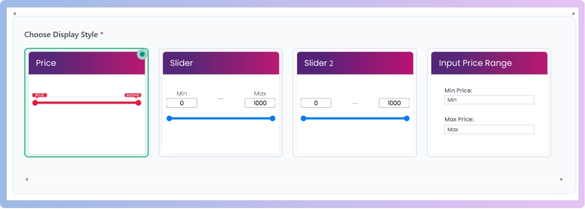
- Pick one of the style options:
- Price
- Slider (drag to select a price range)
- Input Price Range (type minimum and maximum values manually)
- In the Optional Settings, you can also set:
- Min Price: the lowest price available in the filter.
- Max Price: the highest price available.
- After making changes, click Save to apply them.

Step 4: Display the Product Filter on the WooCommerce Shop Page
There are different ways to show the filter on your shop page. You can use shortcodes, Elementor, Gutenberg (Block Editor), or Widgets. Let’s go through each option.
1. Using Shortcodes
Shortcodes are small codes you paste into your site to display features.
To show all filters, use this shortcode: [[plugincy_filters]]
This will show all available filters (price, attributes, categories, etc.). You can put this in sidebars, widgets, or pages.
It also supports attributes (extra settings) to customize it:
- attribute: choose which product attribute to filter.
- terms: set specific terms (comma-separated).
- category: filters for certain categories.
- tag: filters for specific tags.
- layout: choose between sidebar or top_view.
- product_selector: point to the product container.
- pagination_selector: points to the pagination container.
- mobile_responsive: choose style_1 to style_4 for mobile.
Example shortcode:
[[plugincy_filters layout=”top_view” mobile_responsive=”style_2″]]
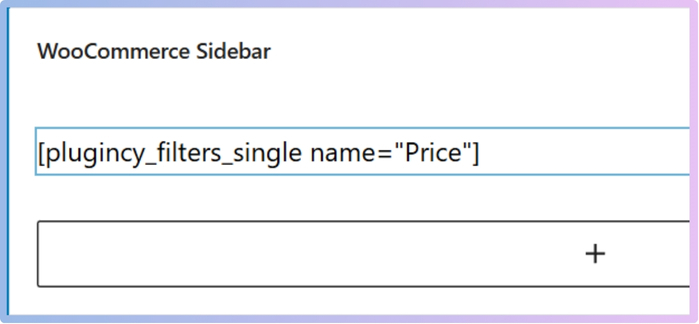
Show a Single Filter
If you want just one filter button (not all), use:
[[plugincy_filters_single name=”attribute_id”]]
Replace attribute_id with the ID of the filter you want.
Show Selected Filters
To show the filters that customers have already chosen (as chips/tags), use:
[[plugincy_filters_selected]]
Use in Sidebar
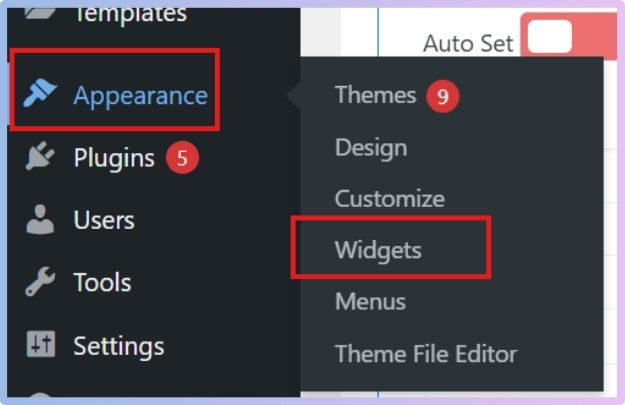
- Go to Appearance > Widgets.

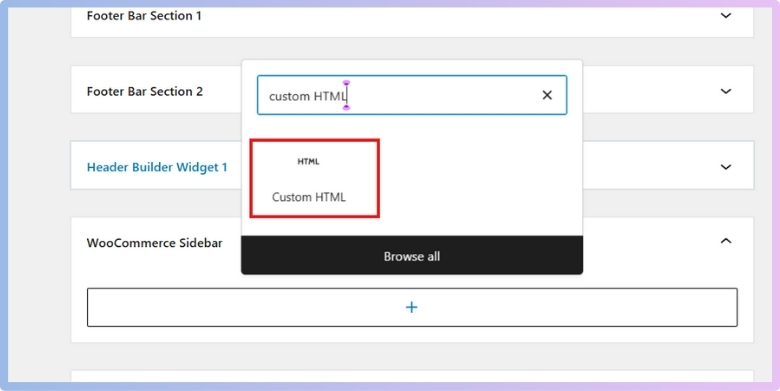
- Drag a Text or Custom HTML widget into your sidebar.

- Paste the shortcode.

- Click Save or Update.
Use in a Page
- Edit the page where you want filters to show.
- Paste the shortcode into the content.
- Update or publish the page.

2. Using Elementor
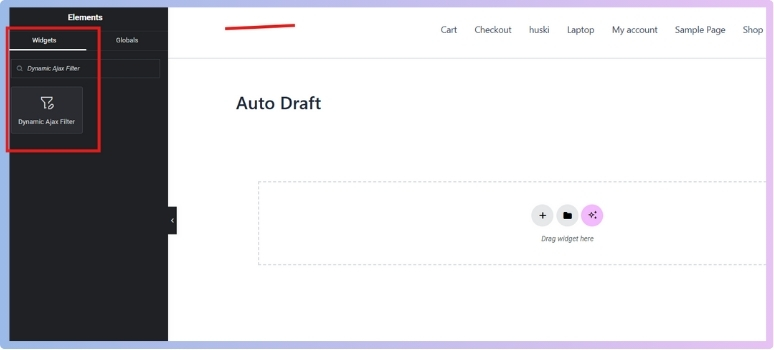
- Go to Pages or Posts and click Edit with Elementor.
- Add a new section with the + button.
- Search for the Dynamic AJAX Filter in the Elementor panel.
- Drag and drop it into your section.

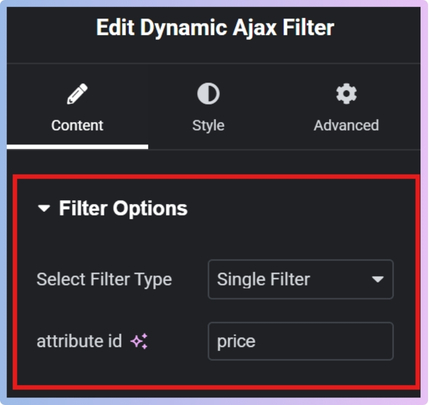
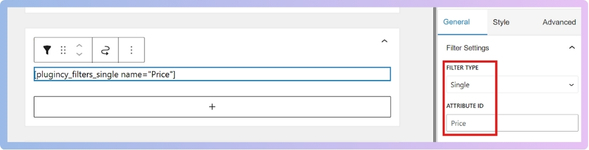
- Configure the filter:
- Select Single from the filter type.
- Set the Attribute ID (e.g., color, size, price).

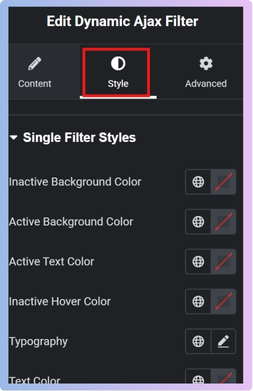
- Use the Style tab to customize appearance.

- Click Update to save.
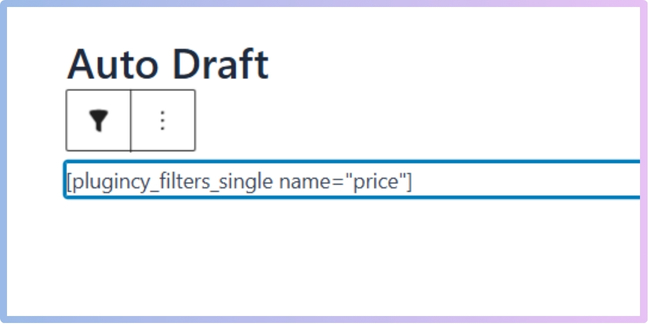
3. Using Gutenberg (Block Editor)
- Edit the page you want in Gutenberg.
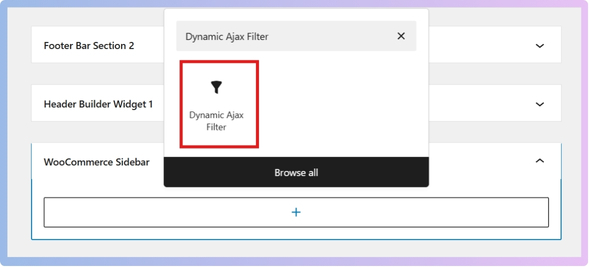
- Click the + icon to add a new block.
- Search for the Dynamic AJAX Filter block.

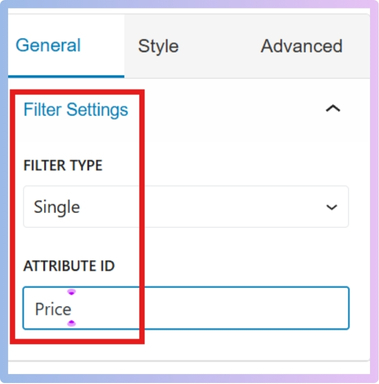
- Configure it:
- Select a Single filter type.
- Enter the Attribute ID.
- Adjust styles as needed.

- The code will look like this
- Click Update to save.

4. Using Widgets (Sidebar, Header, or Footer)
- Go to Appearance > Widgets.
- Pick the widget area (sidebar, header, footer).
- Drag and drop the Dynamic AJAX Filter block.

- Configure it with:
- Filter type: Single
- Attribute ID: choose the filter you want

- Click Save.
Showing a price filter on your WooCommerce shop page helps customers shop more comfortably. By setting products, enabling filters, styling them, and placing them where needed, you create a smooth shopping experience that guides buyers toward the right products.
Do Price Filters on the Shop Page Affect Store Performance?
Adding price filters can make shopping easier, but many store owners wonder if it slows down their site. It depends on how filters are set up and how well the store is optimized. Let’s break down the important points here.
Loading Speed
Price filters work by loading product data each time a customer changes the filter. On smaller stores, this usually happens quickly, but on larger stores with many products, it can slow down page loading. If you notice delays after adding filters to the shop page, it may be necessary to apply optimization techniques to fix WooCommerce price filter slow loading and improve overall store performance.
Server Requests
Every filter action sends a request to the server to fetch updated product results. If the hosting server is not powerful or optimized, too many requests at once can create lag. Good hosting and caching solutions help reduce the stress on the server.
Plugin Impact
Some filter plugins are heavier than others. Lightweight plugins with clean code load faster, while bulky ones may slow down the page. That’s why choosing the right filter plugin is important to balance features and speed without hurting the shop’s performance.
Optimization Tips
Using caching, a content delivery network (CDN), and optimized images can reduce the overall load on the store. Database optimization and minimizing unnecessary queries also keep filters smooth. These small improvements can make a big difference in performance.
Customer Experience
A slow shop page can frustrate customers and increase bounce rates. Smooth and fast filters help buyers find products without delay. This leads to better satisfaction and higher chances of completing a purchase, which benefits both customers and store owners.
Price filters can slightly affect speed, but with the right setup and optimization, you can keep your shop page running smoothly. Always balance functionality with performance to make sure your customers get the best shopping experience.
How Do Plugins Make It Easier to Show Price Filters on the Shop Page?
When someone shops online, being able to filter products by price is one of the most useful features. The default setup in WooCommerce gives a simple way to do this, but plugins can do much more. Let’s see how plugins improve this in different ways.
Better Filter Display
Plugins let you show price filters in a variety of styles, like sliders, dropdowns, or checkboxes. This makes it easier for shoppers to set their budget quickly. Instead of typing numbers, they can just drag or click. It feels smoother and more flexible compared to the basic WooCommerce filter.

More Filter Options
With plugins, you are not limited to only a “min to max” price filter. You can create custom ranges like “under $20” or “$50 to $100.” This makes shopping faster because customers can see set price brackets and choose one without extra effort.
Easy Customization
Third-party plugins allow shop owners to change how the filter looks and works. You can pick colors, designs, and positions that match the store’s theme. You can even choose if filters appear at the top, side, or as floating options on the page.
Faster Performance
Some plugins use advanced coding that makes filtering work instantly without reloading the entire page. This saves time and gives customers a smoother shopping experience. A quick filter response can also reduce frustration and keep people from leaving the site.
Extra Smart Features
Many plugins come with added tools like combining filters with categories or showing only available products in stock. Some even let you track which price ranges get the most clicks. This helps shop owners understand customer behavior while giving shoppers a better experience.
Plugins take the basic WooCommerce price filter and turn it into something more powerful and user-friendly. They make shopping easier, faster, and more enjoyable for customers while giving shop owners extra control.
How Does the Placement of Price Filters Affect User Behavior?
While shopping online, people rely on filters to make choices faster. Price filters are one of the most used options because they let buyers set their spending limit. The position of these filters can change how people use them, and here’s how.
Top Placement
When price filters are placed at the top, they get immediate attention. Users see them right away and often adjust them before scrolling further. This can save time and create a clear shopping path. However, it may also reduce exploration since many people will only view items in the narrowed price range.
Sidebar Placement
Price filters on the sidebar stay visible while users scroll through products. This placement feels more flexible, letting people browse and adjust later if needed. It works best for those who like to explore before deciding. But it may take longer for new visitors to notice them compared to top placement.
Ease of Access
Filters at the top are quick to find, so they attract immediate action. Sidebar filters require more attention, especially if there are many categories. For returning users, both placements work, but first-time shoppers usually respond faster to top filters.
Interaction Style
Top filters encourage one-time adjustments before exploring the products. Sidebar filters encourage repeated changes during browsing. This means top filters lead to a more focused experience, while sidebar filters allow a trial-and-error style of shopping.
Effect on Purchases
Placing filters at the top can push shoppers to decide faster since they only see items within their chosen range. Sidebar filters, on the other hand, often keep people browsing longer, which can increase the chances of impulse buys. Both placements influence buying behavior in different ways.
Where price filters are placed can shape how people shop, how much time they spend, and even what they buy. Both positions have benefits, and the choice depends on what kind of shopping experience a store wants to offer.
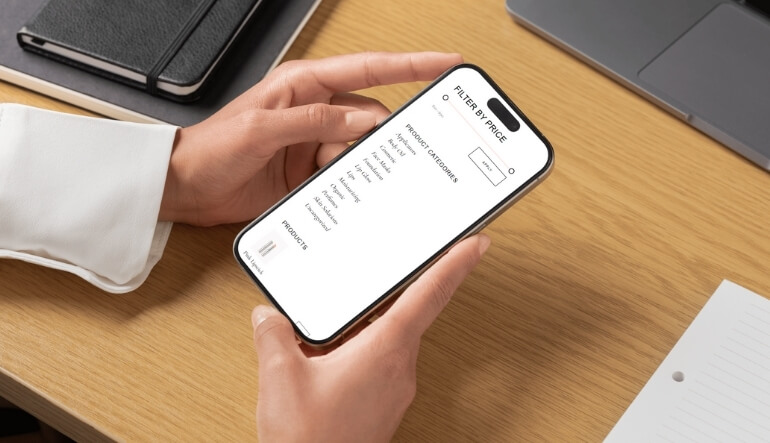
Are Price Filters on the Shop Page Useful for Mobile Shoppers?
Price filters on online shops may seem like a small feature, but they can make a big difference for mobile users. When people shop on their phones, they look for easy, quick, and simple options. Let’s see why filters matter most here.
Quick Choices
On a mobile screen, space is limited. Price filters save time by letting shoppers narrow down products without browsing endlessly. Instead of scrolling through items outside their budget, they can quickly set a range and see what truly fits.
Touch-friendly Access
Tapping on small buttons or sliders can be hard on small screens. A simple and clear price filter makes it easier to select the right range. When filters are designed for fingers instead of a mouse, shopping feels smoother and faster.
Less Scrolling
Scrolling too much on mobile can feel tiring and slow. With a price filter, shoppers avoid going through items that don’t match their budget. This helps them focus on options that matter without wasting effort on extra swipes.
Better Shopping Flow
When price filters are easy to spot, the shopping process becomes stress-free. Shoppers can adjust prices instantly and continue browsing without distractions. This simple flow keeps them engaged and makes the shopping page more enjoyable to use.
Higher Satisfaction
Mobile users are more likely to complete a purchase when filters help them find products quickly. A clear price filter improves the overall experience and builds trust in the shop. The easier it is, the more satisfied shoppers feel.
Price filters are not just a feature; they are a key tool that helps mobile shoppers save time, avoid frustration, and enjoy shopping more.
Can You Combine Price Filters with Other Filters on the Shop Page?
Filters are one of the most useful features in any online store because they help customers find exactly what they need. Many people want to know if price filters can work together with other filter types. Let’s explore the details below.
Combining Options
Price filters can easily be combined with different types of product filters. Many store owners prefer to use multiple filters with WooCommerce price filter, such as category or ratings, to make product searches faster and more accurate. This setup helps customers refine results based on both budget and preferences at the same time.
Flexible Search
When filters work together, the search feels more flexible and user-friendly. Customers can select a category, choose a color, and set a price range all in one go. This makes it quicker to find products without browsing long lists of unrelated items.
Plugin Role
Not all plugins handle multiple filters well. Some may slow down or cause conflicts if too many are active. Choosing a plugin designed to support combined filters ensures smoother performance. Always check the plugin features before deciding to use it.
Performance Factor
Combining filters may increase the number of requests sent to the server, especially if there are many products. To keep the store fast, make sure caching and optimization are in place. Balanced settings can help maintain speed while still offering multiple filter options.
Customer Benefits
Customers save time when they can apply multiple filters together. Instead of searching endlessly, they reach the products that match their needs in just a few clicks. This improves satisfaction and increases the chance of making a purchase in your store.
Yes, you can combine price filters with other filters, and it’s often a smart move. With the right plugin and optimization, this setup makes the shopping process smoother, faster, and more enjoyable for your customers.
FAQs About How Do I Show Price Filter on WooCommerce Shop Page?
Price filters are a useful tool in any WooCommerce store because they help customers find products within their budget quickly. Many shop owners want to know how price filters work, how they affect the store, and how they can be improved. Below are some common questions with easy answers that will guide you in setting up and managing price filters on your shop page.
Can I Show Different Price Filters for Different Product Categories?
Yes, you can set different price filters for different categories. For example, you may want lower ranges for clothing and higher ranges for electronics. This way, customers only see price filters that make sense for that category. It makes shopping easier because the filter feels more relevant to what they are browsing.
How Do I Test If My Price Filter Is Working Properly?
To test your price filter, visit your shop page and use the filter as a customer would. Select a range and check if the products displayed match the prices you set. If something looks wrong, go back to the plugin settings and adjust the filter options. Testing regularly helps avoid confusion for your customers.
Can I Change the Currency Symbol in the Price Filter?
Yes, the price filter will usually follow the default currency set in your WooCommerce store. If you want to change it, go to WooCommerce settings and select your preferred currency. The price filter will automatically update to display that symbol. This ensures customers see prices in the format they expect.
How Can I Make the Price Filter More Visible to Shoppers?
You can place the price filter at the top of the page, in the sidebar, or even highlight it with design elements. Using clear labels like “Filter by Price” also helps customers notice it faster. Bright colors or bold headings can make it stand out more. The goal is to make sure it’s not hidden or hard to find.
Can I Limit the Price Filter to Show Only Certain Ranges?
Yes, most plugins allow you to set minimum and maximum limits for the filter. For example, if your store sells items only between $10 and $500, you can restrict the filter to that range. This avoids confusing customers with unrealistic options like $0 or $10,000. Keeping it relevant makes it more useful.
Do Price Filters Work with Discounted or Sale Prices?
Yes, price filters usually work with both regular and discounted prices. When a product is on sale, the filter uses the current sale price to decide where it belongs. This ensures customers can still find discounted products within their budget. It helps promote sales items without extra effort.
Can I Add Multiple Price Filters on the Same Page?
You can add multiple filters, but it’s usually better to keep just one main price filter. Having too many may confuse shoppers or make the page look messy. If needed, you can add separate filters for different sections, like a sidebar and top bar. Just make sure they work smoothly together.
How Do I Translate the Price Filter for Multilingual Stores?
If your store supports multiple languages, you can use translation plugins like WPML or Polylang. These plugins help translate the labels and text in your price filter. Customers will then see the filter in their own language. This makes the store more user-friendly for international shoppers.
Can I Hide the Price Filter for Out-of-Stock Products?
Yes, some plugins allow you to show filters only for products that are in stock. This avoids frustrating customers who select a range but only see unavailable products. By hiding out-of-stock items, you create a smoother shopping experience. It also helps keep customers focused on products they can actually buy.
How Do I Track Which Price Ranges Customers Use the Most?
Some plugins include reporting tools that show which filters are clicked most often. You can also use Google Analytics to track user behavior on the shop page. Knowing the most popular ranges helps you plan promotions or adjust product pricing. This data gives you useful insight into what your customers prefer.
Conclusion
Adding a price filter to your WooCommerce shop page is one of the easiest ways to make shopping simple and effective. With the right plugin, setup, and placement, customers can quickly find items within their budget. So, how do I show price filter on WooCommerce shop page? The answer is by installing a plugin, setting prices, styling the filter, and then displaying it using shortcodes, widgets, or page builders.
To wrap up, always remember that speed and clarity matter most. Keep your filters light, mobile-friendly, and easy to use. Try different placements to see what works best for your store and customers. Keep testing, keep improving, and I wish you all the best with creating a smooth shopping experience that helps your store grow.