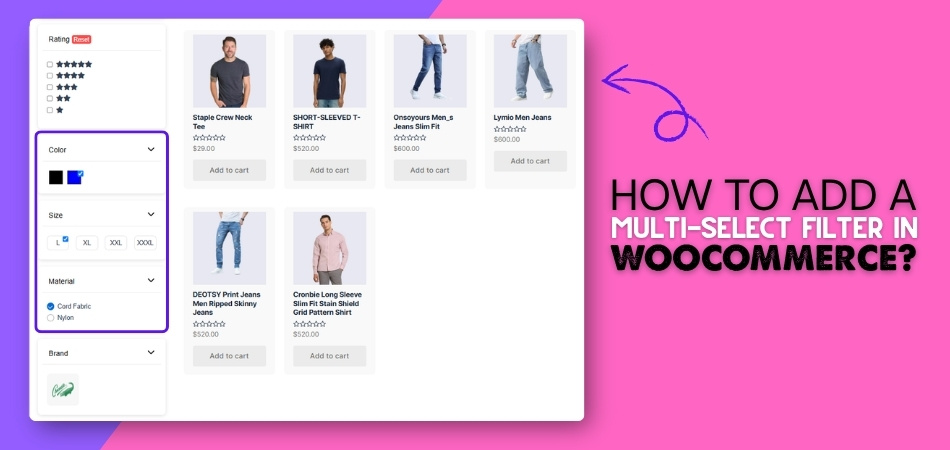
A multi-select filter allows customers to select more than one option at once, such as size or color. They help users quickly narrow down their choices without restarting their search. This smart feature isn’t built into WooCommerce by default. That’s why many people wonder how to add a multi-select filter in WooCommerce.
Add a multi-select filter in WooCommerce using the Dynamic AJAX Product Filters plugin. Install the plugin, go to Form Style, choose an attribute like color or size, set filter style to “Select,” pick Select 2 for multi-select, then save and test.
If you’re curious about setting this up the right way or want your filter to look and work better, you’re in the right place. This article gives you all the steps, tips, and tools you need. Keep reading to find everything you need to know from start to finish.
How to Add a Multi-Select Filter in WooCommerce?
Adding a multi-select filter in WooCommerce makes it easier for visitors to sort and find products by selecting more than one option at a time, like size, color, or brand. This feature isn’t available by default in WooCommerce, so you’ll need a special plugin. Here’s a complete and easy guide to help you install the right plugin and set up multi-select filters step by step.
Choose a Good Plugin
By default, WooCommerce does not support multi-select filters, which means you can’t just turn on this feature from the WordPress dashboard. To add it, you’ll need a plugin that offers this option. One of the best and most popular plugins for this job is Dynamic AJAX Product Filters for WooCommerce, a powerful WooCommerce AJAX product filter that allows multi-select filters, works smoothly with most themes, and comes in both a free and paid version.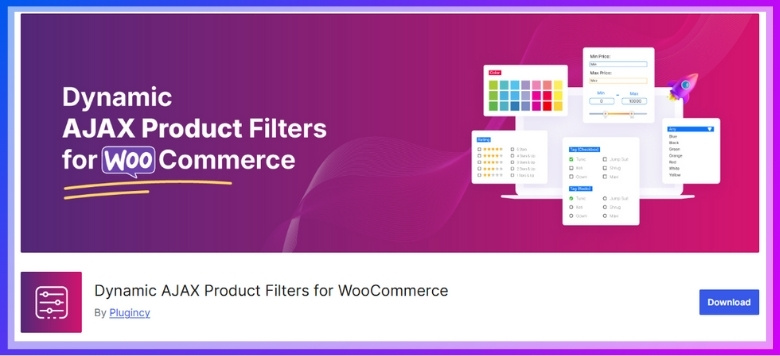
Step-by-Step Guide to Installing the Plugin
There are three ways to install the Dynamic AJAX Product Filters for WooCommerce plugin, depending on how you want to set it up. You can use the WordPress plugin installer, upload the PRO version manually, or use FTP.
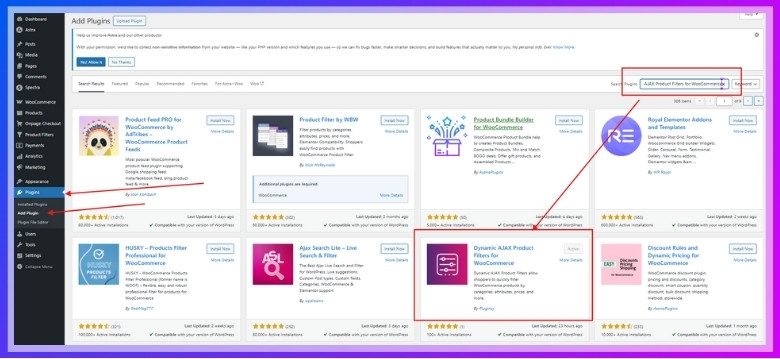
A. Install the Free Version From WordPress
- Go to your WordPress Admin Dashboard.
- Click on Plugins > Add New.
- In the search bar, type Dynamic AJAX Product Filters for WooCommerce.
- Click Install Now, then click Activate once it finishes installing.

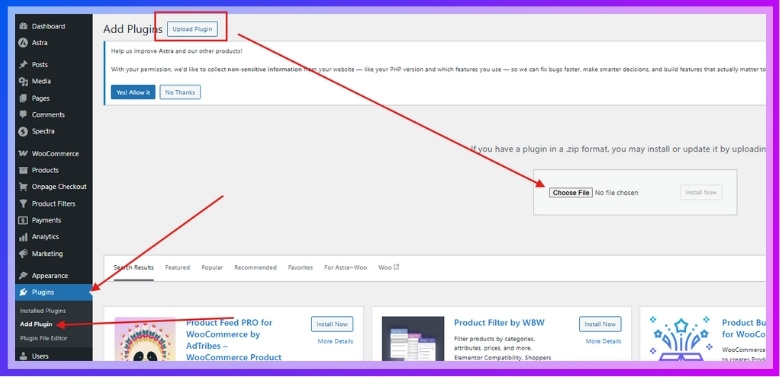
B. Install the PRO Version via Plugin Upload
- Go to your WordPress Admin Dashboard.
- Click on Plugins > Add New.
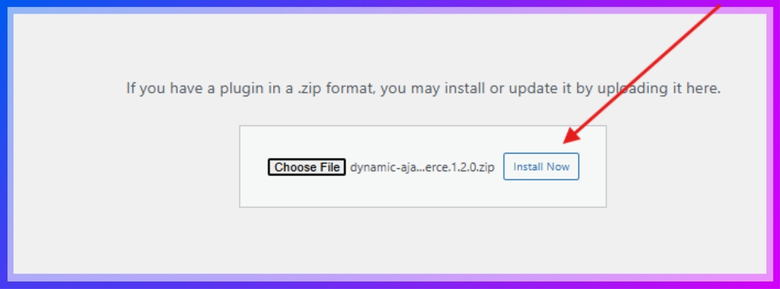
- Select Upload Plugin at the top.

- Click Choose File, then select the plugin ZIP file you got from the plugin’s official source.

- Click Install Now, then Activate the plugin.


C. Install the Plugin Manually Using FTP
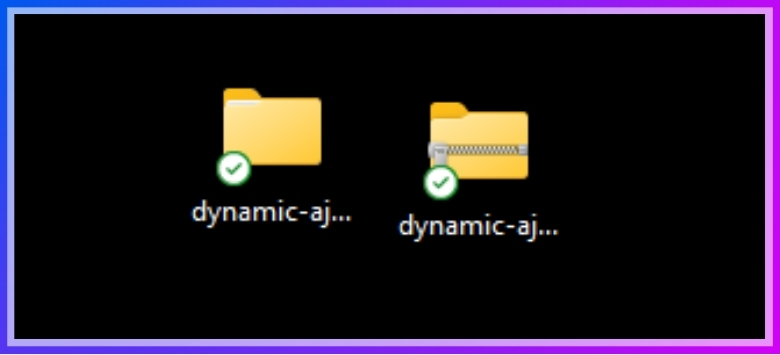
- Download the plugin ZIP file from the plugin website.
- Extract the ZIP file on your computer. You’ll get a folder named something like dynamic-ajax-product-filters.

- Open your FTP client (like FileZilla) and connect to your website using FTP credentials.

- Go to your site’s directory: /wp-content/plugins/.
- Upload the entire extracted folder into this directory.
- Now go back to your WordPress Dashboard > Plugins > Installed Plugins.
- Find Dynamic AJAX Product Filters for WooCommerce in the list and click Activate.

After installing and activating the plugin, you’re now ready to add the multi-select filter to your shop page. Just follow these steps to make it work.
Step 1: Go to the Filter Form Style Settings
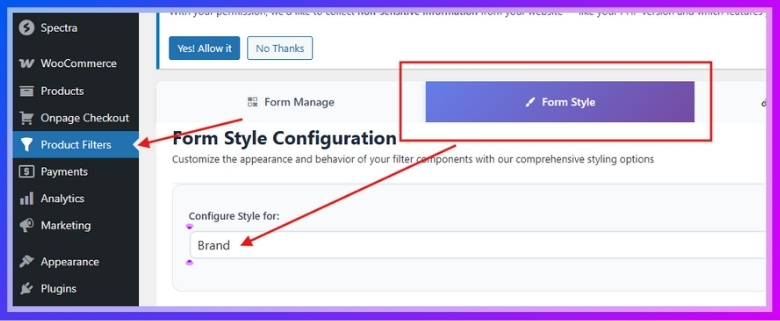
- From your WordPress Dashboard, go to Product Filters > Form Style.
- Look for the Select Attribute dropdown.
- Choose the attribute you want to create a filter for — for example, Size, Color, or Brand.

Step 2: Choose the Filter Style as “Select”
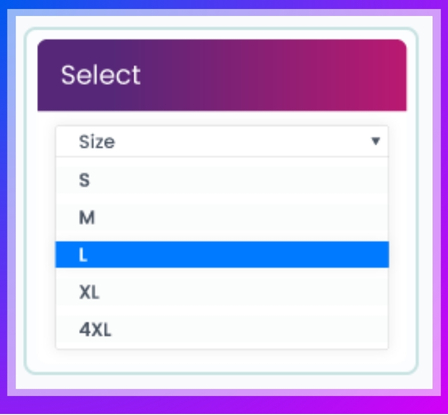
- After selecting your attribute, scroll down to find (Attribute) Filter Style.
- Pick Select from the available style types.

- This will unlock different select dropdown styles for better design and usability.

Step 3: Customize the Dropdown Options
Now you can choose from different dropdown styles to make your filter look and work better:
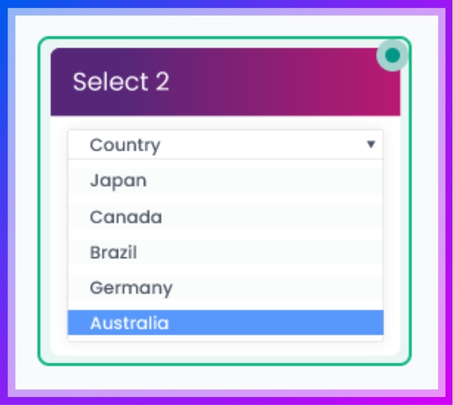
- Select 1: This is the basic dropdown. It’s clean and simple, where users click and pick one or more options from a list.

- Select 2: This one gives you a more modern dropdown look. It includes search support and lets users pick multiple items easily. It’s ideal if you have many filter choices under one attribute.

Step 4: Save Your Settings
Once you’ve picked your dropdown style and made any design tweaks:
- Scroll to the bottom of the page.
- Click the Save button to apply your changes.
- Visit your shop page to check how the new filter looks and works.
Multi-select filters help people shop faster and make your store more user-friendly. With the right plugin and setup, you can add them without any stress. Always test before going live. A smooth filter keeps shoppers happy and ready to buy.
Why Multi-Select Filters Improve Shopping Experience
Shopping online should be easy, but sometimes filters make it harder. That’s where multi-select filters step in. These filters don’t just look cool; they actually make the whole shopping process better. There’s more to explore, so keep reading.
More Options at Once
With multi-select filters, you don’t have to click back and forth to choose different things. You can pick more than one color, size, or brand at the same time. This makes searching faster and simpler. No need to restart your search each time. It saves you time and helps you see everything that matters without missing out. That’s why this type of filter really helps when shopping.
Less Scrolling Needed
You don’t have to scroll forever when you use filters that let you pick many options. You choose what you want, and the page updates based on your picks. This makes it easy to find your item without checking every single product. You stay focused on what matters, and it feels a lot smoother. You’ll probably notice how much quicker everything feels as well.
Better Product Match
Multi-select filters help show products that match your real needs. Instead of seeing a big list of items you don’t want, you get results that fit your selected styles, sizes, or features. It’s like telling the store exactly what you want to see. This helps you feel more in control and makes sure you get better search results every time.
Easy to Compare
Seeing different options side by side is much easier when you can filter by more than one thing. You might want to compare red and blue shoes or large and medium shirts. Multi-select filters make that possible without any extra steps. You don’t have to keep changing filters just to compare. It’s a smoother way to decide what you like most.
Fewer Frustrating Clicks
Without this type of filter, you might get annoyed having to repeat steps just to look at different choices. Clicking one box at a time slows everything down. But with multi-select, you click what you want, and you’re good to go. It feels simpler, cleaner, and way less frustrating, especially when you’re in a hurry or just want things to work fast.
Multi-select filters might seem like a small detail, but they make shopping feel way easier. They help you get what you want, without wasting time. Small changes like this can really make your online shopping experience better.
Best Practices for Using Multi-Select Filters Without Slowing Down Your Site
You need to be very careful when adding filters to your store. A slow site can make people leave before finding what they want. Multi-select filters are helpful, but they can also slow things down. Let’s check out smart ways to keep your store fast and smooth.
Use AJAX Loading
Many websites slow down when the page reloads after each filter click. AJAX helps by loading only product results instead of the whole page again. This keeps everything smooth, even if people choose many filter options. Most good plugins offer this built-in, so you don’t need extra tools. It also gives users a better experience while they shop faster. Always make sure your theme supports AJAX filtering before turning it on.

Keep Plugins Lightweight
Some plugins come with too many features you will never use. These extra tools can slow your store and confuse your customers as well. It’s better to use something simple and fast for a smoother experience. To maintain fast loading speeds, start by selecting the best filter plugin for WooCommerce that supports multi-select without adding unnecessary bulk to your site. Before installing, check plugin reviews and see if it matches your theme.
Enable Smart Caching
Instead of loading everything fresh, caching stores versions of pages for reuse. This makes filters feel faster and keeps your site from working too hard. Good caching can handle many filter clicks without slowing the shop. You can use caching from your host or add a trusted plugin. Make sure filters are set to work well with caching tools. This way, your store stays quick even when busy.
Avoid Too Many Filters
Giving too many filter options may look helpful, but can slow things down. Most people only use a few, like size, price, or brand anyway. If filters take long to load, customers may leave your site. Stick to the most useful filter types and remove the rest. Testing which filters people actually use will help you decide better. A clean and fast filter setup is more useful than too many choices.
Compress Filter Data
Every time someone uses a filter, data is sent to the server. Too much data at once makes the site slow and clunky to use. Some filter plugins compress this data to make things lighter and faster. You can also use tools or extra plugins to shrink the data. Smaller data loads help your site respond quickly, even during busy times. It’s a simple trick that makes a big difference.
Small speed problems can cause shoppers to leave your store early. These steps help keep the filters fast and easy to use. When your store runs smoothly, people are more likely to stay longer. A better filter setup can make your WooCommerce store feel professional and easy.
What to Do If Multi-Select Filters Don’t Work Correctly in WooCommerce?
Multi-select filters make online shopping faster by letting users pick more than one option at once. But sometimes, they don’t work the way they should. Products might not reload properly, or selected values may not show. Let’s look at a few simple fixes you can try right now to solve these problems easily.
- Check Plugin Conflicts: Some plugins don’t work well together. Disable other plugins one by one to see if the filter starts working again.
- Update Everything: Filters can stop working if WooCommerce, WordPress, or the filter plugin is out of date. Always keep everything updated.
- Review Theme Compatibility: A custom theme might not fully support the filter. Try switching to a default WordPress theme and test it again.
- Clear Cache: Filters may load old content. Clear your site and browser cache to make sure you’re seeing the newest version of your page.
- Check Filter Settings: Filters won’t behave properly if they’re not set up right. Double-check the filter options and how you connected them to attributes.
- Use AJAX Correctly: Without proper AJAX setup, filters may reload the full page or show no change. Make sure AJAX is enabled and working.
- Test in Incognito: Browser extensions or saved data may block filters. Try using your site in incognito mode to see if the problem persists.
Fixing a filter doesn’t always need advanced skills or heavy tools. Small changes like clearing the cache or checking settings can do the trick. If one method doesn’t work, just try the next. With a little time and patience, your multi-select filter will run smoothly again.
Tips to Test and Debug Multi-Select Filters Before Launch
Even small filter problems can make shopping feel annoying or broken. If something doesn’t work right, visitors might leave without buying anything. Testing before launch helps avoid all that. Let’s check out what to look for before going live.
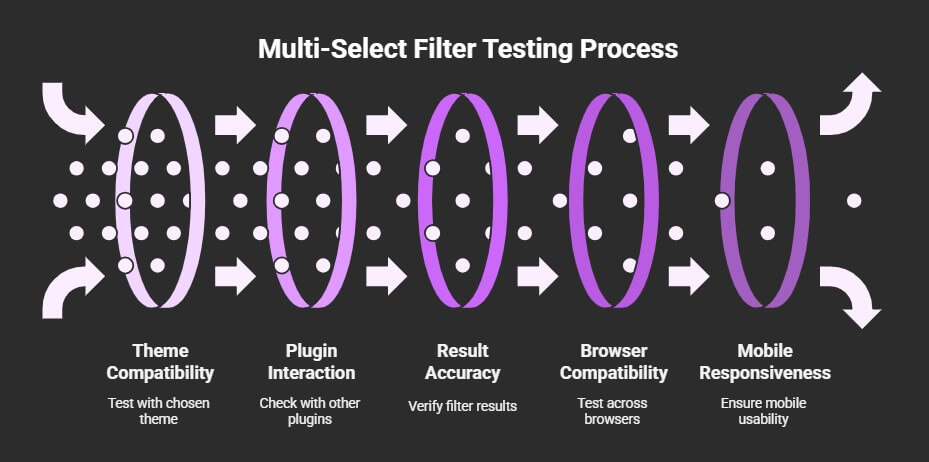
Check Theme Compatibility
Some themes may not work well with advanced filters, especially ones that use AJAX or custom styles. That’s why it’s smart to first test your filter setup inside the theme you’ll actually use. If anything looks strange or doesn’t update correctly, try switching to a default theme to compare. This helps you figure out if the problem comes from the theme or the filter plugin itself. Fixing it early can save a lot of confusion later.
Try Different Plugins
Even if a filter works well on its own, it might behave weirdly when other plugins are running. Try using your filter tool with other popular plugins you already use, like page builders or translation tools. If something breaks or loads slowly, turn things off one by one to see what’s causing it. This is a great way to catch hidden problems before your customers do.
Test Filter Results
Click on different filter choices and see what results show up. Do they match what you selected? If you pick two sizes, are both showing? This part matters the most because shoppers want to see what they asked for. Before going live, make sure your filter setup on WooCommerce shop page functions smoothly across devices and returns accurate results. A broken filter will only frustrate people who are ready to buy.
Use Multiple Browsers
Just because something looks good on your browser doesn’t mean it works everywhere. Test it on Chrome, Firefox, Edge, and Safari to be sure. Filters sometimes look off or stop working depending on the browser or screen size. It’s better to catch these small things now rather than after users start complaining about the same issue again and again.
Check on Phones
More people shop from their phones now than from computers. So, check the filters on different phones and tablets. See if buttons are easy to tap and if results load correctly without zooming or lag. If anything feels slow or confusing, that’s a red flag. Filters should feel smooth and easy, no matter what device people use to shop.
Testing your filters before launch is a smart move that saves time and trouble later. Even small mistakes can make shoppers leave without buying anything. When everything works smoothly, people enjoy using your store more. It’s a simple step that makes a big difference.
Commonly Asked Questions
Setting up a store with useful filters can really improve the shopping experience. But even after adding multi-select filters, some things can still feel confusing. That’s where these extra questions come in handy. They’ll help you get better results and avoid small mistakes.
Can I Add Multi-Select Filters Without Coding?
Yes, you don’t need to know coding to add these filters. Most filter plugins are easy to use with simple settings. You just install the plugin and set it up through your WordPress dashboard. Everything works with clicks and dropdowns, so no coding is needed at all.
Do Multi-Select Filters Work on Mobile Devices?
Yes, multi-select filters can work on phones and tablets too. But they need to be set up properly with mobile-friendly design. Some plugins offer mobile settings, so make sure you turn them on. Always test your filters on a phone before going live.
Can I Add Multi-Select Filters for Custom Attributes?
Yes, you can create filters for your own custom product attributes. First, make sure you add those attributes inside your WooCommerce settings. Then, go to your filter plugin and select those attributes while building the filter. This lets people sort using unique options like material or product use.
Will Filters Work with Product Categories?
Yes, filters can be made to work with categories as well. You can let users filter items based on the type of product. Just choose “category” as an attribute when setting up the filter. This is useful for big stores with lots of different product types.
Can I Add Multi-Select Filters to Any Page?
Yes, most plugins allow filters on shop pages and custom pages too. You can use shortcodes or blocks to place the filters where you want. This makes it flexible if your site uses different layouts. Just make sure the filters are still easy to see and use.
Can I Use Multi-Select Filters in Product Search?
Yes, you can connect filters with search tools for better results. When people search something, they can then filter the results more. This makes it easier to narrow things down and find the right product. You just need to connect the filter to the search section during setup.
Is It Possible to Show Filters in Sidebar Widgets?
Yes, filter widgets can be added to sidebars using plugin settings. Most filter tools come with ready-to-use sidebar widget blocks. This helps keep the shop layout clean and easy to browse. Make sure the widget area is wide enough for dropdown filters.
Do I Need a Special Theme for These Filters?
No, you don’t need a special theme, but it must support WooCommerce well. Some themes may break the filter layout if not fully compatible. Always test the filter with your current theme before launching. Using a trusted WooCommerce-ready theme makes things smoother.
Can I Set Different Filters for Different Categories?
Yes, you can create different filters for different product groups. For example, size and color for clothes, and brand and model for electronics. Just set rules in the plugin that control where each filter shows. This keeps things organized and makes the shopping process better.
Will Filters Affect My Product Layout?
Filters usually don’t break the layout if they’re set up correctly. But sometimes, styles can clash with your theme or custom design. You might need to adjust padding or spacing from the plugin settings. Always preview your changes to be sure everything still looks good.
End Note
Adding multi-select filters can change how people shop on your WooCommerce store. It keeps things fast, smooth, and simple by letting users pick more than one option at a time. With the right plugin and clear setup, you won’t need to code or do anything tricky. So if you were wondering how to add a multi-select filter in WooCommerce, this guide gave you all the easy steps to do it right.
Before you publish your shop, make sure everything works by testing on different devices and browsers. Keep things light, avoid too many filters, and always clear your cache. These small tips help your store run better and keep your visitors happy. Good luck setting up your filters—and here’s to a smoother shopping experience on your WooCommerce site!