A smooth checkout experience is essential for boosting conversions and reducing cart abandonment. WooCommerce One Page Checkout helps simplify the buying journey by combining product selection and payment on a single page.
However, many store owners still struggle to display a coupon field within this layout. Understanding how to add coupon fields to WooCommerce One Page Checkout can significantly improve the user experience and encourage customers to complete their purchase.
You can add coupon fields to WooCommerce One Page Checkout by enabling coupons in WooCommerce settings, then inserting the coupon form directly into your one-page layout using a checkout-customization plugin or a small PHP snippet. This ensures customers can apply discounts instantly without leaving the one-page checkout flow.
Follow this guide to learn the exact steps and improve conversions today. Keep reading to set up your checkout perfectly.
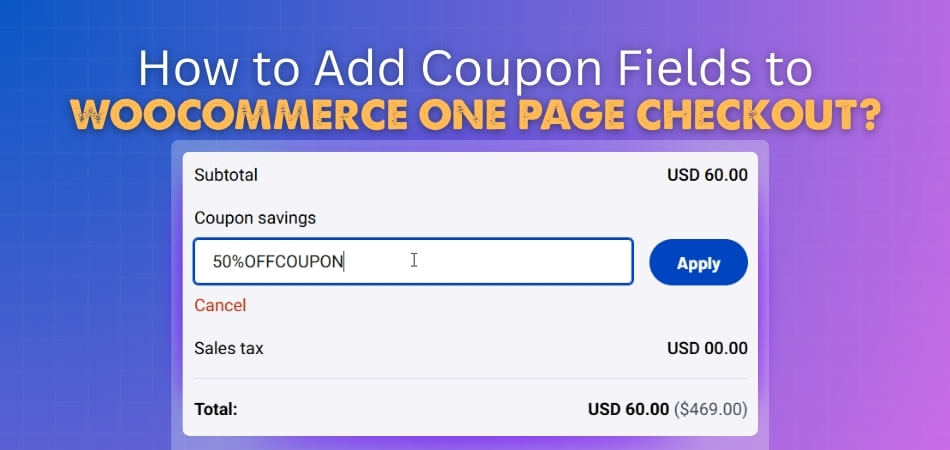
How to Add Coupon Fields to WooCommerce One Page Checkout?
Adding a coupon field to a one-page checkout layout helps customers apply discounts instantly, improving user experience and boosting conversions. Since one-page layouts load products and checkout together, the coupon field doesn’t always appear by default—so you’ll need to enable it manually or through a plugin.
Step 1: Enable Coupon Functionality in WooCommerce Settings
Before adding a coupon field, you must activate coupons in WooCommerce. Go to WooCommerce → Settings → General, scroll to Enable Coupons, and check the box. If this setting is disabled, coupon forms won’t appear anywhere—regardless of your theme or checkout setup.
Step 2: How WooCommerce Handles the Coupon Form by Default
In the standard WooCommerce checkout, the coupon form appears at the top of the page. However, when using a simplified layout through the One Page Checkout for WooCommerce plugin, the form may hide or shift as the entire purchase process happens on one page. This makes manual placement or plugin-based control essential.
You can use these two steps to add the coupon fields to your WooCommerce Store’s check out page. However there are there are some additional methods that you can follow, such as manual integration, using dedicated plugins, and more. The additional methods are as follows.
Method 1: Add Coupon Field Manually Using PHP (Works With Any OPC Layout)
If you prefer more control, you can manually insert the coupon form using a simple PHP snippet. Add this to your theme’s functions.php file or a code snippets plugin:
“add_action( ‘woocommerce_before_checkout_form’, ‘add_custom_coupon_form’ );
function add_custom_coupon_form() {
if ( ! wc_coupons_enabled() ) return;
echo ‘<div class=”custom-opc-coupon”>’;
woocommerce_checkout_coupon_form();
echo ‘</div>’;
}”
Adjust the hook (e.g., woocommerce_checkout_before_order_review) to change the coupon field’s position as needed.
Method 2: Add Coupon Field Using the WooCommerce One Page Checkout Plugin
With the official WooCommerce One Page Checkout extension, adding the coupon form is simple. Edit the page containing your OPC shortcode, select a layout that supports coupons, and ensure the Checkout Form Elements section includes the coupon toggle. Many templates display it inside a collapsible area for a cleaner design.
Method 3: Adding Coupon Fields in Popular One Page Checkout Plugins (CartFlows, Flux, Fast Cart, etc.)
Different one page checkout plugins handle coupon fields in their own way, so the setup steps can vary slightly. Here’s how to enable coupon options in the most commonly used plugins.
CartFlows
Enable the coupon toggle from CartFlows → Settings → Checkout Layout. CartFlows uses AJAX for instant discount updates.
Flux Checkout
In Flux → Settings → Checkout Display, enable the coupon field. Flux places the coupon box inside a modern slide-out panel.
Fast Cart (Barn2)
Go to WooCommerce → Fast Cart Settings and enable the coupon option. The field appears inside the floating modal checkout for quick access.
Each plugin handles coupon visibility differently, so it’s important to test behavior after enabling the feature.
Best Placement for Coupon Fields in a One Page Checkout Layout (UX + CRO Tips)
A well-placed coupon field can improve checkout flow, reduce friction, and increase conversions in a one-page checkout layout. Choosing the right location helps customers stay focused while still giving them access to discounts when they need them most. Here are the best placements you can try for your coupon field in one page checkout layout:
- Below Order Summary: Place the coupon field under the order summary so customers can apply savings when reviewing totals. This keeps the flow natural and avoids interrupting billing or shipping details during the checkout process.
- Near Total Price: Positioning the field near the displayed total creates a smooth and logical interaction point for discount entry. Customers often expect to see coupon options beside pricing details, improving clarity without disrupting their progress.
- Inside Collapsible Toggle: Use a small “Have a coupon?” toggle that reveals the field only when clicked by the user. This reduces visual clutter and prevents distraction while still giving customers immediate access when they need it.
- Avoid Top Placement: Do not place the coupon field at the top because it encourages unnecessary coupon hunting and delays. Keeping it away from the first section helps maintain buyer focus and reduces abandonment risk.
- Avoid Near CTA: Avoid placing it near the “Place Order” button, as customers may pause and search for codes. This can disrupt the final step, lowering conversions by slowing their decision to complete payment.
A smart coupon placement keeps the layout clean, supports buyer focus, and encourages more completed orders without distraction. When integrating payment gateways, this approach creates a smoother checkout flow that reduces abandonment. Positioning elements thoughtfully ensures customers stay engaged, make decisions quickly, and finish their purchases with greater confidence.
Troubleshooting: Coupon Field Not Working or Not Showing in One Page Checkout
A broken coupon field can slow checkout and frustrate customers. You must check common causes first and fix them fast. Many issues come from themes, caching tools, AJAX problems, or other plugins. You can also check custom templates and small code errors during debugging. Here are the troubleshooting tips you can follow.

Theme Conflicts
Some themes change WooCommerce checkout files and remove the coupon field. Switch to Storefront and test again. You confirm a theme issue when the field shows there. Contact the theme developer or edit the template to restore the coupon form.
Cache and AJAX Issues
Caching tools can show old checkout pages without the coupon field. Clear all caches and reload the checkout page. Disable caching for cart and checkout routes. Check your console for AJAX errors and turn off plugins one by one to find the cause.
Plugin Incompatibilities
Many checkout plugins change layouts and hide the coupon field. Turn off every plugin except WooCommerce and your one-page checkout tool. Test the field again and add plugins slowly. Update every plugin to the newest version to avoid new conflicts.
Checkout Customizations
Custom templates can break the coupon field when they change the default form. Make sure the checkout shortcode sits in the page without edits. When you built custom templates, add the coupon form again with ((woocommerce_checkout_coupon_form)) inside the correct file.
Debugging Steps
Check the page HTML to confirm the coupon form still loads. Sometimes scripts hide it with simple CSS. Use your browser tools to find errors and remove custom scripts. Open WooCommerce settings and confirm the coupon switch stays active and ready.
Testing Your Coupon Field Setup (Desktop, Mobile, Guest, and Logged-in Users)
After adding a coupon field to your WooCommerce one page checkout, thorough testing is essential to ensure it works smoothly across all user scenarios and devices. Here’s a detailed testing approach:
Desktop Testing
- Apply varied coupon types (fixed cart, percentage discount, product-specific) to confirm correct discount calculations.
- Verify instant AJAX updates of the order total after coupon application without needing a page refresh.
- Test invalid, expired, and minimum requirement coupons to see proper error messages.
- Check that coupon success feedback is clear and visible on the page.
Mobile Testing
- Confirm the coupon field is responsive, sized well, and easy to interact with on different screen sizes.
- Test input functionality, button taps, and coupon application feedback on popular mobile browsers.
- Ensure toggled coupon fields (e.g., “Have a coupon?”) open smoothly.
Guest User Testing
- Test coupon application on the checkout without logging in, verifying discounts apply, and persist through order completion.
- Confirm no forced login or account creation interrupts coupon usage.
Logged-in User Testing
- Apply coupons while logged in to verify that user-specific coupon rules or usage limits function correctly.
- Test various coupon stacking and usage scenarios (if applicable).
Additional Testing Tips
- Check WooCommerce Admin > Orders to verify discounts are applied correctly in the order metadata.
- Use browser developer tools to track AJAX calls during coupon application and look for any JavaScript errors.
- Clear caching plugins and server caches before testing to avoid stale content issues.
- Test with the default Storefront theme and minimal plugins to isolate any conflicts.
- Use testing plugins like FunnelKit Funnel Builder for custom checkout pages and coupon field customizations.
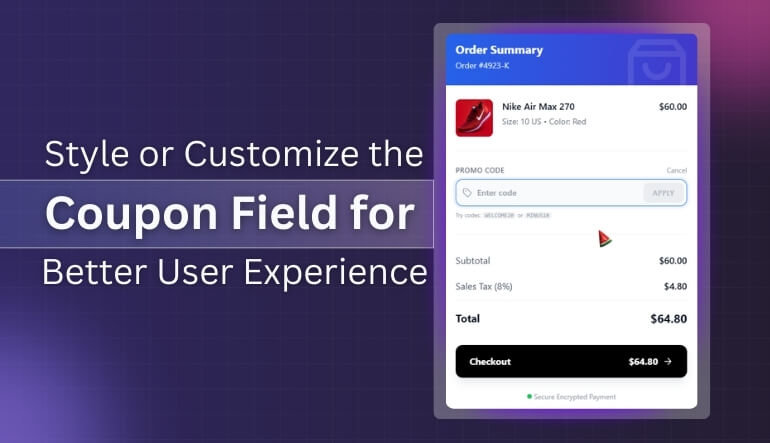
How to Style or Customize the Coupon Field for a Better User Experience?
Styling the coupon field well makes checkout easier and more friendly for shoppers. Small design changes reduce confusion, guide attention, and stop people from leaving during checkout. You can style the field with clear labels, icons, and spacing improvements for a smoother flow overall. Here are the guides.
Toggle or Collapsible Link
Turn the coupon field into a simple toggle link that reveals it when clicked gently. You can pair this with icons or short text, enabling quick product previews while keeping attention on payment. This design keeps the page clean while still giving discount seekers an easy entry point.
Place Near Order Total
Place the coupon field close to the order total so shoppers connect discounts with real savings. This spot feels natural because people often review totals carefully before entering payment information and confirming purchases. Make the field size modest and keep labels short to avoid crowding other price details nearby.
Optimize for Mobile
On phones, use a full-width coupon field so typing feels easy and clear for users. Increase touch spacing around the input and button so thumbs tap accurately without hitting nearby elements. Test different font sizes and button heights to keep the field readable without overpowering the checkout layout.
Improve Visual Clarity
Use clear labels like “Coupon code” and supportive text such as “Apply your discount here” for guidance. Add subtle borders and light background shading so the field stands out without stealing focus from totals. Avoid strong colors that compete with the checkout button, or customers might ignore your primary action.
Refine Button and Feedback
Style the apply button with a label like “Apply” so shoppers understand the action clearly. Show brief success or error messages near the field, using simple words and colors that match your brand. Keep messages short and positive so people stay calm, even when a code fails or needs correction.
FAQs About Coupons in WooCommerce One Page Checkout
A coupon field helps customers apply discounts without slowing down the checkout process. Many store owners want this feature inside a one-page layout. These FAQs cover extra questions you may still have about setup, control, and customization.
Can I Show the Coupon Field Only for Specific Products?
Yes, you can show the coupon field only for certain products by using conditional logic through code or checkout customization plugins. These tools check the cart contents and display the field when selected products qualify. This targeted method creates a smoother user flow.
How Can I Track Coupon Usage in a One-Page Checkout Setup?
You can track coupon usage easily by opening the WooCommerce Reports section or using advanced analytics plugins. These tools display performance data, redemption numbers, and customer activity. Tracking helps you test discount strategies and refine future promotions based on real shopper behavior.
Can I Auto-apply Coupons Without Showing the Coupon Field?
Yes, you can auto-apply coupons using small PHP snippets or discount automation plugins. This method adds eligible coupons instantly when cart conditions match. It removes the need for shoppers to type codes, making checkout smoother while still delivering targeted promotional benefits.
Is It Possible to Rename the Coupon Field Label in One Page Checkout?
You can rename the coupon label by editing language strings, applying a simple translation plugin, or adding a short snippet. Adjusting the label helps match your store’s branding, improves clarity, and guides shoppers who might not recognize the standard coupon terminology.
Can I Add Placeholder Text to Improve Coupon Field Clarity?
Yes, you can add placeholder text like “Enter discount code” by customizing checkout fields through hooks or form-editing plugins. This helps guide customers during checkout and reduces confusion. Clear placeholder text improves form usability and encourages shoppers to complete their purchase smoothly.
Closing Remarks
A great checkout experience helps customers feel confident, move faster, and complete more orders. Adding a clear and functional coupon field supports that flow by giving shoppers an easy way to apply savings without breaking their focus.
When you understand how to add coupon fields to WooCommerce One Page Checkout, the entire process becomes smoother and far more user-friendly. Every step—placement, styling, troubleshooting, and testing—helps create a checkout that feels simple and reliable.
Shoppers stay engaged when your layout works cleanly, loads quickly, and avoids confusion. Keep refining your checkout experience so every visitor feels ready to finish their purchase.