Any small changes can make a big difference in how your online store feels and performs in WooCommerce. One detail many store owners care about is the Add to Cart button—how it looks and what it says. If you’ve been wondering how to improve it, you might already be thinking about how to customize the WooCommerce add to cart button style and text.
Customize the WooCommerce Add to Cart button by installing the “One Page Quick Checkout” plugin. Enable custom settings to change button text and choose styles like Modern or Rounded. Adjust color, size, and design options, then save changes to match your brand.
Do you want to know how to make your Add to Cart button look better and work smarter for your store? Keep reading this article, because everything you need to learn about button styles, text changes, and mobile tips is explained right here.
How to Customize the WooCommerce Add to Cart Button Style and Text?
Changing how the “Add to Cart” button looks (its style) and what it says (the button text) in your WooCommerce online store can significantly improve user experience and conversion rates. Whether you want a more modern design, different wording, or a completely unique look, it’s fully possible to tailor the button to match your brand. To make these changes easily, you’ll first need to install a plugin that allows such customizations directly from your WordPress dashboard—no coding required.
Step 1: Install the Plugin
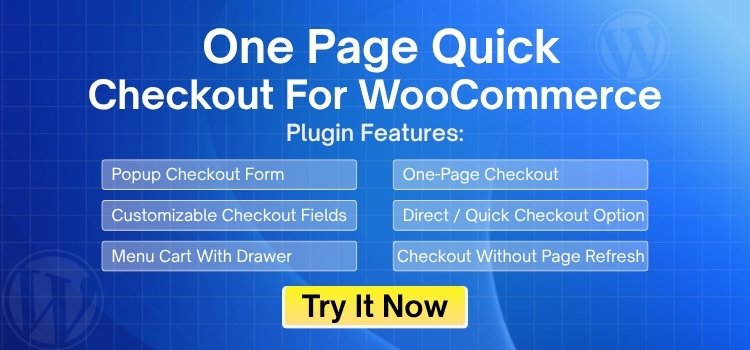
To start customizing the Add to Cart button, you’ll need to install a tool designed specifically for WooCommerce customization. One such popular and user-friendly option is the direct checkout for WooCommerce plugin called One Page Quick Checkout.
Key Features of One Page Quick Checkout for WooCommerce
- Popup Checkout Form – Enables customers to complete their purchase using a convenient popup without leaving the current page.
- Complete Checkout Form Customization – Allows full control over field labels, placeholders, required fields, and more.
- Quick Checkout Buttons – Adds instant checkout buttons to product and archive/category pages for faster purchases.
- AJAX-Powered Checkout – Processes the entire checkout without refreshing the page for a seamless, app-like experience.
- One-Click Product Removal – Lets customers remove items from their order directly from the checkout form.
- Single Product One-Page Checkout – Offers a focused one-page checkout experience for individual products.
- Add to Cart Management – Customize the button style, text, behavior, default quantity, notification style, and sticky behavior on mobile.
- Sticky Add to Cart on Mobile – Keeps the Add to Cart button visible on mobile devices to encourage conversion.
This plugin offers both free and PRO versions, giving you flexibility depending on your needs. Here’s how you can install it:
Free Version Installation
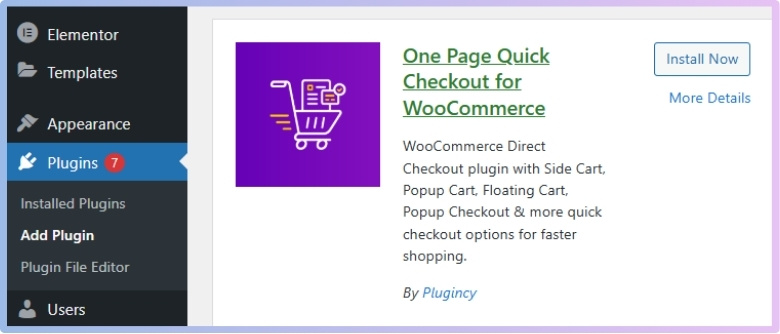
- Go to your WordPress Admin Dashboard.
- Navigate to Plugins > Add New.
- In the search bar, type “One Page Quick Checkout for WooCommerce”.
- Click the “Install Now” button.
- After installation, click “Activate”.

PRO Version Installation
- Visit the official website and complete your purchase.
- A download link will be sent to your email.
- Click the link and download the ZIP file.
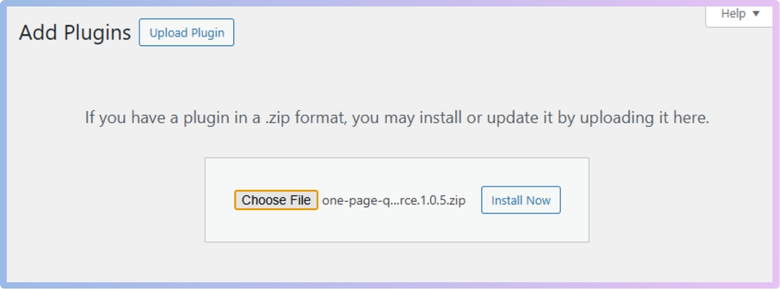
- Go to WordPress Admin Dashboard > Plugins > Add New.
- Click “Upload Plugin”.
- Select the downloaded ZIP file.
- Click “Install Now”.
- Click “Activate” after installation.

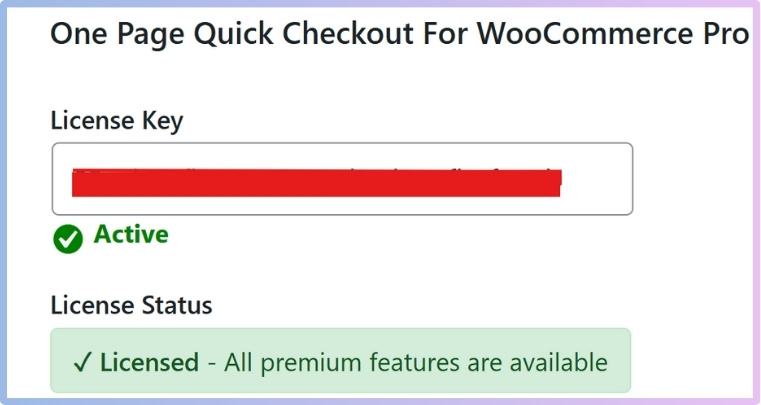
- Navigate to Onpage Checkout > Plugin License in your dashboard.
- Enter your License Key to unlock PRO features.

Step 2: Customize Add to Cart Button Text and Style
After the plugin is installed and activated:
Customize Button Text
- Go to Dashboard > Onpage Checkout.
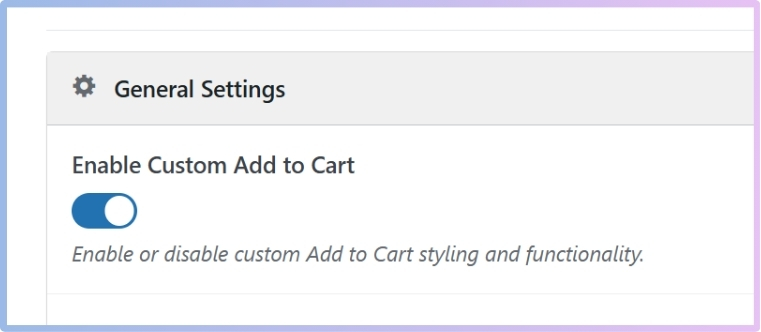
- Click on the “Add to Cart” tab.
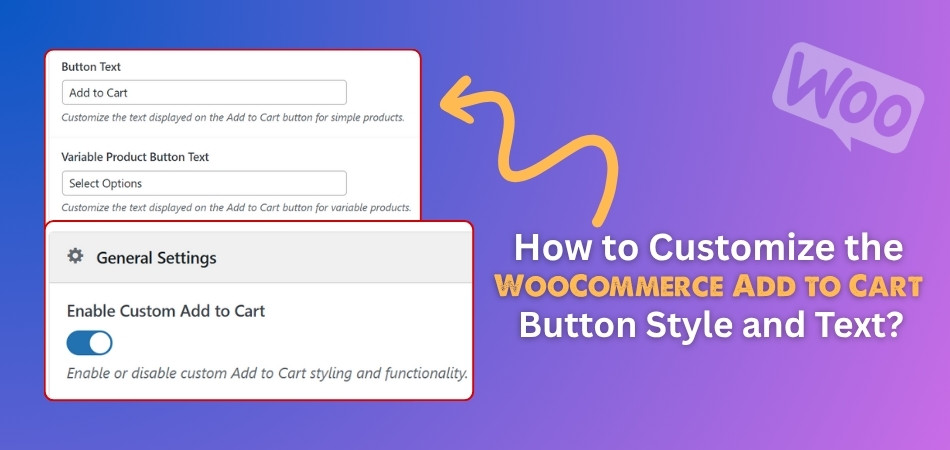
- In the general setting, find the toggle switch labeled “Enable Custom Add to Cart” and turn it ON.

Once enabled, you will see the following text options:
- Button Text: Customize the text shown on the Add to Cart button for simple products.
- Variable Product Button Text: Customize the text for variable product buttons.
- Read More Button Text: Set the text shown for variable products without direct add-to-cart.
- Grouped Product Button Text: Customize the text for grouped product buttons.

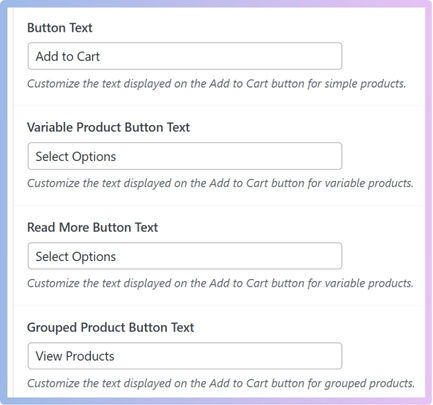
You can edit each of these fields as needed.
Customize Button Style
- Scroll down to find the “Button Style” section.
- A dropdown box will be visible, by default set to “Default WooCommerce Style”.
- Click on the box and choose one of the following styles:
- Modern Style
- Rounded Style
- Minimal Style
- Custom Style
Each style provides a different visual look.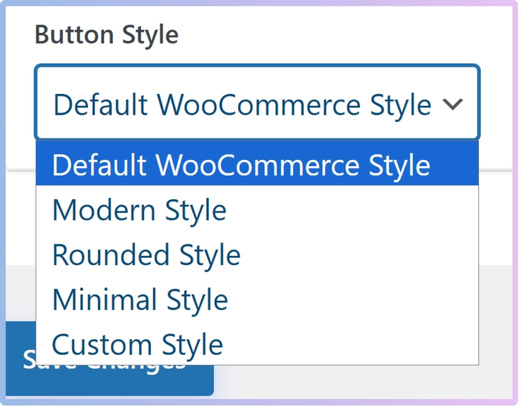
Customize Design Options
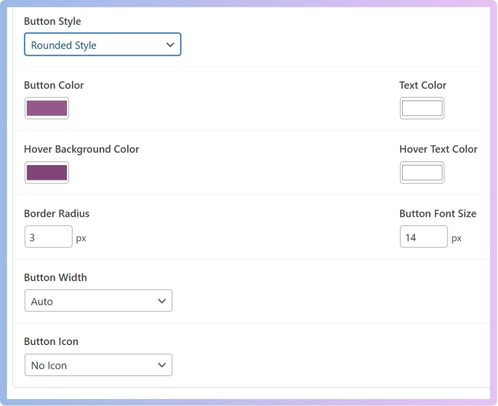
After selecting a style, for example, Rounded Style, more customization settings appear:
- Button Color: Choose a background color for the button.
- Text Color: Set the color of the button’s text.
- Hover Background Color: Set the background color when hovering over the button.
- Hover Text Color: Set the text color on hover.
- Border Radius: Input the radius value (e.g., 3px) to make corners round.
- Button Font Size: Set the font size in pixels (e.g., 14px).
- Button Width: Choose from:
- Auto
- Full Width
- Custom Width

Custom CSS (Advanced Styling)
If you select “Custom Style”, an additional option appears. You can input your own CSS code for more advanced design control.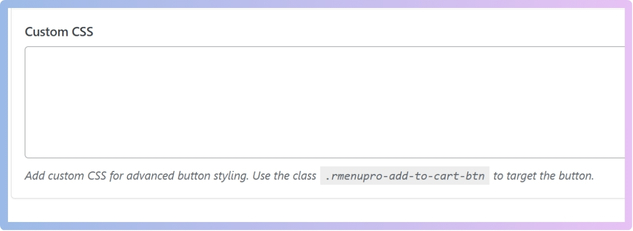
Once all text and styling options are configured, click the “Save Changes” button to apply your customizations.
Now you know how to change both the look and text of your Add to Cart button in WooCommerce. It’s simple once you have the right plugin installed. These changes help your store feel more unique and easy to use. Try it out and see how it improves your customers’ shopping experience
Why Customize the Add to Cart Button in WooCommerce?
When people shop online, even small design choices can affect what they do next. That’s why changing the Add to Cart button can actually matter more than you think. Keep reading to see how it can really help your store.
Better user flow
Some users leave a site just because the steps feel too long or confusing. If the Add to Cart button is clear and easy to spot, shoppers know exactly what to do. Many store owners tweak the button design not just for appearance, but to guide users into a more streamlined flow. Some also enable one page checkout for all products in WooCommerce to reduce steps and increase conversions without making things complicated.
Stronger brand feel
Every store has its own look and feel, and the Add to Cart button is a big part of that. A colorful, bold button might suit a fun brand, while a sleek, simple one fits a modern look. Matching the button style with your store’s design helps everything feel connected. It’s a small touch, but it adds up and gives people more trust in your store.
Clearer message
Sometimes the default “Add to Cart” text doesn’t fit what you’re selling. For example, if you’re offering a free sample or pre-order, that standard text can confuse people. Changing the wording makes things easier to understand. It also sets the right expectation and lets your customers feel confident about what happens next when they click.
Mobile-friendly layout
More people shop using their phones now, so making sure your button looks good and works well on small screens is super important. A sticky Add to Cart button or larger font size can help. You want shoppers to take action easily without pinching or zooming. A clean design that works on both desktop and mobile gives everyone a smoother experience.
More sales chances
A well-designed button that’s easy to read and quick to find can lead to more clicks—and more sales. People are more likely to finish buying when the process feels simple. A better button doesn’t just look nice, it guides buyers to the next step. That means more products in carts and more checkouts completed with less hassle.
Even small updates to your Add to Cart button can create a big difference in how your store feels. It helps make things clearer, faster, and more enjoyable for your visitors. A few quick tweaks can lead to more clicks and better results. So go ahead and try customizing—it’s totally worth it.
Key Elements That Make an Add to Cart Button Stand Out
A good Add to Cart button can really make a big difference while shopping online. It’s often small, but super important for getting people to buy something. Many things can affect how much it stands out to someone. Let’s check out what helps it grab attention best.
- Clear Visual Order: Make sure the Add to Cart button looks more important than other buttons near it by using size, boldness, or icons that pop.
- Smart Button Spot: Place the button close to the product image or price so people don’t have to search or scroll much to find it.
- Strong Color Contrast: Use a color that clearly stands out from the rest of the page so the button catches the eye quickly without needing extra effort.
- Simple Wording: Keep the button text short and clear, like “Add to Cart” or “Buy Now,” so users know exactly what it does at a quick look.
- Big Enough to Tap: Make the button large enough so it’s easy to press on a mobile screen without accidentally clicking something else nearby.
- Extra Touch of Design: Adding a small icon like a cart or a plus sign can make the button look more fun and easier to understand.
- Keep It Visible: Make sure the button doesn’t hide behind other page items or scroll out of view when users are reading about the product.
A great Add to Cart button should be easy to find and simple to click. It needs to look different from the rest of the page and feel important. Using smart design tricks can help it stand out more. Small changes often lead to better shopping results.
Troubleshooting Common Issues When Customizing the Add to Cart Button
Changing the Add to Cart button sounds simple, but it sometimes brings small problems. Maybe the new style won’t show, or the text just won’t change. Sometimes, other plugins or themes mess things up without warning. Let’s look at how to fix these common problems.

Style Not Showing
If your button styling doesn’t appear, it might be because of browser caching. Try refreshing the page or clearing the cache to see if it helps. Also, double-check your code or CSS rules to make sure they are written correctly. Sometimes other styles on the page might be stronger and cancel yours. Using “!important” in your style can help it show up properly.
Text Won’t Update
When the button text doesn’t change, it could be stored in your theme’s files. Some themes don’t let text change from simple settings and need special editing. Try checking the theme settings or using a plugin that controls button labels. If you’re using code, look for the right place where the text is set. One wrong letter can stop the change from working.
Theme Is Blocking
Some themes don’t like custom changes and may stop them from working right. This can happen if the theme uses special buttons or design settings. Try switching to a default theme for testing and see if your change works there. If it does, you may need to adjust the code to match your theme better. Always keep a backup before making changes.
Plugin Conflict
Many times, plugins don’t play nicely together and cause small bugs. If your button looks broken or acts weird, try turning off plugins one by one. That way, you can find which one is causing the trouble. Once you find it, you can try replacing it or checking for updates. Keeping only the needed plugins also helps avoid future problems.
Wrong Code Used
Using the wrong code or typing a small mistake can stop everything from working. Make sure you are editing the right file and following the correct steps. Even missing a semicolon or bracket can break the button. Copy code from trusted sources and test small changes first. Don’t forget to save and reload the site each time to check results.
Mobile Layout Issues
Sometimes, your changes work on the desktop but not on phones. This happens when the code isn’t mobile-friendly or doesn’t fit smaller screens. Try using simple styles that work on all screen sizes. You can also add special mobile CSS rules to fix the layout. Always test your changes on both desktop and mobile for the best results.
Customizing the Add to Cart button is fun, but it can get tricky. Small issues like broken styles or blocked changes happen often. The good news is that most fixes are simple once you know what to check. Always test your changes and stay patient with each step.
Mobile Optimization Tips for Add to Cart Buttons in WooCommerce
Most people shop on their phones these days, so making sure your Add to Cart button works well on mobile is super important. If it’s not easy to find or click, people might leave. Let’s check out some easy ways to fix that.
Easy to Spot
It can be frustrating when shoppers have to scroll around just to find the Add to Cart button. The button should always be placed where it’s easy to notice without effort. Keeping it big enough and using a bold color helps it stand out. Some store owners even add extra space around it so it doesn’t blend into other elements. A clear button gets clicked more.
Always Accessible
Sometimes people scroll down for more details before deciding to buy. But if they have to scroll all the way back up to add the product, they might give up. That’s why it helps to keep the button visible all the time. One effective enhancement is using a sticky add to cart button for mobile in WooCommerce, which ensures your CTA stays accessible throughout the shopping experience.
Works on All Screens
Not all phones are the same size, so your button should adjust nicely to any screen. It shouldn’t break or overlap with other things on the page. Using flexible sizes and testing the layout on different devices is helpful. If your button looks and works great on both small and large screens, users are more likely to complete the purchase.
Fits the Thumb Zone
People mostly use their thumbs while shopping on their phones. That’s why the button should be placed in a spot that’s easy to reach with one hand. Putting it near the bottom right or center of the screen works well. You also want to make sure it’s not too close to other clickable things, so people don’t tap the wrong one by mistake.
Fast and Smooth
Nobody likes delays while shopping. When someone taps Add to Cart, it should respond quickly. Adding smooth animations or showing a small success message can help users know the tap worked. If it takes too long or nothing happens, they might refresh the page or leave. A fast, responsive button keeps the shopping process easy and stress-free.
Making your Add to Cart button better for mobile is a smart move. It helps people shop faster and with less trouble. Small changes like visibility and placement can really boost results. Try these tips and see how they improve your store.
FAQs About How to Customize the WooCommerce Add to Cart Button Style and Text?
Customizing the Add to Cart button in WooCommerce can bring up a lot of questions, especially when trying new designs or changing how things look. It’s helpful to know how things work and what options are available. These FAQs answer common doubts in a simple and clear way. Let’s go through them so you feel more confident while editing your store.
Can I Add Icons to the Add to Cart Button?
Yes, you can add icons like a cart or a plus sign beside the button text. This makes the button look more fun and easier to understand. You can do this by using plugins or editing the button label with basic HTML. Just make sure the icon you choose matches your store’s style.
How Do I Change the Font Style of the Button?
To change the font, you can use custom CSS inside your theme settings or a plugin that allows style edits. Pick a font that is clear and easy to read. Avoid very fancy fonts that might be hard to understand. Keep the size readable, especially on phones.
Is It Possible to Show Different Text for Logged-In Users?
Yes, you can show a different Add to Cart button text for users who are logged in. This can be done using custom code or advanced plugins. For example, you can change the text to “Buy Now with Account” for logged-in users. It helps make the shopping experience feel more personal.
Can I Add Animation to the Button on Hover?
You can add hover effects like color changes or little movements to catch attention. This makes the button feel more active and fun to click. Many plugins offer built-in animation features. Just don’t overdo it, or it might feel too flashy.
How Do I Add a Tooltip to the Button?
Tooltips are little messages that appear when users hover over something. You can add one to explain what happens when the button is clicked. This is helpful if your store has special rules, like pre-orders. Tooltips can be added using simple HTML or with the help of a plugin.
Is It Safe to Edit Button Text Using Custom Code?
Yes, it’s safe if you know what you’re doing and use a child theme. A child theme keeps your changes safe even when the main theme updates. Always copy your current files and keep a backup before editing code. Mistakes in code can break the design, so be careful.
Can I Show Different Button Styles on Different Pages?
Yes, you can show different button styles on different product or category pages. This helps match the look of the page or highlight certain products. You’ll need to use CSS rules or a plugin that lets you pick styles per page. It’s great for seasonal sales or featured items.
How Can I Reposition the Add to Cart Button?
You can move the button to a different spot on the product page using theme settings or code. For example, you might want it above the product description. Just be sure the new position is easy to find and click. Try it out and see what feels best.
Can I Change the Button Shape Completely?
Yes, with custom styles or a design plugin, you can turn the button into any shape. Rounded, oval, square—whatever fits your brand. Just remember to keep it big enough to tap on mobile. Shapes are fun, but don’t let them affect usability.
Will My Changes Stay After Theme Updates?
If you use a child theme or a plugin, your changes should stay safe after updates. But if you edit the main theme files directly, they may get erased. Always test updates on a backup version of your site first. That way, you won’t lose all your hard work.
Last Words
Customizing the Add to Cart button may seem like a small change, but it can really help your store stand out. A button that looks good and works well gives users a better experience. When things feel smoother and clearer, people are more likely to stick around, trust your store, and complete their purchase without confusion or delay.
So, how to customize the WooCommerce add to cart button style and text? The answer is simple: install a plugin like One Page Quick Checkout, turn on the custom option, and adjust the style and wording as you prefer. You can make it colorful, modern, bold, or minimal—whatever suits your shop. These small changes can lead to better results with less effort.
Before wrapping up, here are a few tips: always preview your changes, test them on mobile, and make sure your button stays visible. Don’t overdo the design—keep it clean and focused. A well-placed, well-worded button goes a long way. Best of luck with your store, and happy selling!