One Page Quick Checkout plugin makes the checkout experience smoother for online stores, helping both customers and shop owners. It’s built to simplify how people complete their purchases on WooCommerce. If you’ve been thinking about setting it up, you might be looking for a step-by-step guide to installing One Page Quick Checkout plugin.
To install the plugin, go to your WordPress dashboard, click Plugins > Add New, and search for “One Page Quick Checkout for WooCommerce.” Click “Install Now” and then “Activate.” For the PRO version, buy it from the official site, download the ZIP file, upload it using “Upload Plugin,” and activate it. Enter your license key. You can also install it manually using FTP.
Are you wondering which method is best or curious about each option in more detail? Then keep reading—this article covers everything you need to know about installing the One Page Quick Checkout plugin.
Step-by-Step Guide to Installing One Page Quick Checkout plugin
Installing a plugin might sound tricky, but it’s actually quite simple once you know the steps. This guide will walk you through the different ways you can install the One Page Quick Checkout plugin. Whether you want the free version, the PRO version, or prefer to do it manually, you’ll find easy instructions here. Keep reading to get your plugin up and running smoothly.
Step 1: Free Version Installation
The free version is perfect if you want basic features and a quick setup. You can easily add it straight from your WordPress dashboard without any extra hassle. Here’s how you can install it:
- Log in to your WordPress Admin Dashboard.
- Navigate to Plugins > Add New.
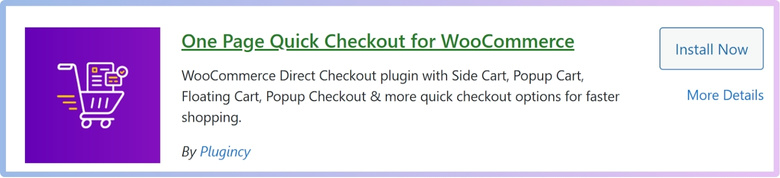
- Use the search bar and type: “One Page Quick Checkout for WooCommerce”
- Find the correct plugin in the search results and click “Install Now”.
- After installation completes, click “Activate”.

Step 2: PRO Version Installation
For more advanced options and special features, the PRO version is the best choice. To install it, follow the guide:
- Go to the plugin’s official website and complete your purchase.
- After purchase, you’ll receive a download link via email.
- Download the ZIP file to your computer.
- From your WordPress Admin Dashboard, go to Plugins > Add New.
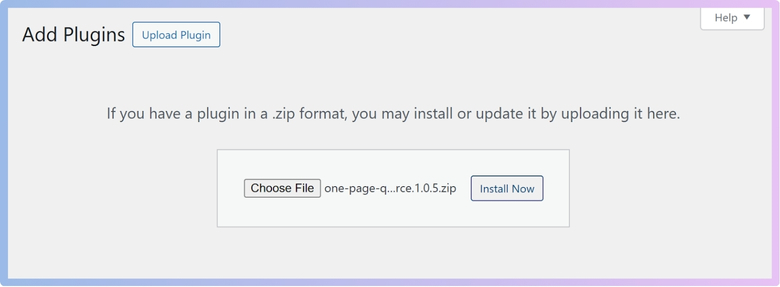
- Click “Upload Plugin” at the top.
- Select the downloaded ZIP file, then click “Install Now”.

- Once installed, click “Activate”.
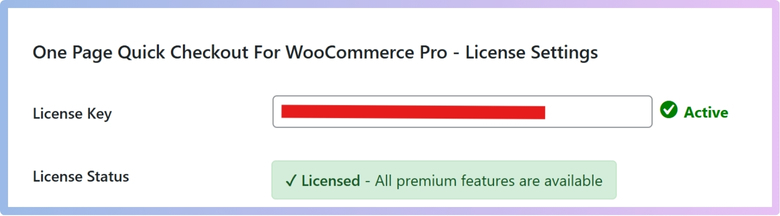
- Navigate to Onpage Checkout > Plugin License in your dashboard menu.
- Enter your license key to unlock PRO-only features.

Step 3: Manual Installation (Using FTP)
Use this method to install One Page Quick Checkout for WooCommerce if you prefer manual control or are working in a restricted hosting environment.
- Download the Plugin (Free or PRO version ZIP).
- Extract the ZIP File on your computer.
- Upload via FTP:
- Open your FTP client (e.g., FileZilla).

- Connect to your site and go to /wp-content/plugins/.
- Upload the extracted plugin folder here.
- Open your FTP client (e.g., FileZilla).
- Activate the Plugin from your WordPress admin → Plugins → Activate One Page Quick Checkout for WooCommerce.
That’s everything you need to get started with the One Page Quick Checkout plugin. Follow these simple steps, and your online store will have a smooth checkout process.
Why Choose One Page Quick Checkout for your WooCommerce Store?
Running an online store means putting your customers’ experience first. A smooth checkout process leads to more completed purchases and fewer abandoned carts. That’s where One Page Quick Checkout can make a real difference. Here’s why it’s worth using.
Fast Checkout Experience
Nobody likes waiting, especially when buying something online. This plugin helps customers finish their orders without going through many steps. Everything happens on one page, and there’s no need to reload. It saves time and makes shopping feel faster. This can help boost your sales as well.
Easy to Use
You don’t need to be a tech expert to use this plugin. It has simple settings and clear options. You can change things like buttons, labels, and how the form looks with just a few clicks. It also works well with other WooCommerce features. You’ll get the hang of it quickly.
Popup Checkout
The popup checkout form means buyers can place an order without leaving the current page. It looks neat and opens smoothly when the customer is ready to buy. They don’t get taken away from their product page. This keeps the shopping flow going. It feels like a modern and fun shopping experience.
Product Control
Customers can change product quantities or remove items right in the checkout area. There’s no need to go back and forth between the cart and the product page. It’s all done in one place. This makes the process faster and less confusing. It’s a small feature that makes a big difference.
Smart Design Options
You can choose how your checkout looks by picking from different templates. Whether you want a table, list, or slider, there’s something that fits your store. It also adds product pictures and useful buttons. This helps customers know exactly what they’re buying. A clean and clear design builds trust.
Mobile Friendly
Lots of people shop on their phones now. This plugin is made to work well on mobile as well. It has sticky add-to-cart buttons, quick checkout options, and fits nicely on small screens. Your store will look and feel great, even on a phone. That means more chances for people to buy.
Extra Features in PRO
If you want more tools, the PRO version has even more options. You can get features like address auto-fill, multi-step checkout, trust badges, and more. These help make the checkout even better. You can also show quick views, social share buttons, and advanced settings. It’s great if you want to take things further.
What to Do Next After Installing the One Page Quick Checkout plugin?
The installation of the One Page Quick Checkout plugin is only the beginning. Once it’s added to your site, there are a few important things you should do next. These steps will help you set things up the right way. Keep reading to find out what to do next.
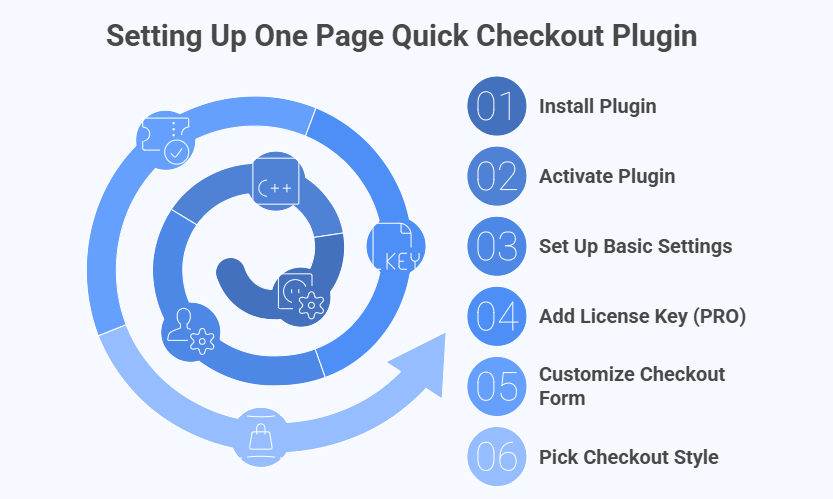
Activate the Plugin
After installing the plugin, make sure you activate it. You can do this from your WordPress dashboard under the “Plugins” section. Just find the plugin name and click the “Activate” button. This step turns the plugin on and gets it ready to use. Without activation, it won’t work on your site.
Set Up Basic Settings
Once it’s active, head over to the plugin settings page. You’ll find options to control how the checkout looks and works. You can also enable One Page Checkout for all products in WooCommerce right from the settings. It’s all simple to manage with easy-to-understand choices. Take your time to look through everything.
Add License Key (PRO)
If you’ve got the PRO version, you’ll need to add your license key. You’ll find this key in the email sent after your purchase. Go to your dashboard, click on “Onpage Checkout,” then go to “Plugin License.” Paste your key in and click save. This unlocks all the PRO features.
Customize Checkout Form
Make the checkout form fit your store. You can change things like labels, field names, and button text. You can also choose which fields are required. These small edits help create a smoother checkout for your customers. A clean form means fewer people leave before finishing their order.
Pick Checkout Style
This plugin gives you different layout styles like tables, lists, or sliders. Try each one and see which looks best with your products. A good layout makes your store look more professional. It also helps customers find what they want faster. Choose the one that feels right for your shop.
Common One-Page Quick Checkout Plugin Installation Errors and How to Fix Them
Plugin installation usually goes smoothly, but minor issues can arise. These issues are common and can be fixed with simple steps. You just need to know what to look for and how to solve them. Let’s check out what can go wrong and how to fix it.
Plugin Not Installing
Sometimes, the plugin won’t install at all. This can happen if your WordPress version is too old or if the ZIP file is broken. Make sure your site is updated and download the plugin file again. Try installing it one more time. If the problem persists, contact the plugin support.
Upload Failed Error
If you see an upload failed message, your file size might be too big. Some websites have limits set by the server. You can fix this by increasing the file size limit or asking your hosting provider for help. Or, use FTP to upload the plugin manually. This is a good backup option.
Plugin Not Activating
You clicked “Activate,” but nothing happens. This could mean there’s a conflict with another plugin. Try turning off other plugins one by one and see if it works. Also, make sure you’re not missing any required settings. If needed, delete and reinstall the plugin.
ZIP File Invalid
If your computer or WordPress says the ZIP file is not valid, it might be corrupted. Delete the file and download it again from the official source. Make sure the download is complete. Do not unzip it before uploading in WordPress. Only upload the full ZIP file as it is.
Missing License Key
If you’re using the PRO version and features are locked, you might have skipped the license key. Check your email for the key you got after buying. Go to the plugin settings and add the key. Without it, the PRO features will not work. This step is easy but very important.
FTP Upload Issues
When using FTP, it’s easy to drop the wrong folder in the wrong place. Always upload the extracted plugin folder to the correct path. After uploading, activate it from your WordPress dashboard. If the folder is missing files, the plugin may break. Double-check everything before moving forward.
Features Not Showing
If features like quick checkout or popups don’t appear, they may be turned off in the settings. Go to the plugin dashboard and check if the main features are switched on. Look through each section carefully to make sure nothing is missing. Sometimes, just clicking the right option can fix the issue. Refresh the page after making changes to see if everything works properly.
How Do You Customize the Checkout Page Layout for Better Conversion?
Well-designed checkout pages build customer confidence and speed up the buying process. Even small changes in layout and style can have a big impact. It’s all about keeping things clear and simple. Here are some smart ways to improve your checkout layout.
Choose the Right Template
Start by picking a layout that fits your store. You can choose from styles like product tables, lists, sliders, or tabs. Each one shows items in a different way. Try a few and see what looks best with your products. The right layout can make checkout look cleaner and easier to follow.
Keep It Simple
Don’t overload the page with too much stuff. Only show the fields that really matter. Remove anything that’s not needed for placing an order. A short and clean form helps customers stay focused. The less confusion, the faster they’ll finish buying.
Add Product Images
Show product pictures next to the names on the checkout page. This helps customers double-check what they’re buying. It also makes the page look nicer and more organized. A small image can be very helpful. People feel better when they see what they’re paying for.
Use Clear Labels
Make sure every field and button has easy-to-read text. Labels like “First Name” or “Email Address” should be simple and clear. Use words that people already understand. Avoid using tricky or fancy terms. Clear words lead to fewer mistakes.
Show Trust Signals
Add trust badges to the checkout area, like “Secure Payment” or “Money-Back Guarantee.” These small signs help customers feel safe. You can also enable mandatory login for checkout in WooCommerce to make sure only real users are placing orders. It shows them that their information is protected. Feeling safe makes people more likely to complete the order.
Keep Buttons Visible
Make the “Place Order” or “Buy Now” button easy to spot. Use a bright color and make sure it stands out on the page. Place it where people can see it without scrolling too much. On mobile, keep buttons sticky so they stay on the screen. This helps people click faster.
Test Before Going Live
Try the checkout yourself before letting others use it. Place a test order and check every step. Make sure all buttons, fields, and options work well. Fix anything that feels slow or confusing. A quick test can save you from losing real sales.
Tips for Tracking One-Page Quick Checkout Functionality After Installation
After setting up the One Page Quick Checkout plugin, it’s important to check if everything is working the right way. This helps you spot any issues early and understand what your customers are doing. Simple tools and steps can make this easy. Continue reading to learn how to track it better.
![]()
Test Checkout Steps
Start by testing the checkout yourself. Try adding different products to the cart and going through the full checkout process. Make sure the form shows up properly and the order goes through. Check that the popups and buttons all work. If anything feels slow or stuck, fix it early.
Use Google Analytics
Google Analytics can help you track how many people start and finish the checkout process. Set up basic tracking using the plugin or a tool like Google Tag Manager. This will show you if customers leave in the middle or complete their orders. Watching these numbers gives helpful clues. You can make better choices from what you learn.
Monitor Cart Behavior
Check how customers are using the cart. Are they adding items and then leaving? Are they going straight to checkout? Some plugins let you track this inside WordPress. If people are leaving the cart often, something might be confusing or broken. It’s a good way to find what needs fixing.
Check Checkout Speed
A slow checkout page can make people leave. Use free tools like PageSpeed Insights to see how fast your checkout loads. If it’s too slow, remove extra stuff or large images. Keep the layout simple and clean. Fast loading means happy shoppers.
Track Form Abandonment
See if users are starting to fill out the form, but then stop. This is called form abandonment. Some plugins help track this by recording where people stop typing. If many stop at the same place, that field might be confusing. Change or remove it to keep them moving.
Use Built-in Reports
Some versions of the plugin come with built-in stats. These reports show how many times the checkout was used and how many orders came through it. You can view them inside your WordPress dashboard. Check these often to stay updated. They give a clear picture of what’s working.
Commonly Asked Questions
Once the One Page Quick Checkout plugin is installed, many users still have small doubts or need extra help with specific steps. This FAQ section answers those extra questions clearly. If you’re looking to learn more or avoid simple mistakes, these answers will help you feel more confident.
Is It Safe to Install the One Page Quick Checkout Plugin on a Live Site?
Yes, it is safe as long as you follow the standard steps. Always back up your website before adding any new plugin. Also, test it briefly before changing any live settings. Most users install it directly without any site issues or breakdowns.
Do I Need WooCommerce Installed Before Adding One Page Quick Checkout Plugin?
Yes, WooCommerce must be installed and active before using One Page Quick Checkout. This plugin is built to work with WooCommerce, and it won’t function properly without it. Make sure WooCommerce is running before adding this plugin to avoid problems.
Can I Use One Page Quick Checkout Plugin With a Custom Theme?
Yes, it works with most custom WordPress themes. However, it’s a good idea to test the layout after installing to make sure everything displays properly. If things look off, you may need to adjust some theme settings or styling.
What Happens If I Delete the Checkout Plugin by Mistake?
If you delete the checkout plugin, the features will stop working, but your site won’t break. You can reinstall it again from the WordPress plugin store or using the ZIP file if you have the PRO version. Your settings may be saved unless you fully reset your site.
Does the Checkout Plugin Work on Subdomains?
Yes, the checkout plugin can be used on subdomains if your WordPress and WooCommerce installations are running there. Make sure the subdomain is properly configured and that you have access to the admin dashboard where you want to install the plugin.
Can I Use This Plugin on Multiple Websites?
For the free version, yes, you can install it on as many websites as you want. For the PRO version, the license usually limits how many sites you can use it on. You’ll need to check the license type you purchased to be sure.
What If I Can’t Find the One Page Quick Checkout Plugin in the Search Results?
If the plugin doesn’t appear when you search inside WordPress, double-check your spelling. If it still doesn’t show up, visit the WordPress plugin site directly or download the ZIP file from the official site. Some regions may have slow plugin loading, so give it a moment.
Bottom Line
Upgrading your online store should feel exciting, not stressful. With the One Page Quick Checkout plugin, you can give your customers a smooth and speedy checkout process that keeps them coming back for more. Setting it up is easier than you might think, and every step brings you closer to a better shopping experience for everyone.
This step-by-step guide to installing One Page Quick Checkout plugin has covered everything you need, from picking the right version to fixing common errors. Each tip was designed to help you get the most out of your store and boost your sales without any headaches along the way.
If you’re ready to create a checkout that’s fast, friendly, and fits your store perfectly, don’t wait any longer. Try the tips from this guide today and see the difference a simple checkout can make.