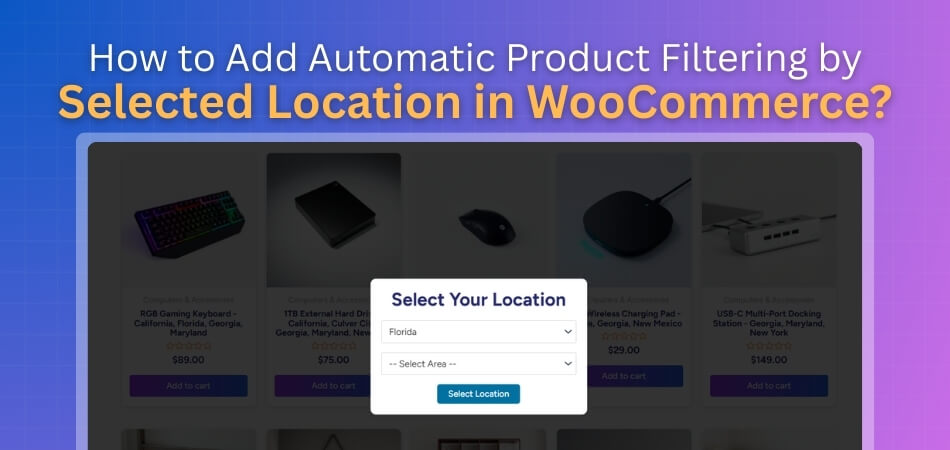
Location can shape how people shop online, especially when stores sell from different areas. Many store owners want their visitors to see only products available nearby. That’s why they often wonder how to add automatic product filtering by selected location in WooCommerce.
Add automatic product filtering by selected location in WooCommerce using the Multi Location Product & Inventory Management plugin. Insert the [[mulopimfwc_store_location_selector]] shortcode via a widget or the shop page header. Once selected, it filters products based on that location, showing only in-stock items per region.
Are you curious about setting up location filters the right way? Keep reading this article to find every simple step, helpful method, and useful tip about automatic product filtering in WooCommerce.
How to add Automatic Product Filtering by Selected Location in WooCommerce?
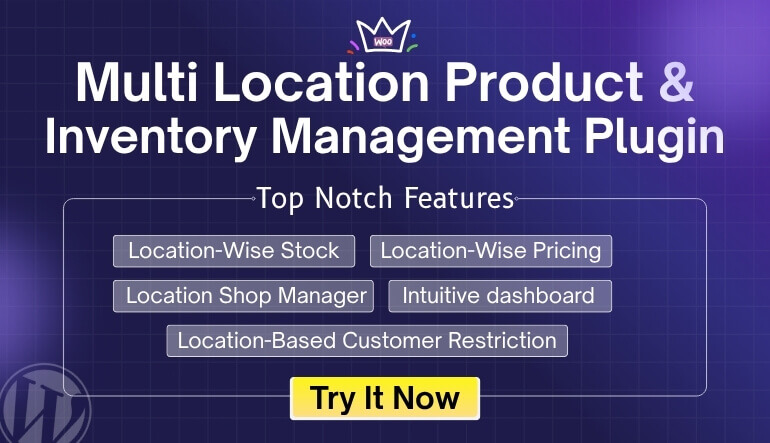
If your WooCommerce store sells products from multiple locations, adding an automatic product filter based on the selected location helps your customers view only the products available at their preferred location. To make this work, you’ll need the Multi Location Product & Inventory Management for WooCommerce plugin.
This plugin is simple to use, doesn’t require any coding skills, and comes with both free and paid versions. Once it’s installed, you can add an automatic location selector in your store so visitors can choose their location and see only the products available there. It’s a great choice for stores that manage stock across several locations because it supports multi location inventory management for WooCommerce, helping you keep your product availability accurate for every region.
There are two main ways to do it with this plugin. Here’s how:
Method 1: Add Location Selector Using Widgets
This is one of the easiest ways to add the location filter to your site’s header area.
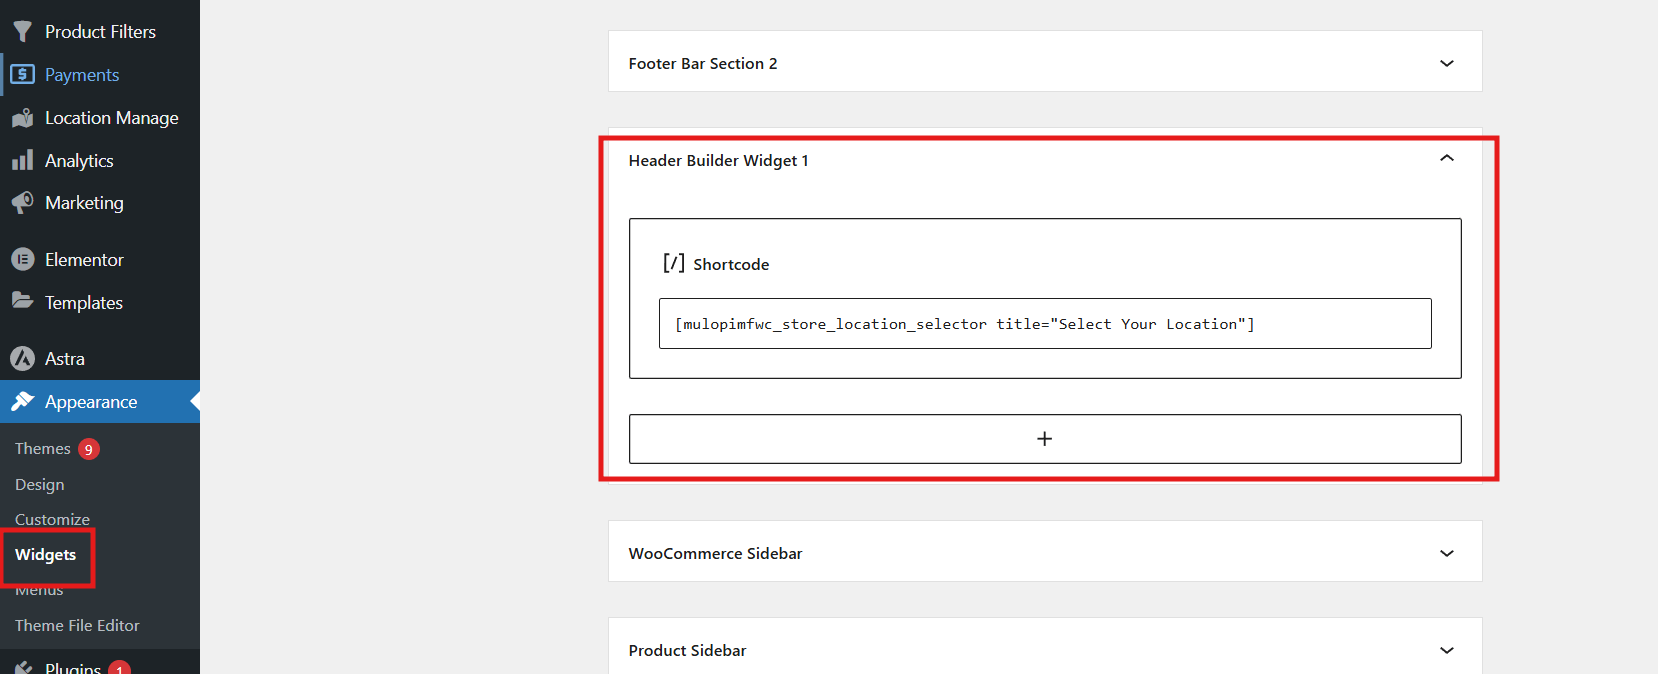
- From your WordPress dashboard, go to Appearance > Widgets.
- Look for the Header section.
- Click the + (Add Block) icon and search for Shortcode.
- Add a shortcode block, and paste this code inside it:
[[mulopimfwc_store_location_selector title=”Select Your Location”]]
Make sure to remove any extra brackets before saving.
- Once done, click Publish or Update to save your changes.
Now, when you visit your online shop, you’ll see a “Select Your Location” dropdown menu at the top. This allows customers to choose their preferred location, and the store will automatically filter products based on that selection.
Method 2: Add Location Selector by Customizing the Shop Page
If your theme doesn’t have a header option under Appearance > Widgets, don’t worry. You can still add the location selector directly through the customization menu.
Here’s how you can do it:
- Go to your Shop Page in WordPress.
- Click on Customize (you’ll find this option at the top of the page).
- Inside the customizer, look for the Header section.
- When you hover your mouse over the bottom part of the header, a + (Add Block) icon will appear.

- Click it and choose any of the available widget areas — Widget 1, Widget 2, or Widget 3.
- After adding a widget, click on it and select the + icon again to add a Shortcode block.
- Paste the same shortcode:
[[mulopimfwc_store_location_selector title=”Select Your Location”]]
Remove the extra brackets before saving.

- Once you’re done, click Publish, Save Draft, or Schedule — whichever fits your current work stage.


After saving, go back to your shop page. You’ll now see a location selection dropdown, just like in Method 1. When customers pick their location, WooCommerce will automatically display only the products that are available in that specific area.
With just a few steps, you can make your WooCommerce store smarter and more organized. This small feature goes a long way in keeping your customers happy and helping you manage your stock efficiently across multiple locations.
Why Location-Based Product Filtering Matters in WooCommerce
Online stores serve people from many places with different product needs. Showing all products to everyone can cause confusion or frustration. Location-based product filtering helps show only the items that are available locally. Let’s look at how this simple idea makes online shopping easier and smarter for customers and sellers.
Makes Shopping Easier for Customers
When buyers only see what they can actually buy, it saves time. They don’t have to check each product to see if it’s available in their area. This helps them make quick and confident choices. It also builds trust because the store feels more reliable and user-friendly.
Helps Local Sellers Reach the Right Audience
Local stores can show products to customers in nearby areas only. This keeps the focus on what is ready to deliver fast. It also supports small sellers who may not ship everywhere. As a result, buyers get better service and sellers avoid unnecessary delivery problems.
Reduces Confusion With Out-of-Stock Items
Customers get annoyed when they find a product but can’t order it. Location-based filtering solves that by hiding items that are unavailable in certain regions. This makes the store look neat and clear. It also helps customers enjoy smooth browsing without running into “not available” messages.
Supports Better Product Visibility
Stores can control which products appear in which region. This helps promote local offers or seasonal products in the right places. Along with location-based product visibility, many stores also use geolocation-based product pricing in WooCommerce to display region-specific prices, improving accuracy and customer trust. This makes the shopping experience more personal and fair.
Improves Order Accuracy and Delivery Time
When customers see only nearby products, delivery becomes faster. Orders reach the right places without delays or confusion. Sellers can plan shipping better and manage stock more easily. It also saves time and effort for both sides, leading to happier customers.
Location-based product filtering is simple but very effective for online stores. It helps customers find what they need without wasting time. Sellers also benefit from fewer delivery issues and better local reach. Add this feature to your WooCommerce store to create a smoother and more reliable shopping experience.
Best Plugins for Automatic Location-Based Product Filtering
The Multi Location Product & Inventory Management plugin for WooCommerce helps online stores manage stock, pricing, and orders across different branches or warehouses. It keeps everything updated automatically, giving customers a better shopping experience with real-time stock and pricing based on their location. The plugin can also detect the nearest store and show products from that location.
Free Version
- Manage multiple store locations
- Basic stock management
- Location selection for customers
- Centralized stock dashboard
- Manual nearest location choice
- Import or export stock using Excel
- Simple setup through WordPress
Pro Version
- Auto order fulfillment rules
- Location-based pricing
- Location-specific shipping and payment methods
- Automatic nearest store detection
- Real-time stock and pricing updates
- Role-based location manager
- Complete reporting and analytics
Common Problems When Setting Up Location-Based Filters and How to Fix Them
Setting up location-based filters can feel tricky at first. Many store owners face small setup mistakes that cause big issues later. The good news is that these problems are easy to solve with the right steps. Keep reading to learn the most common setup problems and how to fix them easily.
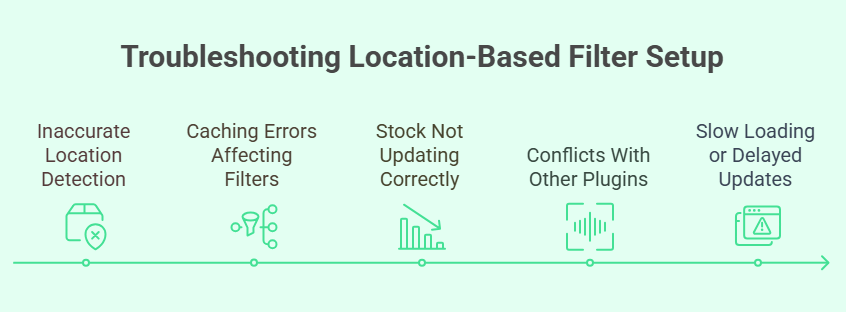
Inaccurate Location Detection
Sometimes the website shows the wrong store or location to users. This can happen if the location detection setting is not turned on properly. Make sure your site has permission to access the user’s location. Double-check your plugin settings to confirm auto-detection is enabled and connected to your store database.
Caching Errors Affecting Filters
Cache memory can cause filters to show old stock or prices. This happens when your website keeps saving data instead of loading fresh updates. Clear your cache after making changes to your product settings. You can also use a plugin that refreshes cache data automatically to keep everything accurate.
Stock Not Updating Correctly
One common problem during setup is that filters don’t show the correct stock for each location. This usually happens when store owners forget to setup a multi location inventory management plugin, which helps link inventory with the right location filters automatically. Once connected, the system updates stock levels in real-time for every store.
Conflicts With Other Plugins
Too many active plugins can cause location filters to stop working. Some plugins may use the same code or settings, creating errors. Try disabling unused plugins one by one to find the problem. Once found, keep only the plugins that are required for your store to run smoothly.
Slow Loading or Delayed Updates
If your filters take too long to load, check your server speed. Slow hosting or heavy plugins can make pages respond slowly. You can fix this by using a lightweight theme and a faster host. Also, reduce extra scripts or large images that delay your filter updates.
Setting up filters the right way saves you time and trouble later. Take a few minutes to test each filter after setup to confirm it works well. Always use trusted plugins that support multi-location features. A well-set system makes shopping faster, easier, and more enjoyable for your customers.
Tips to Improve User Experience with Location-Based Product Filtering
Making location-based product filters simple helps shoppers find what they want faster. Clear labels, auto options, and smart defaults make a big difference. A smooth filter system improves shopping comfort. Let’s see some easy ways to make it better.
- Use Clear Labels: Customers should understand each filter without guessing. Write simple names like “Available Near You” or “Ships to My Area” for better clarity and quick choices.
- Add Auto Detection: Let the website find a visitor’s location automatically. This saves time and removes confusion while showing products available in that area only.
- Keep Filters Visible: Place the filter options at the top or side. This way, users don’t have to search for them while browsing products.
- Offer Smart Defaults: Start with common options based on region or language. It helps people see the most relevant items first without adjusting settings manually.
- Use Simple Design: Keep filter boxes clean with easy-to-read text. Avoid too many buttons or steps that might make the shopping process longer.
- Add Quick Reset Option: Let users clear filters with one click. This helps them start over easily and explore different locations or categories without confusion.
- Show Live Results: Update products instantly as users change filters. This makes the site feel faster and keeps people interested while browsing.
A well-designed filter system can turn confusion into comfort. Shoppers stay longer when finding items feels easy. Clear, smart, and simple filters improve trust and keep customers coming back for more.
FAQs About How to Add Automatic Product Filtering by Selected Location in WooCommerce?
Setting up location-based product filters can raise many small questions. Some users may wonder how to customize filters or connect them with store stock. Others want to make sure the filters update correctly on every page. Below are simple answers to help you manage and improve your WooCommerce store setup.
How Does Location-Based Filtering Work in WooCommerce?
Location-based filtering works by linking your products to different store locations. When a customer selects their area, the store only shows items available there. It saves time for buyers and helps store owners avoid selling out-of-stock items. This makes shopping faster and more accurate for everyone.
Can I Add a Custom Location Dropdown Anywhere on My Site?
Yes, you can place the location selector anywhere you want on your website. Many users add it to the header or sidebar using shortcode blocks. You can also add it to product pages or the homepage for easy access. The goal is to make it simple for customers to select their area before browsing.
Do I Need Coding Skills to Set Up Location Filters?
No, you don’t need coding skills to set this up. The Multi Location Product & Inventory Management for WooCommerce plugin makes it easy to install and use. You can add shortcodes, manage stock, and create filters directly from your dashboard. Everything is done through simple clicks instead of writing code.
Will Location Filters Affect Website Speed?
In most cases, location filters do not slow down your site. But if your hosting is weak or your theme is heavy, it can cause small delays. You can fix this by using caching tools and optimizing images. Always check that your plugin is updated and not conflicting with others.
Can I Show Different Prices for Different Locations?
Yes, you can display different prices for each location using the pro version of the plugin. This helps when shipping costs or taxes change between regions. The plugin adjusts the pricing automatically based on the selected location. It keeps everything accurate and fair for all customers.
How Can I Test If My Filters Are Working Properly?
You can test your filters by choosing different locations and checking product lists. If the products or prices change as expected, it means everything works fine. Try testing on both desktop and mobile devices. This ensures customers see the right stock no matter how they shop.
What Happens If a Customer Doesn’t Choose a Location?
If a user skips choosing a location, the store usually shows general products. Some stores set a default location to display products automatically. You can also set up auto-detection so the plugin picks the nearest store. This small step makes shopping easier for first-time visitors.
Can I Link Stock Updates to Each Location Automatically?
Yes, the plugin can sync stock in real-time across all locations. When one item sells at a specific branch, the inventory updates for that store only. You just need to set up a multi-location inventory management plugin to connect everything correctly. It saves time and keeps your product data clean.
How Do I Make Location Filters Look Better on My Site?
You can customize the style of your filters using your theme options or CSS. Choose clear colors, short labels, and easy-to-read fonts. Keep the dropdown or buttons simple so users can make choices quickly. A clean design helps customers focus on shopping instead of finding filters.
Is It Possible to Use Location Filters With Other WooCommerce Plugins?
Yes, most WooCommerce plugins work well with location-based filtering. However, you should avoid using multiple plugins that handle the same features. Always check compatibility details before installing a new plugin. Testing after installation helps you make sure everything runs smoothly together.
Conclusion
Adding automatic product filtering based on location helps customers find only what’s available in their area. It makes your store more organized, saves time for buyers, and builds trust by showing the right products in the right place without confusion or delay.
If you want to know how to add automatic product filtering by selected location in WooCommerce? it’s simple — just install the Multi Location Product & Inventory Management plugin and add the location selector using a shortcode or widget. This feature automatically filters products based on the customer’s chosen area, creating a smooth and smart shopping experience.
Before wrapping up, remember a few quick tips: always test your filters after setup, clear cache regularly, and keep your plugins updated for better performance. Focus on a clean design and quick loading speed. Wishing you all the best as you build a smooth, location-based WooCommerce store that your customers will enjoy using.