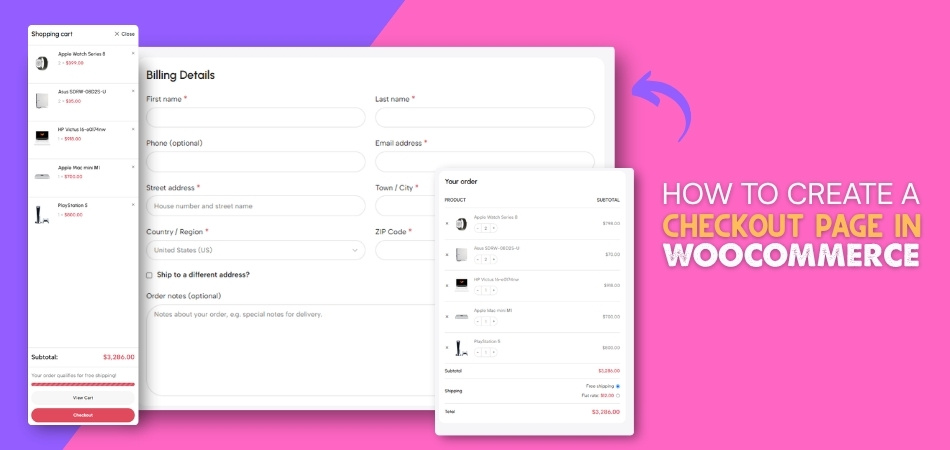
Creating a checkout page in WooCommerce is easier than many store owners expect. WooCommerce can generate one automatically, but you can also build or customize it using default or checkout plugins, depending on your store setup.
In this guide, we’ll explain how to create a checkout page in WooCommerce, which method fits different store needs, and what to check to make sure the page works smoothly before going live. Keep reading to learn in detail.
Quick Answer
To create a checkout page in WooCommerce, use the default page created during setup, build one with the Checkout Block or [[woocommerce_checkout]] shortcode, or use a checkout plugin, then assign it in WooCommerce settings and test the full checkout flow properly.
How the Checkout Page Works in WooCommerce?
WooCommerce checkout page handles the final steps of an online purchase before an order is placed. It connects cart contents, customer details, shipping choices, and payment methods in one flow. Smooth checkout experience helps reduce friction, improves trust, and makes it easier for shoppers to complete a purchase without unnecessary delays. Here are the main ways it works during checkout:
- Cart items move into checkout
- Billing details get collected
- Shipping fields may appear
- Payment methods become available
- Order totals update automatically
- Coupon codes can be applied
- The full order can be reviewed
- Purchase is completed from here
What to Check Before Creating a Checkout Page in WooCommerce?
Before setting up a new checkout page, it helps to make sure your store basics are already working properly. Small setup issues in pages, payments, or theme support can affect the checkout experience later. These quick review first can save time and help the page function smoothly from the start.
- WooCommerce Installation: Make sure WooCommerce is installed, activated, and updated so checkout features, settings, and store pages work as expected.
- Existing Store Pages: Check whether cart, checkout, and account pages already exist before creating anything manually or replacing the current setup.
- Page Assignment: Confirm the correct checkout page is assigned in WooCommerce settings so your one page checkout setup or default checkout flow sends customers to the right page.
- Payment Gateways: Enable and review payment methods first, because checkout page testing is incomplete without working payment options.
- Shipping Settings: Review shipping zones, methods, and rules so the checkout page can display accurate delivery options and totals.
- Theme Compatibility: Use a WooCommerce-compatible theme to avoid layout issues, missing fields, or broken checkout design elements.
- Permalink Structure: Make sure permalinks are working correctly, since broken URLs can stop checkout pages from loading properly.
- Basic Checkout Test: Run a quick test order first to confirm the existing checkout flow works before making custom changes.
How to Create a Checkout Page in WooCommerce? 4 Simple Methods
Once the basic setup is ready, the next step is choosing the method that fits your store best. WooCommerce gives you several ways to build a checkout page, from the default setup to custom layouts and even a more streamlined one page checkout WooCommerce experience for faster purchases. Here are the main methods to follow.
Method 1: Use the WooCommerce Default Setup
Default WooCommerce setup is the easiest way to create a checkout page because core pages are often generated automatically during installation. For many stores, this method is enough to get checkout working quickly without extra tools or design changes. Here is the process:
- Check Existing Checkout Page: Go to Pages in WordPress and see whether a checkout page is already available in your site pages.
- Restore Missing Store Pages: Open WooCommerce > Status > Tools and use the page creation option if default store pages are missing.
- Review Page Content: Open the checkout page and confirm it contains the correct WooCommerce checkout setup instead of unrelated text or layout elements.
- Assign Checkout Page: Go to WooCommerce > Settings > Advanced and choose the correct page from the checkout page dropdown.
- Save Store Settings: Save the updated settings, so WooCommerce uses the selected page for the checkout process.
- Test Checkout Flow: Add a product to the cart and move to checkout to confirm the page loads and works properly.
Method 2: Create With the WooCommerce Checkout Block
WooCommerce Checkout Block gives you a more modern way to build the checkout experience inside the WordPress editor. It works well for stores that want more layout flexibility while still using WooCommerce’s native checkout system. Follow these steps:
- Create a New Page: Go to Pages > Add New and create a fresh page for your checkout setup.
- Add the Checkout Block: Open the block editor, search for the Checkout block, and insert it into the page.
- Adjust Block Layout: Review the available checkout sections and make small layout changes based on your store’s needs.
- Publish the Page: Save and publish the new page once the checkout block is added properly.
- Set It As Checkout Page: Open WooCommerce > Settings > Advanced and assign the new block-based page as the checkout page.
- Run a Test Order: Visit the front end and test the full checkout process to make sure fields, totals, and payment options appear correctly.
Method 3: Classic WooCommerce Checkout Page With Shortcode
Classic shortcode method works well for stores using older WooCommerce setups, classic themes, or simple page structures. It is a practical option when you want a manual checkout page without relying on the Checkout Block. Here is the breakdown:
- Add a New Page: Go to Pages > Add New and create a new page for checkout.
- Insert the Shortcode: Add the [[woocommerce_checkout]] shortcode using a shortcode block or the page editor.
- Publish the Page: Save and publish the page after adding the shortcode correctly.
- Assign the Page: Open WooCommerce > Settings > Advanced and select this page as the checkout page.
- Check Front-End Display: Visit the page on the front end and confirm the checkout form loads properly.
- Test Order Submission: Run a test purchase to make sure checkout fields, payment methods, and order placement work as expected.
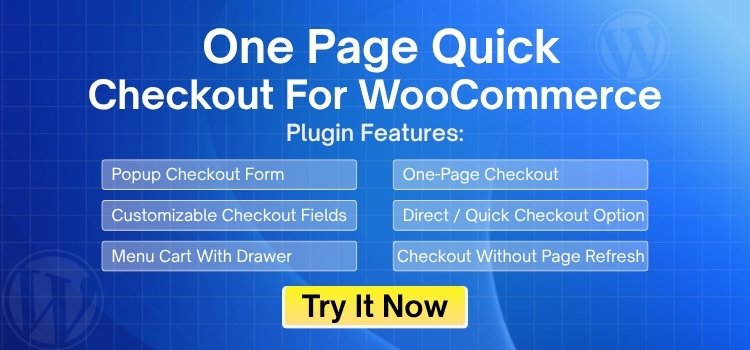
Method 4: Advanced Checkout Page With a Dedicated Plugin
Default WooCommerce checkout works for many stores, but some stores need more control over layout, product display, and checkout flow. In that case, one page quick checkout for WooCommerce can help create a more flexible single-product or multi-product checkout experience from one place.
Step 1: Install the Plugin
Start by installing the version that matches your store setup.
Installation (Free Version)
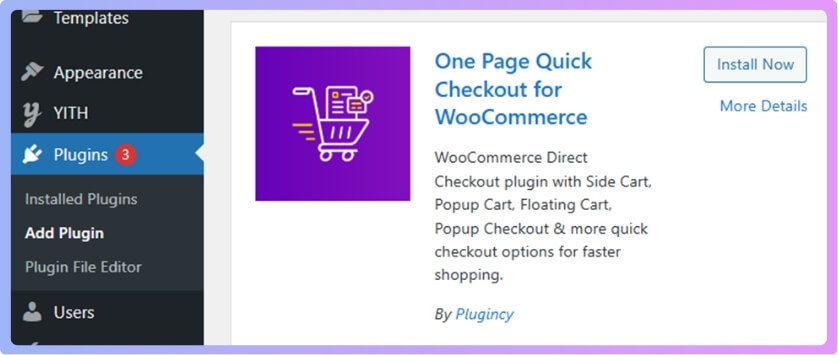
- Go to your WordPress Admin Dashboard
- Click Plugins → Add Plugin
- Search for One Page Quick Checkout for WooCommerce
- Click Install Now
- Click Activate

Installation (Pro Version)
- Purchase the Pro version from the official website
- Download the ZIP file from the email you receive
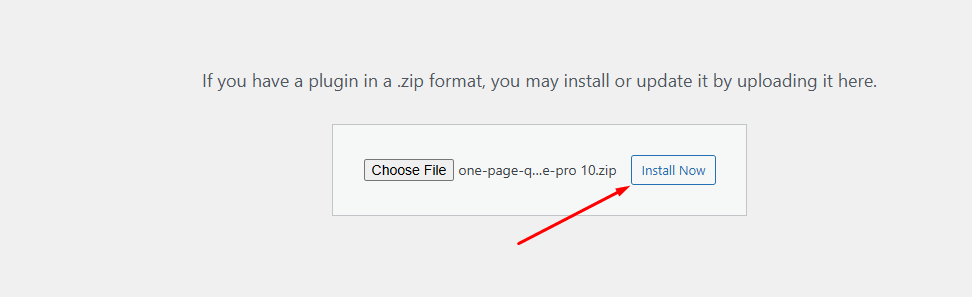
- Go to Plugins → Add Plugins → Upload Plugin
- Upload the ZIP file
- Click Install Now
- Activate the plugin

After Activation
- Go to One page Checkout → Plugin License
- Enter your license key to unlock Pro features
Step 2: Choose the Type of One Page Checkout
Plugin supports two main checkout setups depending on how you want customers to shop and complete their orders.
- Single Product One Page Checkout
- Multi Product One Page Checkout
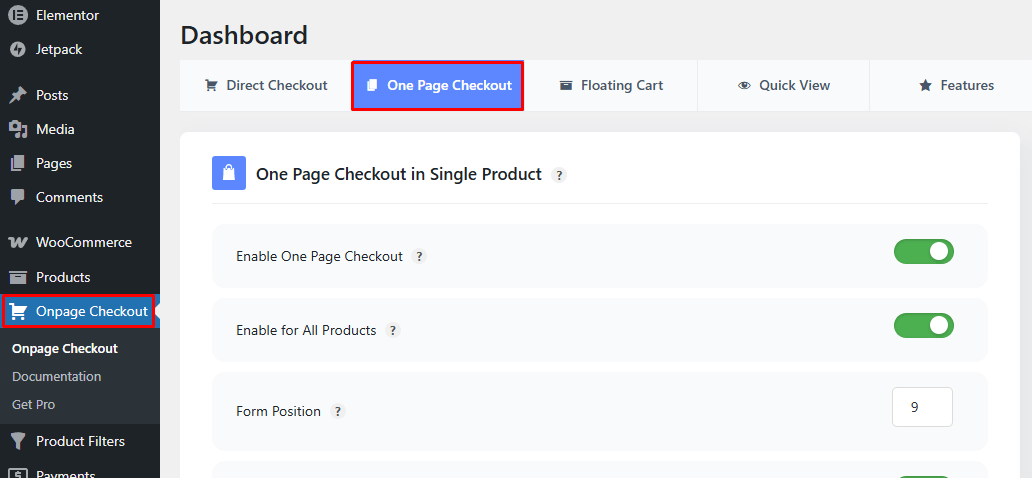
Single Product One Page Checkout
- Go to One page Checkout in your WordPress dashboard
- Click One Page Checkout
- You will see two options:
- Enable One Page Checkout
- Enable for All Products

How These Options Work
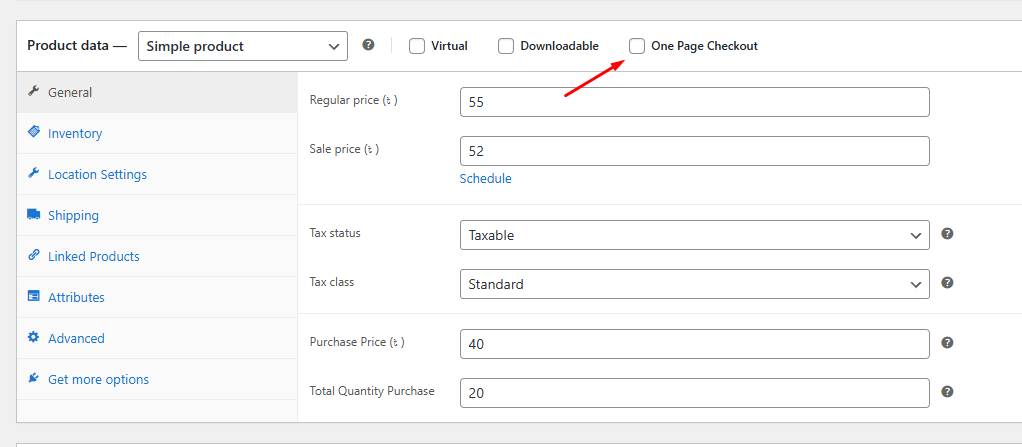
- Enable One Page Checkout: Use this when you want one-page checkout only for selected products. You need to turn it on manually inside the Product Data settings for each product.

- Enable for All Products: Use this when you want one-page checkout enabled across the entire store automatically.
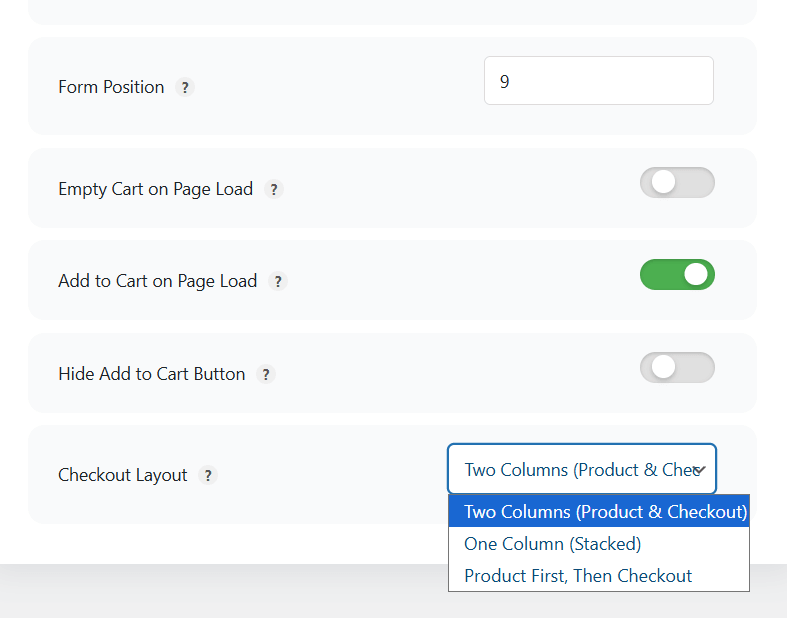
Additional Configuration Options
- Form Position: choose where the checkout form appears
- Empty Cart on Page Load: clear the cart automatically when the page opens
- Add to Cart on Page Load: add the selected product to the cart as soon as the page loads
- Hide Add to Cart Button: remove duplicate cart actions from the page
- Checkout Layout: adjust the checkout structure to better fit your store design

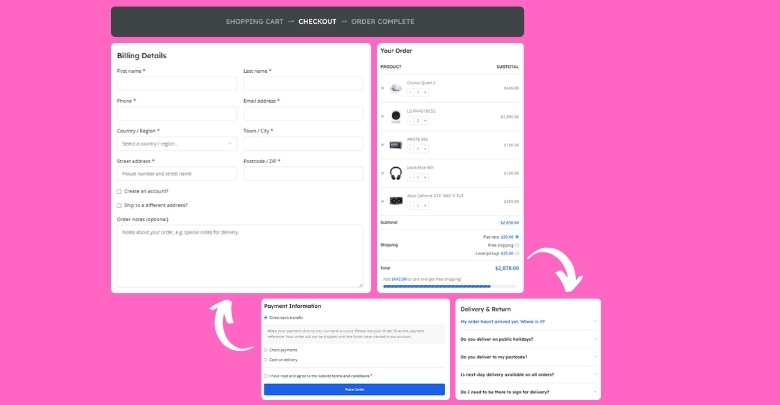
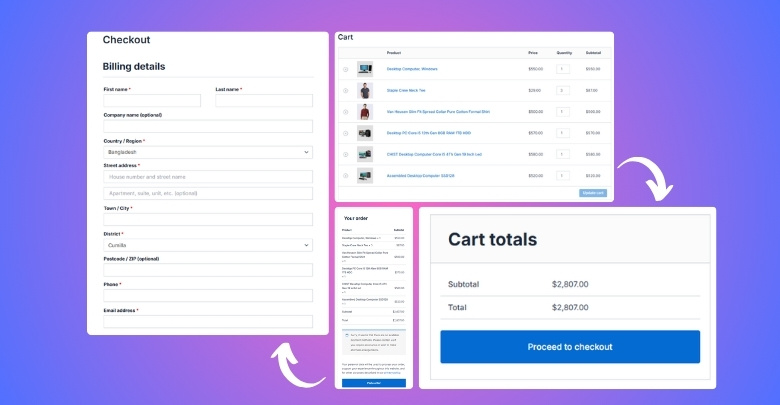
Multi Product One Page Checkout
This setup allows shoppers to choose multiple products and complete checkout on the same page.
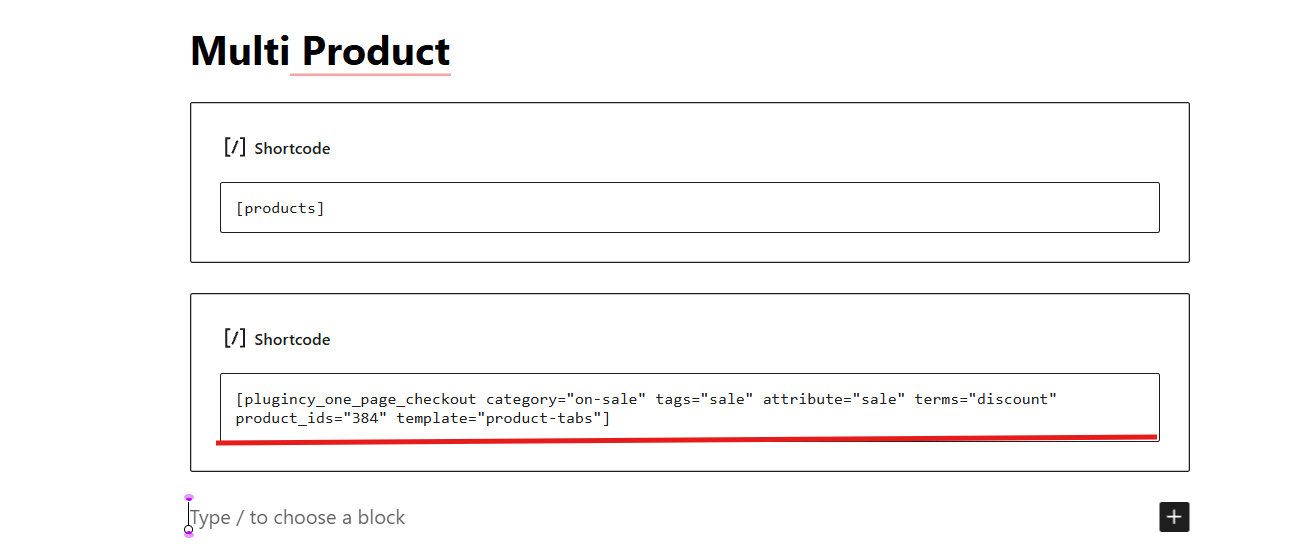
Using the Shortcode
- Add the shortcode to the page where you want multi-product checkout to appear
- Use this format:
[[plugincy_one_page_checkout category=”” tags=”” attribute=”” terms=”” product_ids=”” template=”product-tabs”]]
Shortcode Attributes
- category
- tags
- attribute
- terms
- product_ids
- template
Available Templates
- product-table
- product-list
- product-single
- product-slider
- product-accordion
- product-tabs
- Pricing-table
Step 3: Create the Checkout Page With WordPress Blocks or Elementor
Multi-product setup also lets you build the checkout page visually instead of relying only on shortcode placement.
Using WordPress Blocks
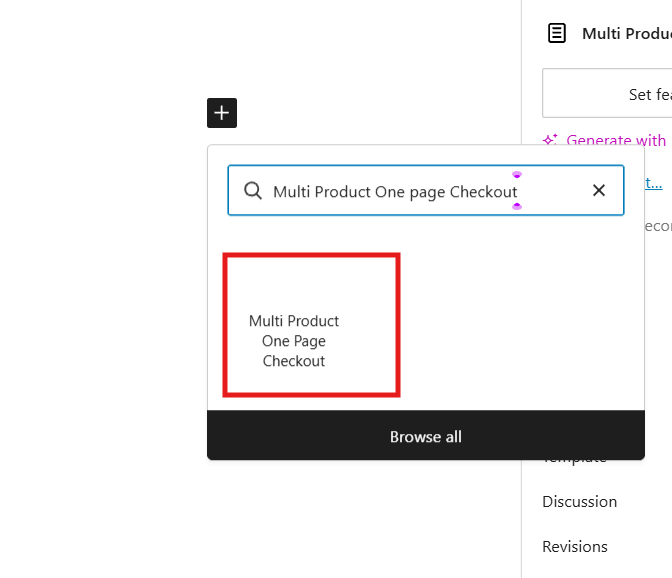
- Create or open the page where you want checkout to appear
- Search for Multi Product One Page Checkout blocks
- Add the block to the page
- Select products and choose a layout
- Adjust styling if needed
- Publish or update the page

Using Elementor
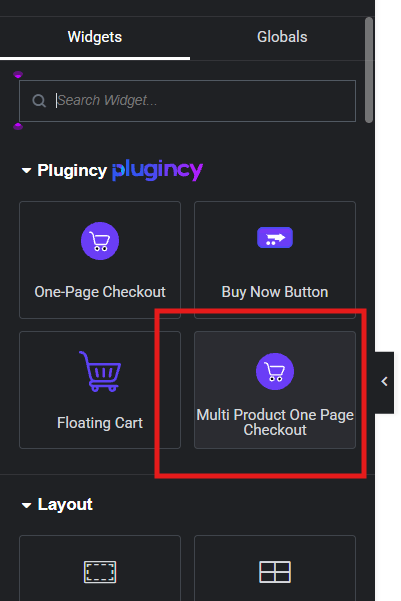
- Create or open the page with Elementor
- Search for the Multi Product One Page Checkout widget
- Add the widget to the page
- Select products and choose a layout
- Style the widget as needed
- Publish or update the page

Which Checkout Page Method Is Best for Your Store?
Best method depends on your store setup, how much flexibility you need, and how you want customers to move through checkout. Quick comparison below makes it easier to see which option fits different store types and checkout goals.
| Method | Store Type | Best For |
| WooCommerce Default Setup | New or simple stores | Getting checkout live quickly with minimal setup |
| WooCommerce Checkout Block | Modern WooCommerce stores | Native customization through the block editor |
| Classic Checkout With Shortcode | Stores using classic themes | Manual checkout page setup with broad compatibility |
| Dedicated Checkout Plugin | Growth-focused or conversion-focused stores | Faster checkout flow and more advanced checkout features |
Essential Elements Every WooCommerce Checkout Page Should Include
Strong checkout pages need more than just a form and a payment button. Missing or unclear sections can create confusion, slow down the buying process, and increase the chance of cart abandonment. Including these elements helps shoppers move through checkout with less friction and more confidence.
- Billing Fields: Collect customer details needed for the order, such as name, address, email, and phone number.
- Shipping Details: Show delivery fields when physical products require shipping information during checkout.
- Payment Methods: Display available payment options clearly so customers can choose how they want to pay.
- Order Summary: Present selected products, quantities, and totals so shoppers can review the order before payment.
- Coupon Field: Allow customers to apply valid discount codes during checkout without leaving the page.
- Place Order Button: Keep the final action button clear, visible, and easy to click on all devices.
- Trust Signals: Add helpful details like secure payment messaging or policy links to improve confidence before purchase.
Can You Use Multiple Checkout Pages in WooCommerce?
Yes, WooCommerce can support multiple checkout page setups, but not always in the default way store owners expect. Standard WooCommerce usually works with one main assigned checkout page, while extra checkout experiences are often created through custom flows, product-based checkout links, or tools like a WooCommerce One Page Checkout plugin for more flexible purchase paths.
- Default WooCommerce uses one assigned checkout page
- Extra checkout flows usually need a custom setup
- Product-based checkout pages can be created with plugins
- One-page checkout can be used for selected products
- Different checkout experiences can support different campaigns
- Plugin-based control makes multiple checkout paths easier
Choosing the Right Checkout Layout for Your Store
The right checkout layout should match the way your store sells, not just how the page looks. A layout that fits your products and buying flow can make checkout feel clearer, faster, and easier to complete. To narrow it down, focus on these practical points first.
- Match Layout to Product Type: Simple products often work well with a clean layout, while larger catalogs may need a more structured checkout experience.
- Consider Cart Complexity: Stores with more options, variations, or add-ons usually need a layout that keeps order details easy to review.
- Think About Customer Buying Behavior: Fast buyers may respond better to a shorter layout, while careful buyers may prefer more visible order information.
- Keep Important Sections Easy to Find: Payment, order details, and customer information should stay visible without making the page feel crowded.
- Choose Mobile-Friendly Structure: Layout should remain clear and usable on smaller screens without forcing too much scrolling or zooming.
- Avoid Visually Heavy Designs: Extra sections, banners, or distractions can make checkout feel longer than it really is.
- Support Your Checkout Goal: Some stores need a basic completion-focused layout, while others need a more sales-focused structure with upsells or quick product selection.
- Review the Full Page Flow: Look at the page as one experience to make sure each section feels connected and easy to follow.
How to Optimize Checkout Fields for Better Flow?
Once the checkout page is in place, the next step is making the form easier to complete. Small changes to field order, labels, and form length can make checkout feel smoother and less frustrating. That is why customizing WooCommerce checkout fields in a practical way can improve the buying experience. Here’s how.
- Remove Unneeded Fields: Keep only the fields that matter so customers can complete checkout with less effort.
- Arrange Fields Clearly: Group related fields in a natural order to make the form easier to follow.
- Use Simple Labels: Write labels in a clear way so shoppers understand what each field needs.
- Mark Required Fields Properly: Show important fields clearly to help customers avoid errors during checkout.
- Improve Mobile Usability: Make sure fields are easy to tap, read, and complete on smaller screens.
- Avoid Repeating Details: Do not ask for the same information more than once unless it is necessary.
- Use Guidance Only Where Needed: Add short placeholder text or hints only when they truly help.
- Test the Form Flow: Review checkout from a shopper’s perspective to see where the process can be improved.
FAQs About Creating a Checkout Page in WooCommerce
Final setup questions often come up once the checkout page starts taking shape. These FAQs cover a few useful points that can help clarify options, reduce uncertainty, and support better checkout decisions.
Does WooCommerce Always Create a Checkout Page Automatically?
WooCommerce often creates a checkout page during the initial setup, but that does not always mean the page stays active, assigned correctly, or unchanged over time. Some stores may need to restore or reassign it later.
Can I Create a Separate Checkout Experience for Specific Products?
Yes, some stores create different checkout experiences for selected products, promotions, or faster buying flows. This is usually done through product-based checkout tools or advanced plugin features rather than a single default setup.
Should I Use Checkout Block or Shortcode for a New Store?
For a newer store, the Checkout Block is usually the more modern option because it fits better with current WordPress editing. Shortcode-based checkout still works, but it is often a better fit for classic themes or older setups.
Can I Turn a Product Page Into a Checkout Page?
Yes, that is possible with the right checkout plugin. Some tools let customers view a product and complete the order from the same page, which can make the path to purchase shorter and more direct.
What Makes a WooCommerce Checkout Page More Conversion Friendly?
Cleaner layout, fewer distractions, better field flow, and a checkout process that feels quick and clear often make the biggest difference. Strong usability usually matters more than adding extra design elements.
Final Thoughts
Getting checkout right can make a real difference in how easily customers finish a purchase. Once you understand how to create a checkout page in WooCommerce, it becomes much easier to choose a setup that fits your store, supports your products, and keeps the buying process clear from start to finish.
Default WooCommerce options may be enough for some stores, while others may need block-based checkout, shortcode control, or a dedicated plugin for a more flexible flow. What matters most is using a checkout page that works smoothly, feels easy to follow, and helps customers place an order without extra friction.