Custom taxonomies let you organize products in ways that go beyond standard WooCommerce categories, tags, and attributes. When shoppers need to browse by those extra groupings, adding a custom taxonomy filter can make product discovery more useful and keep results easier to narrow.
This guide explains how to add a WooCommerce Custom Taxonomy Filter, which setup options are available, and what to check before placing the filter on your shop or category pages.
Quick Answer
Adding a custom taxonomy filter in WooCommerce usually starts with three things: the taxonomy must exist, products must already be assigned to its terms, and your filter setup must be able to display those terms on the front end.
At a basic level, the process looks like this:
- Register the custom taxonomy properly
- Assign taxonomy terms to the relevant products
- Use a filter method that supports custom taxonomies
- Place the filter on the shop or archive pages
- Test the filter to make sure it returns the right products
What You Need Before Adding a Custom Taxonomy Filter?
Before you add a custom taxonomy filter in WooCommerce, make sure the basic setup is already in place. Without that, the filter may not show properly or return the right products.
- Installed and active WooCommerce
- Products already published
- Custom taxonomy registered
- Relevant terms assigned to products
- Compatible filter plugin or code-based setup
- Clear filter placement on shop pages
- Theme layout that handles filters properly
How to Add WooCommerce Custom Taxonomy Filter (Step by Step)
There is more than one way to add a WooCommerce custom taxonomy filter, but the right method depends on how your store is built and how much control you need. Some store owners prefer a plugin-based setup for speed and ease, while others use custom code for more flexibility. Here are the details of each method.
Method 1: Add a WooCommerce Custom Taxonomy Filter Using a Plugin
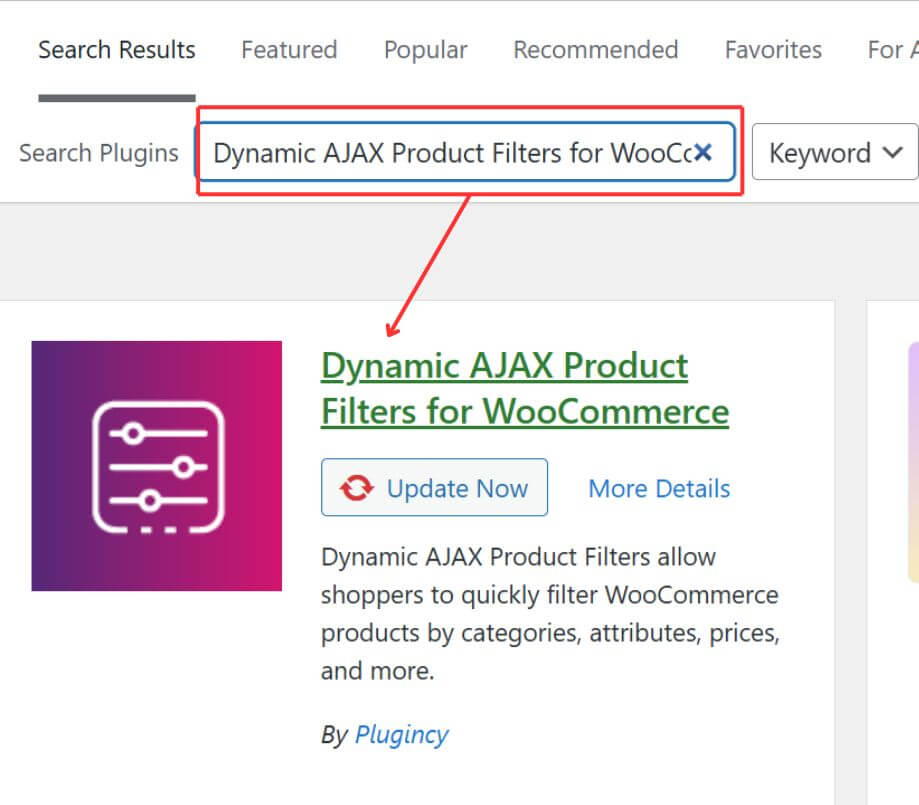
One of the simplest ways to add aWooCommerce custom taxonomy filter is by using Dynamic AJAX Product Filters for WooCommerce. In this method, you install the plugin, turn on the custom taxonomy option from the filter settings, style it from the form style area, and then test it on your shop page to make sure it works properly.
Step 1: Install and activate the Plugin
- Go to Plugins > Add New Plugin in your WordPress dashboard
- Search for Dynamic AJAX Product Filters for WooCommerce if you want to use the free version
- Click Install Now
- Click Activate after installation finishes

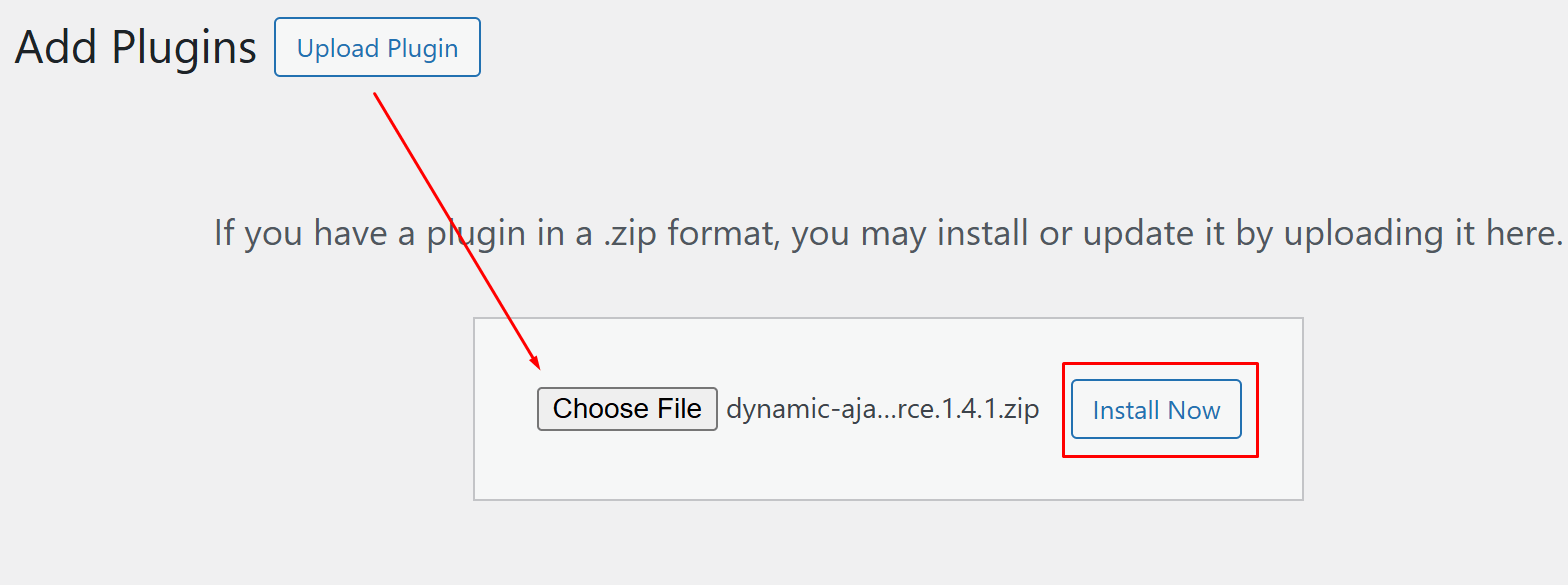
If you are using the Pro version, first install the free plugin if required by the plugin setup
- Upload the Pro plugin ZIP file through Plugins > Add New Plugin > Upload Plugin
- Click Install Now and then Activate
- Enter the license key if the Pro version includes license activation

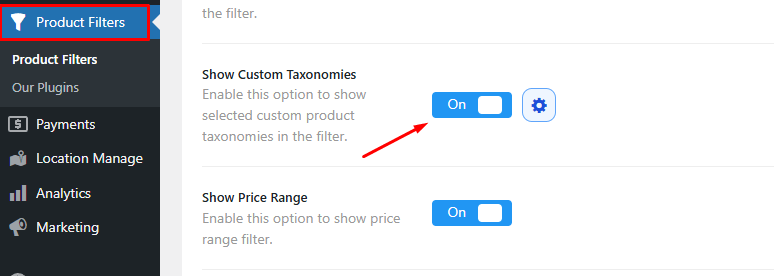
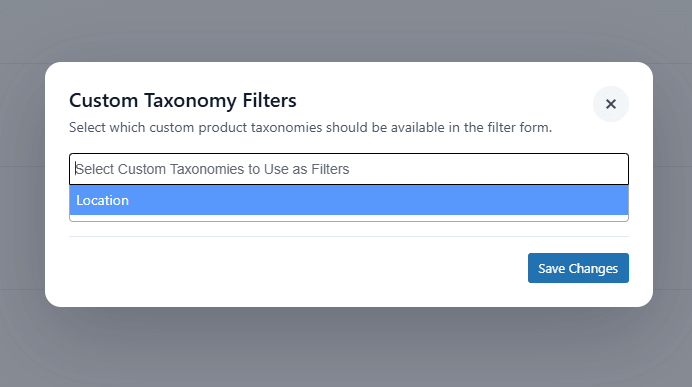
Step 2: Enable The Custom Taxonomy Filter Option
- Go to Product Filters > Form Manager
- Find the Show Custom Taxonomies option
- Turn it On

- Click the settings icon next to it
- Select the custom taxonomies you want to use in the filter

Step 3: Style The Custom Taxonomy Filter
- Open the Form Style tab
- In the style configuration area, choose Custom Taxonomies
- Select the Taxonomies after that
- Adjust the filter style based on your shop layout
- Choose the display style
- Configure optional and advanced settings
- Save changes


Step 4: Display the filter on the shop page
- Copy the shortcode [plugincy_filters]
- Paste it into the page, sidebar, or template where you want the filter to appear
- Use a Shortcode block in the block editor
- Or use an Elementor Shortcode widget if the page is built with Elementor
- Save the page or template
Step 5: Test The Filter On The Shop Page
- Visit your WooCommerce shop page
- Check whether the custom taxonomy filter appears in the selected filter area
- Select different taxonomy terms
- Confirm that the correct products are shown after filtering
Method 2: Use Theme-Based Integration
WoodMart includes a built-in AJAX filter system, but it only recognizes WooCommerce product attributes by default, not custom taxonomies. The fix is to register your taxonomy as a product attribute, which gives you full access to WoodMart’s filter widgets without any extra plugins or code.
Step 1: Register Your Taxonomy As A Product Attribute
- Go to Products → Attributes in your WordPress dashboard
- Create a new attribute using the same name and terms as your custom taxonomy
- Enable the Archive option so WoodMart can recognize it as a filterable item
Step 2: Assign The Attribute To Your Products
- Open each product and scroll to the Attributes section
- Add the attribute and select the relevant terms
- Save the product to make the attribute available for filtering
Step 3: Add The Filter Widget To The Shop Sidebar
- Go to Appearance → Widgets and locate the Shop Page Widget Area
- Add the WoodMart WooCommerce Layered Nav widget to this area
- Select your attribute from the widget settings and save
Step 4: Configure The Filter Area In Theme Settings
- Go to WoodMart → Theme Settings → Product Archive
- Set the shop layout to include a sidebar or enable the filters area above the product listing
- Choose between sidebar, off-canvas, or horizontal layout depending on your store design
Step 5: Test The Filter On The Shop Page
- Visit the live shop page and confirm the attribute filter appears correctly
- Select a filter term and check that only matching products are shown
- Test across category pages and the main shop page to confirm consistent behavior
Method 3: Custom Taxonomy With Custom Code
If you want more control, you can add a WooCommerce custom taxonomy filter with custom code. The basic idea is simple: register the taxonomy, show its terms on the shop page, and filter products based on the selected term.
Step 1: Register the Custom Taxonomy
Add a custom taxonomy for WooCommerce products in your theme’s functions.php file or a custom plugin.
function my_custom_product_taxonomy() {
register_taxonomy(‘product_brand’, ‘product’, array(
‘label’ => ‘Brands’,
‘public’ => true,
‘hierarchical’ => true,
‘rewrite’ => array(‘slug’ => ‘product-brand’),
));
}
add_action(‘init’, ‘my_custom_product_taxonomy’);
This example creates a custom taxonomy called Brands for WooCommerce products.
Step 2: Assign Terms To Products
- Open a product in your dashboard
- Find the new taxonomy section, such as Brands
- Add or select terms like Nike, Adidas, or Puma
- Save the product
Step 3: Show the Filter on the Shop Page
You can display the taxonomy terms as simple filter links.
function my_brand_filter_list() {
$terms = get_terms(array(
‘taxonomy’ => ‘product_brand’,
‘hide_empty’ => true,
));
if (!empty($terms) && !is_wp_error($terms)) {
echo ‘<ul class=”custom-brand-filter”>’;
foreach ($terms as $term) {
echo ‘<li><a href=”‘ . esc_url(add_query_arg(‘product_brand’, $term->slug)) . ‘”>’ . esc_html($term->name) . ‘</a></li>’;
}
echo ‘</ul>’;
}
}
Then call this function where you want the filter to appear in your shop template:
<?php my_brand_filter_list(); ?>
Step 4: Filter the WooCommerce Products
Now modify the shop query so that products change based on the selected taxonomy term.
function my_filter_products_by_brand($query) {
if (!is_admin() && $query->is_main_query() && is_shop() && isset($_GET[‘product_brand’])) {
$query->set(‘tax_query’, array(
array(
‘taxonomy’ => ‘product_brand’,
‘field’ => ‘slug’,
‘terms’ => sanitize_text_field($_GET[‘product_brand’]),
)
));
}
}
add_action(‘pre_get_posts’, ‘my_filter_products_by_brand’);
This checks the selected term from the URL and only shows matching products.
Step 5: Test the Filter
- Visit your shop page
- Click one of the taxonomy filter links
- Check that only matching products appear
- Test a few different terms to confirm it works properly
Which Method Should You Choose?
The best method depends on your store setup and how much control you want. Plugin-based setup works well for most stores, theme-based integration fits filter-ready themes, and custom code is better for stores with more specific filtering needs. Here’s a simple way to compare them:
| Store Type or Setup | Best Method | Why It Makes Sense |
| Standard WooCommerce store | Plugin method | Faster setup and easier filter control from the dashboard |
| Store using a filter-ready theme like WoodMart | Theme-based integration | Makes use of the theme’s existing filter system |
| Store with custom product flow or shop logic | Custom code method | Gives more control over how filtering works |
| Store owner who wants less manual work | Plugin method | Simpler to manage and easier to maintain |
How to Combine Multiple Custom Taxonomies for Advanced Filtering?
Combining multiple custom taxonomies in WooCommerce helps shoppers narrow products in a more precise way. Instead of filtering by one taxonomy at a time, you can layer multiple product groupings together to return results that match a more specific buying intent.
To make that setup work well, focus on these points:
- Use Taxonomies That Serve Different Purposes: Each taxonomy should narrow products in a distinct way, such as brand, use case, material, or collection, instead of repeating the same kind of grouping.
- Keep Term Structure Clean: Taxonomy terms should stay clear, consistent, and easy to understand so shoppers can combine filters without confusion or overlap.
- Avoid Too Many Narrow Combinations: Too many filters applied at once can shrink the result set too quickly and leave shoppers with very few or no products.
- Pair Broad Filters With Specific Ones: A broader taxonomy can narrow the general product group first, while a more specific taxonomy helps refine the final results.
- Test Filter Logic Carefully: Make sure combined taxonomy filters return the right products and do not break when shoppers switch terms or stack multiple selections.
- Use Clear Front-End Labels: Filter names should explain what they do at a glance, especially when more than one taxonomy appears in the same filter area.
- Mix Taxonomies With Practical Filters: Advanced filtering becomes more useful when custom taxonomies work alongside price, stock, or a product dimensions filter in WooCommerce for tighter product discovery.
- Check Mobile Usability: Combined filters should still feel easy to open, apply, and clear on smaller screens without turning the filter area into clutter.

SEO Tips for Using the Custom Taxonomies Filter in WooCommerce
Custom taxonomy filters can improve product discovery, but they also create more filtered URLs and more crawl paths. To keep the setup useful for search, focus on structure, clarity, and which filtered pages actually deserve visibility.
Index Only Filter Pages With Real Search Value
Only filtered pages that match real search intent and show useful product results should be considered for indexing. Low-value combinations usually add clutter instead of helping visibility.
Keep Low-Value Filter URLs Out of Search
Most filtered taxonomy URLs do not need to appear in search results. Leaving every variation open to indexing can create duplicate pages and waste crawl attention.
Use Clear Taxonomy Names and Term Labels
Search engines and shoppers both benefit when taxonomy names are simple and descriptive. Clear labels make filtered pages easier to understand and improve topical relevance.
Avoid Creating Too Many Thin Filter Combinations
Layering too many taxonomies can generate pages with very few products or no useful content. Those pages rarely help SEO and often weaken site structure.
Watch Combined Filters With Seasonal or Time-Based Terms
Stores that add new arrivals filter in WooCommerce should treat those filtered pages carefully. Time-based filters can lose value quickly and should not all be indexed automatically.
Keep Filtered Pages Helpful for Real Visitors
Even an indexable filtered page should still help someone browse products more effectively. If the page does not improve discovery, it usually does not add SEO value either.
Review Canonical and Crawl Handling Regularly
Filtered taxonomy pages can multiply fast as the catalog grows. Regular checks help you catch duplicate paths, weak pages, and crawl issues before they build up.
FAQs About Custom Taxonomy Filters in WooCommerce
Once the filter structure is in place, a few practical questions usually come up around product behavior, store performance, and long-term management. These answers cover useful points that can help before the filter goes live.
Can a Custom Taxonomy Filter Work With Variable Products?
Yes, as long as the taxonomy terms are assigned in a way your store setup can read correctly. Good results depend on how the product data is structured.
Can One Product Belong to More Than One Custom Taxonomy Term?
Yes, a product can be assigned to multiple terms within a custom taxonomy if that fits your catalog structure. This can make filtering more flexible for shoppers.
Will a Custom Taxonomy Filter Affect Page Speed?
It can, especially when a store uses many filters, large catalogs, or layered filtering. Impact usually depends on how the filter is built and how much data it needs to load.
Can Custom Taxonomy Terms Be Renamed Later?
Yes, term names can be changed later, but changes should be handled carefully. Renaming terms without checking the front end can affect filter clarity and consistency.
Is a Plugin Always Necessary for Custom Taxonomy Filtering?
No, a plugin is not always required. Some stores use theme-based setups or custom code, but plugins are often the easier option for faster front-end filtering.
Final Takeaway
Getting clear on how to add a woocommerce custom taxonomy filter is really about making your product structure easier for shoppers to use. When the taxonomy is set up well, and the filter appears in the right place, it helps people narrow products in a way that feels natural instead of forcing them through broad categories that do not fit.
From here, focus on the practical side. Keep the term names easy to understand, place the filter where shoppers will notice it, and test whether the results actually help people find the right products faster.