Managing products across many locations can be a real challenge for online store owners. That’s where multi location inventory management comes in handy. With the help of the right WooCommerce plugin, store owners can easily handle stock, prices, and availability across warehouses or pickup points. However, new online store owners may be wondering how this works and how to setup a multi location inventory management plugin.
To set up a multi location inventory plugin in WooCommerce, install and activate Multi-Location Product & Inventory Management for WooCommerce. Then go to Location Manage to create store locations, configure settings, assign products, manage stock, and add a location selector for customers. Finally, test everything to ensure updates work correctly.
Are you curious about making your WooCommerce store run smoother with better stock control? Continue reading because this article explains everything you need to know.
How to Setup a Multi Location Inventory Management Plugin?
Running an online store with products in different places can be confusing. You might have items in several warehouses or pickup points. WooCommerce makes this simple with the right plugin. Here’s how to get started and make your system work efficiently.
Choose the Right Plugin
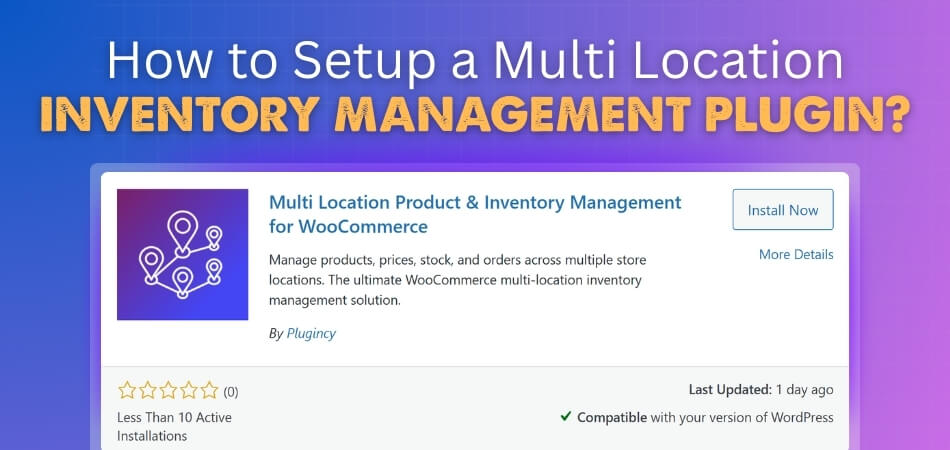
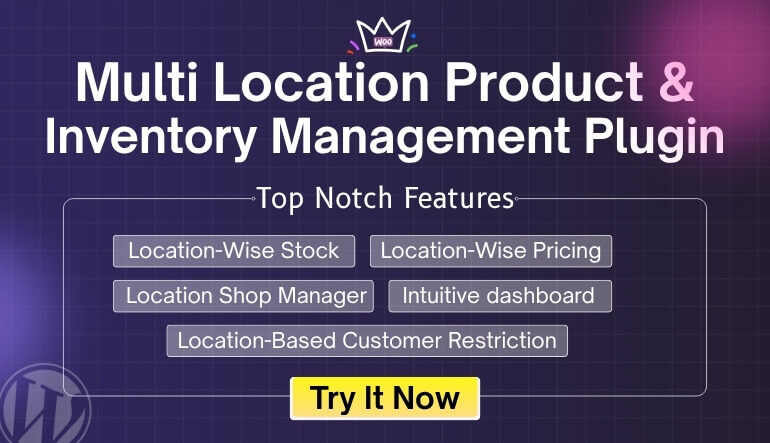
Pick a plugin made for handling many locations. A good one is Multi-Location Product & Inventory Management for WooCommerce. It helps you track stock from different points, connect locations, and keep updates in real time. You can install it right from your WordPress dashboard or upload it manually.
Automatic Installation
Go to Plugins → Add New in your WordPress admin panel. Type “Multi Location Product & Inventory Management for WooCommerce” in the search bar. Click Install Now and then Activate. Once done, open Location Manager from the admin menu to begin setting up your locations.

Manual Installation
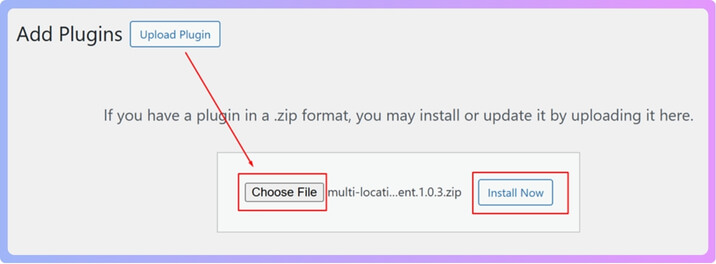
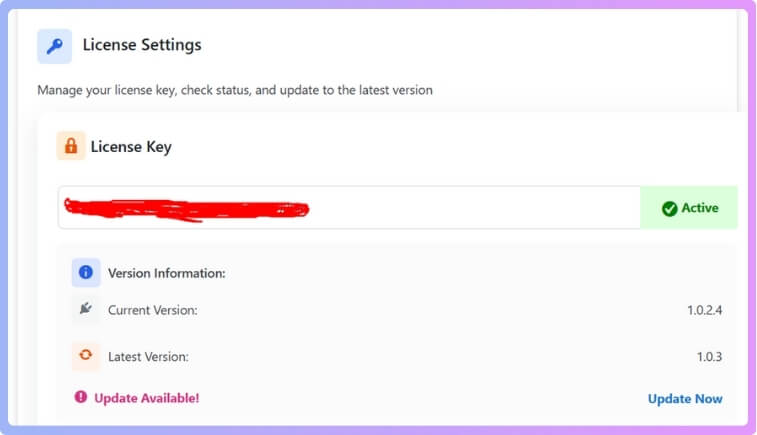
If you bought the Pro version, download the plugin ZIP file from the official website. In your WordPress dashboard, go to Plugins → Add New → Upload Plugin. Select the ZIP file, click Install Now, and then Activate. After activation, enter your license key in the plugin settings.
Configuration
Once the plugin is active, you can start setting it up. Inside the settings panel, Multi Location Product & Inventory Management for WooCommerce gives you full control over location details and stock rules. Go to Location Manage in your WordPress admin area. This is where you handle everything related to stores, warehouses, and product stock movement.
Create Store Locations
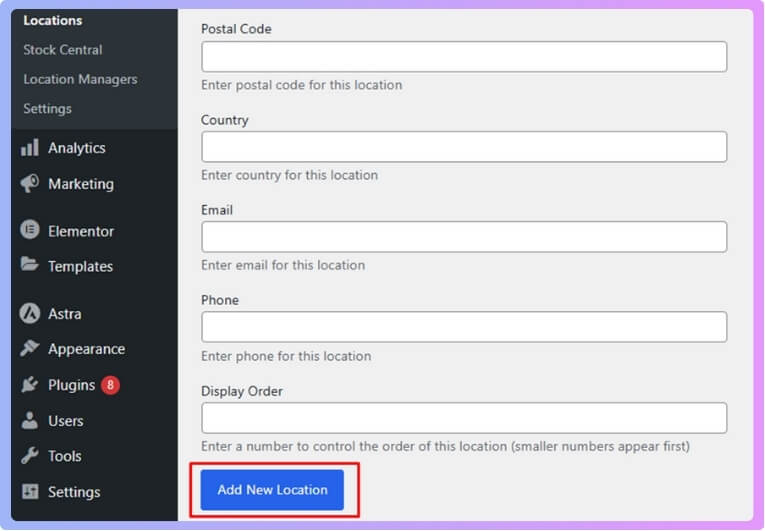
Head to Location Manage → Locations. Add details like the name, address, hours, and contact info for each store or warehouse. This helps you track where your stock is stored. Each location you add will show up in the plugin when assigning products later.

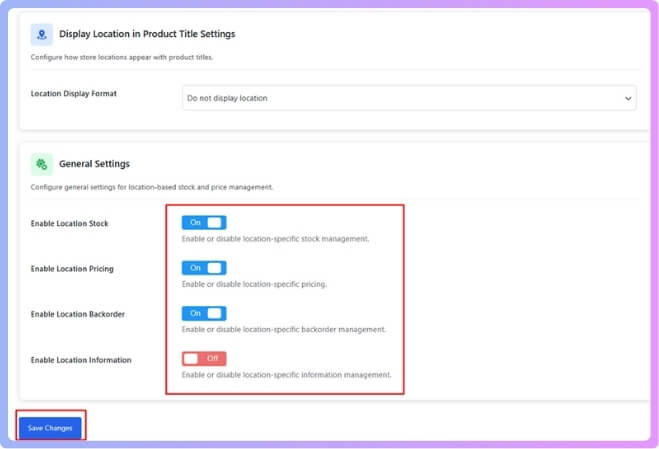
Configure General Settings
Go to Location Manage → Settings and review each option. You can adjust how your locations work, how inventory syncs, and how prices update. Make sure the options match how your store operates. Save your settings after making any changes.
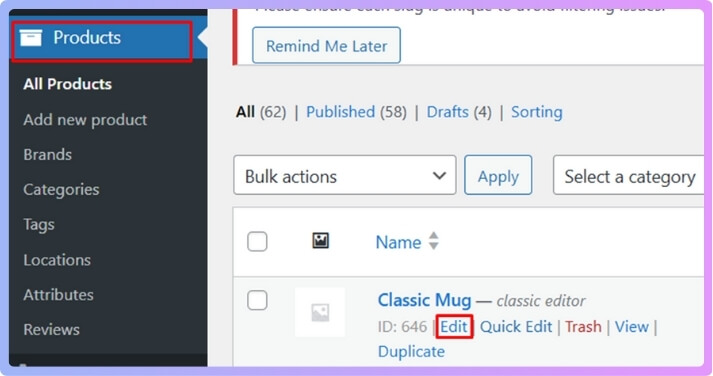
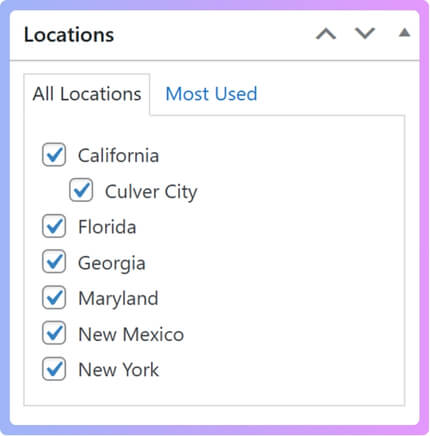
Assign Products to Locations
Open any product in your WooCommerce store. In the “Locations” section, choose one or more locations where that product is stored. This helps you keep stock separate for each place. You can edit these details anytime if your stock changes.
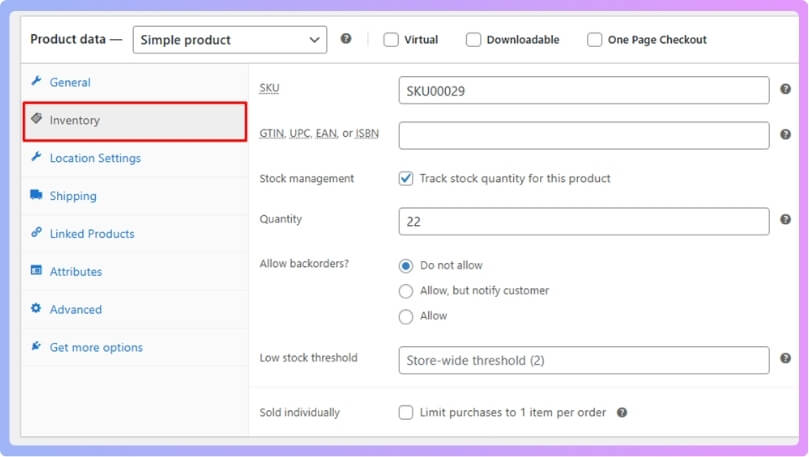
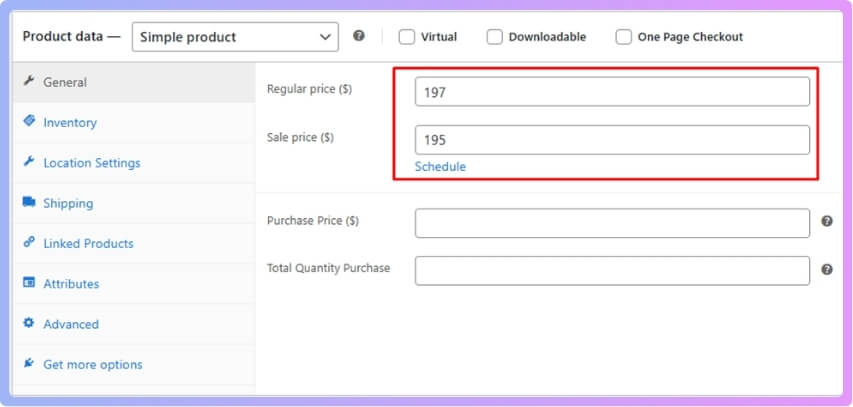
Manage Stock and Prices
Each store or warehouse can have its own stock levels and prices. You can also set backorder options for each one. Keeping this updated ensures your online store always shows the right numbers. It also helps prevent overselling or delivery errors.
Add Location Selector to Your Store
You can easily add a location selector to your store for customers. Use the shortcode [[mulopimfwc_store_location_selector]] and place it on any page or post. You can also go to Appearance → Widgets, open Header Builder Widget 1, paste the shortcode there, and click Update.
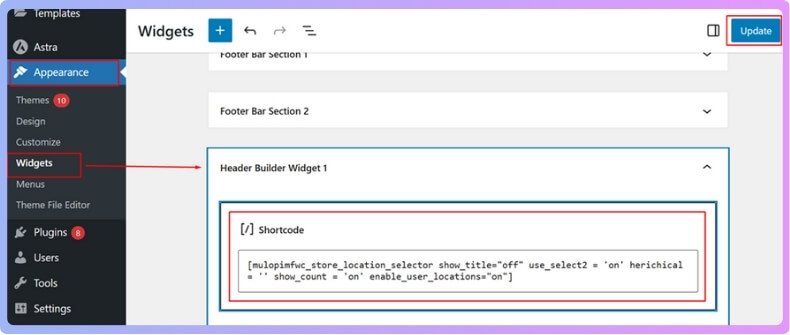
If you prefer adding it through code, use <?php echo do_shortcode(‘[mulopimfwc_store_location_selector]’); ?>. This feature lets customers pick their store location while browsing products.
Test the Setup
After setup, open your shop page to check everything. Pick a location and see if the products, prices, and stock update correctly. Make sure all locations show the right data. Once confirmed, your multi-location inventory system is ready to use.
Things to Prepare Before Installing the Plugin
Setting up your WooCommerce store becomes easier when you prepare early. A few small steps can help avoid issues later. Before installing the plugin, you need to make sure your site and system are ready. Let’s go through what you should prepare before getting started.
Check WordPress Version
Make sure your WordPress version is up to date. Older versions can cause plugin errors or slow performance. Go to Dashboard → Updates and check if any updates are available. Click Update Now if needed. Keeping WordPress updated helps the plugin work without issues.
Verify WooCommerce Installation
Confirm that WooCommerce is already installed and working. Go to your Plugins page and look for WooCommerce in the list. If it’s not there, install it first. The plugin will not work without WooCommerce being active on your site.
Backup Your Website
Before installing anything new, it’s smart to back up your website. This keeps your files and data safe if something goes wrong. You can use a backup plugin like UpdraftPlus or your hosting backup tool. Having a recent backup gives you peace of mind.
Check PHP and Server Requirements
Make sure your hosting server meets the plugin’s needs. Most plugins, including this one, require PHP 7.4 or higher. You can ask your hosting provider to confirm this. Also, check that your server has enough space and memory to handle WooCommerce smoothly.
Disable Conflicting Plugins
Some plugins may interfere with how the new plugin works. Look for any old inventory or stock management plugins. Disable them before installing this one to prevent errors. You can always reactivate them later if needed.
Get Plugin File or Access
If you are using the free version, you can install it directly from WordPress. If you bought the Pro version, download the ZIP file from the official site. Keep your license key ready. Having these files ready will make the setup faster and easier.
Prepare Admin Access
You need full admin access to install and activate the plugin. Make sure you can log in with an account that has administrator rights. Without admin access, you won’t be able to upload files or change plugin settings properly.
Getting ready before installation saves time and prevents problems later. These simple checks make your setup smooth and error-free. Once everything is ready, you can install and configure the plugin with ease. Follow these steps and start managing your store the right way.
Why Do You Need Multi Location Inventory Management Plugin for Your Online Store?
Running an online store with more than one stock location can be tough. You might sell from a warehouse, a shop, or a pickup spot. Without proper tracking, your stock numbers can get messy fast. Let’s find out why using a multi-location inventory plugin makes your store easier to manage.
Keep Stock Data Accurate
When you have many locations, tracking stock can get confusing. A plugin helps you track inventory per location in WooCommerce with real-time updates. It shows how much stock is left in each place. This reduces errors and prevents you from overselling products you no longer have.
Save Time on Manual Work
Handling stock for different stores by hand takes a lot of time. A plugin automates this work for you. You no longer need to update each product manually. Everything changes automatically when an item is sold, moved, or restocked.
Improve Customer Experience
Customers like knowing products are available at their nearest store. With this plugin, they can check stock based on location. This helps avoid delays and boosts trust. When customers see correct stock details, they’re more likely to complete their order.
Manage Multiple Warehouses Easily
If your business has more than one warehouse, the plugin helps a lot. You can control each warehouse from one dashboard. This makes shipping and restocking faster and smoother. You can also decide which location should handle specific orders.
Simplify Order Fulfillment
When customers buy online, orders are often sent from different places. The plugin automatically chooses the right location to ship from. This means fewer mistakes and faster delivery. It also helps you save on shipping costs by picking closer stock points.
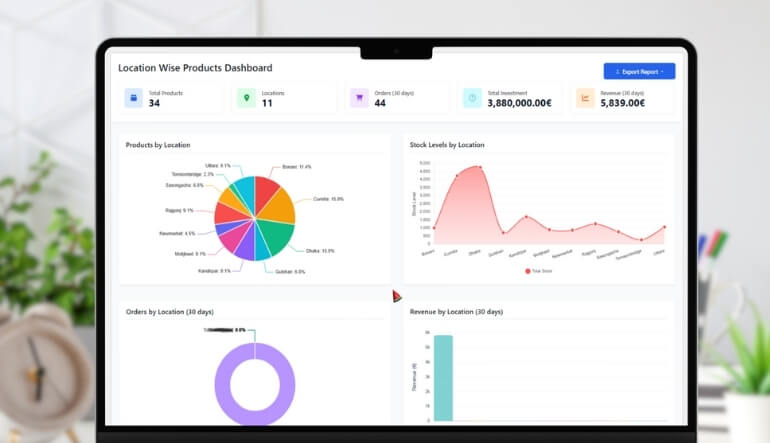
Track Sales by Location
Knowing which store sells more helps plan better. The plugin gives you reports showing sales per location. You can use these numbers to adjust pricing, stock, or marketing. It’s a simple way to understand what’s working best in each place.
Handle Backorders Smoothly
Sometimes products run out in one place but are available elsewhere. The plugin lets you set backorders and move stock from one spot to another. This ensures you don’t lose sales just because one warehouse is empty.
Support Store Pickup and Local Delivery
Many stores offer local pickup or same-day delivery. The plugin makes this easy to manage. Customers can choose their pickup point during checkout. This feature improves convenience and gives buyers more control over their orders.
How Often Should You Check and Maintain Your Plugin Setup?
Regular plugin checks help your online store run smoothly and avoid hidden problems. Skipping them can cause slow pages, broken features, or stock errors. Many store owners forget that plugins also need simple maintenance, just like any other part of their website. Checking your setup often keeps everything safe, fast, and working as expected.
Every few weeks, review your plugin settings, updates, and compatibility with WooCommerce. Doing this helps you spot small issues before they turn into bigger ones. You can also test key features like payment gateways and order tracking for smooth performance. Use Geolocation to Optimize WooCommerce Store and make sure your plugin connects well with customer locations for better accuracy.
Monthly maintenance is a good routine for most stores to follow. Update plugins, remove unused ones, and back up your data before making changes. If your site handles heavy traffic or sales, weekly checks may work better. Keeping a steady maintenance schedule ensures your WooCommerce store always performs at its best.
Quick Ways to Test If Everything Is Working Fine
After setting up your WooCommerce plugin, testing is an important final step. Simple checks can help you find problems early and fix them fast. It also helps confirm that your store looks and works the way you planned. Let’s look at a few easy ways to test your setup properly.
Check Storefront Display
Visit your store’s main page and browse products like a customer would. Make sure product images, prices, and descriptions appear correctly. Try switching between different categories to see if all links work. A clear and working display helps visitors trust your store right away.
Test Add to Cart Function
Pick any product and add it to your cart. Make sure it shows the right price and quantity. Try removing or updating items in the cart to confirm accuracy. This helps ensure your checkout process will run smoothly for every buyer.
Review Checkout Process
Place a test order using the different payment methods available in your store. Ensure the order confirmation message or email is received properly. Check that tax and shipping costs are calculated correctly during checkout. A smooth payment process builds confidence for new and repeat customers.
Confirm Email Notifications
After a test order, check all order-related emails. Make sure both the customer and store admin receive messages correctly. Review the subject lines and details for any missing information. Fixing email errors early avoids confusion and missed order updates.
Test Location and Stock Display
If you manage products from different warehouses or stores, test your location settings. Switch between store locations and check stock updates. Make sure your website shows correct quantities for each branch. This helps customers know which location has the item they need.
Review Mobile Display
Use your phone or tablet to open your store’s pages. Make sure everything fits well on smaller screens. Check that buttons, forms, and menus respond quickly. A mobile-friendly design improves user experience and boosts sales.
Test Loading Speed
Use free tools like Google PageSpeed Insights to test your store speed. A fast site keeps users from leaving too soon. If pages load slowly, check image sizes and remove extra plugins. A well-optimized store performs better and ranks higher in search results.
Frequently Asked Questions
Setting up a multi-location inventory system can bring up many questions for store owners. Whether you’re handling several warehouses or planning to grow, it’s important to understand how the system works. Below are some common questions and answers that will help you manage it better.
How Does a Multi Location Plugin Help Small Businesses Grow?
A multi location plugin helps small businesses manage stock from different places without confusion. It saves time by syncing all inventory in real time. Owners can easily check which branch needs restocking or has extra items. This balance reduces waste and improves product availability for customers.
Can I Use Multi Location Inventory Management Plugin With Other WooCommerce Extensions?
Yes, most multi location plugins work well with other WooCommerce extensions. However, it’s always best to test compatibility before using them together. You can check for plugin conflicts by enabling them one by one. Keeping all plugins updated also helps avoid performance issues.
Does It Support Multi-Vendor Marketplaces?
Many advanced versions of the plugin support multi-vendor stores. Each vendor can manage stock for their own locations independently. It helps sellers track their items accurately without mixing up data. This is useful if you run a marketplace where many sellers share one site.
How Can I Handle Seasonal or Temporary Locations?
If you open a temporary store or run a pop-up shop, you can easily add it. Just create a new location in the plugin and assign products. When the season ends, you can disable that location. It’s flexible and perfect for short-term business setups.
Is It Safe to Update the Plugin Often?
Yes, keeping your plugin updated is important for safety and performance. Updates fix bugs, improve features, and support new WooCommerce versions. Always back up your website before updating. This simple habit prevents data loss if something goes wrong during the update.
What Should I Do If Stock Doesn’t Update Automatically?
If your stock doesn’t update automatically, first clear your site cache and refresh. Check if cron jobs or sync options are enabled in settings. Make sure all plugins and WooCommerce are up to date. If the issue remains, contact the plugin support team.
Can I Assign Different Managers to Each Location?
Yes, many plugins let you give each location its own manager. You can assign specific user roles and permissions. This way, each manager can update stock only for their branch. It keeps control simple while improving accountability and accuracy.
Conclusion
Stores can be run across many locations without feeling overwhelming. Once you organize everything properly, managing stock becomes simple and stress-free. The right plugin turns a messy setup into a smooth system that works on its own.
By learning how to setup a multi location inventory management plugin, you can keep every product, warehouse, and order in perfect sync. It helps your team save time and lets customers shop with confidence knowing stock details are always correct.
So, take the time to set it up the right way. Follow each step carefully and test everything once it’s done. With a little effort today, your WooCommerce store will run faster, stay accurate, and grow with ease.