Using WooCommerce’s built-in redirect option allows customers to go directly to checkout right after adding a product. It’s quick to set up but offers limited customization.
Another approach involves the One Page Quick Checkout for WooCommerce plugin, which gives you more flexibility and control over how the checkout behaves.
For smaller stores, the One Page Checkout layout is ideal; it combines product selection, cart review, and payment on a single page for a faster experience.
A Floating Cart feature also enhances convenience by letting shoppers access their cart instantly from any page. Combined, these methods simplify the buying journey and make checkout feel effortless.
These are the 4 ways to enable Direct Checkout in your WooCommerce store. Now, before we discuss them more in depth, first let’s understand what direct checkout is and why it is important.
What is Direct Checkout in WooCommerce and Why is it Important?
Direct checkout is a shortcut that lets shoppers skip the cart page and go straight to the checkout page after clicking “Buy Now.” It’s like saying, “Hey, I’m ready to take my money!” instead of making people go through extra steps.
Imagine you’re shopping online. You find the perfect item, click “Add to Cart,” and boom, you’re sent straight to the checkout instead of wandering through the cart page first. That’s direct checkout in action.
What It Actually Does
- Skips the cart page: No detour. Customers are taken straight to where they can enter their details and place the order.
- Fewer clicks = faster buying: It removes extra steps and makes buying quicker and easier.
- Special links: You can create direct checkout links for specific products. When people click that link, they’ll land on the checkout page with that product already in the bag.
- “Buy Now” buttons: These buttons can be added to product pages so shoppers can go directly to checkout without browsing around.
4 Ways to Enable Direct Checkout in Your WooCommerce Store
There are several ways to enable direct checkout in WooCommerce. Some methods can be done without using a plugin, while others require a plugin for better control and flexibility. Below are four simple methods you can use.
Method 1: Redirect Customers to Checkout After Adding a Product (Without Plugin)
This is the easiest way to enable direct checkout because WooCommerce already has a built-in option for it.
To enable it:
- Log in to your WordPress dashboard.
- Go to WooCommerce. Click on Settings. Select the Products tab.
- Find the option that says “Redirect to the checkout page after adding to cart.” Turn it on.
- Click Save changes.
After you turn this on, customers will be redirected straight to the checkout page as soon as they add a product to their cart, skipping the cart page completely.
Pros:
- Built-in feature (no plugin required)
- Quick and easy to set up
- Reduces checkout steps for customers
Cons:
- Limited control over customization
- Doesn’t support advanced features like one-page checkout
To make checkout even simpler, you can use a plugin. For this guide, we’ll use One Page Quick Checkout for WooCommerce. This plugin is easy to use, requires no coding knowledge, and has both free and paid versions. Using a WooCommerce One Page Checkout plugin helps reduce cart abandonment by letting customers review their order, fill in details, and complete payment all on a single page.
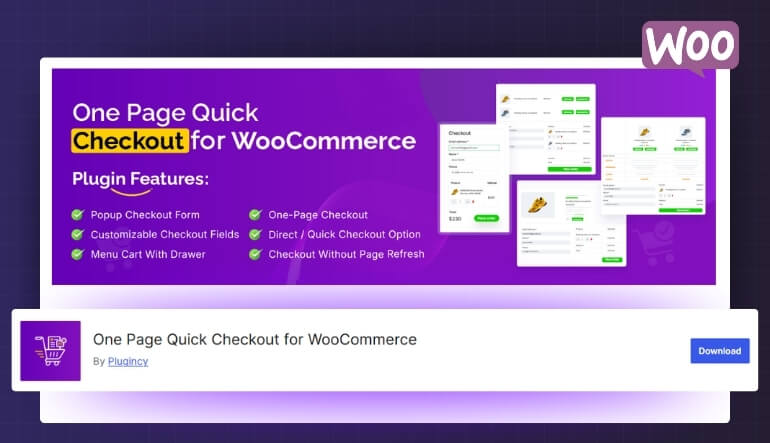
Free Version Installation
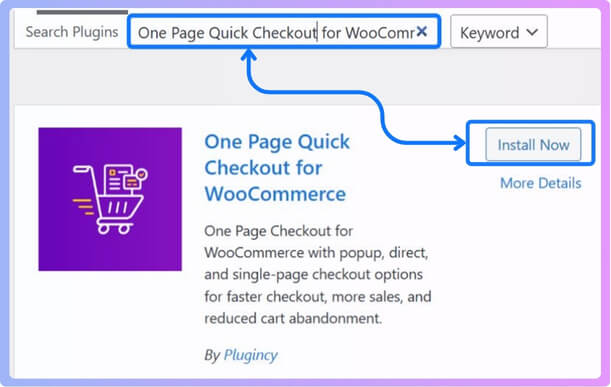
- Go to your WordPress Dashboard → Plugins. Click Add New Plugin.
- Search for “One Page Quick Checkout for WooCommerce.”
- Click Install Now and then Activate.

Pro Version Installation
If you purchased the Pro version, follow these steps:
- Purchase it from the official website.
- After purchase, you’ll get a download link by email — click the link to download the ZIP file.
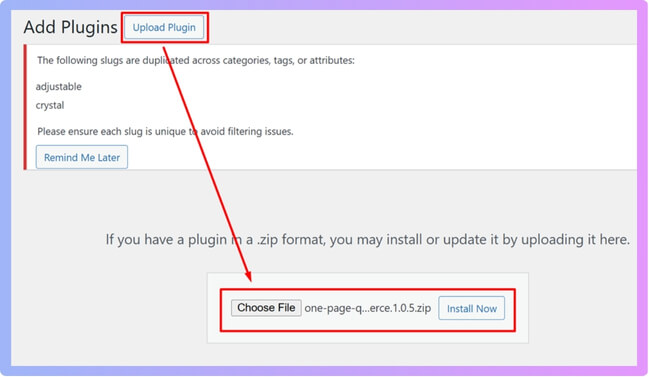
- Go to Plugins > Add New. Click Upload Plugin, then select the ZIP file. Click Install Now and then Activate.

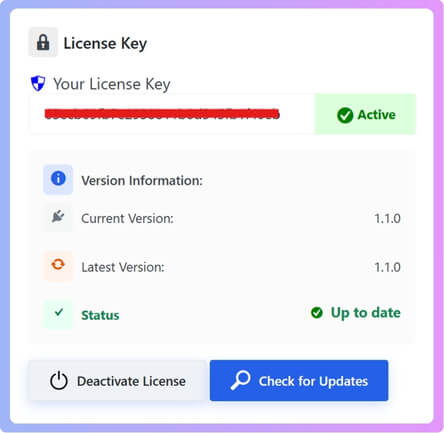
- Go to Onpage Checkout > Plugin License and enter your license key to unlock Pro features.
Once installed, you can start enabling direct checkout options.
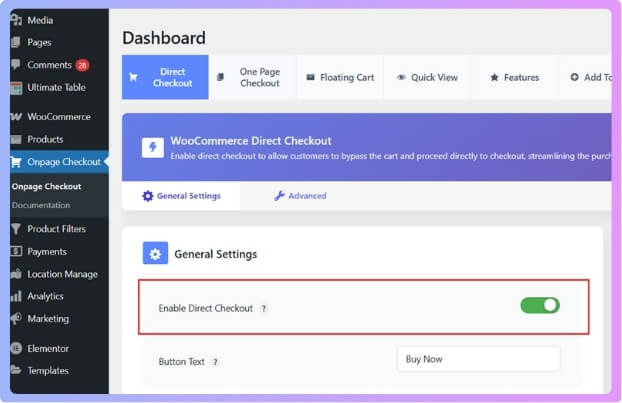
Method 2: Enable Direct Checkout Using a Plugin
This is the main feature of the plugin. It lets customers skip the cart and go straight to checkout with one click.
From your dashboard, go to Onpage Checkout > Direct Checkout. Here you’ll see an option named Enable Direct Checkout — toggle it on.
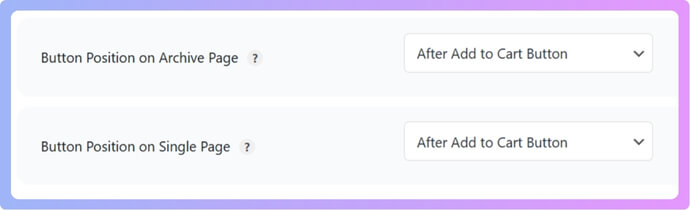
You can also adjust other options like:
- Button Position on Archive Page
- Button Position on Single Page
For both options, select the After Add to Cart Button
On the right side, you’ll find display settings to choose where this applies:
- Product Type
- Product Page
- Archive Page
- Other Pages
- Widgets & Shortcodes
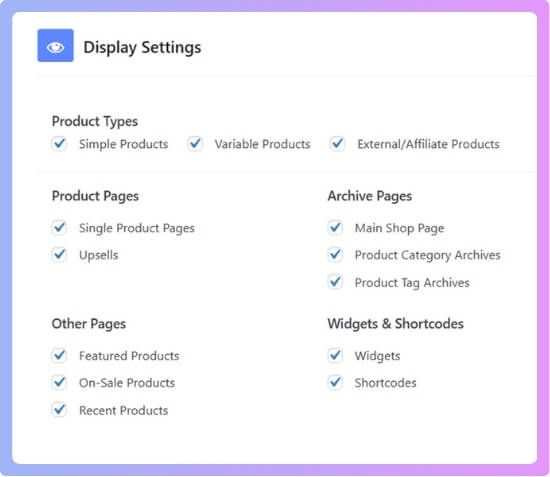
Once done, click Save Changes. Now your store will have direct checkout enabled through the plugin.
Pros:
- Very easy to enable with no coding
- Let’s you control where and how checkout buttons appear
- Saves time for shoppers
Cons:
- Requires a plugin
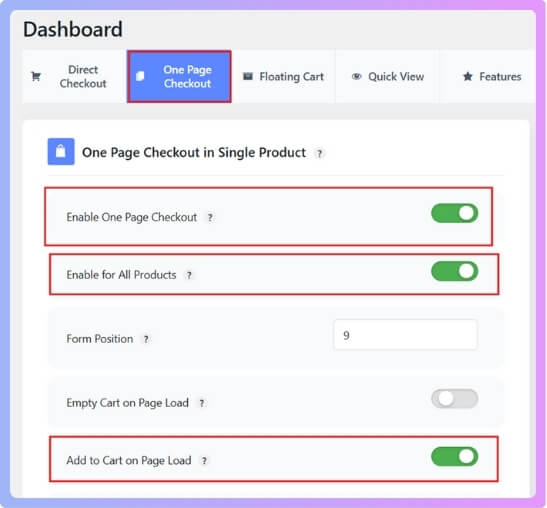
Method 3: Enable One Page Checkout
This option works similarly to the direct checkout feature, but it’s focused on a single-page checkout system.
From your dashboard, go to Onpage Checkout > One Page Checkout. Then, toggle on Enable One Page Checkout. This feature lets customers buy directly from the product page.
You can choose:
- To enable it for a specific product only.
- Or toggle on Enable for All Products to apply it to all products.
If you want the product to be automatically added to the cart when the page loads, turn on Add to Cart on Page Load. This method creates a faster, smoother buying process for customers.
Pros:
- Simple and fast checkout on the same page
- Great for single-product stores
- Reduces cart abandonment
Cons:
- Best suited for smaller product catalogs
Method 4: Enable Floating Cart
A floating or sticky cart makes the checkout process more accessible by keeping the cart icon visible on every page. Here’s how you can enable it:
- Go to Onpage Checkout > Floating Cart.
- Toggle on Enable Sticky Cart. This adds a floating cart button to your store.
- Under Cart Checkout Behavior, select Direct Checkout.

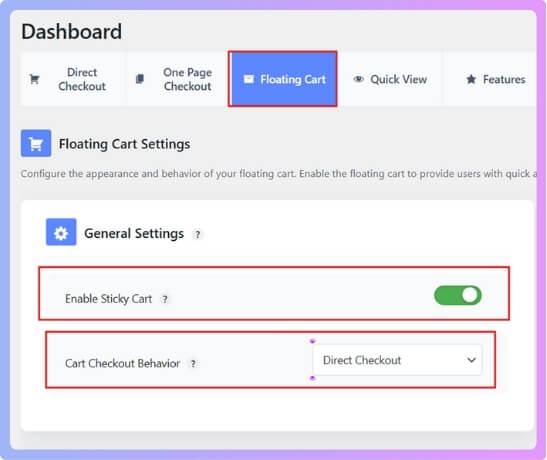
You can also change the button color and background color to match your store’s design. Once you’re happy with it, click Save Changes.
This method gives customers quick access to their cart and checkout options from anywhere on your site.
Pros:
- Looks modern and improves customer experience
- Easy access to checkout from any page
- Customizable appearance
Cons:
- Can slightly overlap page elements on certain themes (minor issue)
Each of these methods helps your customers reach the checkout page faster, improving the shopping experience and reducing cart abandonment.
Which Method Suits Your WooCommerce Store Type to Enable Direct Checkout?
Choosing the right method depends on how your store works and what kind of shopping experience you want for your customers. Each method fits a different type of store, so let’s see when to use each and when not to.
1. Redirect Customers to Checkout After Adding a Product (Without Plugin)
This is the simplest and fastest setup because it uses WooCommerce’s built-in settings.
When to Use:
- If you run a small store with only a few products.
- When you want customers to skip the cart page and checkout quickly.
- Perfect for single-product or one-time-purchase stores.
When Not to Use:
- If you want advanced control or design flexibility.
- When you have multiple products that customers might want to buy together, they’ll miss the chance to review their cart).
2. Enable Direct Checkout Using Plugin
This method gives you more control while keeping things simple. The plugin adds customization options that the default WooCommerce settings don’t have.
When to Use:
- If you want to place direct checkout buttons on different pages (product, archive, or widgets).
- For stores with medium to large product lists that want a smoother checkout experience.
- When you need a balance between speed and flexibility.
When Not to Use:
- If you don’t want to install extra plugins.
- When you prefer a very basic setup without custom button placements.
3. Enable One Page Checkout
This setup lets customers complete the entire purchase process — from adding to cart to paying — on one single page.
When to Use:
- Great for single-product stores or services (like digital downloads, memberships, or event tickets).
- When you want a fast checkout without sending users to separate pages.
- Ideal for improving conversion rates by reducing steps.
When Not to Use:
- If your store has lots of products or variations, the single-page layout might look crowded.
- When you need customers to review or compare multiple items before buying.
4. Enable Floating Cart
The floating cart option adds a small, movable cart icon on your site that lets customers view their cart or go straight to checkout anytime.
When to Use:
- For modern-looking stores that focus on user convenience.
- If you want customers to reach checkout from anywhere on the site.
- Perfect for stores with many browsing pages or long product listings.
When Not to Use:
- If your site design is very minimal and you don’t want extra floating buttons.
- When your theme already includes a built-in sticky cart or quick cart option.
In Short:
- Small or single-product stores: Use Method 1 or Method 3.
- Medium or large stores: Go for Method 2 for better control.
- Visually modern stores: Try Method 4 to keep checkout easy and accessible.
Each method works well for different types of stores; just pick the one that fits your customer flow and store design best. When deciding which direct checkout setup to use, it’s smart to consider overall WooCommerce Checkout Optimization, since a faster and simpler process can greatly improve your store’s conversions.
What to Watch for on Mobile When Enabling Direct Checkout for WooCommerce Store?
When you add direct checkout to your WooCommerce store, make sure it looks and works perfectly on mobile. A smooth, simple, and quick process helps customers finish their orders easily without getting confused or frustrated.
- Touch-friendly layout: Make all buttons and form fields large, spaced out, and easy to tap. Avoid small areas that cause users to miss their touch while checking out.
- Simple navigation: Keep checkout steps short and clear. A visible “Proceed to Checkout” button should stay on screen, helping users move forward without scrolling too much.
- Collapsible order view: Use a section that expands and hides order details. This keeps the screen neat while allowing users to check their cart when needed.
- Quick cart editing: Let customers change quantities or remove products directly from the checkout page. This saves time and keeps them from leaving the process.
- Speed and performance: Ensure your checkout page loads fast, ideally within two seconds. Use caching, compress images, and remove slow, heavy plugins.
- Easy form filling: Keep only the most needed fields like name, email, and payment. Add autofill so users finish faster with fewer typing errors.
- Trusted payment options: Add secure and mobile-friendly payment choices like PayPal, Apple Pay, and Google Pay. Show SSL badges to make users feel safe.
A well-optimized mobile checkout can help you keep customers happy and reduce cart abandonment. When buying feels easy and safe, people are more likely to complete their orders and come back again.
Plugins You Can Use to Enable Direct Checkout in Your WooCommerce Store
A fast checkout can make a big difference in sales. People on mobile want things quick and simple. Long forms and extra steps can make them leave. Let’s look at some tools that help you create a faster checkout on your WooCommerce store.
1. One Page Quick Checkout for WooCommerce
This plugin is one of the best plugin for Direct Checkout in WooCommerce because it gives several fast checkout styles like popup checkout, one-click checkout, and a full one-page checkout. It helps reduce cart steps and speeds up the buying process.
Key Features:
- Checkout happens in a popup without leaving the page.
- AJAX powered for faster, smoother experience without reloads.
- Skip the cart page and go directly to checkout.
- Add “Buy Now” or “Quick Checkout” buttons on product and category pages.
- Choose variations directly from shop or category pages.
- Create one-page checkout with multiple layout options.
- Edit checkout form fields and labels easily.
- Show product thumbnails and clickable titles in checkout.
- Option to disable the WooCommerce cart page.
- Add trust badges at checkout (premium feature).
- Enforce login during checkout (premium).
- Works with variable products, themes, and builders.
2. Direct Checkout for WooCommerce
Users can skip the cart and reach checkout faster with this plugin. It removes unnecessary fields and uses AJAX for quicker actions, making the entire process smooth and user-friendly with simple setup options and an easy control panel.
Key Features:
- Skip the cart page and go to checkout directly.
- Add a single page checkout layout.
- Remove unwanted checkout fields quickly.
- AJAX add-to-cart for smoother actions.
- Easy setup and user-friendly controls.
- Free version available with key features.
3. Fluid Checkout
Designed for better user experience, this plugin improves the checkout layout for WooCommerce. It offers a clean, responsive, and mobile-friendly design, ensuring that customers can complete their purchase easily and without any confusion or distractions during checkout.
Key Features:
- One-page checkout layout for faster flow.
- Fully mobile-friendly design.
- Option for multi-step checkout process.
- Clear and easy-to-read order summary.
- Works well with popular payment gateways.
- More features in the Pro version.
4. CheckoutWC
Known for its professional look, this plugin redesigns the WooCommerce checkout page to boost conversions. It includes features like order bumps, guest checkout improvements, and side cart options, making the entire checkout process modern and efficient.
Key Features:
- Modern and professional checkout templates.
- Includes side cart and mini cart features.
- Enhances guest checkout experience.
- Built-in tools for order bumps and upsells.
- Fast and clean checkout layout.
- Premium plugin with strong support.
5. WooCommerce One Page Checkout
Built to simplify the buying process, this plugin allows customers to select products and finish checkout on one page. It’s perfect for single product stores or promotional pages focused on quick and easy purchases.
Key Features:
- Lets users select products and check out on one page.
- Supports various custom page layouts.
- Great for single product or small stores.
- Speeds up the entire buying process.
- Includes order review and payment on the same page.
- Works well with sales funnels and promotions.
FAQs About 4 Ways to Enable Direct Checkout in Your WooCommerce Store
Here are some simple and helpful FAQs to clear your doubts about direct checkout. These cover common questions people often ask before setting it up. You’ll find answers that explain how it works, why it helps, and what you should know. Let’s go through them one by one below.
Is Direct Checkout Safe for Online Payments?
Yes, it’s completely safe when your store uses SSL protection. WooCommerce supports trusted gateways like Stripe, PayPal, and Apple Pay. Always make sure your SSL certificate is active. This keeps your customer’s data secure and builds strong trust during checkout.
Can Direct Checkout Be Used for Digital Products or Downloads?
It works perfectly for digital goods such as eBooks, software, or online classes. Customers can complete their purchase quickly without extra pages. After checkout, they instantly receive download links or access. It’s a fast, secure, and user-friendly process.
Does Direct Checkout Work Well on Mobile Devices?
Yes, it performs well on mobile if your site is responsive. Make sure buttons are large, forms are readable, and payment fields are easy to use. Also, optimize for speed so users complete checkout without waiting too long.
What Are the Common Mistakes to Avoid When Enabling Direct Checkout?
Avoid using too many plugins that slow your site down. Always test checkout flow on mobile and desktop. Keep payment steps short and clear. Show total costs upfront to prevent confusion and keep customers confident while paying.
How Can You Test If Direct Checkout Is Working Properly?
Try adding a product to your cart and check if it redirects correctly. Test it on different devices and browsers to confirm smooth performance. Complete a test order using real payment methods to make sure everything functions properly.
Conclusion
Creating a fast and simple checkout helps customers complete their orders easily. From built-in WooCommerce settings to using plugins, you can set up a smooth and direct checkout process that reduces cart abandonment. These simple steps show the 4 ways to enable direct checkout in your WooCommerce store.
Make sure your checkout page loads quickly, looks good on mobile, and includes secure payment options. Always test your checkout flow before going live. With the right setup and attention to detail, your store can see more completed sales. Good luck with your store’s success!