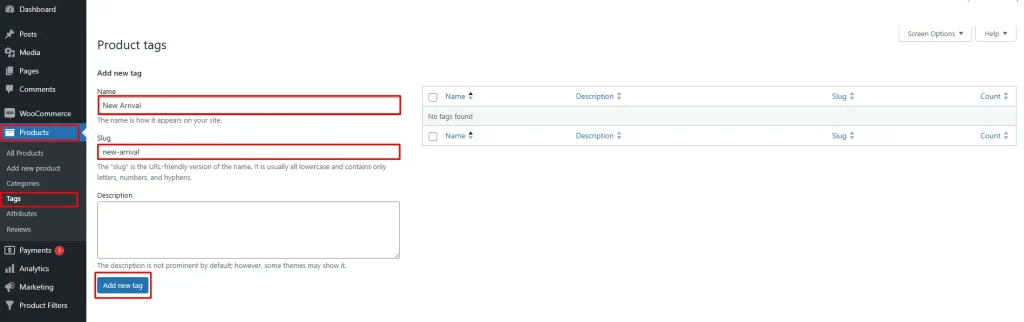
Step 1: Create a Tag
- Navigate to Tags:
- Go to Products > Tags in your WordPress dashboard.
- Add a New Tag:
- Fill in the required fields:
- Name: Enter the name of the tag (e.g., New Arrival).
- Slug: Create a URL-friendly version of the tag name (e.g., new-arrival).
- Description: Provide a description for the tag (optional).
- Click the Add New Tag button.
- The new tag will appear in the list.
- Fill in the required fields:
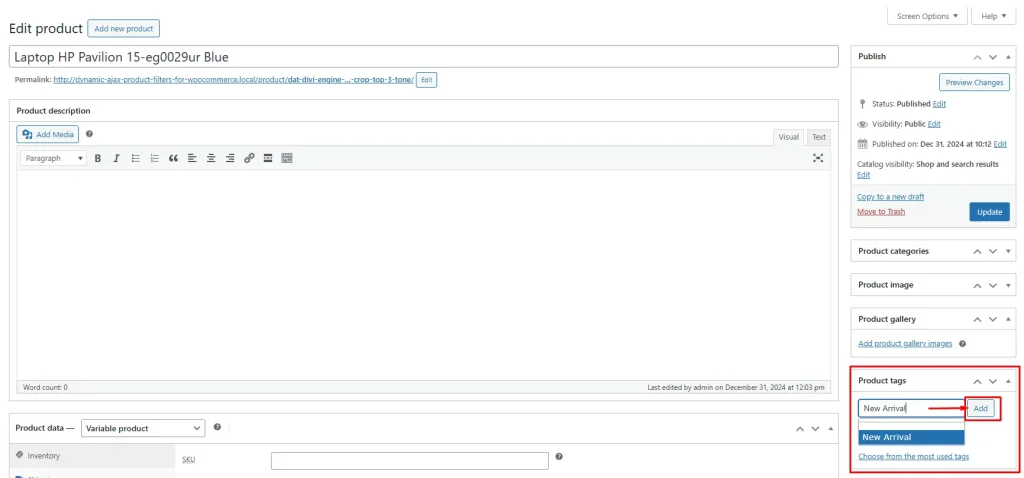
Step 2: Add the Tag to a Product
- Go to All Products:
- Navigate to Products > All Products.
- Edit or Add a New Product:
- Click on an existing product to edit it or click Add New to create a new product.
- Assign the Tag:
- On the product edit page, locate the Tags section on the right panel.
- Check the box next to the tag you want to assign (or click Add New Tag to create a new one).
- After selecting the tag, click Update or Publish to save your changes.
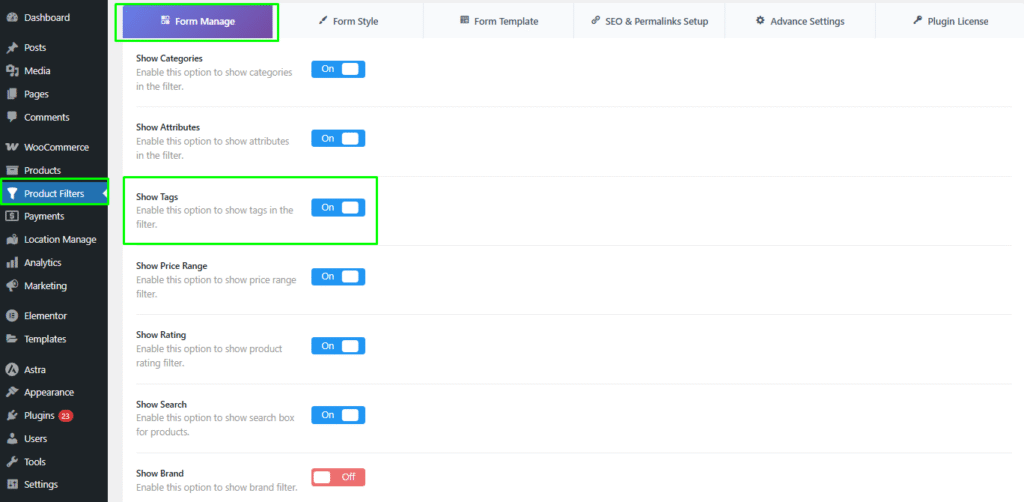
Step 3: Manage Tags in the Filter Widget Form
- Access Filter Settings:
- Go to Product Filters > Form Manage in your WordPress dashboard.
- Show Tags:
- In the settings, find the Show Tags option.
- Toggle this option on or off to control whether tags appear in the filter widget.
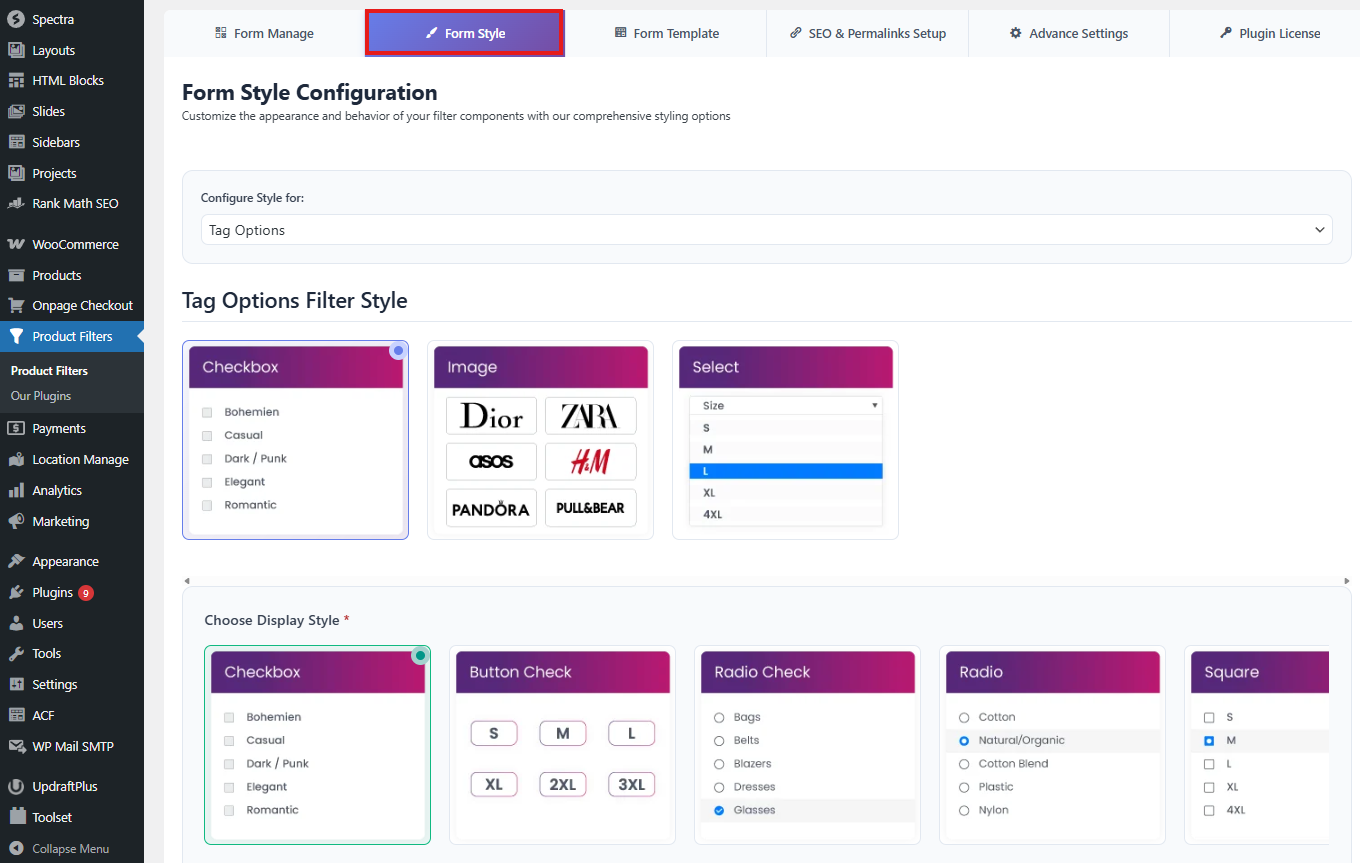
Step 4: Style/Design/Customize the Tags Widget
- Access Form Style Settings:
- Go to Product Filters > Form Style in your WordPress dashboard.
- Select Tags from Dropdown:
- From the Configure Style for dropdown menu, choose tags.
- Choose Tags Style Options:
- Select one of the style options:
- Checkbox
- Image
- Select
- Each option provides a different way for users to interact with the filter.
- Select one of the style options:
- Select Suboptions:
- Depending on the style option you choose (Checkbox, Image, or Select), select the appropriate suboptions to configure the appearance and behavior of the tags widget.
Optional Settings
The Optional Settings section allows you to control the appearance, behavior, and ordering of individual filter widgets.
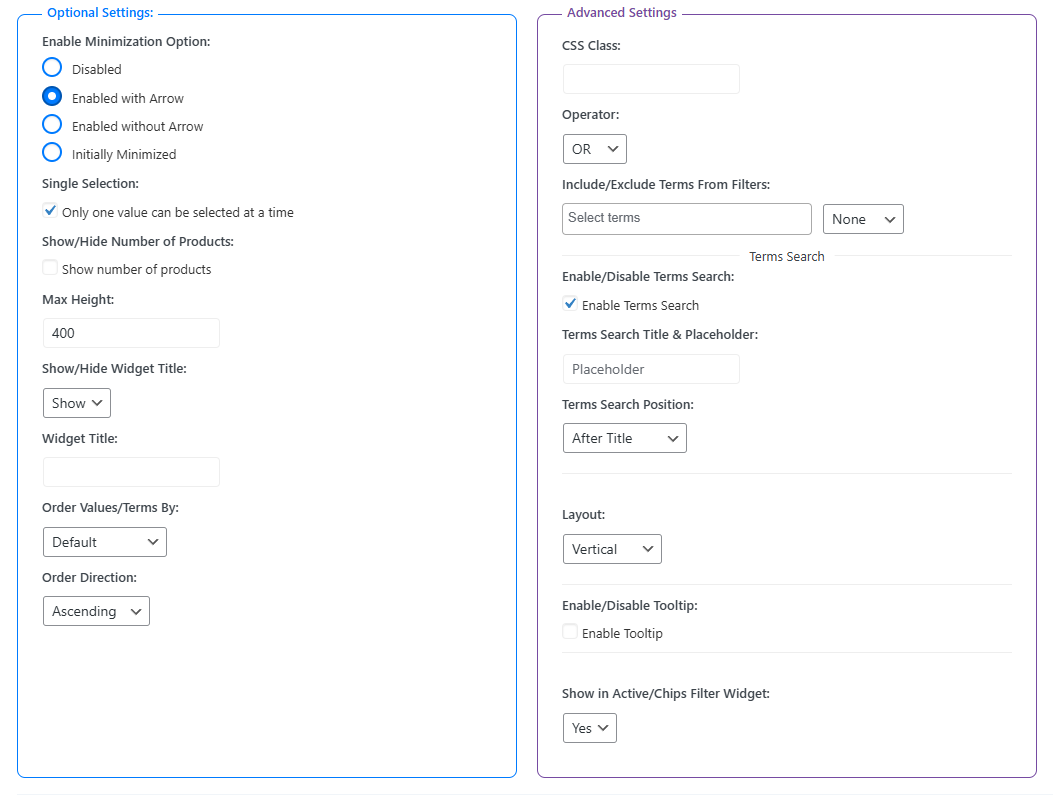
Enable Minimization Option
Controls whether the filter widget can be collapsed.
- Disabled – Filter always stays expanded
- Enabled with Arrow – Toggle using an arrow icon
- Enabled without Arrow – Toggle without showing an icon
- Initially Minimized – Filter loads in collapsed state
Single Selection
Allows only one filter value to be selected at a time.
Show / Hide Number of Products
Displays the product count next to each filter term.
Max Height
Sets a maximum height for the filter list.
- Enter 0 to disable height restriction
- Useful for long lists with scrolling
Show / Hide Widget Title
Controls the visibility of the filter title on the frontend.
- Show – Display title
- Hide – Hide title
Widget Title
Set a custom title for the filter widget.
Order Values / Terms By
Controls how filter values are sorted.
- Default
- Alphabetically (A–Z)
- Numeric
- Month & Year
- Menu Order
- Product Count
Order Direction
Defines sorting order.
- Ascending
- Descending
Advanced Settings
The Advanced Settings section lets you fine-tune filter behavior, appearance, and user interaction, including term logic, search options, tooltips, and auto-suggestion.
CSS Class
Add a custom CSS class to the filter widget for custom styling or JavaScript targeting.
Operator (OR / AND)
Controls how multiple selected terms are applied:
- OR – Products matching any selected term
- AND – Products matching all selected terms
Include / Exclude Terms From Filters
Control which terms are displayed:
- None – Show all terms
- Include – Show only selected terms
- Exclude – Hide selected terms
Terms Search
Helps users quickly find filter options, especially useful for long term lists.
- Enable / Disable Terms Search – Show or hide the search field
- Terms Search Title & Placeholder – Set label and placeholder text
- Terms Search Position
- In title bar
- After title
- After all terms
- Layout
- Vertical
- Horizontal (Add Number of Columns)
Tooltip Settings
Provides additional information for filter terms.
- Enable / Disable Tooltip
- Tooltip Text – Set tooltip content
Show in Active / Chips Filter Widget
Displays selected filter terms in the Active Filters or Chips widget for easy visibility and removal.
Step 5: Save Changes
After customizing the category widget, make sure to click Save Changes to apply your changes.
Step 6: Display the Product Filter on Your Webpage
- Insert Filter Shortcode:
- Visit the page where you want to display the product filter.
- Add the shortcode
plugincy_filtersto the desired location (e.g., in a page or widget).
- Optional Product Shortcode:
- If you want to display products alongside the filters, you can also include the shortcode
products.
- If you want to display products alongside the filters, you can also include the shortcode
- Customize Sidebar or Page:
- You can add the filter shortcode to a sidebar widget or directly within a page’s content.
Once you complete these steps, customers will be able to filter products by tags on your webpage using the Dynamic AJAX Product Filters plugin. This feature enhances the shopping experience by allowing users to quickly find products that match their specific tags or interests.