
The Form Manage section controls which filter widgets are displayed in Dynamic AJAX Product Filters for WooCommerce.
From this page, you can enable or disable different filter types such as categories, attributes, tags, price range, rating, search, brand, stock status, sale status, featured products, dimensions, SKU, discount, date filter, custom fields, and custom taxonomies.
Use this page when you want to decide which filters should appear on your WooCommerce shop, category, tag, or custom product listing pages.
Step 1: Open Form Manage Settings
- Go to your WordPress Dashboard.
- Navigate to Product Filters > Form Manage.
- You will see all available filter toggles.
- Turn on the filters you want to display.
- Turn off the filters you do not want to display.
- Click Save Changes.
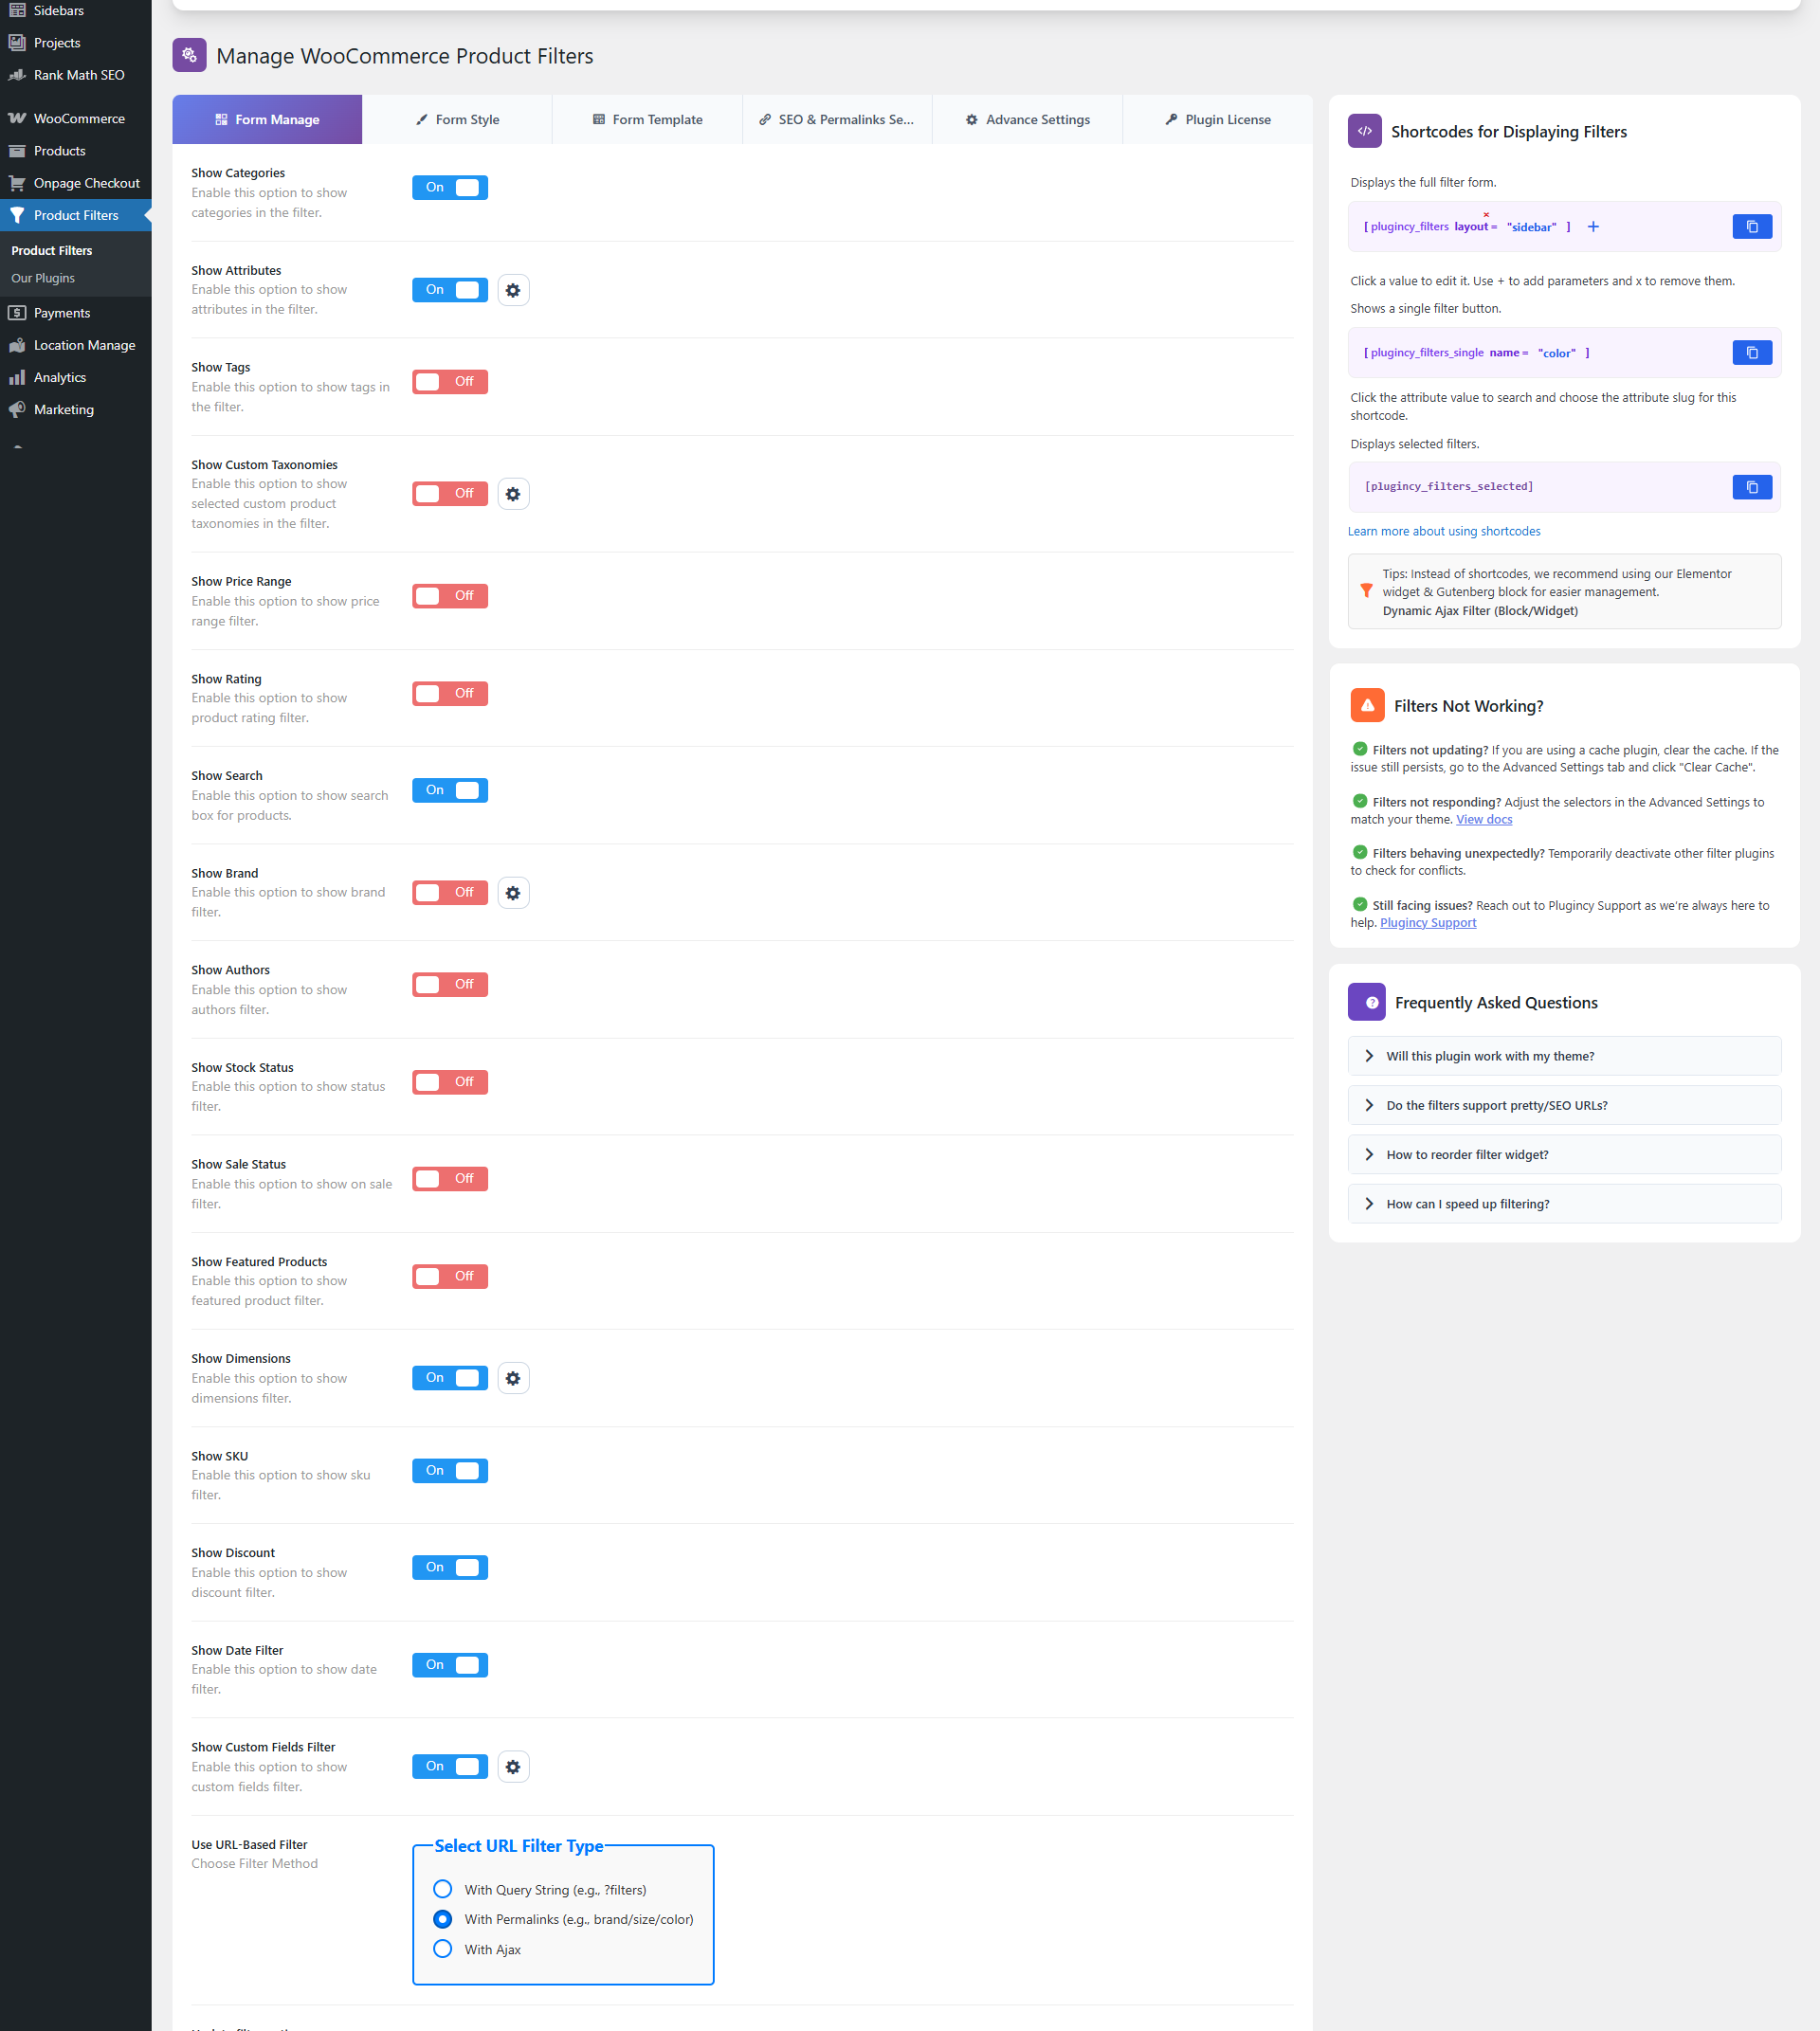
Image: Product Filters Form Manage settings
Available Filter Toggles
Below are the current filter options available in the Form Manage section.
Show Categories
Enable this option to display product categories in the filter.
Customers can filter products by WooCommerce product categories such as Clothing, Shoes, Accessories, Electronics, or any categories created in your store.
Use this when you want customers to browse products by category.
Related documentation:
Filter Product by Categories in WooCommerce
Show Attributes
Enable this option to display WooCommerce product attributes in the filter.
Attributes can include values such as color, size, material, style, capacity, or any custom product attribute used in your store.
Use this when your products have variations or attribute-based details that customers commonly search by.
Related documentation:
Filter Product by Attributes in WooCommerce
Show Tags
Enable this option to display product tags in the filter.
Customers can filter products by WooCommerce product tags such as New Arrival, Best Seller, Summer Collection, Handmade, or any tags used in your store.
Related documentation:
Filter Product by Tags in WooCommerce
Show Custom Taxonomies
Enable this option to display selected custom product taxonomies in the filter.
Custom taxonomies are useful when your store uses additional product grouping systems beyond categories, tags, attributes, or brands.
Examples:
- Material Type
- Collection
- Product Series
- Region
- Manufacturer
- Season
- Compatibility
This option may require the Pro version, depending on your plugin license.
Related documentation:
Filter Product by Taxonomy
Show Price Range
Enable this option to display a price range filter.
Customers can filter products by minimum and maximum price. This is useful for stores where customers often shop within a specific budget.
Related documentation:
Filter Product by Price Range in WooCommerce
Show Rating
Enable this option to display a product rating filter.
Customers can filter products based on WooCommerce review ratings, such as 5-star, 4-star, 3-star, and lower ratings.
Use this when your products have customer reviews and ratings.
Related documentation:
Filter Product by Rating in WooCommerce
Show Search
Enable this option to display a product search field inside the filter.
Customers can search products by product title or keyword while using other filter options.
Related documentation:
Enabling Product Search for Product Filtering
Show Brand
Enable this option to display the Brand Filter.
Customers can filter products by brand, manufacturer, designer, supplier, or any brand taxonomy used in your WooCommerce store.
Brand Filter Settings
Click the settings icon beside Show Brand to open the Brand Filter Settings popup.
From this popup, you can choose how the plugin detects the brand taxonomy.
Available modes:
Auto Detect
The plugin automatically detects supported brand taxonomies from your store.
Recommended for most stores.
Manual Selection
Manually select the brand taxonomy or taxonomies you want to use.
Use this if:
- Your store has multiple brand taxonomies.
- Auto Detect selects the wrong taxonomy.
- You use a custom brand taxonomy.
- You want full control over which brand taxonomy appears in the Brand Filter.
Related documentation:
Filter Product by Brands in WooCommerce
Show Authors
Enable this option to display an author filter.
Customers can filter products by product author or vendor-style author data, depending on how your store uses product authors.
This is useful for marketplace-style stores, multi-vendor setups, book stores, digital product stores, or stores where product creator information matters.
Related documentation:
Filter Product by Authors in WooCommerce
Show Stock Status
Enable this option to display a stock status filter.
Customers can filter products by stock availability.
Common stock options include:
- In stock
- Out of stock
- On backorder, if supported by your WooCommerce setup
Related documentation:
Filter Product by Stock Status in WooCommerce
Show Sale Status
Enable this option to display a sale status filter.
Customers can filter products by whether products are currently on sale.
This is useful for stores that frequently run promotions, discounts, or clearance campaigns.
Related documentation:
Filter Product by Sale Status in WooCommerce
Show Featured Products
Enable this option to display a featured product filter.
Customers can filter products that are marked as Featured in WooCommerce.
Use this when you want customers to quickly view highlighted, promoted, recommended, or featured items.
This option may require the Pro version, depending on your plugin license.
Recommended documentation to create:
Filter Product by Featured Products in WooCommerce
Show Dimensions
Enable this option to display dimension filters.
Customers can filter products by product dimensions and weight.
Supported fields include:
- Length
- Width
- Height
- Weight
Dimension Filter Settings
Click the settings icon beside Show Dimensions to open the Dimension Filter Settings popup.
From this popup, you can:
- Enable or disable individual dimension fields.
- Reorder dimension fields.
- Choose which dimension fields should appear on the frontend.
For example, you can show only Width and Height, or reorder the fields so Weight appears first.
Related documentation:
Filter Product by Dimensions in WooCommerce
Show SKU
Enable this option to display the SKU filter.
Customers can search or filter products by SKU. This is useful for stores where customers, wholesalers, staff, or B2B buyers search products using product codes.
Related documentation:
Filter Product by SKU in WooCommerce
Show Discount
Enable this option to display a discount filter.
Customers can filter products by discount amount or discount range, depending on your filter configuration.
This is useful for stores that want to highlight products with active discounts.
Related documentation:
Filter Product by Discount in WooCommerce
Show Date Filter
Enable this option to display a date filter.
Customers can filter products by product publish date or date-based product availability, depending on your setup.
This is useful for showing:
- New arrivals
- Recently added products
- Products published within a selected date range
- Older or archived catalog items
Related documentation:
Filter Product by Post Date in WooCommerce
Show Custom Fields Filter
Enable this option to display custom field filters.
Custom field filters allow customers to filter products using product metadata or custom product fields.
Examples:
- Warranty
- Model Year
- Product Condition
- Compatibility
- Location
- Product Type
- Supplier Code
This option may require the Pro version, depending on your plugin license.
Related documentation:
Filter Product by Custom Fields in WooCommerce
How to Enable a Filter
To enable any filter:
- Go to Product Filters > Form Manage.
- Find the filter option you want to use.
- Turn the toggle On.
- Click Save Changes.
- Visit the frontend page where the product filter is displayed.
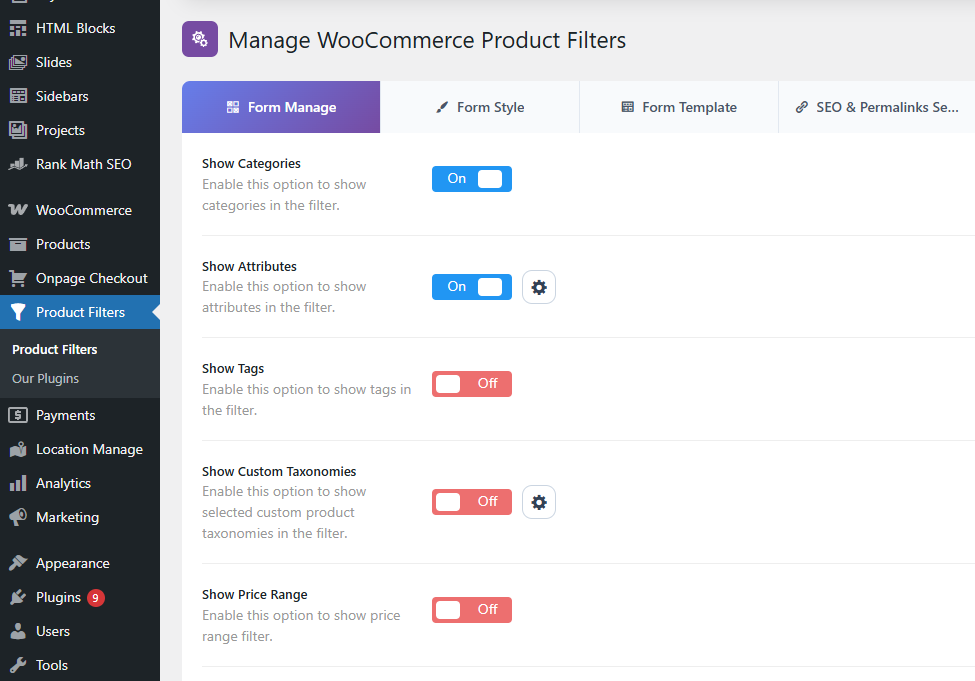
How to Disable a Filter
To disable a filter:
- Go to Product Filters > Form Manage.
- Find the filter option you want to remove.
- Turn the toggle Off.
- Click Save Changes.
The filter will no longer appear on the frontend.
Configure Filter Design
After enabling filters in Form Manage, you can customize their design from Form Style.
- Go to Product Filters > Form Style.
- Choose the filter you want to customize.
- Adjust style and display options.
- Click Save Changes.
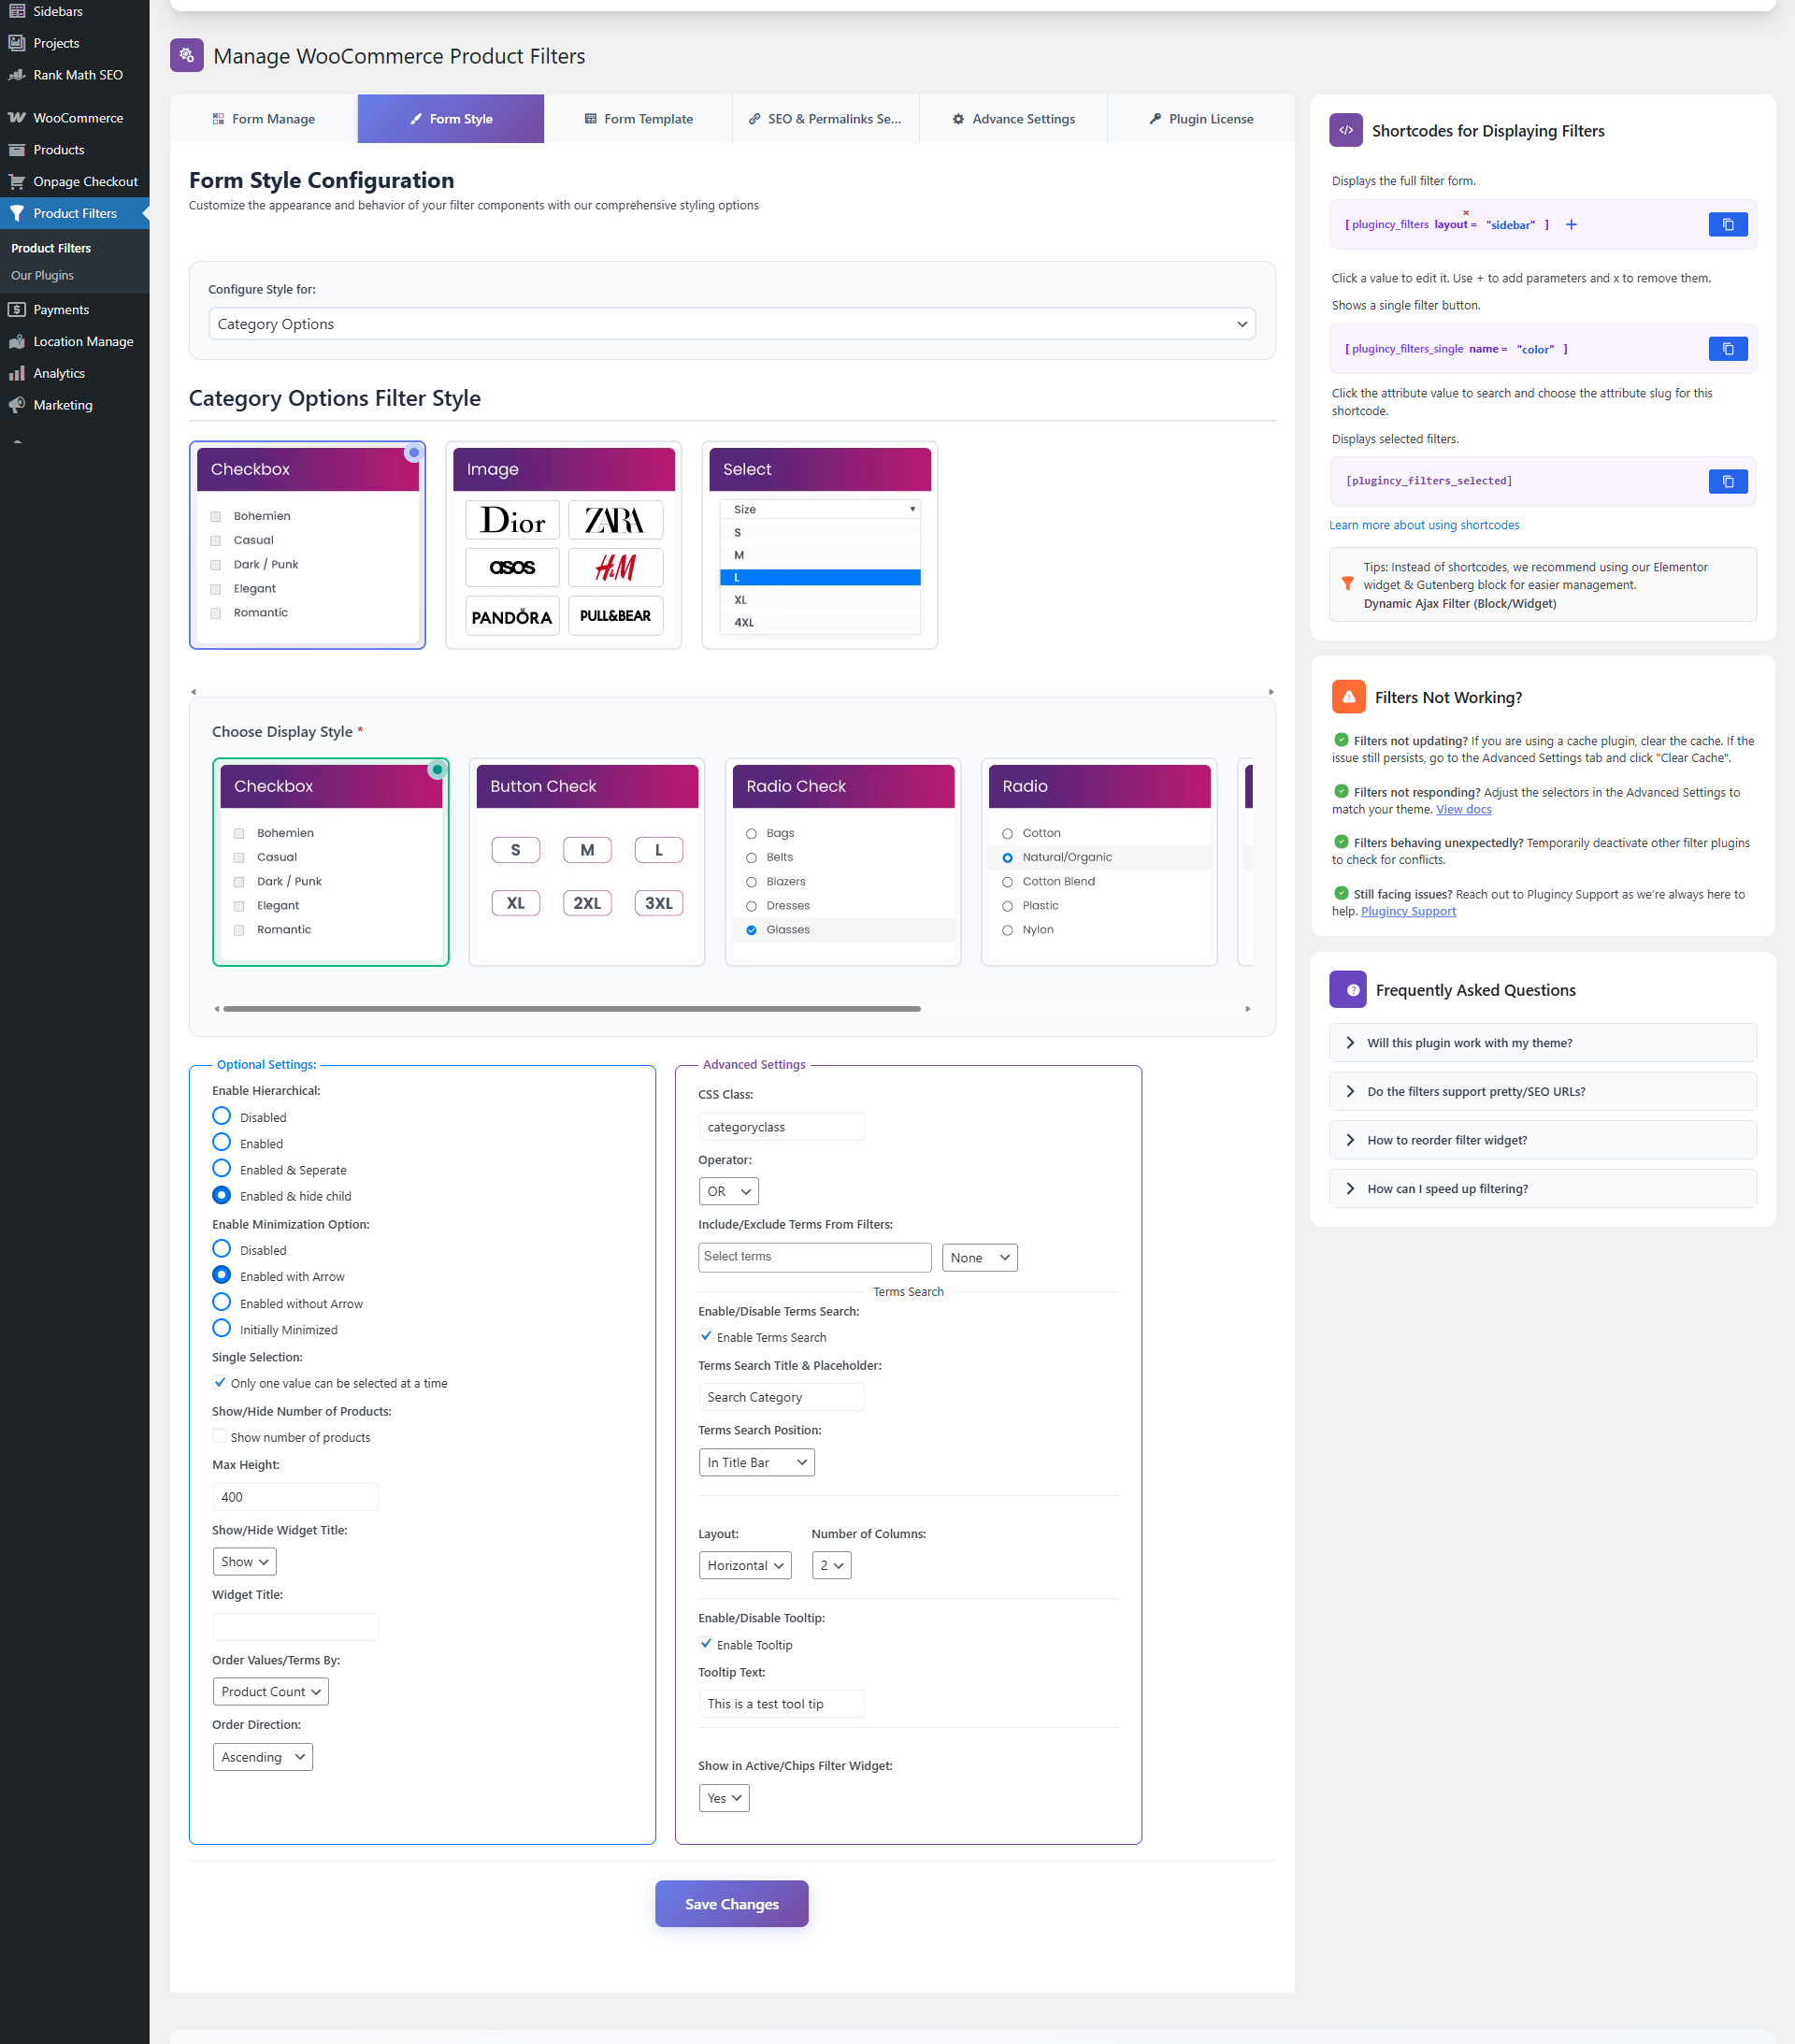
Common style options may include:
- Filter display type
- Widget title
- Product count
- Max height
- Minimized/collapsed display
- Apply button
- Reset button
- Tooltip
- Ordering
- Hierarchical display, where supported
For common widget style options, see:
Optional Settings
Display the Filter on Your Webpage
After enabling and customizing filters, display them using the shortcode:
[plugincy_filters]
You can add this shortcode to:
- Pages
- Posts
- Gutenberg shortcode blocks
- Elementor shortcode widgets
- Other page builder shortcode modules
- Sidebar widgets
- Theme template files using
do_shortcode()
PHP example:
<?php echo do_shortcode('[plugincy_filters]'); ?>
Expected Result
After configuring Form Manage, only the enabled filters will appear on the frontend.
For example:
- If Show Categories is enabled, customers can filter by categories.
- If Show Price Range is enabled, customers can filter by price.
- If Show Brand is enabled, customers can filter by brand.
- If Show Dimensions is enabled, customers can filter by length, width, height, or weight.
- If Show SKU is enabled, customers can filter by SKU.
- If Show Custom Fields Filter is enabled, customers can filter by selected custom field data.
Notes
- Make sure WooCommerce products have the required data for each filter.
- Category, tag, brand, taxonomy, and attribute filters require terms assigned to products.
- Price filters require product prices.
- Rating filters require product ratings/reviews.
- Dimension filters require product length, width, height, or weight values.
- SKU filters require product SKU values.
- Custom field filters require valid custom field data.
- Some filters may require the Pro version.
- If a filter is enabled but empty, check whether matching product data exists.
- Clear site cache after changing filter settings.
Troubleshooting
A filter is not showing on the frontend
Check the following:
- The filter is enabled in Product Filters > Form Manage.
- The filter shortcode or widget is added to the page.
- Products have the required data for that filter.
- The settings were saved.
- Cache has been cleared.
Brand Filter shows the wrong brands
Open the Brand Filter Settings popup and switch from Auto Detect to Manual Selection. Then choose the correct brand taxonomy.
Dimension fields are missing
Open the Dimension Filter Settings popup and make sure the missing fields are enabled.
For example, if Weight is disabled, the Weight filter will not appear.
Custom taxonomy filter is not showing
Check the following:
- The custom taxonomy exists.
- The taxonomy is selected in the plugin settings.
- Products are assigned to taxonomy terms.
- The feature is available in your license.
- Cache has been cleared.
Custom field filter is not showing
Check the following:
- Products have custom field data.
- The custom field is not excluded globally.
- The feature is available in your license.
- Cache has been cleared.
Filter is visible but product results do not update
Check:
- The product listing exists on the page.
- The product selector is correct in Advanced Settings.
- AJAX is not blocked by cache or optimization plugins.
- The selected filter has matching products.
- The page builder is not replacing product markup after load.