The Multi Location Product & Inventory Management for WooCommerce plugin provides an Export option in its dashboard. This allows you to download product and inventory reports in two formats: CSV and HTML. Each format is useful in different situations.
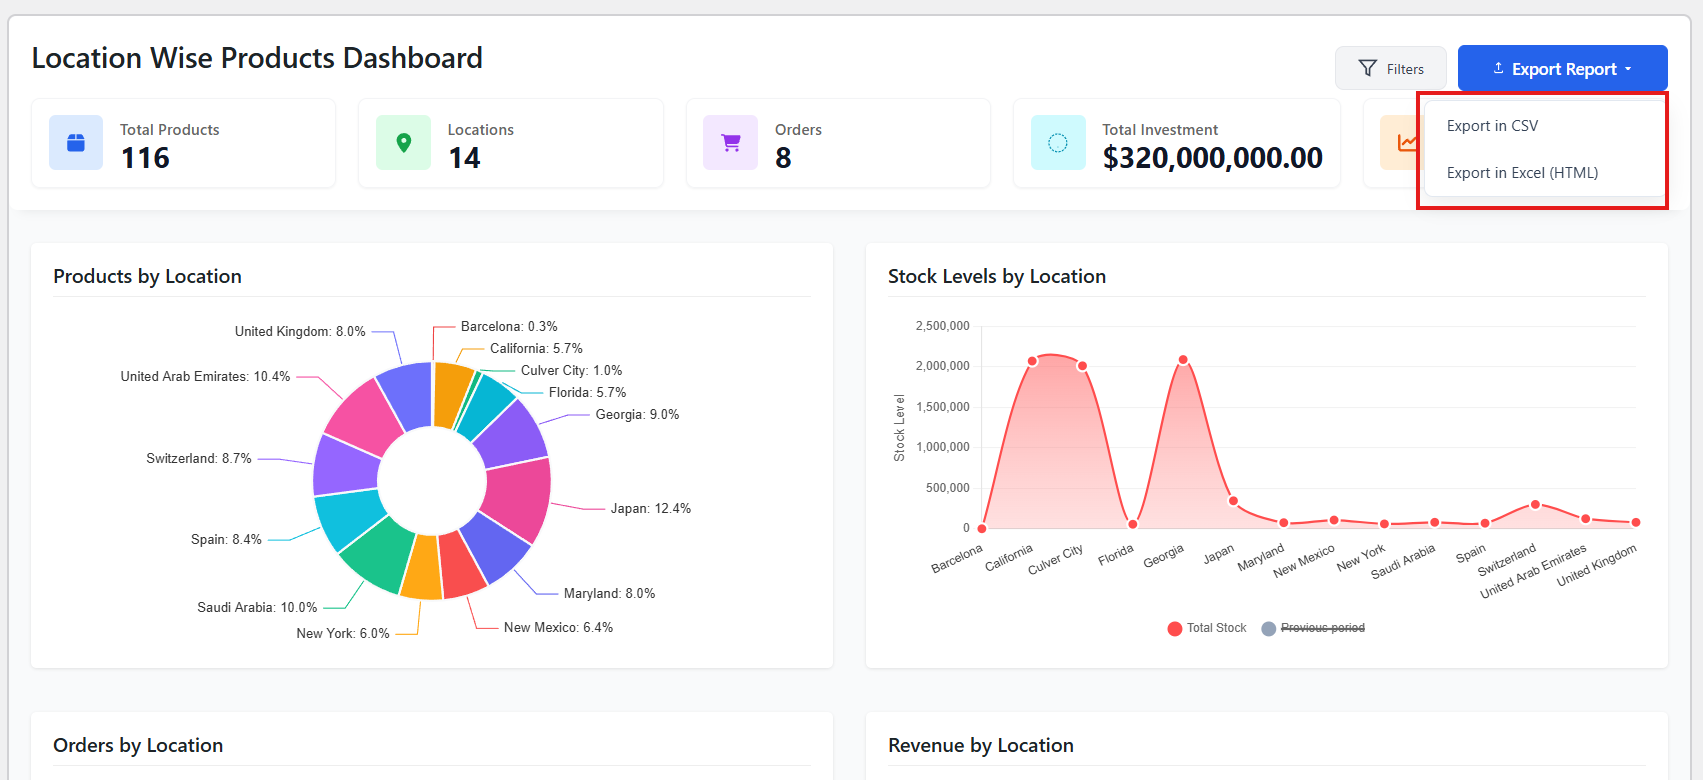
CSV Export
- What it is: CSV stands for Comma-Separated Values. It’s a plain text file where data is arranged in rows and columns.
- Why use it:
- Works perfectly with spreadsheet tools like Excel or Google Sheets.
- Easy to filter, sort, and analyze numbers.
- Ideal for sharing raw data with your team or importing into other systems.
- Example use case: Exporting monthly inventory levels to calculate stock turnover in Excel.
HTML Export
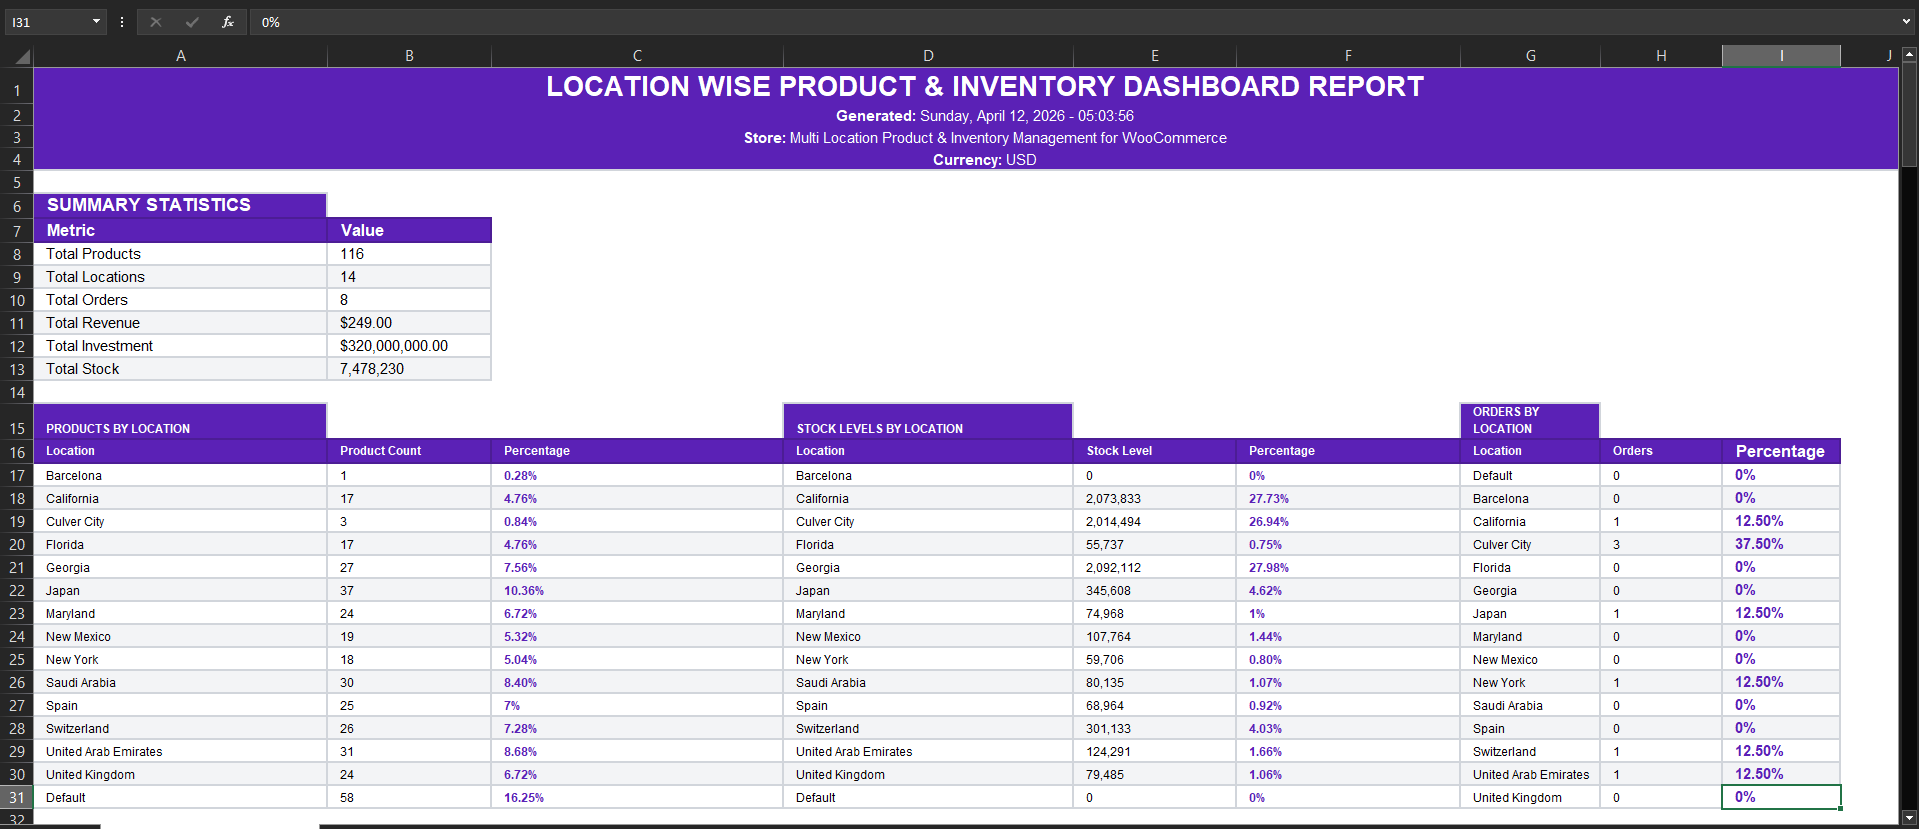
- What it is: HTML is the format used for web pages. Exporting in HTML creates a report that looks like a styled webpage.
- Why use it:
- Quick to view in any browser.
- Easy to print or share as a formatted report.
- Useful when you want a clean, readable snapshot without needing Excel.
- Example use case: Exporting a weekly inventory summary to share with management in a visually readable format.
Recommended Reporting Cadence
Exporting reports regularly helps you stay on top of inventory changes across multiple locations. A simple cadence to follow is:
- Daily: Quick HTML export for store managers to check stock levels.
- Weekly: CSV export for operational teams to analyze sales and restocking needs.
- Monthly: CSV export for finance or business analysis (profit margins, turnover rates).
Suggested image placement:
- A simple infographic or calendar-style visual showing Daily → Weekly → Monthly export cycles.
Workflow Summary
- Go to the plugin dashboard.
- Select Export.
- Choose either CSV or HTML depending on your needs.
- Save or share the file with your team.