The Store Locations feature allows you to create, organize, and manage multiple inventory locations (warehouses, stores, pickup points) within WooCommerce. Each location can have its own address, stock thresholds, shipping methods, payment gateways, business hours, and more.
How to Add a New Store Location
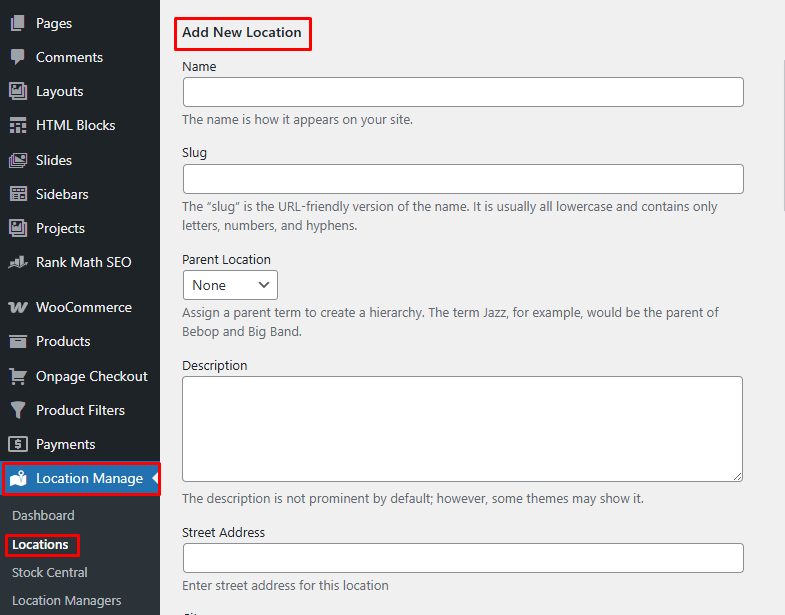
- From your WordPress Admin Dashboard, go to:
Location Manage → Locations - Click Add New Location
- Fill in the location details as described below
- Click Add New Location to save
Location Form Fields Explained
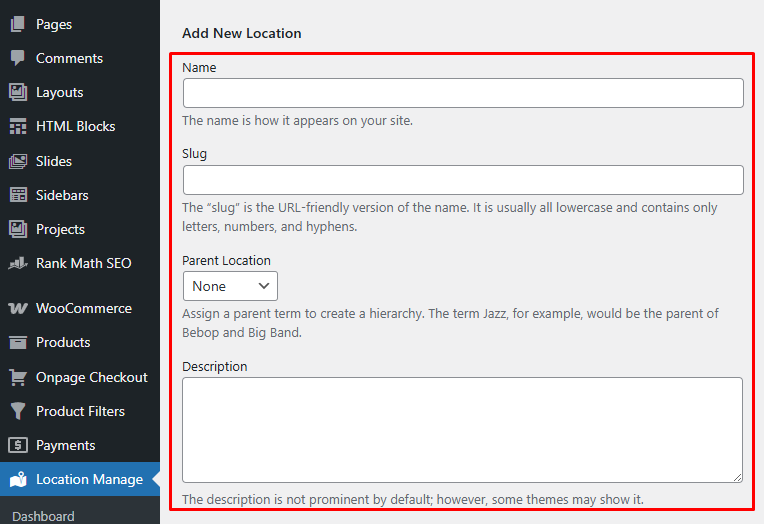
Basic Information
- Name
The display name of the location as it appears on your website and admin panels. - Slug
A URL-friendly version of the name.
Use lowercase letters, numbers, and hyphens only (e.g.canada-warehouse). - Parent Location
Assign a parent location to create a hierarchy.
For example, Jazz can be the parent of Bebop and Big Band. - Description
Optional description of the location.
Some themes may display this on the frontend or archive pages.
Parent and Child Store Locations
Store locations can be organized in a parent-child structure.
For example:
- United States
- New York Store
- California Store
- United Kingdom
- London Store
- Manchester Store
This is useful when you want to group locations by country, region, city, warehouse group, or service area.
Parent-child locations can also make large location lists easier to manage in the admin area.
Global Map & Location Search
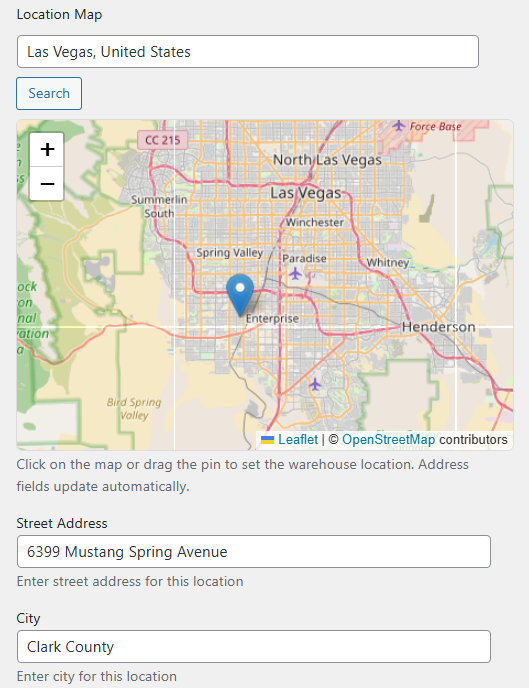
The store location feature includes a global map interface that makes it easy to pinpoint and configure your location.
Map Features
- Search Box Quickly find your location by typing the address or place name into the search box.
- Manual Map Selection Drag and zoom the map to manually select your location. This is useful for broad placement when exact coordinates are not required. It will automatically fill the street address and other necessary information for that location.
For more accurate placement, you can manually enter address & contact details. This ensures precise mapping for delivery, pickup, or distance-based logic.
Address & Contact Details
- Street Address – Full street address of the location
- City – City name
- State – State or province
- Postal Code – ZIP or postal code
- Country – Country name
- Email – Contact email for this location
- Phone – Contact phone number
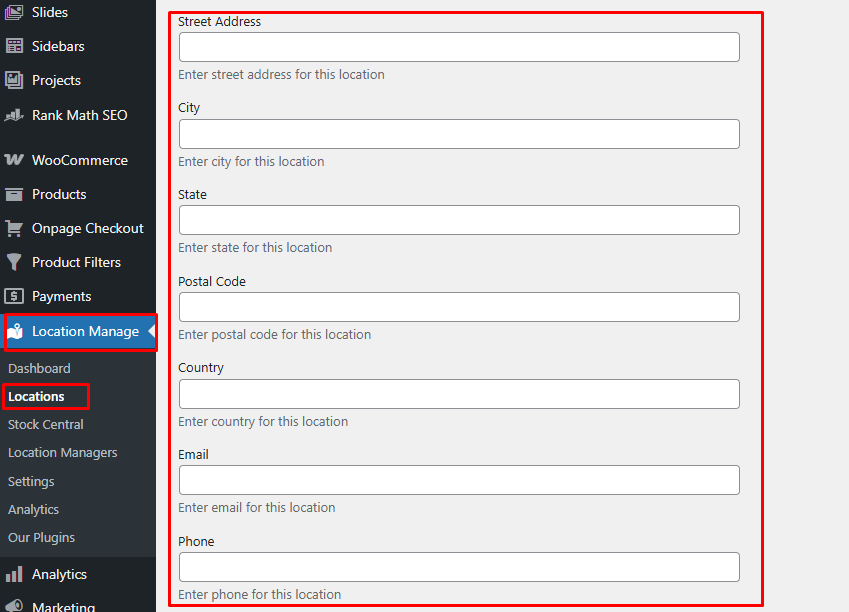
These details can be used for shipping logic, pickup locations, or frontend display.
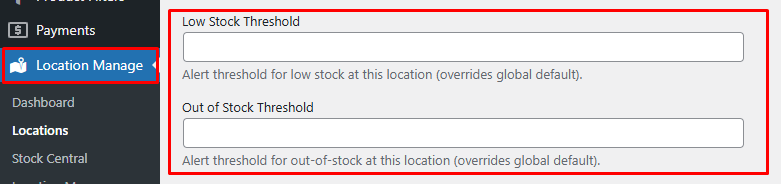
Inventory Thresholds
- Low Stock Threshold
Stock quantity at which a low-stock alert is triggered for this location.
(Overrides global settings) - Out of Stock Threshold
Quantity at which products are marked out of stock for this location.
(Overrides global settings)
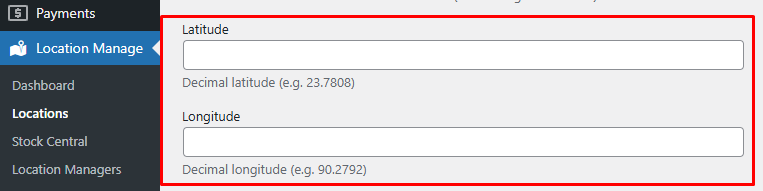
Map & Location Data
- Latitude
Decimal latitude (example:23.7808) - Longitude
Decimal longitude (example:90.2792)
Useful for map integrations, distance-based logic, or store locator features.
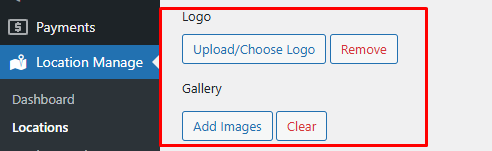
Media
- Logo
Upload or choose a logo for this store location. - Gallery
Add multiple images related to this location (store photos, warehouse images, etc.).
Business Hours
- Timezone
Select the correct timezone (e.g.Africa/Abidjan). - Daily Schedule (Monday – Sunday)
For each day, choose one of the following:- Closed
- 24 hours
- Custom hours (e.g.
09:00 AM – 06:00 PM)
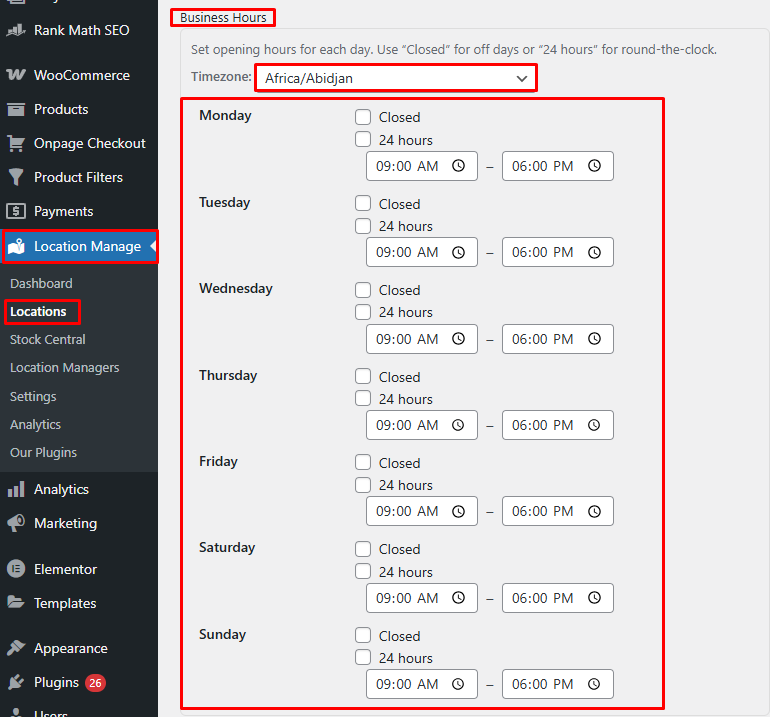
These hours can be displayed on the frontend and used for pickup availability.
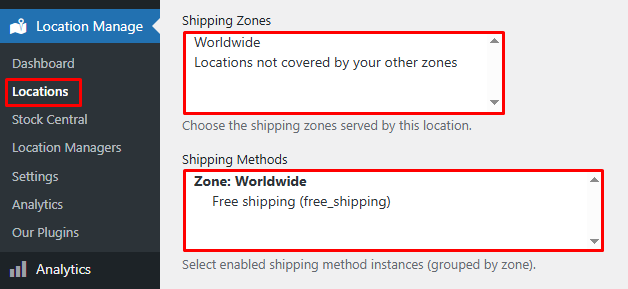
Shipping Configuration
- Shipping Zones
Choose which WooCommerce shipping zones are served by this location
(e.g. Worldwide, Locations not covered by other zones). - Shipping Methods
Select enabled shipping method instances per zone, such as:- Free Shipping
- Flat Rate
Only selected methods will be available for this location.
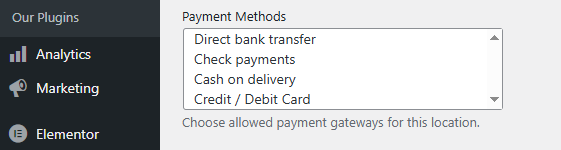
Payment Options
- Payment Methods
Choose which payment gateways are allowed for this location, such as:- Direct bank transfer
- Check payments
- Cash on delivery
- Credit / Debit Card
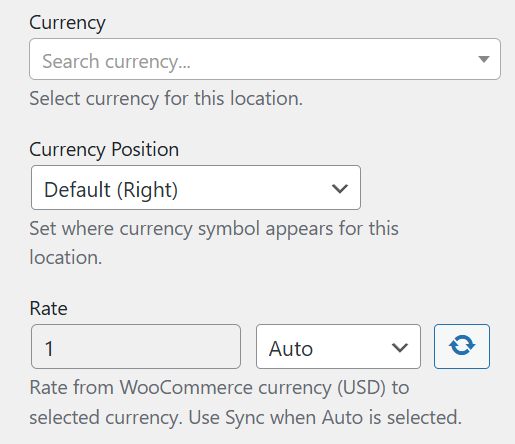
Currency Options
From the currency settings, you can configure how each store location handles its currency display and conversion.
Currency Settings
- Currency Selection Search and select the currency you want to assign to this location.
- Currency Icon Position Choose how the currency symbol appears relative to the price:
- Left (e.g.,
$100) - Right (e.g.,
100$) - Left with space (e.g.,
$ 100) - Right with space (e.g.,
100 $)
- Left (e.g.,
- Currency Rate Define the exchange rate for the selected currency.
- Auto: Updates in real time based on live exchange rates.
- Fixed: Remains constant at the value you set manually.
- Refresh Rate Button Use the refresh button to manually update and fetch the latest exchange rate when using auto mode.
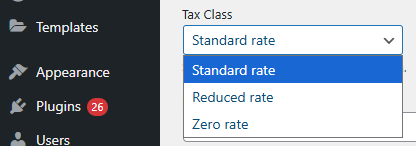
Tax & Display Settings
- Tax Class
Select the default tax class for this location
(e.g. Standard rate). - Display Order
Enter a numeric value to control the order of locations.
Smaller numbers appear first in lists and selectors.

Managing Existing Locations
The Multi Location Product & Inventory Management for WooCommerce plugin provides several tools to manage, organize, and customize your store locations. This section explains how to reorder, activate/inactivate, edit, and configure locations effectively.
Re‑Order Locations
You can easily change the order of your existing locations using drag & drop.
- Locate the 3‑line icon beside a location.
- Click and hold the icon, then drag the location up or down.
- Release it where you want the location to appear.
This feature helps you prioritize or organize locations in a way that matches your business workflow.
Enable or Disable a Store Location
You can enable or disable a store location without deleting it.
Disabling a location is useful when:
- A branch is temporarily closed.
- A warehouse is not currently accepting orders.
- A location is under maintenance.
- You want to hide a location from customers but keep its data saved.
When a location is disabled, it should not be treated as an active selectable location for customers, depending on your display and product settings.
Quick Editing Store Locations
The store location list supports quick editing, allowing you to update important location details without opening the full edit screen.
Quick edit is useful for making fast changes, such as:
- Updating location status
- Changing display order
- Editing basic location information
- Adjusting quick location settings
For full location configuration, use the regular Edit option.
This allows you to temporarily disable a location without deleting it.
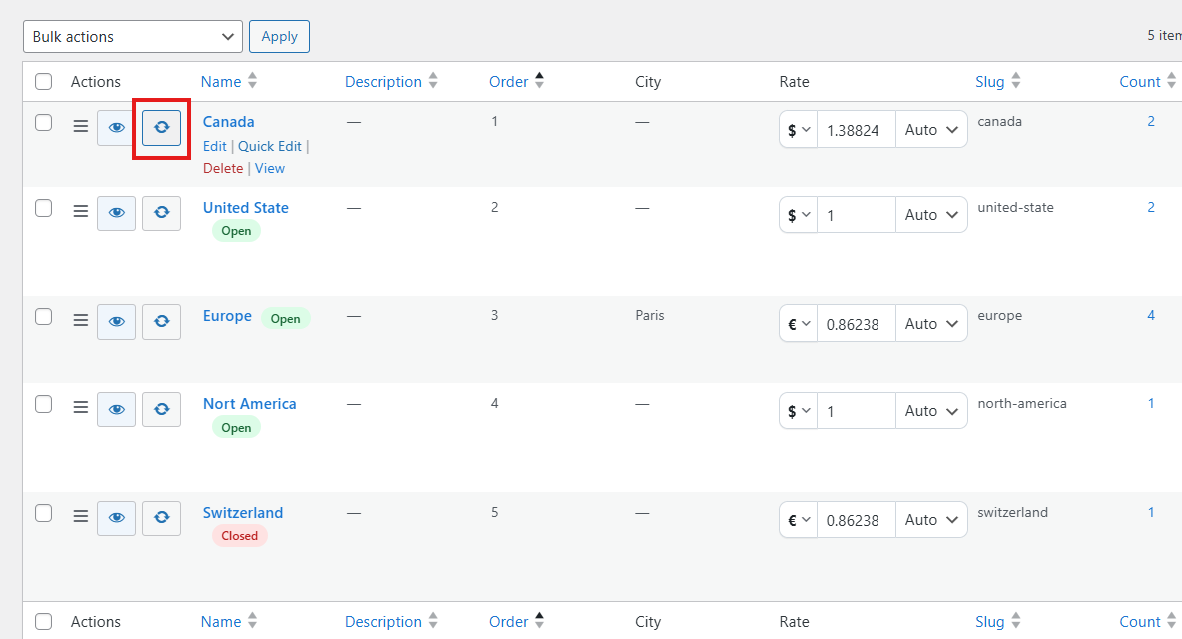
Sync Button
Beside the eye icon, you’ll notice a sync button.
- Clicking this button updates the latest currency rate automatically.
- This eliminates the need to manually input currency rates.
Editing Locations
There are two ways to edit a location:
- Edit:
- Click Edit under a location to open the full settings.
- Here you can modify all details related to the location.
- Quick Edit:
- Provides access to basic settings such as:
- Location Name
- Slug
- Status (Active/Inactive)
- Order
- Provides access to basic settings such as:
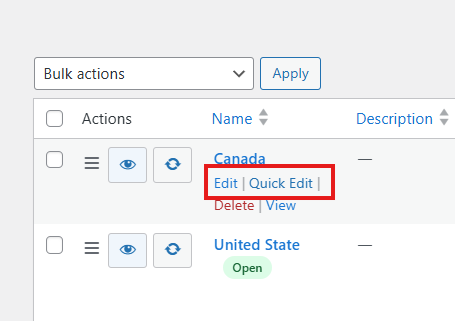
Quick Edit is useful for small adjustments, while Edit allows complete customization.
Delete Location
If you no longer need a location:
- Click Delete under the location name.
- This will permanently remove the location from your system.
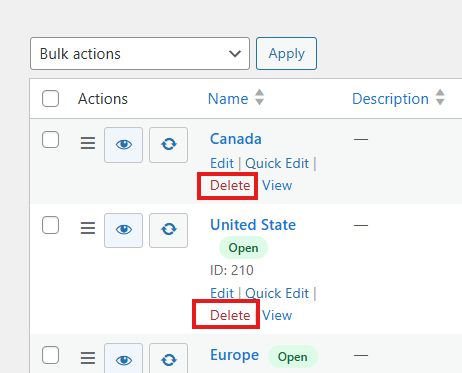
View Location
- Click View to open the location archive page on the frontend.
- If the View option is missing, you may need to Configure-location-based-archive-page in your site settings.

Currency Management
Each location can have its own currency settings:
- Use the currency button to change or update the currency.
- The system shows the current rate compared to USD.
- You can set the rate in two ways:
- Auto: Automatically updates the currency rate.
- Fixed: Keeps the rate you manually enter.
This ensures accurate pricing across different regions.
Product Count
Every location displays a product count:
- This shows how many products are assigned to that location.
- Clicking the count will take you directly to the product page for that location.
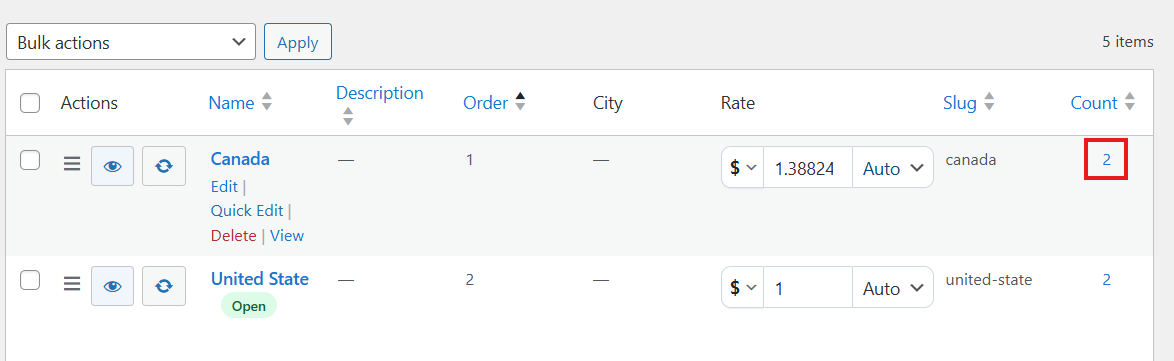
This feature helps you quickly monitor inventory distribution.
Once you have successfully created locations in the Multi Location Product & Inventory Management for WooCommerce plugin, the next step is to assign these locations to your products. This ensures that each product is linked to the correct store location, allowing you to manage stock, pricing, and backorder settings accurately. The process differs slightly for simple products and variable products, but both follow a clear step-by-step workflow.
Location Status Badge
The plugin includes a shortcode for displaying a location status badge.
You can display a location status by ID:
[mulopimfwc_location_status id="123"]Or by slug:
[mulopimfwc_location_status slug="new-york-store"]This can be useful on custom pages, landing pages, store locator pages, or location archive pages.
Adding Store Locations to WordPress Menus
Store locations can be added to WordPress navigation menus.
This is useful if you want customers to access specific location pages directly from your website menu.
Example menu structure:
- Store Locations
- New York
- London
- Toronto
- Dubai
Recommended Workflow
For best results, set up locations in this order:
- Create all store locations.
- Add address, contact, and map information.
- Upload logo and gallery images.
- Organize locations into parent-child groups if needed.
- Set display order.
- Enable or disable locations as required.
- Assign products, stock, pricing, shipping, payment, and pickup rules.
- Test the frontend location selector and product visibility.
Notes
- Do not delete a location if you only want to hide it temporarily. Disable it instead.
- Use parent-child locations when managing many stores or warehouses.
- Use display order to control which locations appear first.
- Use quick edit for small updates.
- Use the full edit screen for complete configuration.
Best Practices
- Use clear, unique names and slugs for better SEO and usability
- Set location-specific stock thresholds for accurate inventory alerts
- Assign shipping and payment methods carefully to avoid checkout issues
- Always configure business hours and timezone for pickup-based stores
With properly configured store locations, you can efficiently manage multi-warehouse inventory, location-based shipping, payments, and pickup options in WooCommerce.