The Multi Location Product & Inventory Management for WooCommerce plugin lets you configure shipping and payment methods per location. If these options are missing at checkout, it usually means the rules are not set up correctly or there is a conflict. This guide explains rule precedence and provides a structured debugging approach.
Rule Precedence
- Shipping Zones must exist before shipping methods can be applied.
- Shipping Methods are tied to zones and only appear if the zone matches the customer’s address.
- Location Assignment links each store location to a zone, method, and payment option.
- Plugin Settings must have location-based shipping and payment enabled, otherwise WooCommerce will use the defaults to global rules.
Step 1: Create a Shipping Zone
Shipping zones define where your shipping rules apply. Without zones, no shipping methods will appear.
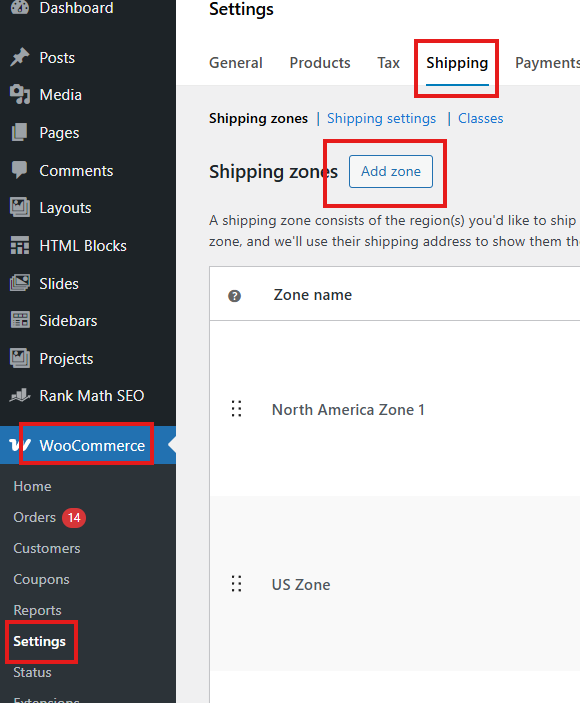
- Go to WooCommerce → Settings → Shipping.
- Click Add Zone.
- Enter a Zone Name (e.g., “California Zone”).
- Select the Zone Region (e.g., United States → California).
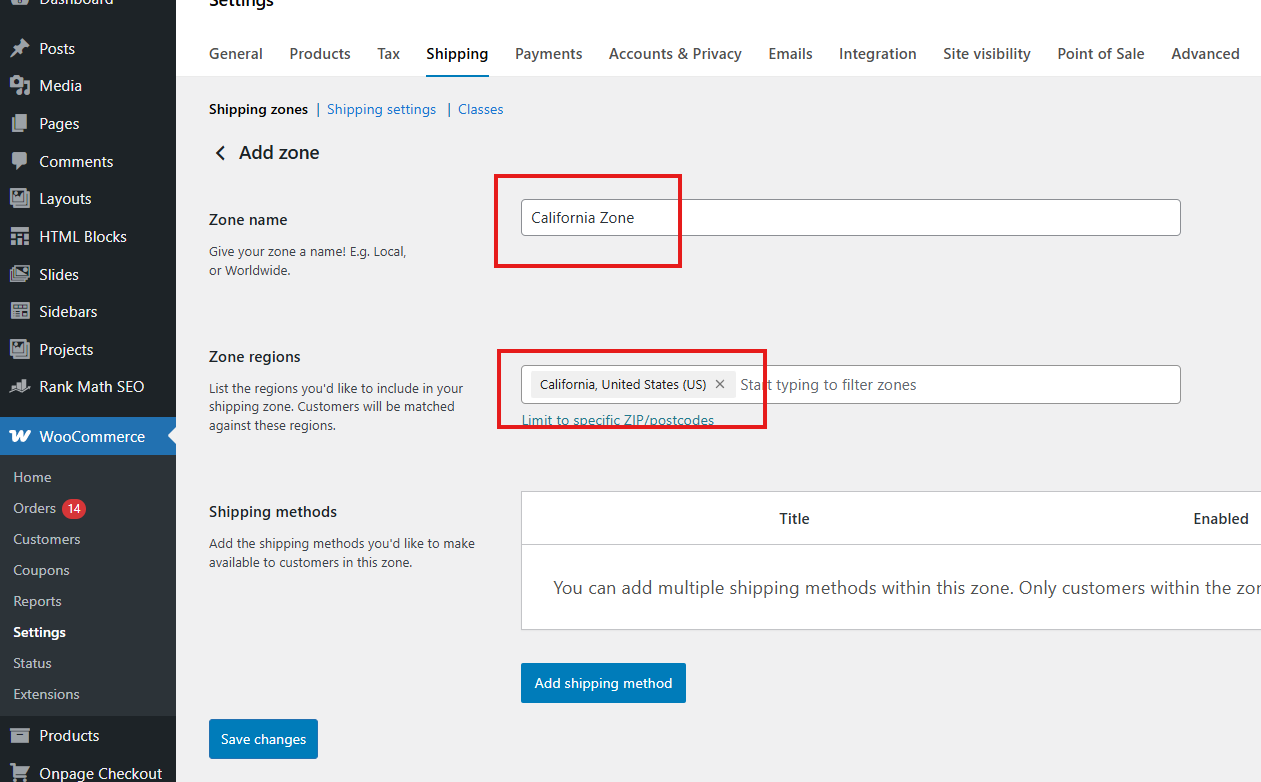
- Add one or more Shipping Methods:
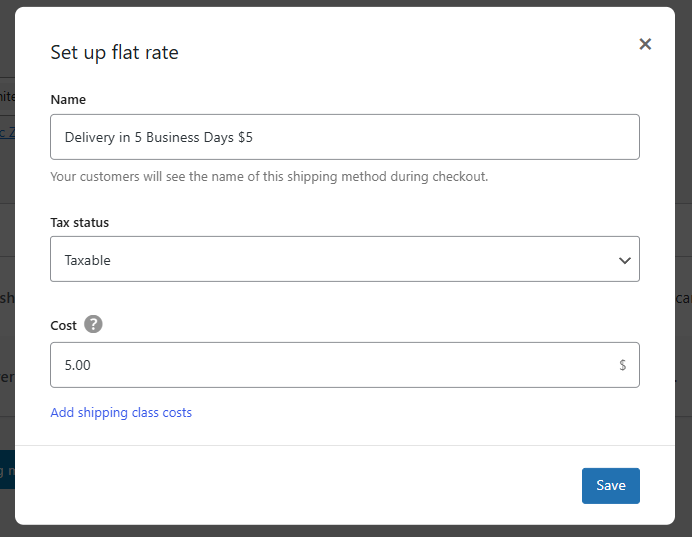
- Flat Rate
- Customers pay a fixed amount for shipping.
- Example: $10 flat rate for California.
- You can add multiple flat rates with different labels (e.g., “Delivery in 5 Business Days $5” vs. “Deliver in 3 Business Days $10”).
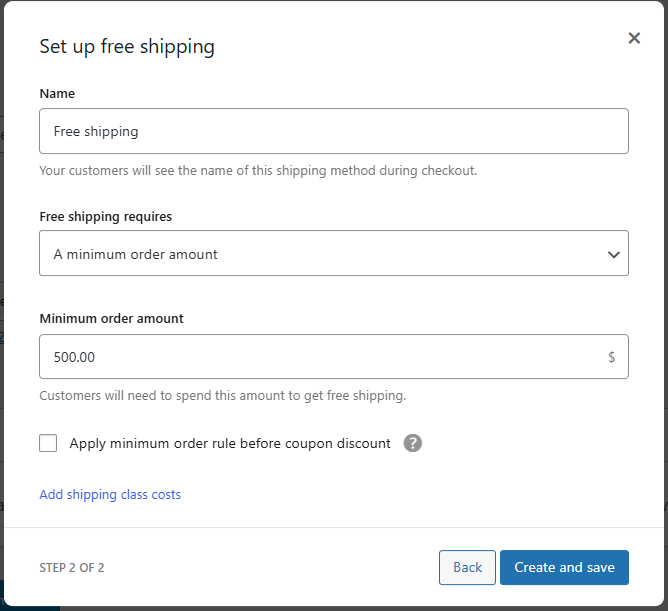
- Free Shipping
- Customers pay nothing for shipping.
- Can be unconditional or require rules such as: Minimum order amount (e.g., free shipping for orders over $500).
- Flat Rate
- Click Save Changes.
You can create multiple zones (e.g., California, Texas, New York) with different shipping methods for each.
Step 2: Assign Zones and Methods to Locations
Once zones and methods are created, link them to your store locations:
- Go to Location Manage → Locations → Edit Location.
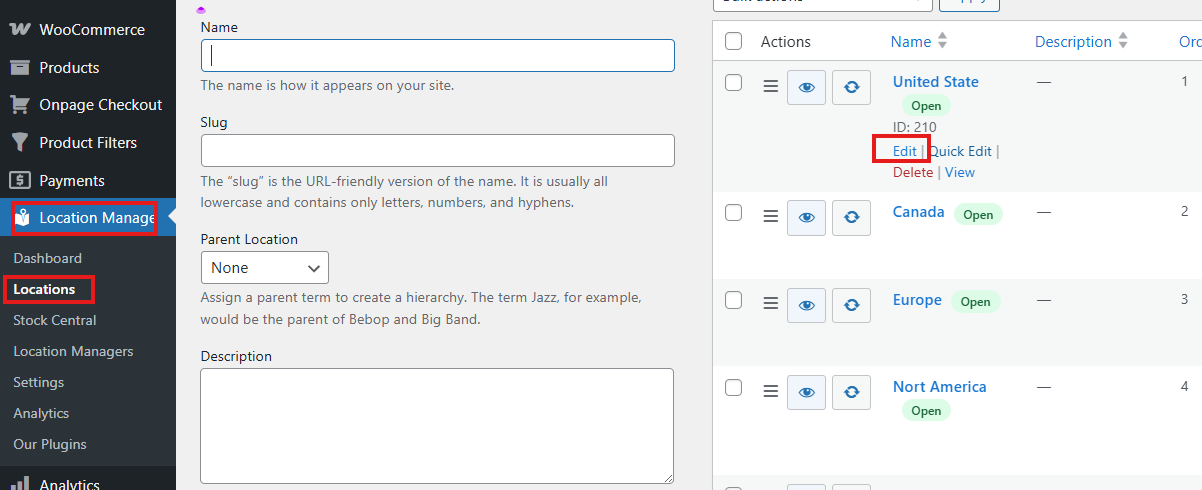
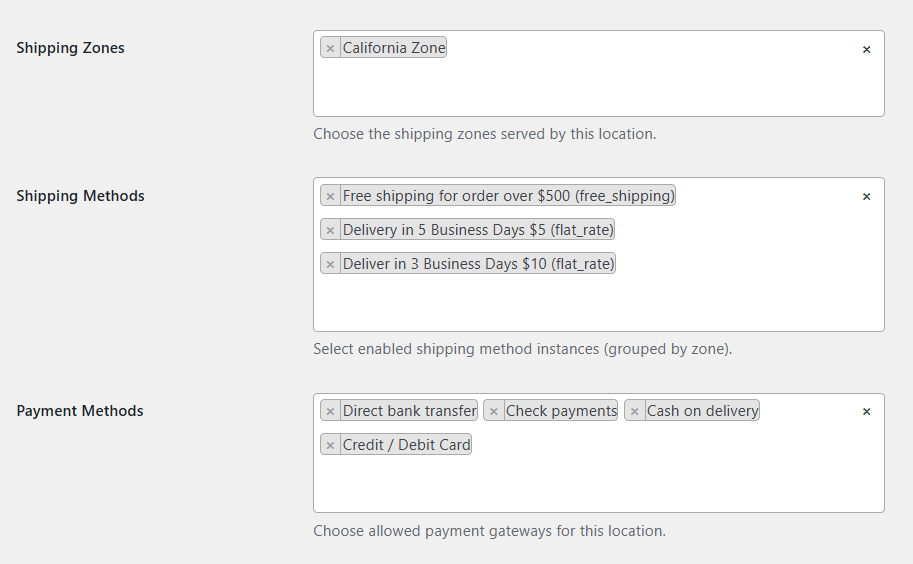
- Scroll down to Shipping Zone, Shipping Method, Payment Method.
- Select the Shipping Zone you created.
- Choose which Shipping Methods apply to this location.
- Example: Delivery in 5 Business day $5, Delivery in 3 Business Days, Free Shipping (orders over $500).
- Select Payment Methods (e.g., Cash on Delivery).
- Click on Update to save changes.
Step 3: Enable Location-Based Rules
- Go to Location Manage → Settings → Location Wise Everything.
- Turn on Enable Location-Based Shipping.

- Click the Payment tab and turn on the option named “Enable Location-wise Payment.”
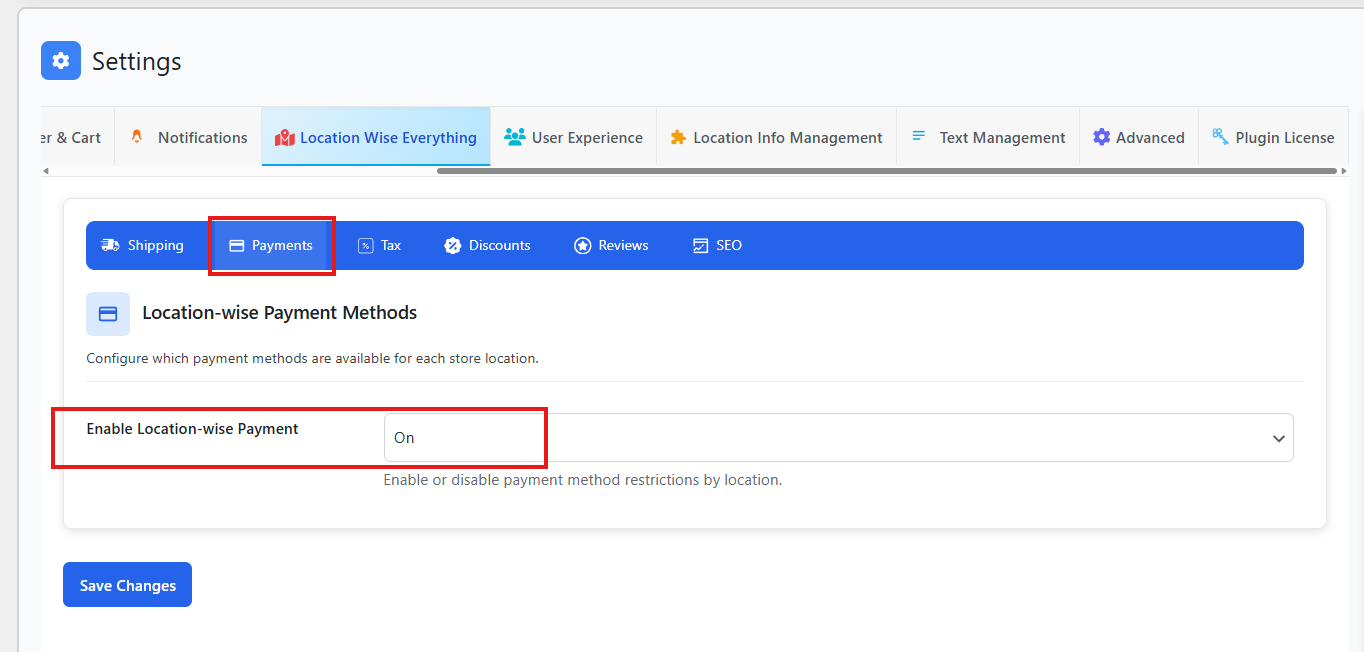
- Save changes.
Step 4: Verify Checkout
- Select a location.
- Add a product to the cart.
- Add shipping address.
- At checkout, confirm that the correct shipping zone, shipping methods, and payment methods appear.
Debugging Approach
If shipping or payment methods are still missing:
- Check Plugin Updates: Ensure the plugin is up to date.
- Clear Cache: Cached pages may hide updated rules. Clear WordPress, CDN, and browser cache also make sure to clear the plugin cache. Go to Location Manage > Settings > Advanced. Here, you’ll see an option named Clear Plugin Cache. Click on it and clean the cache..
- Theme Conflicts: Some themes override WooCommerce checkout templates. Switch to a default theme to test.
- Plugin Conflicts: Disable other plugins temporarily to identify conflicts.
- Support Contact: If issues persist, contact plugin support with details (WooCommerce version, plugin version, theme used, screenshots).
Best Practices
- Always create at least one shipping zone before assigning methods.
- Assign both shipping and payment methods per location to avoid gaps.
- Use staging environments to test changes before applying them live.
- Document your configuration for future troubleshooting.