The Multi Location Product & Inventory Management for WooCommerce plugin allows admins to manually assign store locations to customer orders. This ensures products are dispatched from the correct location with available stock.
Enable Manual Assignment
- Go to Location Manage > Settings > Order & Cart.
- Find the option Order Assignment Method.
- Select Manual Assignment.
- Click Save Changes.

Customers will now place orders without selecting a location. For more in detailed guide about this option, read the Manual Assignment documentation
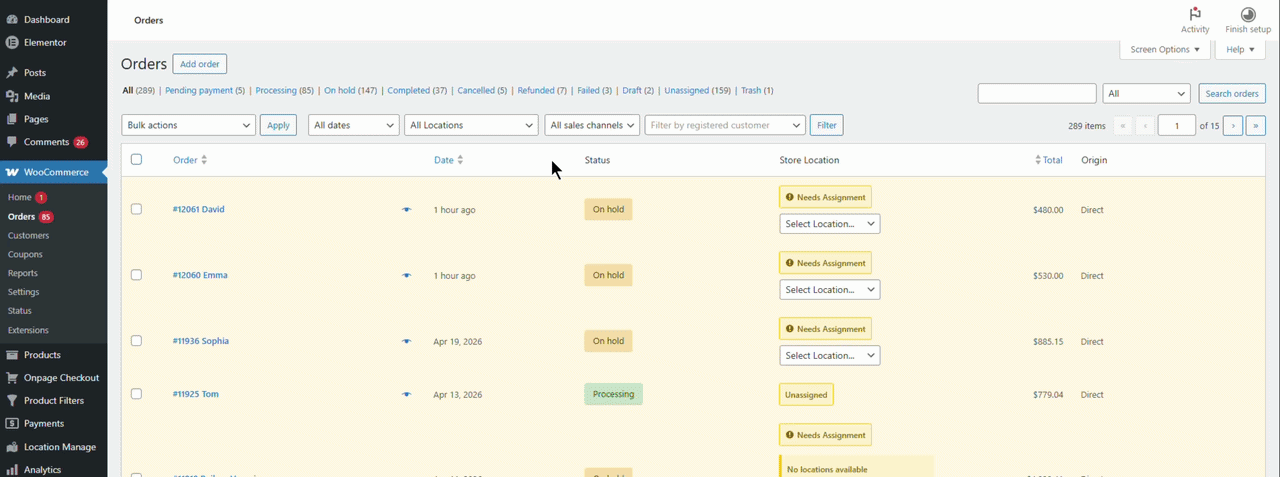
Method 1: Bulk Assign from Orders List (Store Column)
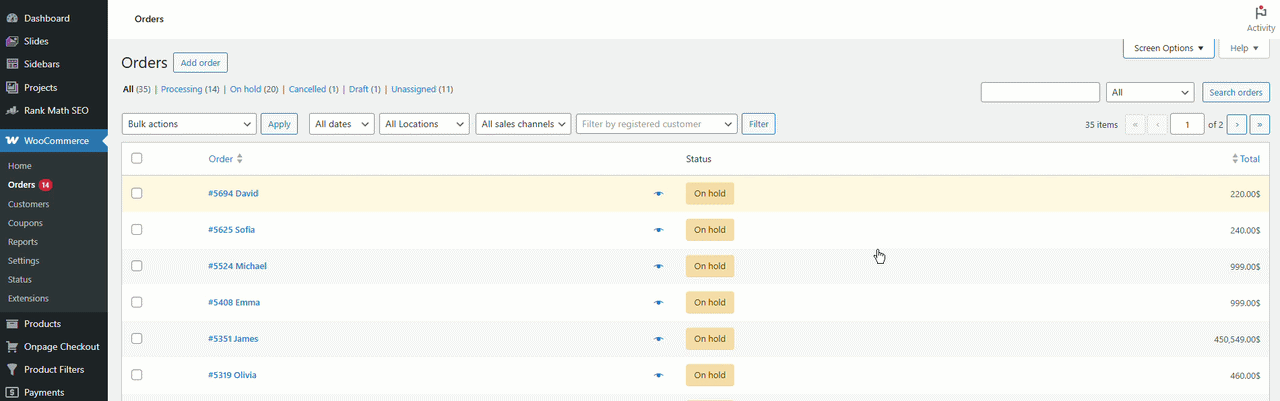
- Go to WooCommerce → Orders.
- Locate the Store Location column.
- Select a location from the dropdown for the order.
- The order updates immediately.
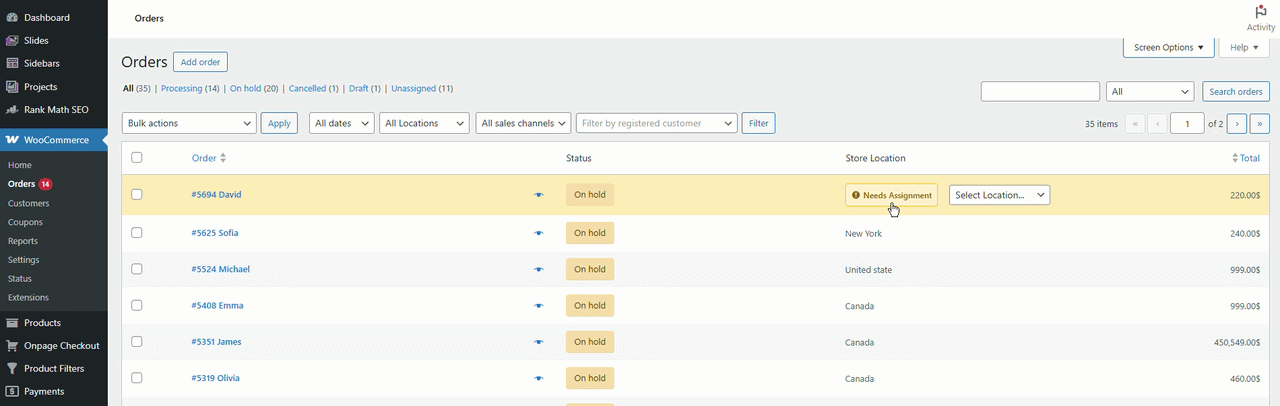
Note: If the Store Location column isn’t visible, click on Screen Options and enable Store Location. The column will then appear in your view.
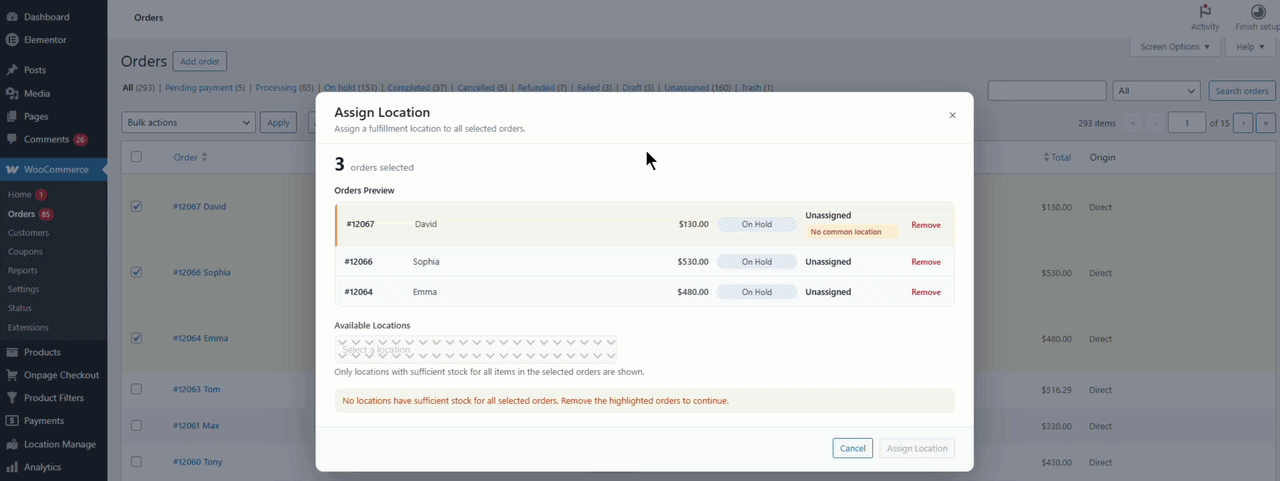
Method 2: Bulk Action – Assign Location
- Go to WooCommerce → Orders.
- Select one or more orders using the checkboxes.
- Open the Bulk Actions dropdown.
- Choose Assign Location.
- Click Apply.
- Select the location.
- Click Assign Location to confirm.
Note: When using the bulk action, some orders may belong to different locations. In this case, the Assign Location bulk action will highlight mismatched orders and suggest removing them. You can then assign the correct location later.
Method 3: Assign Location from Order Edit Screen
- Go to WooCommerce → Orders.
- Click Edit on the desired order.
- In the right sidebar, find Store Location.
- Select the desired location.
- Click Update to save changes.
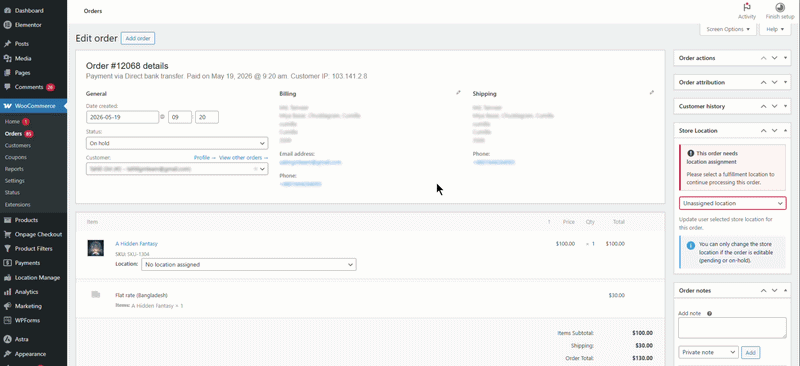
Method 4: Assign Different Locations Per Product (Advanced / Split Fulfillment)
- Go to WooCommerce → Orders.
- Open the order you want to edit.
- Scroll down to the Items section.
- Under each product line item:
- Use the Location dropdown next to the product.
- Assign or change the location for each product individually.
- Click Update to save changes.
This method allows advanced split fulfillment, ensuring each product is dispatched from the correct location.
Checklist
- Select Manual Assignment in Order & Cart settings.
- Use Store Location column for quick bulk assignment.
- Apply Bulk Action – Assign Location for multiple orders.
- Edit individual orders to assign locations.
- Assign different locations per product for split fulfillment.
Testing the Feature
- Place a test order.
- Assign a location using one of the methods.
- Verify that the order reflects the correct location.
- For split fulfillment, confirm each product is assigned to the correct location.
Testing ensures that manual location assignment works correctly and improves order accuracy.
Troubleshooting
- Store Location column not visible: Enable it from Screen Options.
- Bulk action mismatch: Remove mismatched orders and assign locations individually.
Key Takeaway
Manual location assignment provides admins with full control over order fulfillment, ensuring accuracy and flexibility in multi-location management.