The Classic Mode of the Multi Location Product & Inventory Management for WooCommerce plugin provides a straightforward and easy-to-use layout for managing product stock and pricing across multiple locations. Unlike the Modern Mode, Classic Mode displays all products in a list format, making it simple to edit and update inventory details directly. This feature is essential for store owners who want a clear, traditional interface to manage stock, prices, and location-specific configurations efficiently.
Benefits
Classic Mode offers several advantages for WooCommerce store management:
- Easy-to-use layout with all products visible in one place.
- Quick access to enable stock management for simple and variable products.
- Flexible location assignment, including the option to apply settings to all locations or add them individually.
- Comprehensive control over stock quantity, regular price, sale price, backorder options, and purchase price.
- Efficient saving process with a single click on the tick icon.
Step 1: Accessing Classic Mode
Start by switching from Modern Mode to Classic Mode.
- From your WooCommerce dashboard, go to Location Manage > Stock Central.
- By default, the Modern Mode layout will be selected.
- Click on Classic to change the layout to Classic Mode.
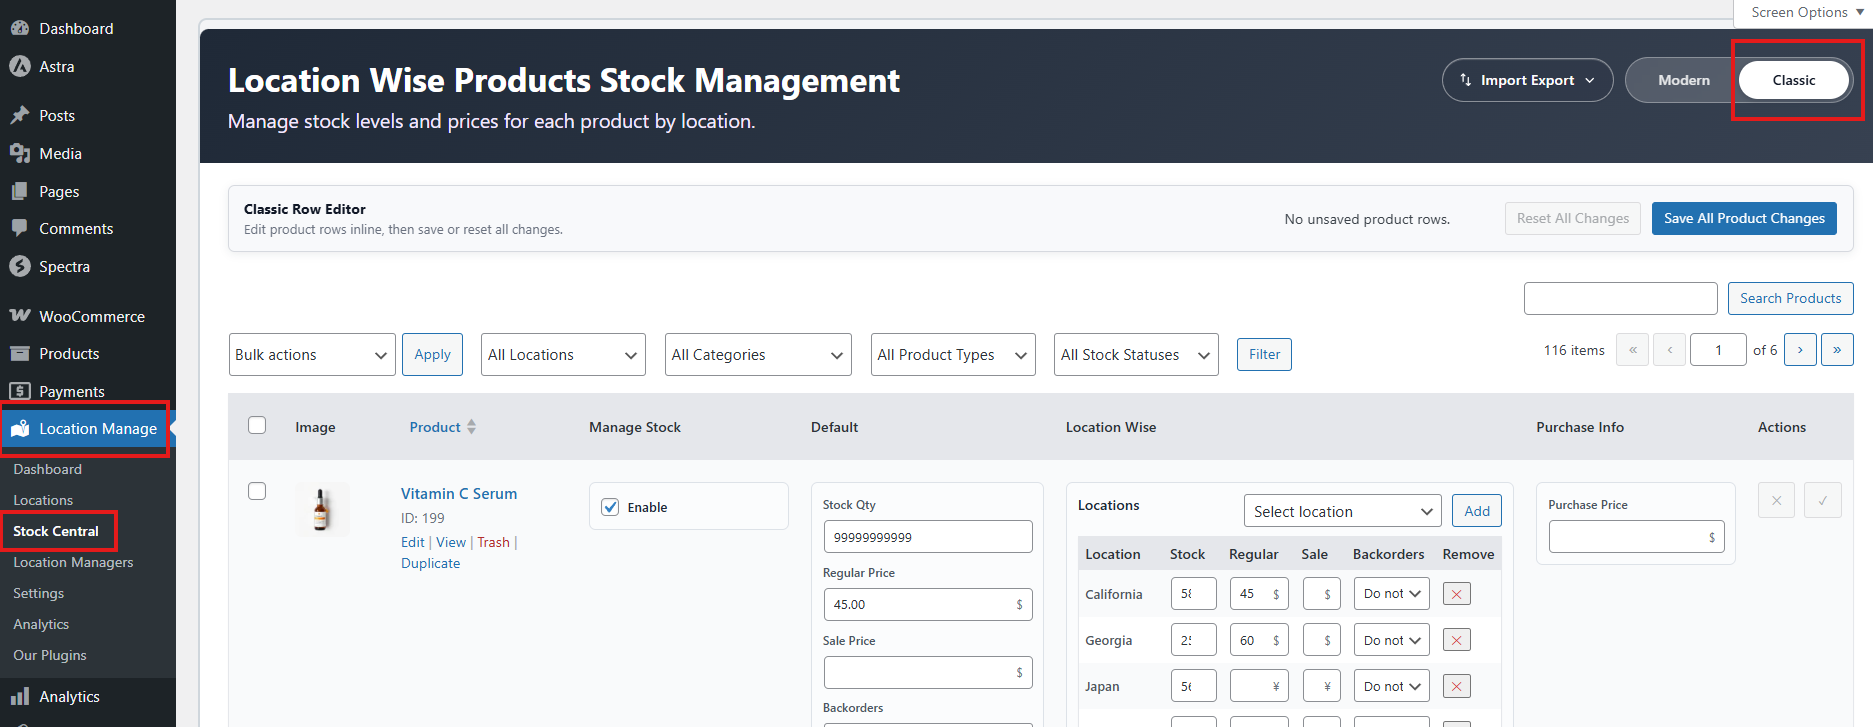
Step 2: Configuring Simple Products
Classic Mode makes managing simple products intuitive.
- In the Classic layout, all your products will be listed.
- Choose the product you want to edit or update.
- Beside the product name, check the option labeled Enabled.
- Fill in the General Info fields:
- Stock Quantity
- Regular Price
- Sale Price
- Backorder Options
- On the right side, locate the Location section:
- If no location is assigned, select one from the dropdown.
- You can select All Locations to apply settings to all created locations.
- Alternatively, add locations one by one:
- Select a location, click Add.
- Repeat for each location.
- For each location, enter:
- Stock Quantity
- Regular Price
- Sale Price
- For the regular price and sale price and left the filed empty to convert the currency automatically.
- Backorder Availability
- To remove any locaiton you can click on the X icon. It will ask for confirmation then you can remove it.
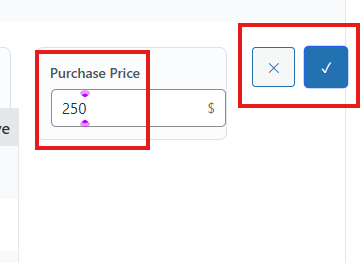
- On the right side, enter the Purchase Price.
- Click the Tick icon to save all changes.
Configuring simple products ensures accurate stock and pricing across all locations, preventing overselling and maintaining consistency.
Step 3: Configuring Variable Products
Managing variable products in Classic Mode follows a similar process but with added flexibility.
- Select the variable product you want to edit.
- Click on Enable.
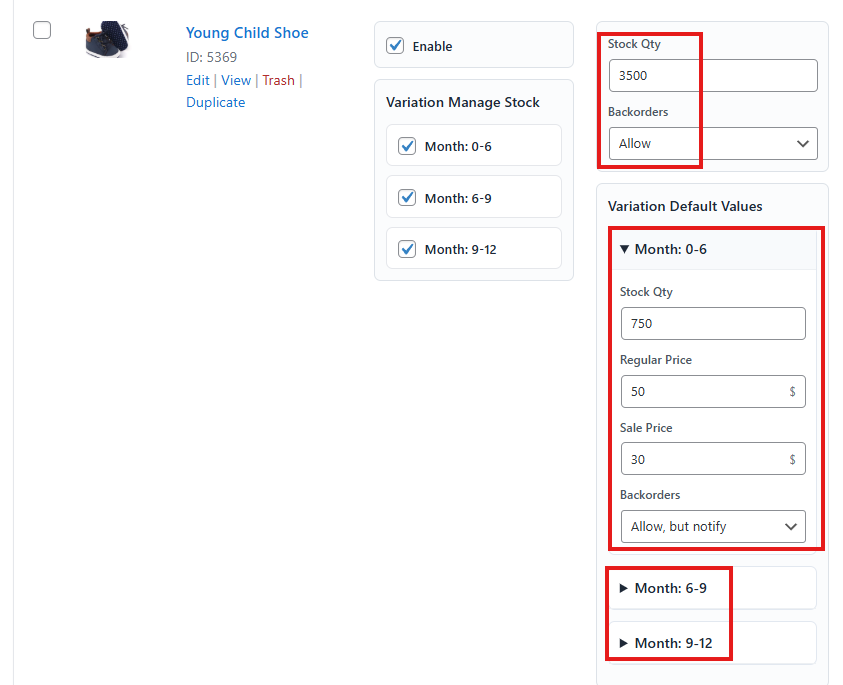
- A box named Variation Manage Stock will appear.
- All variations of the product will be displayed.
- Checkmark the variations you want to edit. To edit all, select all the variations.

- Then give the total stock quantity and if the backorder is available or not.
- Fill the following info inside the Variation Default Values box for each variation:
- Stock Quantity
- Regular Price
- Sale Price
- Backorder Options
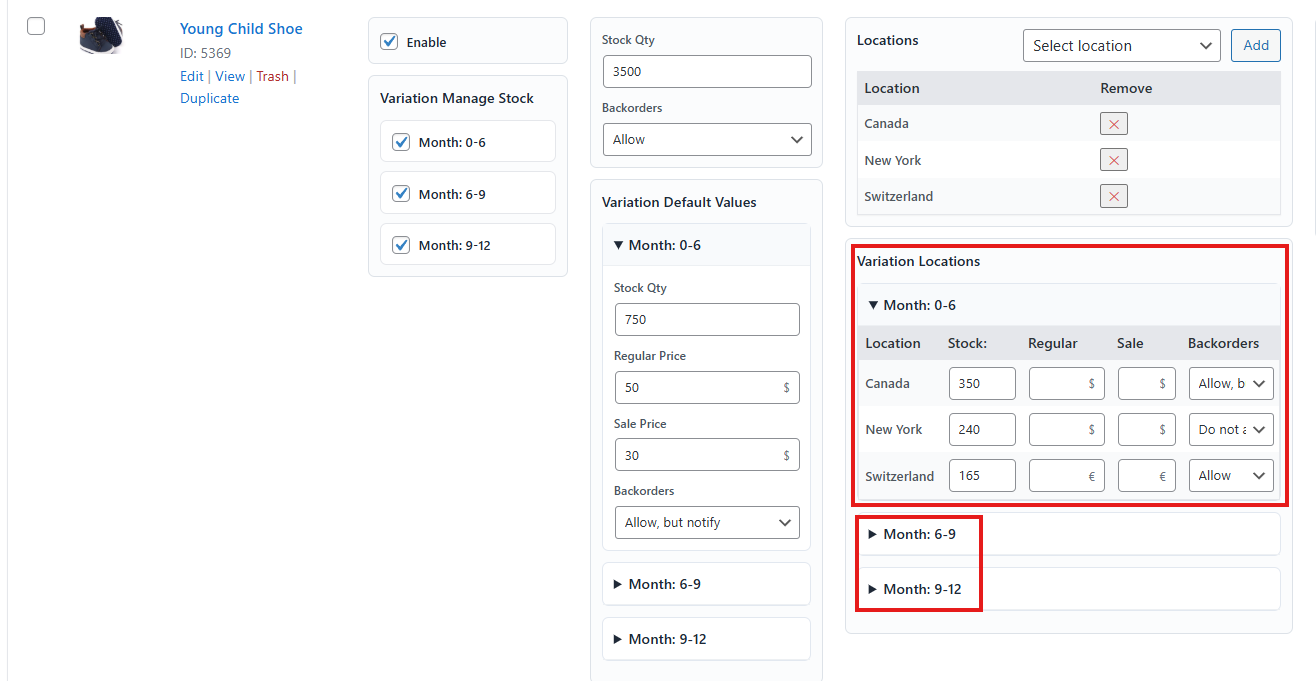
- In the Location section:
- Select locations for the variations, same as with simple products.
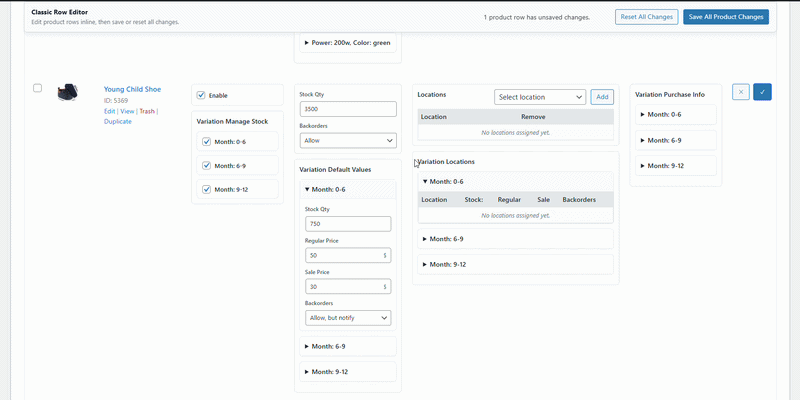
- In the Variation Locations box, enter for each variation and location:
- Stock Quantity
- Regular Price
- Sale Price
- You can leave the regular price and sale price empty if you want automatic currency conversation.
- Backorder Availability
- For each variation, enter the Purchase Price.
- Save all changes by clicking the Tick icon.
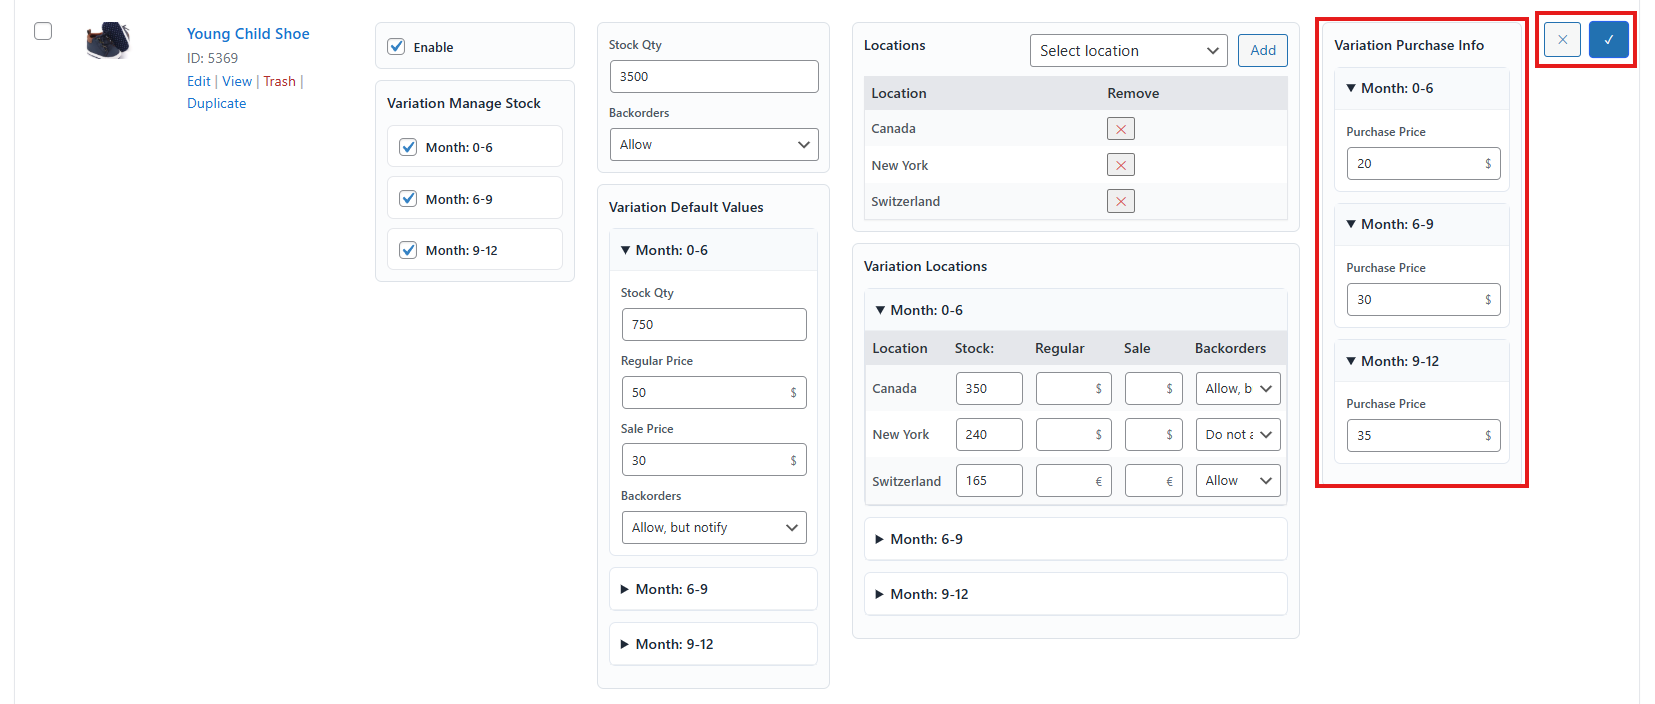
Properly configuring variable products ensures each variation has accurate stock and pricing per location, giving customers reliable purchase options.
Testing the Feature
After configuration, it is important to test Classic Mode to ensure everything works correctly.
- Navigate to your store’s front end.
- Check product listings to confirm stock quantities, prices, and variations are displayed correctly.
- Verify that location-specific settings are applied as intended.
- Attempt a test purchase to ensure backorder options and stock management behave properly.
Conclusion: Testing validates that your Classic Mode setup is functioning correctly, ensuring smooth customer experiences and accurate inventory control.
Key Takeaway
Classic Mode provides a simple yet powerful way to manage product inventory across multiple locations. By following the steps outlined, you can ensure accurate stock, pricing, and location-specific configurations for both simple and variable products.