
The Multi Location Product & Inventory Management for WooCommerce plugin allows you to display a location selector anywhere on your store. This feature ensures that customers can choose their preferred location directly from product pages, cart pages, popups, or even custom areas like headers and footers. Before using this feature, you must install and activate the plugin. For detailed instructions, read the plugin installation guide.
Benefits
Adding a location selector anywhere provides several advantages:
- Customer Convenience: Customers can select their preferred location easily.
- Flexible Placement: Display the selector on product pages, cart pages, popups, or custom areas.
- Improved Accuracy: Customers see product availability based on their chosen location.
Real-World Example
Imagine a store with multiple branches. A customer browsing a product page can select their location before adding the product to the cart. This ensures they only see stock and pricing relevant to their chosen branch.
Add Location Selector on Single Product Page
You can display the location selector directly on product pages.
- From your WordPress dashboard, go to Location Manage > Settings > Location Info Management.
- Find the setting named Location Selection Display.
- Enable Display Location on Single Product.
- Set the Location Display Position. Options include:
- After Product Price
- Before Add to Cart Button
- After Add to Cart Button
- In Product Meta Section
- Set the Location Display Layout. Options include:
- List View
- Button Style
- Select Dropdown
- Enable Hide Out of Stock Locations if you want to hide unavailable locations.
- Click Save Changes.
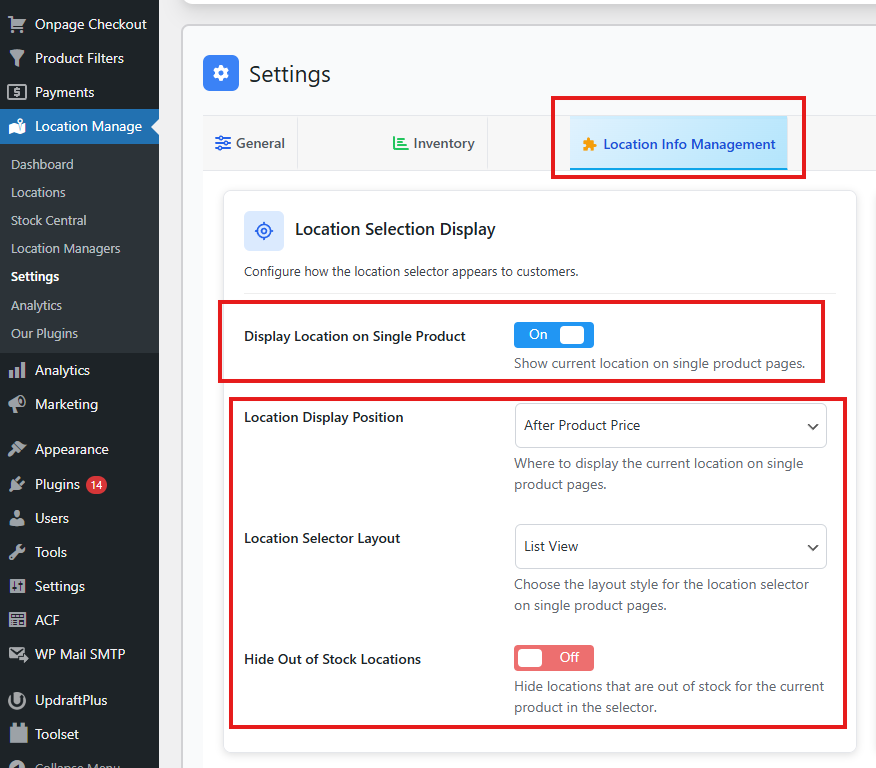
Adding the selector to product pages ensures customers can choose their location before purchasing.
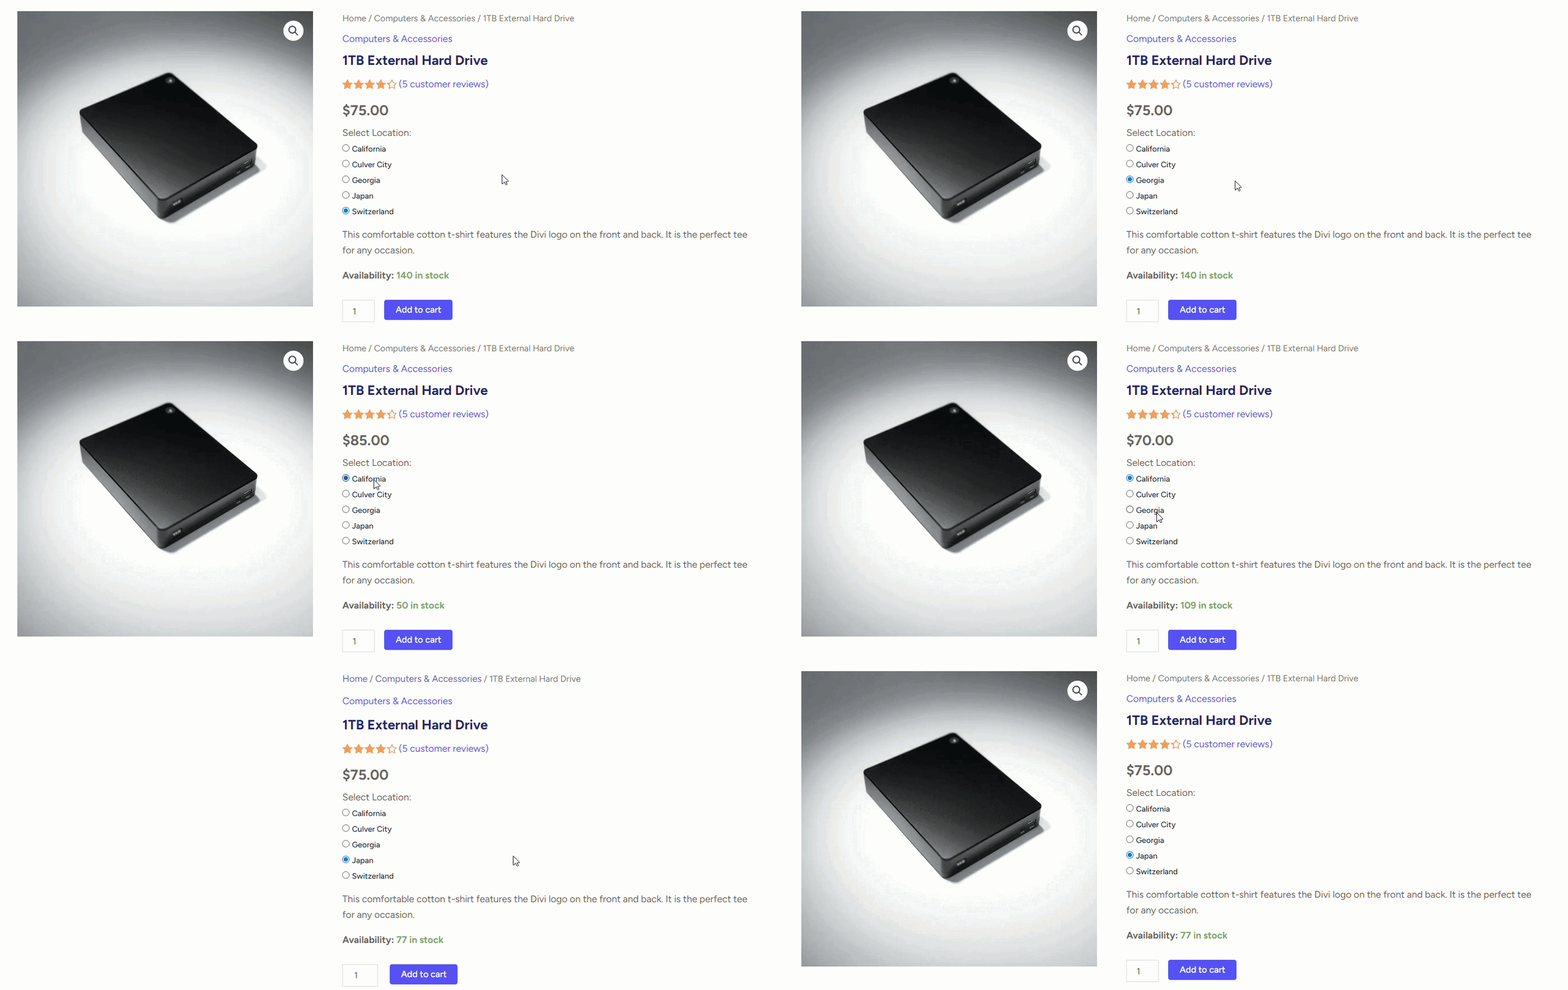
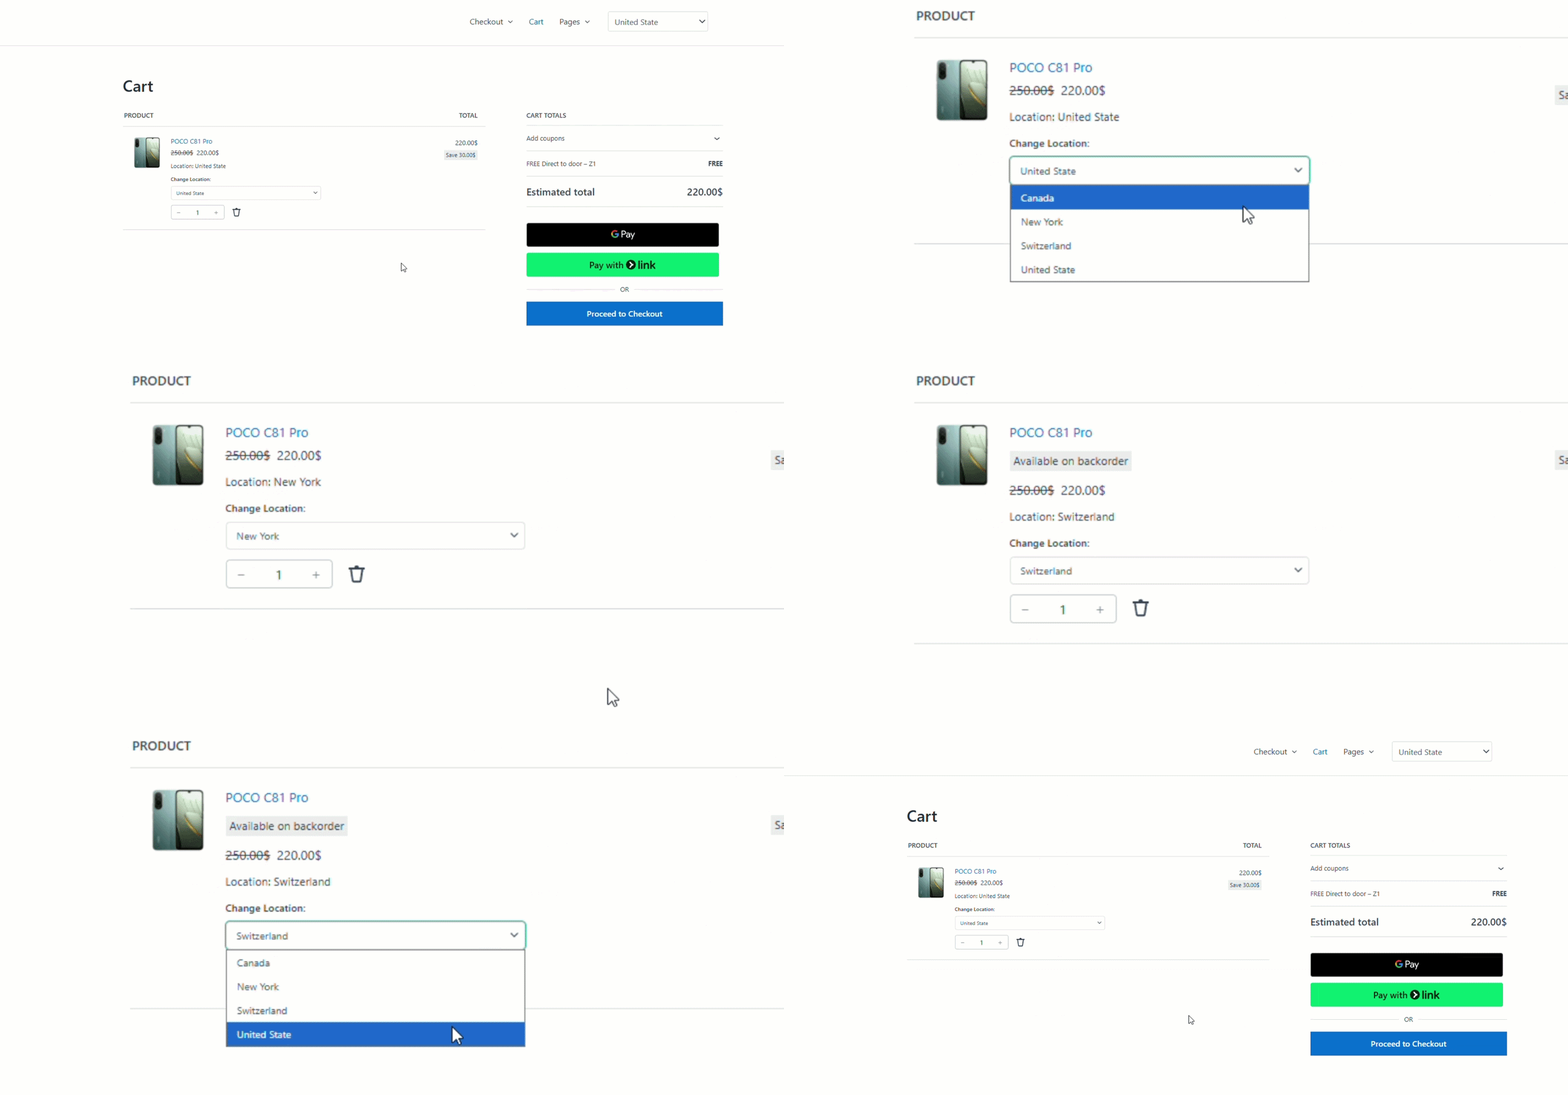
Add Location Selector on Cart Page
You can also display the location selector on the cart page.
- From your dashboard, go to Location Manage > Settings > Order & Cart.
- In the Cart Setting section, enable Allow Location Change in Cart.
- Click Save Changes.
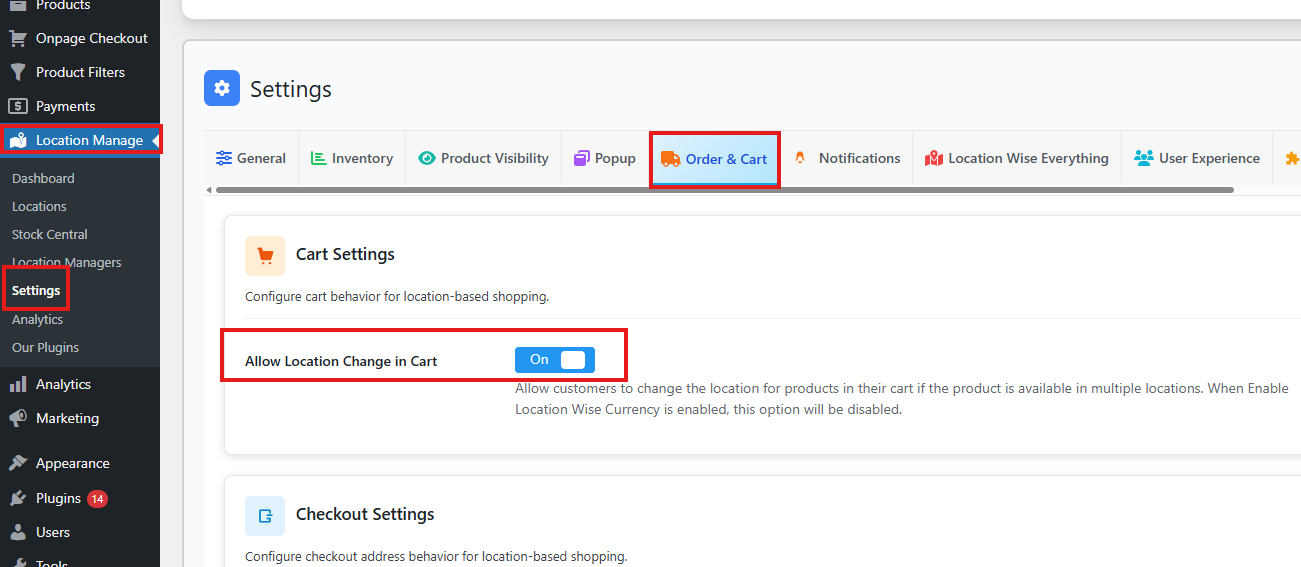
Note: If the Allow Location Change in Cart setting is not clickable, it is because Location Wise Currency is enabled. Disable it first, then enable the cart setting.
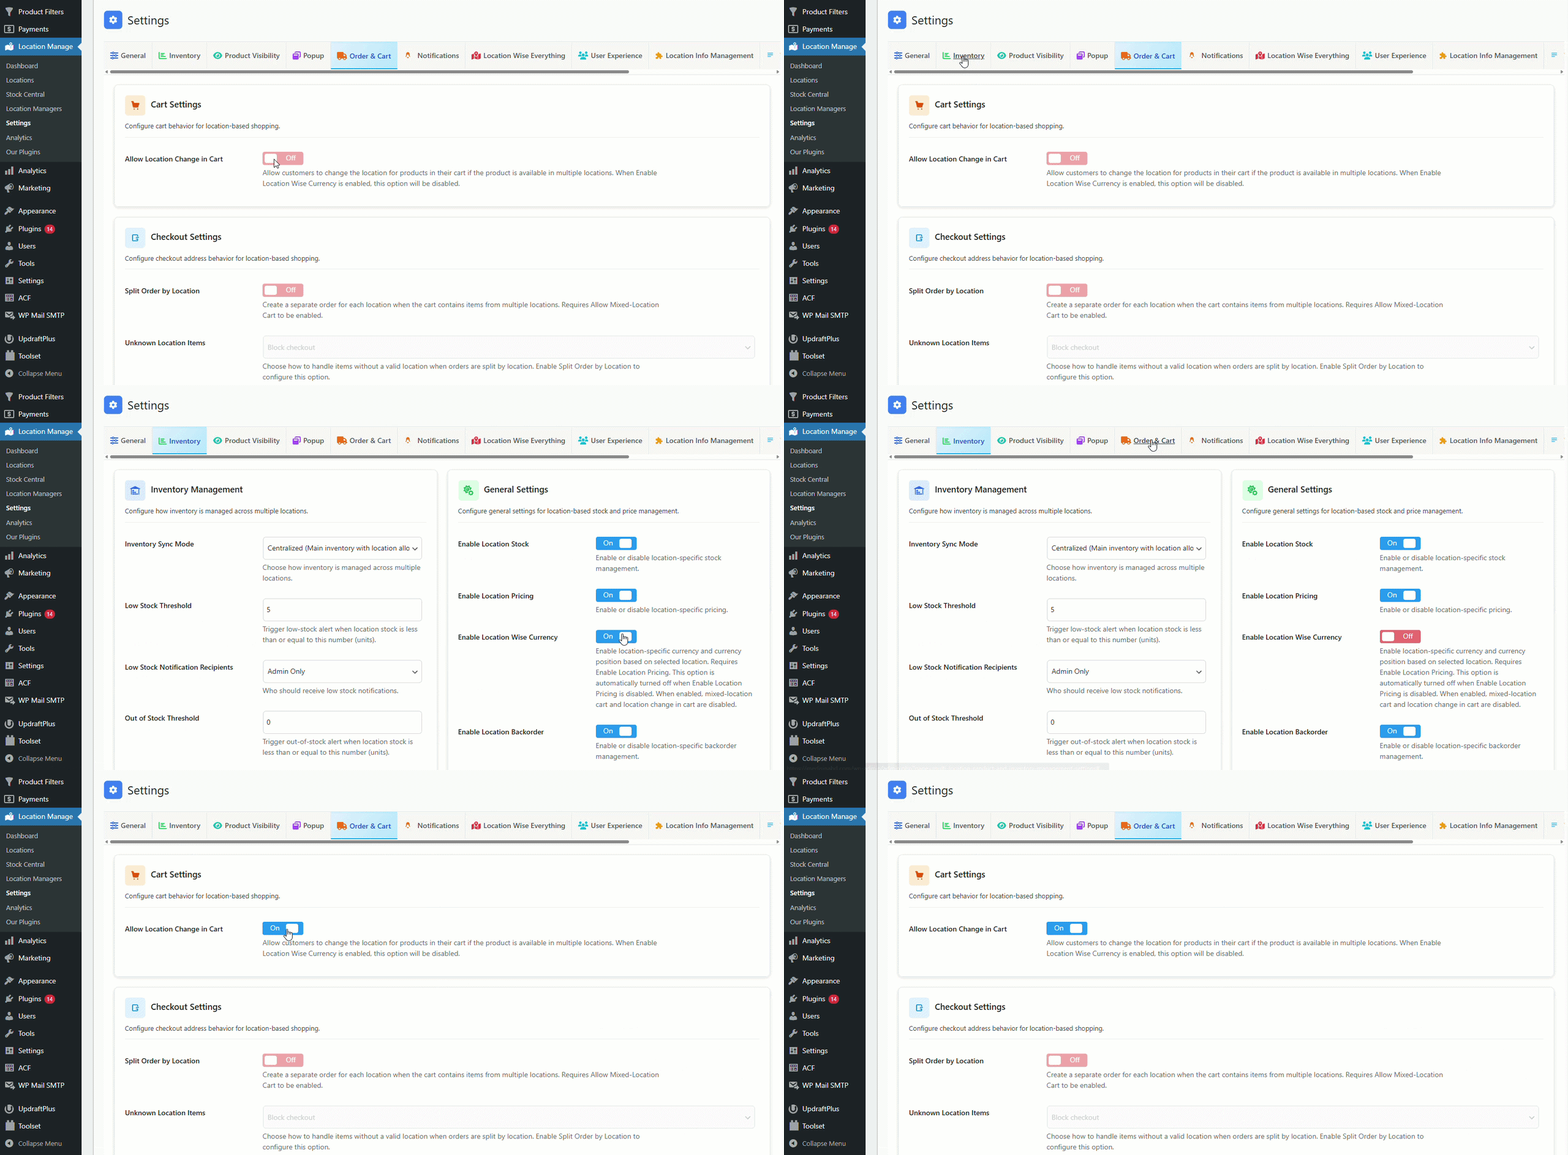
Adding the selector to the cart page allows customers to change their location during checkout.
Add Location Selector with Popup
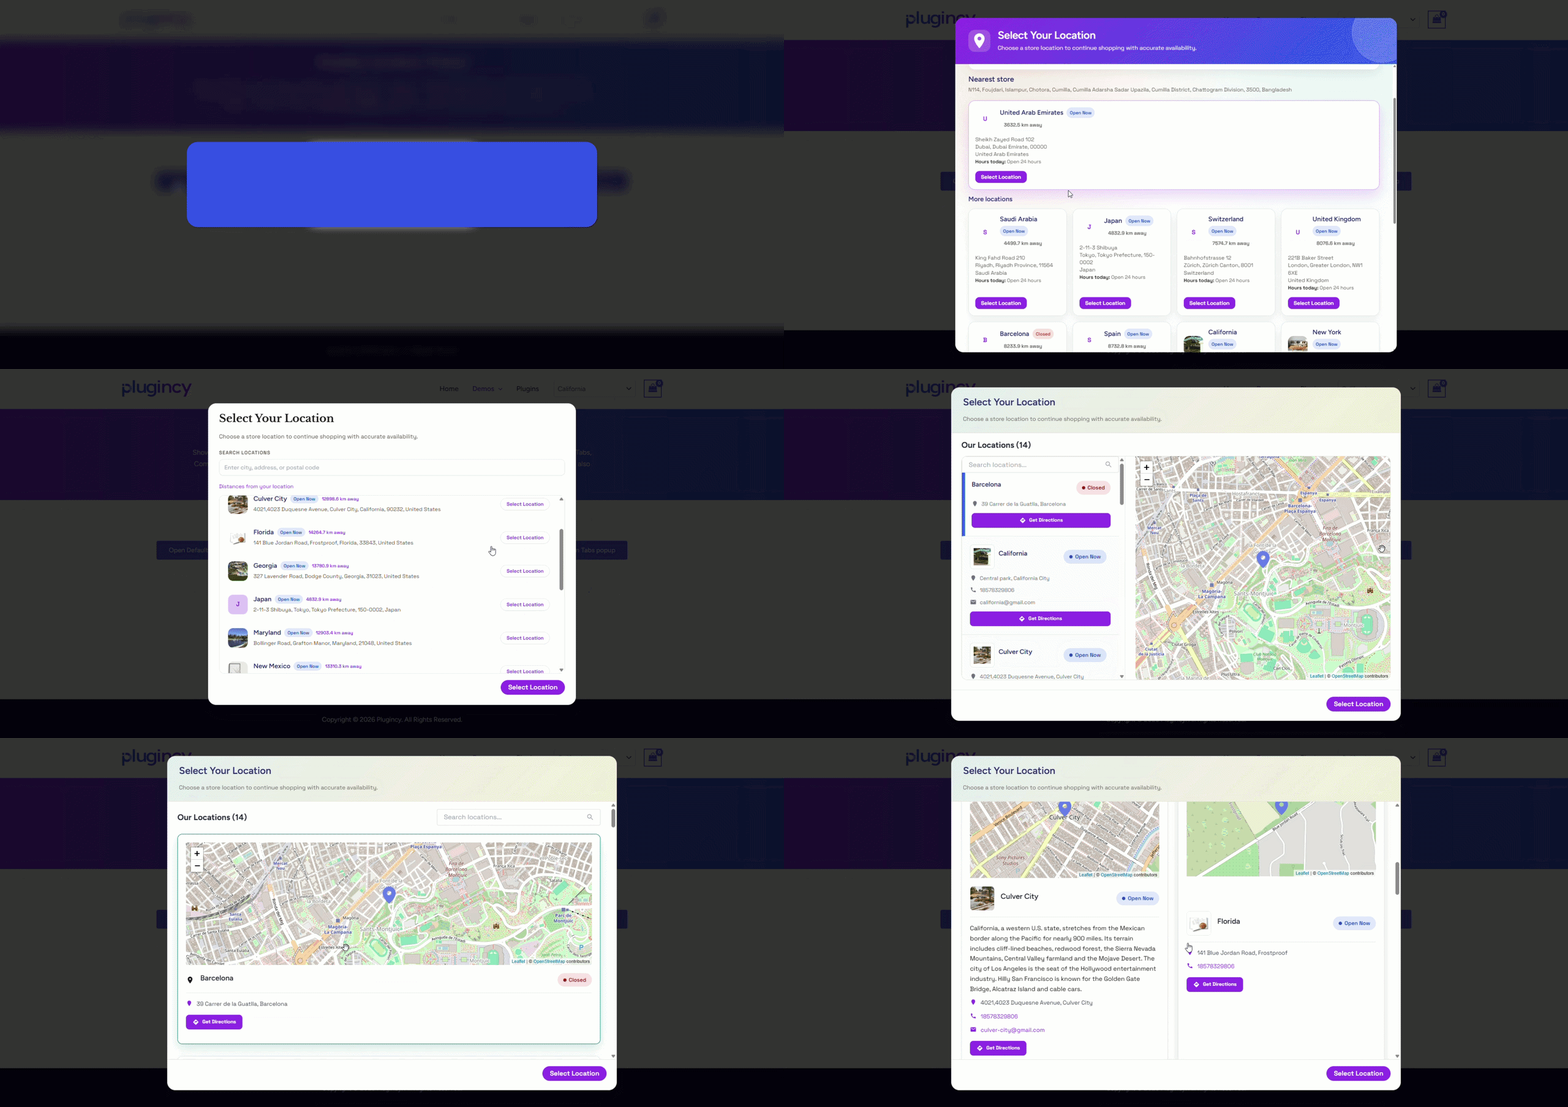
You can display a popup location selector when visitors first enter your site.
- From your dashboard, go to Location Manage > Settings > Popup.
- Toggle on Enable Popup.
- Choose a Template Selection. Options include:
- Default
- Modern
- Modern Simple
- Classic
- Tabs
- Compact
- Grid
- Configure additional settings:
- Use Select2
- Title Show in Popup
- Hierarchical Option
- Show Count
- Show Popup for Admins
- Click Save Changes.
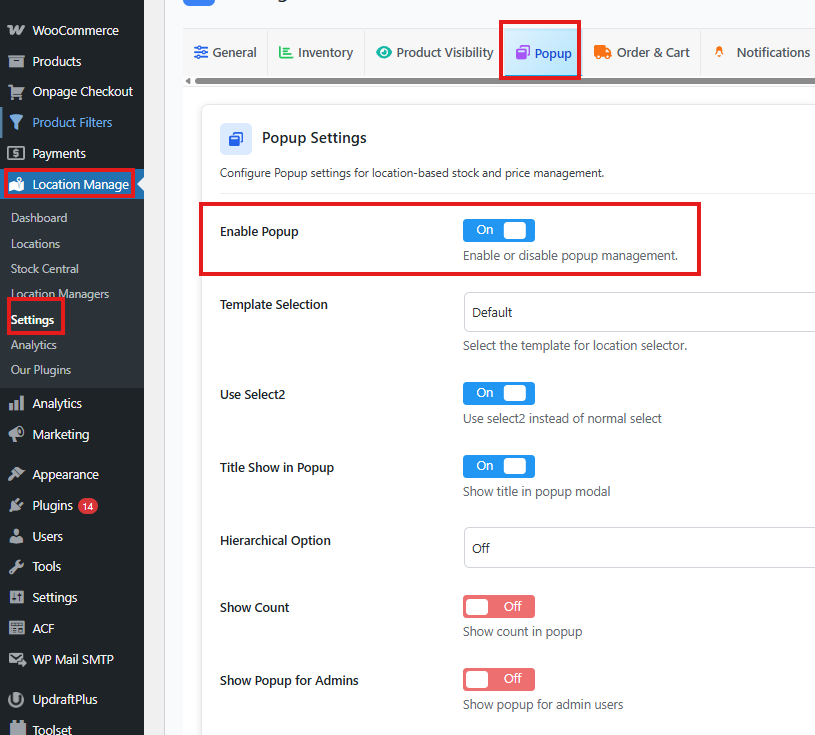
Adding a popup ensures visitors select their location before browsing your store.
Add Location Selector Using Shortcode
You can add the location selector anywhere using a shortcode.
- Copy the shortcode:
[mulopimfwc_store_location_selector]. - For a page:
- Open the page editor.
- Add a shortcode block.
- Paste the shortcode.
- For the header:
- Go to Customize > Header.
- Add a widget.
- Insert a shortcode block.
- Paste the shortcode.
- Click Publish.
- For the footer:
- Go to Customize > Footer.
- Add a widget.
- Insert a shortcode block.
- Paste the shortcode.
- Click Publish.
Shortcode for Single Product Landing Page
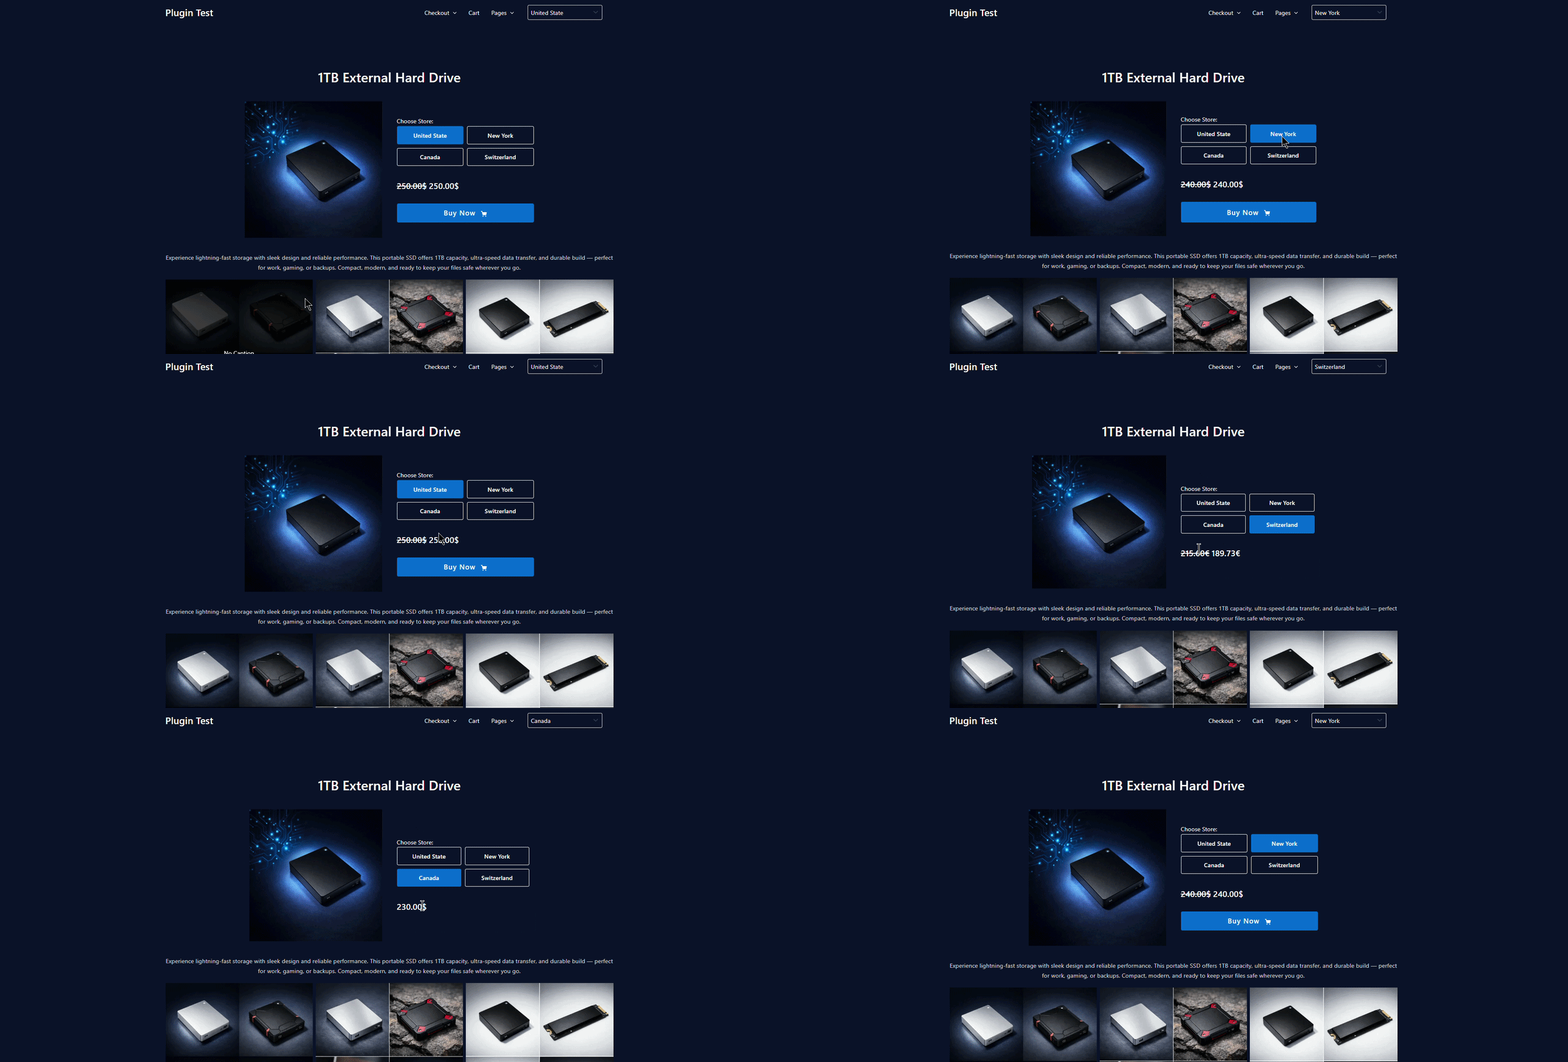
You can also use the shortcode to display a location selector for a single product landing page.
- Choose the page where you want to add the location selector.
- Add a shortcode block and paste the shortcode.
[mulopimfwc_location_selector product_id="123" layout="buttons" label="Select Location:"] - In that page, only the assigned and available locations for the product will be shown.
Shortcode Parameters
- product_id: Specify the product ID to show its location. Example:
product_id="123". (Auto-detects if not provided.) - layout: Choose from
list,buttons, orselect. Example:layout="buttons" - label: Add custom label text. Example:
label="Choose Store:".
Checklist
- Install and activate the plugin.
- Enable location selector on single product pages.
- Configure display position and layout.
- Enable location selector on cart page.
- Resolve cart setting issues by disabling Location Wise Currency if needed.
- Enable popup location selector and choose a template.
- Add location selector using shortcode with parameters.
Testing the Feature
Testing ensures the location selector works correctly.
- Visit a product page and verify the selector appears in the chosen position.
- Add a product to the cart and check if the selector appears on the cart page.
- Visit your site as a new visitor and confirm the popup appears.
- Add the shortcode to a page, header, or footer and verify the selector displays correctly.
Conclusion: Testing confirms that the location selector is functioning across all areas of your store.
Troubleshooting
Common issues include:
- Cart setting not clickable: Disable Location Wise Currency first.
- Popup not appearing: Ensure the Enable Popup option is toggled on.
- Shortcode not working: Verify the shortcode is placed in a shortcode block.
Solution: Double-check settings and re-save changes if necessary.
Key Takeaway
The location selector can be displayed anywhere in your WooCommerce store, providing customers with flexibility and ensuring accurate product availability. By displaying the location selector across product pages, cart pages, popups, and custom areas, you empower customers to choose their preferred location seamlessly. This feature enhances usability, builds trust, and improves the overall shopping experience.